SINGER HD0400S Heavy Duty Serger Common Problems and Troubleshooting
Welcome to our guide on troubleshooting common problems with the SINGER HD0400S Heavy Duty Serger. As a proud owner of the HD0400S, you’re already aware of its incredible capabilities and features. However, even the best machines can face issues from time to time. In this article, we’ll address potential problems that may arise and provide solutions to keep your serger running smoothly.
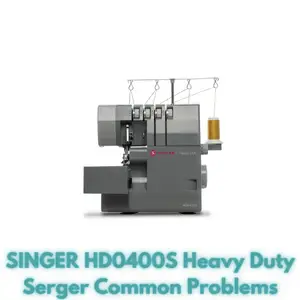
SINGER HD0400S Heavy Duty Serger Overview
This Heavy Duty serger is a powerhouse designed to handle even the toughest sewing tasks. With a 60% larger cutting knife compared to other Singer sergers, it effortlessly cuts through thicker fabrics. The heavy-duty metal frame ensures durability and skip-free sewing, providing stability during operation.
What sets this serger apart is its ability to sew and finish seams simultaneously while trimming excess seam allowance. With a speed of 1,300 stitches per minute, it delivers professional-looking seams and finishes in no time. The machine offers a range of stitch combinations using 2, 3, or 4 threads, making it versatile for various projects.
The serger boasts 6 different stitch types, including blind hems, rolled hems, flatlocking, finishing raw edges, and sewing seams. Threading is a breeze thanks to the color-coded threading system and easy-to-follow diagrams on the machine.
The fully adjustable differential feed ensures even fabric feeding at any speed and thickness, making it perfect for different fabric types. The high-performance motor and free arm allow you to tackle complex projects and hard-to-reach areas with ease.
Additional features include powerful LED lighting for clear visibility, adjustable stitch length and width, built-in rolled hem, movable upper knife for trimming, and an extra high presser foot lifter for thick fabrics. The machine’s dimensions are 14″ long x 11″ wide x 11.5″ high, and it comes pre-threaded with color-coded threads for your convenience.
Product Details and Features
| Feature | Description |
|---|---|
| Built-In Stitches | Choose from a variety of stitches for basic sewing, decorative sewing, and more |
| Adjustable Stitch Length | Customize the appearance of a stitch by increasing or decreasing the distance between stitches. |
Causes of Common Problems with the SINGER HD0400S Heavy Duty Serger
Before we delve into specific troubleshooting tips, let’s explore some common problems you might encounter while using the SINGER HD0400S Heavy Duty Serger. Each of the following sections will address these issues and provide solutions to keep your serger operating at its best.
Common Problems with the SINGER HD0400S Heavy Duty Serger
1. Thread Breakage During Sewing
- Description of the Problem: Threads frequently break while sewing with the SINGER HD0400S.
- Cause of the Problem: Incorrect threading or tension imbalance can lead to thread breakage.
- Troubleshooting Steps:
- Ensure proper threading by following the color-coded threading system on the machine.
- Check thread tension settings and make adjustments as needed, ensuring they are balanced.
- Inspect the thread path for any obstructions or entanglements.
2. Uneven Stitching and Fabric Gathering
- Description of the Problem: Stitches appear uneven and the fabric gathers or puckers during sewing.
- Cause of the Problem: Incorrect differential feed settings or improper fabric handling can cause this issue.
- Troubleshooting Steps:
- Adjust the differential feed settings according to the type of fabric being used.
- Ensure the fabric is properly guided through the machine without excessive stretching or pulling.
- Experiment with different stitch lengths and tensions to find the optimal settings for the fabric.
3. Skipping Stitches
- Description of the Problem: The machine skips stitches, resulting in incomplete seams.
- Cause of the Problem: Dull or misaligned needles, incorrect threading, or improper needle type can lead to skipped stitches.
- Troubleshooting Steps:
- Ensure that the needles are correctly inserted and properly aligned.
- Check for needle damage or dullness and replace if necessary.
- Re-thread the machine, paying close attention to the threading path.
- Use appropriate needles for the fabric type and thickness.
4. Excessive Noise and Vibration
- Description of the Problem: The SINGER HD0400S produces more noise and vibration than usual during operation.
- Cause of the Problem: Unbalanced machine components, loose parts, or insufficient lubrication can cause excess noise and vibration.
- Troubleshooting Steps:
- Ensure that all machine components are properly secured and tightened.
- Check for any loose screws or parts and tighten them as needed.
- Apply recommended lubrication to the moving parts as specified in the user manual.
5. Fabric Gets Stuck in the Feed Dogs
- Description of the Problem: Fabric becomes trapped or stuck in the feed dogs, impeding the sewing process.
- Cause of the Problem: Improper fabric handling, incorrect presser foot pressure, or debris in the feed dogs can lead to fabric getting stuck.
- Troubleshooting Steps:
- Guide the fabric gently and evenly through the machine, avoiding sudden tugs or pulls.
- Adjust the presser foot pressure to match the fabric thickness.
- Clean the feed dogs and surrounding area to remove any accumulated debris or lint.
6. Fabric Puckering on Seams
- Description of the Problem: Seams are resulting in fabric puckering or gathering.
- Cause of the Problem: Incorrect tension settings, using the wrong needle type, or sewing too quickly can cause fabric puckering.
- Troubleshooting Steps:
- Adjust the tension settings on the machine to achieve a balanced stitch.
- Ensure you’re using the appropriate needle type for the fabric.
- Slow down the sewing speed to prevent fabric distortion.
7. Needle Breakage
- Description of the Problem: Needles are breaking frequently during sewing.
- Cause of the Problem: Using bent or damaged needles, sewing over pins, or improper needle insertion can lead to needle breakage.
- Troubleshooting Steps:
- Replace needles that are bent or damaged.
- Remove any pins from the fabric before sewing.
- Ensure needles are correctly inserted and tightened.
8. Uneven Cutting of Fabric
- Description of the Problem: The cutting knife is not evenly trimming the fabric edges.
- Cause of the Problem: Dull or misaligned cutting knife, incorrect pressure on the upper knife, or improper threading can cause uneven cutting.
- Troubleshooting Steps:
- Inspect the cutting knife for dullness or damage and replace if necessary.
- Adjust the pressure on the upper knife according to the fabric thickness.
- Ensure proper threading, and re-thread the machine if needed.
9. Tangled Threads on the Backside of Fabric
- Description of the Problem: Threads are tangling and forming knots on the underside of the fabric.
- Cause of the Problem: Incorrect threading, improper tension settings, or using low-quality thread can lead to tangled threads.
- Troubleshooting Steps:
- Check and correct the threading path following the color-coded system.
- Adjust thread tensions to achieve a balanced stitch.
- Use high-quality thread suitable for your fabric type.
10. Fabric Not Feeding Properly
- Description of the Problem: The fabric is not moving smoothly through the machine during sewing.
- Cause of the Problem: Feed dogs are not engaging properly, incorrect presser foot pressure, or the fabric is not being guided evenly.
- Troubleshooting Steps:
- Ensure the feed dogs are properly engaged and moving the fabric forward.
- Adjust the presser foot pressure according to the fabric thickness.
- Guide the fabric evenly and gently to prevent misfeeds.
11. Excessive Fabric Skipping
- Description of the Problem: The fabric is skipping stitches or not being sewn properly in certain areas.
- Cause of the Problem: Uneven fabric feeding, incorrect needle choice, or improper presser foot pressure can cause fabric skipping.
- Troubleshooting Steps:
- Check the fabric feeding mechanism and ensure it’s functioning smoothly.
- Select the appropriate needle type and size for the fabric you’re using.
- Adjust the presser foot pressure to match the fabric thickness.
12. Irregular Stitch Formation
- Description of the Problem: Stitches are uneven in length or appearance, creating an irregular pattern.
- Cause of the Problem: Incorrect tension settings, damaged needles, or improper threading can result in irregular stitch formation.
- Troubleshooting Steps:
- Adjust the tension settings to achieve a balanced stitch appearance.
- Inspect the needles for damage or dullness and replace if needed.
- Re-thread the machine carefully, following the correct threading path.
13. Fabric Slippage During Serger Operation
- Description of the Problem: The fabric slips or shifts unexpectedly while using the serger.
- Cause of the Problem: Insufficient pressure on the presser foot, incorrect differential feed settings, or improper fabric handling can cause slippage.
- Troubleshooting Steps:
- Adjust the presser foot pressure to firmly hold the fabric in place.
- Check and adjust the differential feed settings based on the fabric type.
- Ensure you’re guiding the fabric evenly and smoothly through the machine.
14. Fabric Edge Fraying
- Description of the Problem: The fabric edges are fraying excessively after sewing.
- Cause of the Problem: Incorrect stitch settings, using a dull cutting knife, or sewing with improper tension can lead to fabric fraying.
- Troubleshooting Steps:
- Adjust the stitch settings to achieve a suitable stitch length and width for preventing fraying.
- Check the cutting knife for sharpness and replace if necessary.
- Ensure balanced thread tension to prevent excessive pulling on the fabric edges.
15. Limited Stitch Variation
- Description of the Problem: The machine is not producing the expected variety of stitches as per the manual.
- Cause of the Problem: Incorrect stitch selection, malfunctioning stitch mechanism, or threading errors can limit stitch variation.
- Troubleshooting Steps:
- Review the stitch selection process in the manual to ensure correct stitch choices.
- If the problem persists, consult the user manual for potential mechanical issues.
- Verify that the machine is threaded correctly according to the desired stitch type.
16. Inconsistent Thread Tension
- Description of the Problem: Stitches are uneven in tension, with some appearing tighter or looser than others.
- Cause of the Problem: Incorrect thread tension settings, threading errors, or worn tension discs can cause inconsistent tension.
- Troubleshooting Steps:
- Adjust the thread tension settings according to the fabric and stitch type.
- Re-thread the machine, ensuring that threads are properly seated in the tension discs.
- If the problem persists, clean or replace worn tension discs as needed.
17. Excessive Fabric Stretching
- Description of the Problem: Fabrics with stretch are being overly stretched during sewing, causing distortion.
- Cause of the Problem: Incorrect differential feed settings, improper fabric handling, or using the wrong stitch type for stretchy fabrics can lead to excessive stretching.
- Troubleshooting Steps:
- Adjust the differential feed settings to accommodate stretch fabrics without overstretching.
- Guide the fabric gently through the machine, avoiding excessive pulling or stretching.
- Choose appropriate stitch types designed for stretchy fabrics.
18. Looping Threads on the Edge
- Description of the Problem: Threads are looping or tangling at the fabric edges instead of forming proper stitches.
- Cause of the Problem: Incorrect needle insertion, damaged needles, or improper threading can cause looping threads.
- Troubleshooting Steps:
- Ensure that the needles are correctly inserted and facing the right direction.
- Inspect the needles for damage and replace them if necessary.
- Re-thread the machine, following the correct threading path.
19. Limited Free Arm Functionality
- Description of the Problem: The free arm is not working as expected, restricting access to smaller or tubular projects.
- Cause of the Problem: Incorrect positioning of the removable storage compartment or obstruction in the free arm area can limit its functionality.
- Troubleshooting Steps:
- Ensure that the removable storage compartment is correctly positioned and securely attached.
- Remove any obstructions or debris from the free arm area that may be restricting movement.
- If the issue persists, refer to the user manual for guidance on troubleshooting free arm functionality.
20. Limited Accessory Storage
- Description of the Problem: The storage area inside the cloth plate is not accommodating all included accessories properly.
- Cause of the Problem: Incorrect placement of accessories or overcrowding in the storage area can limit storage capacity.
- Troubleshooting Steps:
- Organize accessories inside the storage area with careful arrangement to maximize space.
- Remove any excess or unnecessary items from the storage area to create more room.
- If storage remains inadequate, consider alternative storage solutions for accessories.
21. Limited Stitch Length Adjustment
- Description of the Problem: The stitch length adjustment is not producing the desired results.
- Cause of the Problem: Mechanical issues within the stitch length adjustment mechanism or incorrect settings can limit stitch length control.
- Troubleshooting Steps:
- Refer to the user manual to ensure you’re using the correct procedure for adjusting stitch length.
- If the problem persists, consult the manual for guidance on addressing mechanical issues.
- Double-check that the machine is threaded properly and all components are in the correct position.
22. Motor Overheating
- Description of the Problem: The machine’s motor becomes excessively hot during extended use.
- Cause of the Problem: Prolonged sewing at high speeds without breaks, obstructed ventilation, or mechanical issues can lead to motor overheating.
- Troubleshooting Steps:
- Allow the machine to rest periodically during extended sewing sessions to prevent overheating.
- Ensure the machine is placed in a well-ventilated area to allow for proper cooling.
- If the motor continues to overheat, consult the user manual for potential mechanical concerns.
23. Difficulty in Switching Stitch Types
- Description of the Problem: Changing between different stitch types is proving challenging or not functioning properly.
- Cause of the Problem: Mechanical issues within the stitch selection mechanism or incorrect sequence of steps can lead to difficulty in switching stitch types.
- Troubleshooting Steps:
- Refer to the user manual for the correct procedure to switch between stitch types.
- If problems persist, inspect the stitch selection mechanism for obstructions or malfunctions.
- Ensure the machine is threaded correctly for the desired stitch type.
24. Motor Inconsistencies
- Description of the Problem: The machine’s motor is inconsistently delivering power, resulting in uneven sewing speed.
- Cause of the Problem: Mechanical issues, power fluctuations, or damaged motor components can cause motor inconsistencies.
- Troubleshooting Steps:
- Check the power source for stability and consistency to rule out power-related issues.
- If inconsistencies persist, consult the user manual for guidance on addressing motor-related concerns.
- Ensure all machine components are properly aligned and secured.
25. Unresponsive LED Lights
- Description of the Problem: The LED lights are not turning on or remain unresponsive.
- Cause of the Problem: Electrical issues, loose connections, or damaged LED components can lead to unresponsive LED lights.
- Troubleshooting Steps:
- Check the power source and connections to ensure proper electrical supply.
- If the issue persists, consult the user manual for guidance on checking and addressing LED light problems.
- Inspect the LED components for damage and replace if necessary.
SINGER HD0400S Heavy Duty Serger Sewing Machine User Reviews
Positive Reviews from SINGER HD0400S Heavy Duty Serger Sewing Machine Users
- Users were satisfied with the heavy-duty build of the SINGER HD0400S, praising its durability and steady performance.
- Some customers appreciated the serger’s ability to handle thicker fabrics with ease due to the larger cutting knife.
- Users found the differential feed feature to be effective, ensuring even fabric feeding and smooth seams.
- Several customers noted the convenience of the color-coded threading system and the included easy-to-read threading diagram.
- Many users found the LED lighting to be bright and effective, providing optimal visibility while sewing.
Positive feedback indicates that the SINGER HD0400S Heavy Duty Serger Sewing Machine is well-regarded for its sturdy construction, advanced features, and ease of use.
Negative User Reviews of the SINGER HD0400S Heavy Duty Serger Sewing Machine
- Some users reported issues with inconsistent tension, resulting in uneven stitches and thread breakage.
- Several customers expressed frustration with the machine’s tendency to skip stitches, leading to incomplete seams.
- Users mentioned difficulties in threading the machine correctly, which sometimes resulted in tangled or looped threads.
- Some customers experienced issues with the motor, including overheating and inconsistent power delivery.
- A number of users expressed dissatisfaction with the serger’s performance on stretch fabrics, noting excessive stretching or distortion.
Negative feedback highlights concerns related to tension, stitching accuracy, threading challenges, motor performance, and handling of stretch fabrics.
The majority of users expressed satisfaction with the SINGER HD0400S Heavy Duty Serger Sewing Machine, particularly praising its durability, performance, and convenient features.
SINGER HD0400S Heavy Duty Serger Sewing Machine Manual
The operating instructions and user manual for the SINGER HD0400S Heavy Duty Serger Sewing Machine can be accessed on the manufacturer’s official website. Please visit the SINGER Support page to find the comprehensive manual, which will provide detailed information on setup, operation, troubleshooting, and maintenance.
SINGER HD0400S Heavy Duty Serger Frequently Asked Questions
Q: How do I thread the SINGER HD0400S Heavy Duty Serger?
A: Threading instructions can be found in the user manual. Follow the color-coded threading system displayed on the machine for efficient threading. Refer to the manual for detailed steps and troubleshooting tips if you encounter any issues.
Q: What should I do if my SINGER HD0400S Serger’s stitches are uneven?
A: Uneven stitches can be caused by tension issues, improper threading, or needle problems. Check the manual’s troubleshooting section for guidance on adjusting tension settings, ensuring correct threading, and using appropriate needles for your fabric.
Q: How can I prevent fabric skipping while using the serger?
A: Fabric skipping may occur due to uneven feeding, incorrect presser foot pressure, or needle-related problems. The manual provides instructions on adjusting presser foot pressure, ensuring proper fabric guidance, and addressing needle-related issues.
Q: My SINGER HD0400S Serger’s motor seems to be overheating. What should I do?
A: Overheating can result from extended use without breaks or insufficient ventilation. Refer to the manual for recommended usage times and cooling periods. Ensure the machine is in a well-ventilated area and not obstructed by objects that may impede airflow.
Q: Can the SINGER HD0400S Serger handle stretch fabrics?
A: Yes, the machine is designed to handle stretch fabrics. However, stretch fabric issues may arise due to incorrect differential feed settings or improper handling. Consult the manual for guidance on adjusting differential feed settings and fabric handling techniques for stretch materials.
Conclusion
For any issues with your SINGER HD0400S Heavy Duty Serger Sewing Machine, it’s advisable to consult the user manual for specific instructions and troubleshooting steps. If the problem persists, consider reaching out to customer service or a certified service center for further assistance and professional support.
SINGER Patchwork 7285Q Common Problems