
How to Sew Double Fold Bias Tape: The Ultimate Guide for Beginners
Embarking on a sewing journey, especially for beginners, can be a delightful yet challenging experience. One key element that adds a professional touch to your projects is the use of double fold bias tape.
This versatile tape is not only functional but also aesthetically pleasing, making it a must-have for various applications like quilting, armholes, necklines, and decorative finishes. This comprehensive guide will walk you through the process, making it understandable and enjoyable, whether you choose store-bought tape or decide to craft your own using a bias maker.
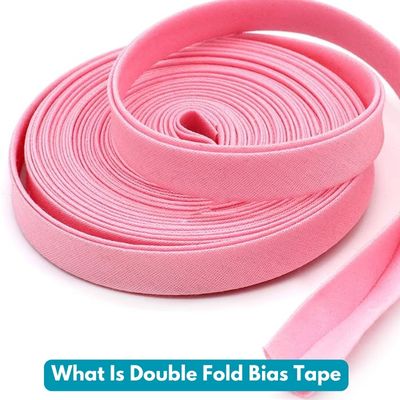
What Is Double Fold Bias Tape?
Double fold bias tape stands as a cornerstone in the repertoire of sewing, offering versatility and finesse to projects. This vital tool is meticulously crafted by cutting fabric on the diagonal and then pressing it into quarters.
This unique method not only imparts flexibility to the tape but also guarantees a refined finish, making it an indispensable element in sewing. Let’s delve into the intricacies of double fold bias tape, exploring its applications and significance in elevating the craftsmanship of your creations.
The Crafting Process
Crafting double fold bias tape involves a precise sequence of steps, showcasing the artistry in sewing:
- Diagonal Cut: The fabric is cut diagonally, creating strips that inherently possess stretch and pliability. This diagonal cut is known as the bias, allowing the tape to curve gracefully around corners and edges.
- Pressing into Quarters: After the diagonal cut, the fabric strips are meticulously pressed into quarters. This step not only establishes the tape’s width but also accentuates its ability to fold neatly, providing a clean and polished appearance.
Significance in Sewing
The application of double fold bias tape extends beyond functionality, becoming a hallmark of sophistication in various sewing projects:
- Decorative Finishes: When used for decorative purposes, double fold bias tape adds a touch of elegance and flair to garments. It serves as a stylish accent, enhancing the overall aesthetic appeal.
- Polished Necklines and Armholes: Double fold bias tape excels in finishing raw edges around necklines and armholes. Its ability to conform to curves and corners ensures a professional and refined look, elevating the quality of the garment.
Single Fold vs Double Fold Bias Tape: Navigating Widths for Optimal Results
In the vast landscape of bias tapes, understanding the distinctions between single fold and double fold varieties is crucial for achieving optimal results in sewing projects. Let’s explore the characteristics and applications of each width, shedding light on the delicate balance between functionality and aesthetic appeal.

Double Fold Bias Tape (½ inch / 12mm):
- Functionality: The ½ inch (12mm) width of double fold bias tape strikes a balance between functionality and visual appeal. It is versatile enough to handle various sewing applications with ease.
- Applications:
- Necklines: Provides a polished finish around necklines, creating a professional and refined look.
- Armholes: Perfect for finishing armhole edges, ensuring a clean and tailored appearance.
- Quilting: Adds a decorative touch to quilt edges, enhancing the overall design.
Single Fold Bias Tape (¼ inch / 6mm):
- Functionality: The narrower ¼ inch (6mm) width of single fold bias tape is preferred for binding seams, offering a subtle and understated finish.
- Applications:
- Seam Binding: Ideal for neatly binding seams without adding bulk, ensuring a clean and tidy appearance.
Choosing the Right Tape for the Right Task
Selecting between single fold and double fold bias tape depends on the specific requirements of your project. Consider the following factors:
- Project Type: Evaluate whether the project demands a decorative finish or a discreet seam binding.
- Fabric Thickness: The thickness of the fabric can influence the choice of bias tape. Thicker fabrics may benefit from the subtlety of single fold tape, while decorative finishes often favor the broader width of double fold tape.
Incorporating double fold bias tape into your sewing endeavors not only showcases your understanding of intricate techniques but also enhances the overall quality and appearance of your creations. By navigating the nuances of widths and applications, novice seamstresses can embark on a journey of creativity and refinement in their craft.
How To Sew Double Fold Bias Step-By-Step Instructions
Sewing with double fold bias tape can be a transformative experience for novice seamstresses, enhancing the quality and appearance of your projects. Whether you prefer a quick and easy method or a traditional approach, mastering these techniques is essential for creating polished and professional finishes.
Method 1 – Fast and Easy Double Fold Bias Sewing
Ideal for novices and suitable for straight or slightly curved edges, this method ensures a quick and straightforward approach to sewing double fold bias tape.
| Step | Description |
|---|---|
| 1 | Open Bias Tape: Unfold the bias tape, exposing the wider side at the bottom. This step prepares the tape for easy application. |
| 2 | Slip Over Fabric: Gently slide the bias tape over the fabric, creating a sandwich with the raw edges neatly tucked inside. This ensures a clean and finished look. |
| 3 | Pin and Stitch: Pin the bias in place from the top (narrower) edge and stitch along the edge. Ensure the wider bottom edge is consistently caught throughout, providing a secure and professional finish. |
Method 2 – Traditional Sewing of Double Fold Bias Tape
For those who appreciate a traditional touch and are dealing with more intricate edges, this method offers a foolproof professional finish.
Tip: To handle curves with ease, press the tape in a curve before beginning.
Step 1 – Open and Stitch First Seam:
| Step | Description |
|---|---|
| 1 | Open Bias Tape: Unfold the double fold bias tape with the wrong side facing up, preparing it for attachment. |
| 2 | Pin to Project: Pin the wider side to the wrong side of your project, ensuring proper alignment of raw edges. This step lays the foundation for a secure and polished finish. |
| 3 | Stitch First Seam: Stitch along the folded edge closest to the project edge, securing the bias tape in place. This step provides stability and ensures a clean edge. |
Step 2 – Press and Wrap:
| Step | Description |
|---|---|
| 1 | Flip Project: Flip your project over, placing it right-side up on your work surface. This step facilitates ease of handling during the wrapping process. |
| 2 | Wrap Bias Tape: Gently wrap the bias tape over the raw edge, ensuring a smooth and unwrinkled fold. This meticulous wrapping contributes to a polished and professional appearance. |
| 3 | Secure with Pins: Pin the bias tape in place to maintain its position during the subsequent stitching. This step ensures accuracy and consistency. |
Step 3 – Sew the Double Fold Bias:
| Step | Description |
|---|---|
| 1 | Stitch on the Right Side: On the right side of the fabric, stitch close to the open edge of the bias tape, effectively catching the underneath side. This step secures the tape in place, providing a flawless and professional finish. |
| 2 | Remove Pins: Ensure to remove pins after stitching for a clean and polished result. This final step contributes to the overall professionalism of your sewing project. |
How To Sew Double Fold Bias Tape With Overlapping & Finishing
In the world of sewing, achieving a seamless overlap and finishing is a hallmark of professionalism. This section will guide novice seamstresses through the steps, ensuring a polished result that adds finesse to circular projects and end binding. Let’s explore the techniques and nuances involved in these critical aspects.
How to Overlap Double Fold Bias Tape:
When working on circular projects like a bound neck or armhole, mastering the art of overlapping double fold bias tape is essential for a flawless finish.
| Step | Description |
|---|---|
| 1 | Fold the Beginning: Start by folding the end of the bias tape over by ½ inch (12mm) where you initiate the sewing. This meticulous folding sets the foundation for a seamless join, ensuring a polished appearance. |
| 2 | Overlap the Ends: When returning to the starting point, overlap the ends by ½ inch (12mm). Crucially, ensure that the top end lies flat and is not folded over like the underneath piece. This technique guarantees a smooth and invisible connection. |
Sewing Double Fold Bias Tape on Ends:
For projects requiring end binding, the following steps contribute to a neat and professional result, ensuring the ends are elegantly tucked inside.
| Step | Description |
|---|---|
| 1 | Fold the End: Commence by folding the end of the project over by ½ inch (12mm). This initial folding sets the stage for a tidy and secure finish. |
| 2 | Stitch and Sew as Normal: Proceed to stitch and sew the bias as you normally would. This step ensures the end binding is securely attached, contributing to the durability of the finished project. |
| 3 | Fold Bias Over: As you fold the bias over, the ends will be neatly tucked inside. This meticulous folding creates a polished appearance, concealing the raw edges and providing a professional finish. |
Tips for Perfect Overlapping and Finishing:
- Consistent Measurement: Maintain a consistent ½ inch (12mm) measurement throughout the folding and overlapping process for uniformity.
- Precision in Overlapping: When overlapping the ends, pay close attention to ensuring the top end lies flat. This precision eliminates any visible folds, contributing to a seamless finish.
- Secure Stitching: Ensure that your stitching during the overlapping and end-binding process is secure. This not only enhances the durability of the project but also contributes to a professional appearance.
Additional Tips and Preferences: Fostering Creativity and Skill-Sharing
The world of sewing is a dynamic and creative space, and when it comes to sewing double fold bias tape, exchanging tips and preferences enhances the craft. Novice seamstresses can benefit greatly from the insights of experienced sewers, creating a supportive community where creativity and skill-sharing flourish.
Sharing Tips for Sewing Double Fold Bias Tape:
1. Stitching Techniques:
- Tip: Experiment with different stitching techniques for attaching double fold bias tape. Consider using a straight stitch, zigzag stitch, or even decorative stitches to add a unique touch to your projects.
- Preference: Share your preferred stitching method and explain the reasons behind it. Novice seamstresses can learn from your experiences and choose the technique that best suits their projects.
2. Fabric Selection:
- Tip: Consider the type of fabric you’re working with when choosing double fold bias tape. Different fabrics may require adjustments in tension or stitch length.
- Preference: Share your preferred fabrics for various projects. Whether it’s a delicate silk or a sturdy denim, your insights can guide others in making suitable choices.
3. Seam Allowance:
- Tip: Pay attention to seam allowances when attaching double fold bias tape. Adjusting your seam allowance can impact the final appearance and durability of the project.
- Preference: Share your preferred seam allowance for different applications. This can be especially helpful for beginners who are still getting acquainted with seam allowances.
Fostering Community Engagement:
1. Commenting and Collaboration:
- Tip: Engage with fellow sewers in the comments section. Ask questions, provide feedback, and share your own experiences with sewing double fold bias tape.
- Preference: Share your thoughts on others’ tips and methods. Collaboration fosters a sense of community, and your input may inspire new ideas and approaches.
2. Virtual Workshops and Tutorials:
- Tip: Consider organizing or participating in virtual workshops or tutorials focused on sewing double fold bias tape. This allows for real-time interaction and learning.
- Preference: Share your preference for virtual learning or suggest any online platforms that have been particularly beneficial for expanding your sewing skills.
Tables for Quick Reference:
Table 1: Stitching Techniques and Preferences
| Technique | Description |
|---|---|
| Straight Stitch | A basic, straight-line stitch suitable for various projects. |
| Zigzag Stitch | Provides a secure edge and can be visually appealing. |
| Decorative Stitches | Adds a unique and decorative touch to the bias tape. |
Table 2: Fabric Selection Tips and Preferences
| Fabric Type | Considerations |
|---|---|
| Delicate Fabrics | May require a lighter touch and careful handling. |
| Sturdy Fabrics | Can withstand more tension and may benefit from reinforced stitching. |
Table 3: Seam Allowance Tips and Preferences
| Application | Preferred Seam Allowance |
|---|---|
| Necklines | 1/4 inch (6mm) for a subtle finish. |
| Armholes | 1/2 inch (12mm) for added durability. |
| Quilting Projects | Varies based on the design, experimentation is encouraged. |
Bias Maker: Enhancing Precision in Bias Tape Creation
For those seeking an additional tool to streamline the process of making bias tape, a bias maker proves to be a valuable asset. Bias makers are specialized tools designed to fold and press fabric strips into bias tape with consistent precision. This section explores the benefits of using a bias maker and provides recommendations for reputable brands.
Advantages of Using a Bias Maker:
- Efficiency: Bias makers simplify and speed up the process of creating bias tape by providing a guided mechanism for folding and pressing.
- Consistency: Achieve uniformity in the width of the bias tape, ensuring a professional and polished look in your sewing projects.
- Versatility: Bias makers come in various sizes, allowing for the creation of bias tape in different widths to suit diverse sewing applications.
Recommended Brands for Bias Makers:
To assist beginners in choosing a reliable bias maker, consider the following reputable brands known for producing quality sewing tools:
| Brand | Key Features |
|---|---|
| Clover | – Offers a range of bias makers for various tape widths. |
| Dritz | – Known for durable and easy-to-use bias tape makers. |
| Simplicity | – Provides versatile bias tape maker sets for different projects. |
| June Tailor | – Offers ergonomic bias makers for enhanced ease of use. |
These brands are widely recognized in the sewing community for producing tools that facilitate the creation of bias tape with precision and efficiency. When selecting a bias maker, consider factors such as the width of bias tape you require and the overall ease of use offered by the tool.
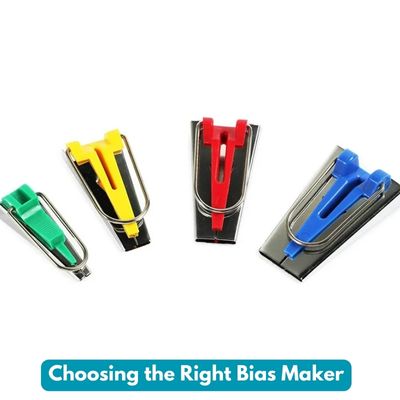
Choosing the Right Bias Maker:
- Size Options: Look for a bias maker that offers the desired width options suitable for your sewing projects.
- Material Quality: Ensure the bias maker is made from durable materials, providing longevity and withstanding regular use.
- User-Friendly Design: Opt for a bias maker with an intuitive design that simplifies the folding and pressing process, especially for beginners.
Conclusion
In conclusion, this comprehensive guide on how to sew double fold bias tape serves as an invaluable resource for beginners venturing into the world of sewing. From understanding the basics of double fold bias tape to mastering various sewing methods and finishing techniques, this guide provides a step-by-step journey towards achieving polished and professional results.
The inclusion of additional tips and preferences fosters a sense of community, encouraging creativity and skill-sharing among novice seamstresses. Armed with these insights, beginners can confidently embark on their sewing projects, elevating their craftsmanship and creating garments that exude a refined and professional finish.