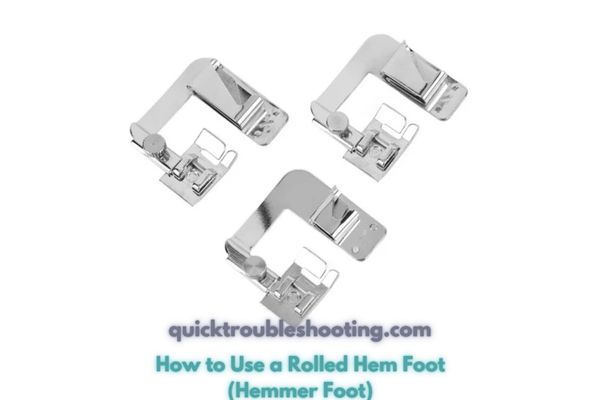
How to Use a Rolled Hem Foot (Hemmer Foot): A Step-by-Step Guide
Unlock the secrets to achieving flawless narrow hems with the invaluable tool known as the rolled hem foot, also referred to as the narrow hem foot or hemmer foot. Seamstresses, are you wondering how to use a rolled hem foot (hemmer foot), this essential accessory effectively?
Delve into our step-by-step guide to master the art of utilizing a rolled hem foot for creating impeccable hems, especially ideal for delicate and transparent fabrics as well as those tricky curved hemlines. This versatile technique not only ensures a polished finish but also proves to be a time-saving solution, particularly beneficial when working on ruffles, enhancing both efficiency and aesthetic appeal. Let’s dive into the intricacies of this indispensable sewing skill.
What Is A Rolled Hem Foot?
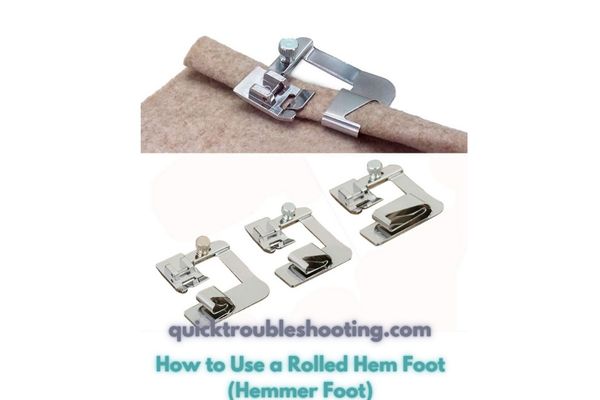
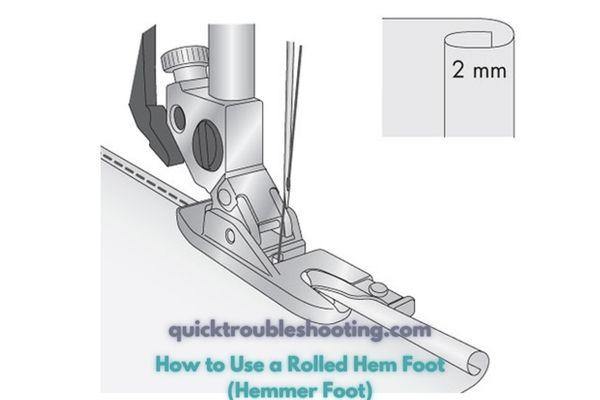
The rolled hem foot, often referred to as the hemmer foot, stands as a pivotal accessory in the arsenal of every seamstress. This tool is ingeniously designed with a unique curved channel at the front, serving the essential purpose of double-folding the raw edge during the sewing process. This distinctive feature contributes significantly to achieving seamless hem stitching without the necessity for laborious manual pressing.
Why Use A Rolled Hem Foot (Hemmer Foot): Advantages of Utilizing a Rolled Hem Foot
Importance of the Rolled Hem Foot
- Efficient Hemming: The curved channel of the rolled hem foot streamlines the process of creating narrow hems with remarkable efficiency.
- Consistency: The foot ensures a uniform and tidy finish across the entire hem, elevating the overall quality of the sewing project.
- Time-Saving: By eliminating the need for manual pressing before sewing, the rolled hem foot proves to be a time-saving solution, making it particularly beneficial for projects with multiple hems.
Versatility in Applications
- Suitable for Various Fabrics: The rolled hem foot is adaptable to a variety of fabrics, especially excelling with delicate and sheer materials where manual hem pressing might be challenging.
- Ideal for Curved Hemlines: While initially most effective on straight edges, the foot’s design allows for versatility, making it suitable for gentle curves with a bit of practice.
- Noteworthy for Ruffles: The narrow hems created by the rolled hem foot enhance the beauty of ruffles, allowing them to hang gracefully while saving considerable sewing time.
Acquiring and Utilizing the Rolled Hem Foot
Availability and Affordability:
- Most sewing machines come equipped with a rolled hem foot, showcasing its widespread recognition and utility.
- In cases where a sewing machine lacks this accessory, obtaining one is cost-effective, either individually or as part of a kit, available on popular online platforms such as eBay or Amazon.
Get Started without the Foot: If a rolled hem foot is not yet part of your toolkit, discover alternative methods for sewing a narrow hem.
What Does A Rolled Hem Foot Look Like?
Snap-On vs. Screw-On: The foot may feature a snap-on design, facilitating quick and effortless switching, or an older machine might have a screw-on variety. Understanding the design of the foot aids in efficient usage.
Types Of Rolled Hem Foot: Varieties of Rolled Hem Foot
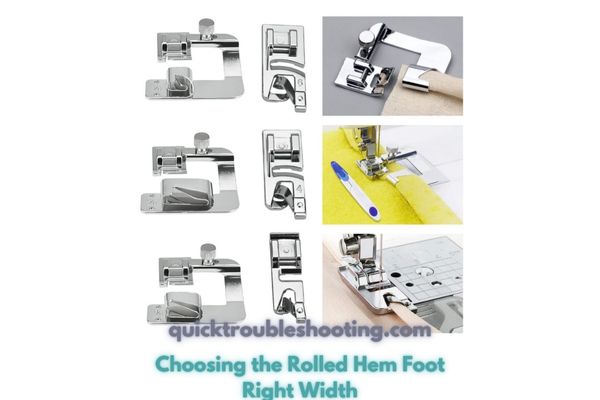
Diverse Hem Width Options: Rolled hem feet are available in various widths, allowing you to choose the one that aligns with your preferred hem width. The prevalent type is the ⅛ inch (3mm) seam width, with another common option being the ¼ inch (6mm) size.
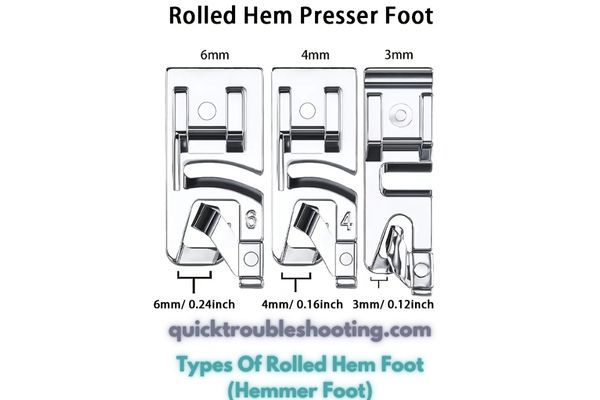
Consideration for Specific Fabrics and Curves: Optimal results are achieved by selecting the appropriate hem size based on your sewing needs. For sewing curved hems or working with extremely sheer fabrics, the smaller hem size proves to be the most effective choice.
Here is a table summarizing the different hem widths available for rolled hem feet:
Choosing the Rolled Hem Foot Right Width
| Hem Width | Description |
|---|---|
| ⅛ inch (3mm) | Commonly used for a narrow and delicate hem. Ideal for lightweight fabrics and intricate projects. |
| ¼ inch (6mm) | Offers a slightly wider hem, suitable for a bit more substantial fabrics. Provides a balanced look for various sewing applications. |
Stitch Settings For A Rolled Hem Foot: Configuring Stitch Settings for Precision
Ensure your sewing machine is set to a straight stitch, opting for a smaller stitch length to maintain proportionality, typically around 2.0, given the narrow width of the hem you’re working on. While a zig-zag stitch may be suitable in certain cases, experimentation will reveal the most fitting look for your specific sewing project.
Here is a table summarizing optimal stitch settings for using a rolled hem foot:
| Stitch Setting | Description |
|---|---|
| Optimal Stitch Length | Set your sewing machine to a straight stitch with a smaller stitch length, typically around 2.0. This adjustment complements the narrow width of the hem, providing a proportional and aesthetically pleasing result. |
| Experimenting with Stitch Types | While a straight stitch is the conventional choice, experimenting with a zig-zag stitch allows users to tailor the look to suit the specific characteristics of the fabric and project. |
How To Use A Rolled Hem Foot (Hemmer Foot)
Embarking on the journey of mastering the rolled hem foot involves a step-by-step process that ensures a flawless and polished outcome. Novice seamstresses can find this guide helpful in understanding each stage of the process.
1. Finger Pressing the End
- Start by delicately finger pressing the end twice, creating a ⅛ inch (3mm) fold. This initial fold lays the foundation for a neat and narrow hem.
- Secure the fold in place with a horizontally placed pin, focusing particularly on the first 3 inches (8cm) for optimal results. This precision ensures a well-executed beginning to your hemming process.
2. Preparing to Sew
- Lower the presser foot onto the fabric after securing the initial fold and removing the pin. This action signals the commencement of the sewing process.
- Stitch the first 4 stitches while holding the threads. This precautionary measure prevents the threads from catching underneath, ensuring a smooth and uninterrupted sewing experience.
3. Executing the Hem Stitch
- After completing the initial 4 stitches, stop with the needle down in the fabric. This strategic pause prevents unwanted movement during the subsequent repositioning steps.
- Lift the foot and insert the folded fabric into the curl of the foot. Lower the foot again, setting the stage for the foot to guide the fabric seamlessly.
- Begin stitching while holding the fabric in front. This technique ensures a controlled and precise hemming process, showcasing the effectiveness of the rolled hem foot.
4. Ensuring Clean Edges
- Confirm the cleanliness and lack of fraying at the fabric’s edge before initiating the hemming process. A clean starting point contributes significantly to the creation of a polished and professional-looking hem.
- For fabrics prone to fraying, trim the edge immediately before sewing. This preventative measure ensures that the material doesn’t unravel during the sewing process, maintaining the integrity of the hem.
Summary of Rolled Hem Foot Techniques
| Step | Description |
|---|---|
| Finger Pressing | Start by pressing the end twice, creating a ⅛ inch (3mm) fold. Secure with a pin for the initial 3 inches (8cm). |
| Preparing to Sew | Lower the presser foot, remove the pin, and stitch the first 4 stitches while holding the threads to prevent catching. |
| Executing the Hem Stitch | Stop after 4 stitches with the needle down. Lift the foot, insert the folded fabric into the foot’s curl, lower the foot, and continue stitching. |
| Ensuring Clean Edges | Confirm a clean, unfrayed fabric edge. Trim immediately before sewing for fabrics prone to fraying. |
This detailed guide, complete with step-by-step instructions and a summarized table, equips both novice and experienced seamstresses with the knowledge and techniques required to master the art of using a rolled hem foot effectively.
Mastering Tips for Using the Rolled Hem Foot
Seamstresses, both novice and seasoned, can elevate their sewing projects by incorporating these indispensable tips for effective utilization of the rolled hem foot.
- Gentle Handling During Stitching: While engaged in the stitching process, adopt a delicate touch. Gently hold the fabric’s edge slightly folded to ensure a controlled and precise outcome. This gentle handling contributes to the overall finesse of the hem.
- Relying on the Curved Channel: Resist the urge to manually manipulate the fabric. Instead, trust in the functionality of the curved channel of the rolled hem foot. Allowing the foot to perform the essential work ensures a consistent and professional-looking narrow hem.
- Regular Repositioning: Acknowledge the necessity of periodic pauses during stitching. Stop at intervals to reposition your hand in front of the rolled hem foot. This practice ensures continuous guidance, preventing any deviations in the fabric alignment.
Essential Tips for Using the Rolled Hem Foot
| Tip | Description |
|---|---|
| Gentle Handling During Stitching | While stitching, gently hold the fabric’s edge slightly folded for a controlled and precise outcome. |
| Relying on the Curved Channel | Avoid manual manipulation; trust the curved channel of the rolled hem foot for consistent and professional-looking hems. |
| Regular Repositioning | Periodically stop to reposition your hand in front of the foot, ensuring continuous guidance and preventing fabric misalignment. |
Revitalizing the Hem Appearance
After the sewing process, special attention to post-sewing care ensures the hem’s appearance meets the highest standards.
- Post-Sewing Care: Assess the hem’s appearance after sewing. If it appears wrinkled or stretched, employ the use of a steam iron to revitalize its condition. This step is crucial for achieving a polished and professional finish.
- Proper Ironing Technique: When ironing, refrain from dragging the iron along the hem. Instead, employ a technique of pressing down and lifting to address each section. This method minimizes the risk of distorting the hem and contributes to a smooth, well-defined finish. Gentle stretching of the hem during the ironing process enhances the final appearance, allowing for a more tailored and refined outcome.
Navigating Corners with the Rolled Hem Foot
Navigating corners with the rolled hem foot is a crucial skill for seamstresses aiming to achieve precision and finesse in their projects. This comprehensive guide provides detailed insights and alternatives for handling corners seamlessly.
Handling Corners in Two Passes
- When confronted with the task of sewing a corner, opt for a strategic two-pass approach. Begin by sewing the first edge all the way to the end before addressing the second edge separately. This method ensures precision in corner hemming, maximizing the effectiveness of the rolled hem foot.
- Adopting a two-pass technique allows for meticulous attention to detail in corner hemming, showcasing the versatility and control that the rolled hem foot offers.
Two-Pass Approach for Corner Hemming
| Step | Description |
|---|---|
| Sewing the First Edge | Initiate the process by sewing the first edge of the corner all the way to the end. This establishes a baseline for precise corner hemming. |
| Addressing the Second Edge Separately | Upon completing the first edge, address the second edge separately. This two-pass approach ensures accuracy and control in corner hemming. |
Considering Alternatives for Corner Hems
- In projects involving corners, it is prudent to explore alternatives for hemming. One such alternative involves using a regular foot in conjunction with a standard double-folded edge employing a mitered corner technique.
- This alternative, although potentially requiring a bit more time, introduces a methodical approach to corner hemming. The choice between the rolled hem foot and the alternative depends on factors such as available time and the desired level of perfection for the final product.
Alternatives for Corner Hemming
| Technique | Description |
|---|---|
| Rolled Hem Foot (Two-Pass Approach) | Utilizes the rolled hem foot with a two-pass approach for precision in corner hemming. This method is efficient and ensures a controlled outcome. |
| Regular Foot with Mitered Corner Technique | Involves using a regular foot and a standard double-folded edge with a mitered corner technique. This alternative method requires more time but provides a meticulous finish. |
By understanding and employing the two-pass approach with the rolled hem foot and considering alternatives for corner hems, seamstresses can enhance their skill set and tailor their approach based on the specific requirements of their sewing projects. These techniques empower both novice and experienced sewers to navigate corners with confidence and achieve professional results.
Exploring Rolled Hem Foot Brands: Enhancing Your Sewing Experience
When it comes to selecting a rolled hem foot for your sewing endeavors, the market offers a variety of reputable brands that cater to different preferences and needs. Each brand brings its unique features, design nuances, and compatibility with various sewing machines. Here’s a brief overview of some popular rolled hem foot brands:
- SINGER: A household name in the sewing industry, SINGER is known for producing high-quality sewing accessories, including rolled hem feet. Their products often boast durability and compatibility with a wide range of sewing machines.
- Janome: Janome is synonymous with innovation in sewing technology. Their rolled hem feet are designed with precision, offering users the flexibility to create immaculate narrow hems on different fabrics. Janome often ensures that their accessories are user-friendly and easy to attach to their sewing machines.
- Brother: Brother, a well-respected brand in the sewing world, provides rolled hem feet that are engineered for efficiency and accuracy. Their accessories often integrate seamlessly with Brother sewing machines, offering a smooth hemming experience.
- Pfaff: Pfaff is recognized for its commitment to crafting accessories that elevate the sewing process. Pfaff’s rolled hem feet are no exception, often featuring ergonomic designs and compatibility with their range of sewing machines.
- Bernina: For those who appreciate Swiss precision, Bernina offers rolled hem feet that meet high standards of craftsmanship. Bernina’s accessories are known for their durability and the precision they bring to intricate sewing projects.
- Husqvarna Viking: With a legacy in sewing machine manufacturing, Husqvarna Viking extends its expertise to accessories like rolled hem feet. These feet are designed to complement the brand’s sewing machines, offering users the ability to achieve impeccable narrow hems.
- Dritz: Dritz is a brand recognized for providing a wide range of sewing notions. Their rolled hem feet often cater to various sewing machine models, providing an affordable yet reliable option for seamstresses.
Before making a purchase, it’s advisable to check the compatibility of the rolled hem foot with your specific sewing machine model. Additionally, user reviews and testimonials can offer valuable insights into the performance and durability of a particular brand’s rolled hem foot. Ultimately, the choice of a rolled hem foot brand can significantly impact the overall sewing experience, so it’s worth exploring the options available to find the perfect fit for your needs.
Concluding Insights on the Rolled Hem Foot (Hemmer Foot)
In concluding insights, the rolled hem foot emerges as a versatile and indispensable tool for seamstresses seeking precision and efficiency in hemming. From handling corners with a strategic two-pass approach to exploring alternative techniques, such as serging and double-folding with the regular foot, this guide has equipped both novice and experienced sewers with a comprehensive understanding of maximizing the rolled hem foot’s potential.
Embracing these techniques opens a realm of possibilities, ensuring polished and professional results in various sewing projects. As the final stitch is placed, the mastery of the rolled hem foot becomes a testament to the seamstress’s skill and commitment to achieving impeccable craftsmanship.