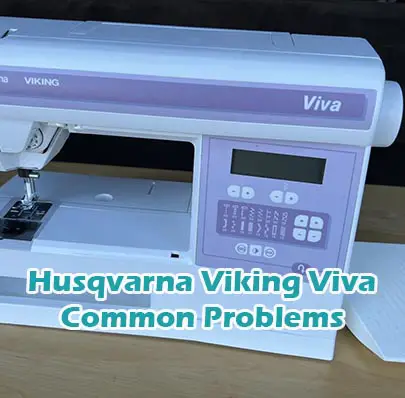
Husqvarna Viking Viva Common Problems and Troubleshooting
Welcome to our guide on addressing common problems and troubleshooting tips for the Husqvarna Viking Viva sewing machine. If you own this model, you may encounter certain issues during your sewing projects. In this article, we’ll delve into various problems users might face and provide solutions to overcome them. Whether you’re experiencing difficulties with the machine’s functionality, stitches, or other aspects, we’re here to assist you in maximizing your sewing experience with the Husqvarna Viking Viva.
Causes of Common Problems with the Husqvarna Viking Viva
This section will explore various common issues that users might encounter with the Husqvarna Viking Viva sewing machine and provide troubleshooting techniques to resolve them. From basic maintenance to advanced troubleshooting, we aim to address a wide range of problems to ensure smooth operation of your sewing machine.
Here you can find all the
parts and accessories for the Husqvarna Viking Viva
guaranteed to fit your sewing machine
Common Problems with the Husqvarna Viking Viva
1. Thread Breakage – Tension Issues
- Description of the Problem: Thread breakage occurs frequently during sewing, disrupting the stitching process.
- Cause of the Problem: Incorrect tension settings can lead to excessive pressure on the thread, causing it to break.
- Troubleshooting Step-by-Step:
- Check the upper thread tension settings on the Husqvarna Viking Viva.
- Ensure the thread is correctly threaded through the tension disks and the bobbin case.
- Adjust the tension settings gradually, testing the stitches on scrap fabric until the thread breakage ceases.
2. Uneven Stitching – Feed Dog Malfunction
- Description of the Problem: The stitching appears uneven, with some stitches longer or shorter than others.
- Cause of the Problem: Malfunctioning feed dogs on the Husqvarna Viking Viva may fail to advance the fabric evenly.
- Troubleshooting Step-by-Step:
- Inspect the feed dogs for any debris or obstructions that may hinder their movement.
- Clean the feed dogs and surrounding area thoroughly.
- Check the feed dog mechanism for any signs of damage or wear and tear.
- If necessary, lubricate the feed dog mechanism following the manufacturer’s instructions.
3. Bobbin Jamming – Improper Bobbin Installation
- Description of the Problem: The bobbin gets jammed frequently, disrupting the sewing process.
- Cause of the Problem: Incorrect installation of the bobbin or using a damaged bobbin can lead to jamming issues.
- Troubleshooting Step-by-Step:
- Remove the bobbin case from the Husqvarna Viking Viva and inspect the bobbin for any damage or irregularities.
- Ensure the bobbin is inserted correctly into the bobbin case, following the machine’s instruction manual.
- Clean the bobbin area to remove any lint or debris that may be causing the jamming.
- If the problem persists, consider replacing the bobbin with a new one.
4. Needle Breakage – Incorrect Needle Size
- Description of the Problem: Needles frequently break while sewing with the Husqvarna Viking Viva.
- Cause of the Problem: Using the wrong needle size for the fabric thickness or sewing at too high a speed can cause needle breakage.
- Troubleshooting Step-by-Step:
- Check the needle size and type recommended for the fabric being used.
- Ensure the needle is properly inserted and tightened in the machine.
- Reduce the sewing speed, especially when working with thicker fabrics or multiple layers.
- If needle breakage persists, consider replacing the needle with a new one of the correct size and type.
5. Machine Freezing – Software Glitch
- Description of the Problem: The Husqvarna Viking Viva freezes or becomes unresponsive during operation.
- Cause of the Problem: Software glitches or errors in the machine’s programming can lead to freezing issues.
- Troubleshooting Step-by-Step:
- Power off the sewing machine and unplug it from the power source.
- Wait for a few minutes to allow the machine to reset.
- Plug the machine back in and power it on again.
- If the issue persists, consider updating the machine’s software or contacting customer support for further assistance.
6. Thread Bunching – Bobbin Tension Imbalance
- Description of the Problem: Excess thread bunches up underneath the fabric, creating messy stitches.
- Cause of the Problem: Imbalanced bobbin tension, where the tension is either too tight or too loose, can result in thread bunching.
- Troubleshooting Step-by-Step:
- Check the bobbin tension and adjust it according to the machine’s manual.
- Clean the bobbin case and surrounding area to remove any lint or debris.
- Ensure the bobbin is wound evenly and inserted correctly into the bobbin case.
- If necessary, replace the bobbin with a new one and rethread the machine.
7. Fabric Not Feeding – Feed Dog Alignment
- Description of the Problem: The fabric fails to move smoothly under the presser foot, causing sewing difficulties.
- Cause of the Problem: Misaligned or damaged feed dogs may prevent proper fabric feeding.
- Troubleshooting Step-by-Step:
- Inspect the feed dogs for any misalignment or damage.
- Adjust the feed dog height and alignment according to the machine’s manual.
- Ensure the presser foot is properly attached and aligned with the feed dogs.
- If necessary, clean and lubricate the feed dog mechanism to ensure smooth operation.
8. Skipped Stitches – Needle and Thread Mismatch
- Description of the Problem: Stitches are occasionally skipped, resulting in incomplete seams or patterns.
- Cause of the Problem: Using the wrong needle or thread type for the fabric being sewn can cause stitches to skip.
- Troubleshooting Step-by-Step:
- Ensure the needle and thread are compatible with the fabric type and thickness.
- Check the needle for any damage or dullness and replace it if necessary.
- Re-thread the machine, ensuring the thread is properly inserted and tensioned.
- If the problem persists, try using a different needle size or type that is suitable for the fabric.
9. Loud Noise During Operation – Mechanical Issue
- Description of the Problem: The sewing machine produces unusually loud noises while in use, indicating a mechanical problem.
- Cause of the Problem: Loose or damaged mechanical components within the Husqvarna Viking Viva can result in noisy operation.
- Troubleshooting Step-by-Step:
- Inspect the machine for any loose screws, bolts, or parts.
- Tighten any loose components using the appropriate tools.
- Check for any signs of damage or wear on the machine’s moving parts.
- If necessary, lubricate the mechanical components to reduce friction and noise.
10. Error Messages on Display – Software Error
- Description of the Problem: The display screen on the Husqvarna Viking Viva shows error messages or codes, indicating a software issue.
- Cause of the Problem: Software errors or glitches within the sewing machine’s programming can trigger error messages on the display.
- Troubleshooting Step-by-Step:
- Refer to the machine’s manual for troubleshooting instructions related to specific error codes.
- Power off the machine and unplug it from the power source for a few minutes.
- Restart the machine and check if the error message persists.
- If the error message continues to appear, contact customer support for further assistance or software updates.
11. Fabric Puckering – Incorrect Presser Foot Pressure
- Description of the Problem: The fabric becomes wrinkled or puckered during sewing, affecting the overall finish of the project.
- Cause of the Problem: Incorrect presser foot pressure settings can cause excessive pressure on the fabric, leading to puckering.
- Troubleshooting Step-by-Step:
- Adjust the presser foot pressure according to the fabric type and thickness being sewn.
- Test sew on a scrap piece of fabric to determine the optimal presser foot pressure settings.
- If necessary, clean the presser foot and surrounding area to ensure smooth fabric feeding.
- Consider using a different presser foot type or attachment that is better suited for the fabric being sewn.
12. Bobbin Thread Showing on Top – Bobbin Case Issues
- Description of the Problem: The bobbin thread appears on the top side of the fabric, affecting the appearance of the stitches.
- Cause of the Problem: Improperly installed or damaged bobbin case components can cause the bobbin thread to show on the top side.
- Troubleshooting Step-by-Step:
- Remove the bobbin case and inspect it for any damage or debris.
- Clean the bobbin case thoroughly and ensure it is properly installed in the machine.
- Check the bobbin tension and adjust it if necessary to prevent the thread from showing on the top side.
- If the problem persists, consider replacing the bobbin case with a new one.
13. Buttonhole Malfunction – Sensor Calibration
- Description of the Problem: The automatic buttonhole function on the Husqvarna Viking Viva does not produce consistent or accurate results.
- Cause of the Problem: Misaligned or improperly calibrated sensors can cause inaccuracies in the buttonhole stitching process.
- Troubleshooting Step-by-Step:
- Check the sensor alignment and calibration according to the machine’s manual.
- Perform a test buttonhole on scrap fabric to assess the accuracy of the sensor settings.
- Calibrate the sensors as needed to ensure precise buttonhole stitching.
- If calibration does not resolve the issue, contact customer support for further assistance.
14. Jammed Needle Plate – Debris Accumulation
- Description of the Problem: The needle plate becomes jammed with debris, hindering the sewing process.
- Cause of the Problem: Accumulation of lint, thread, or other debris in the needle plate area can cause jamming.
- Troubleshooting Step-by-Step:
- Turn off the machine and unplug it from the power source.
- Remove the needle plate and clean the area thoroughly with a brush or lint remover.
- Inspect the needle plate for any signs of damage or warping that may be causing the jamming.
- Replace the needle plate if necessary and test sew on scrap fabric to ensure smooth operation.
15. Fabric Slippage – Presser Foot Pressure Adjustment
- Description of the Problem: The fabric slips or shifts during sewing, resulting in uneven stitches or misalignment.
- Cause of the Problem: Insufficient presser foot pressure can cause the fabric to slip, especially when sewing slippery or stretchy materials.
- Troubleshooting Step-by-Step:
- Increase the presser foot pressure to provide better grip on the fabric.
- Test sew on scrap fabric to ensure the fabric stays in place during stitching.
- Consider using a walking foot or other specialized presser foot attachments for slippery or stretchy fabrics.
- If the problem persists, check the feed dogs and adjust their alignment or height as needed.
Here you can find all the
parts and accessories for the Husqvarna Viking Viva
guaranteed to fit your sewing machine
16. Thread Nesting – Bobbin Thread Tension
- Description of the Problem: Thread nesting, also known as bird’s nesting, occurs when the upper thread loops and tangles with the bobbin thread underneath the fabric.
- Cause of the Problem: Incorrect bobbin thread tension or improper threading of the bobbin case can lead to thread nesting issues.
- Troubleshooting Step-by-Step:
- Check the bobbin tension and adjust it according to the machine’s manual.
- Ensure the bobbin is correctly inserted into the bobbin case and threaded properly.
- Verify that the upper thread is threaded correctly through the machine’s tension discs.
- If necessary, clean the bobbin case and surrounding area to remove any lint or debris.
17. Motor Overheating – Continuous Use
- Description of the Problem: The sewing machine’s motor becomes excessively hot during prolonged use, potentially leading to overheating and damage.
- Cause of the Problem: Continuous use of the sewing machine without allowing the motor to cool down can cause overheating.
- Troubleshooting Step-by-Step:
- Turn off the sewing machine and allow the motor to cool down for a sufficient amount of time.
- Avoid using the machine continuously for extended periods, taking breaks to allow the motor to rest.
- Ensure proper ventilation around the sewing machine to prevent heat buildup.
- If overheating persists, consider contacting customer support for further assistance or motor inspection.
18. Skipped Stitches – Dull Needle
- Description of the Problem: Stitches are occasionally skipped, leaving gaps in the sewing pattern, which may be due to a dull needle.
- Cause of the Problem: A dull needle can struggle to penetrate the fabric properly, resulting in skipped stitches.
- Troubleshooting Step-by-Step:
- Inspect the needle for any signs of dullness, bending, or damage.
- Replace the needle with a new, sharp needle appropriate for the fabric being sewn.
- Ensure the needle is inserted correctly and tightened securely in the machine.
- If skipped stitches persist, consider adjusting the machine’s tension settings or using a different needle size.
19. Needle Breakage – Sewing Through Thick Layers
- Description of the Problem: Needles frequently break when sewing through thick layers of fabric or multiple layers.
- Cause of the Problem: Sewing at high speeds or using the wrong needle size for thick fabrics can cause needles to break.
- Troubleshooting Step-by-Step:
- Use a needle specifically designed for sewing through thick fabrics or multiple layers.
- Reduce the sewing speed when working with thick layers to prevent needle breakage.
- Consider using a walking foot attachment or a specialty needle to improve fabric feeding and reduce needle stress.
- If needle breakage persists, inspect the machine for any signs of mechanical issues and contact customer support if necessary.
20. Stitch Length Variation – Stitch Length Adjustment
- Description of the Problem: The length of stitches varies inconsistently, resulting in uneven seams or patterns.
- Cause of the Problem: Incorrect stitch length settings or mechanical issues within the sewing machine can cause stitch length variation.
- Troubleshooting Step-by-Step:
- Adjust the stitch length settings on the machine to the desired length for the project.
- Ensure the feed dogs are functioning properly and feeding the fabric evenly under the presser foot.
- Clean and lubricate the machine’s mechanical components to ensure smooth operation and consistent stitch length.
- If stitch length variation persists, consider consulting the machine’s manual for advanced troubleshooting or contacting customer support.
21. Fabric Not Cutting – Dull Blade
- Description of the Problem: The fabric is not cut cleanly by the machine’s blade, resulting in frayed edges or incomplete cuts.
- Cause of the Problem: A dull or damaged blade can prevent the fabric from being cut properly.
- Troubleshooting Step-by-Step:
- Inspect the blade for any signs of dullness, nicks, or damage.
- Replace the blade with a new, sharp one if necessary.
- Ensure the blade is installed correctly and securely in the machine.
- If fabric cutting issues persist, consider adjusting the blade alignment or contacting customer support for further assistance.
22. Bobbin Winding Malfunction – Bobbin Winder Alignment
- Description of the Problem: The bobbin winding function of the machine does not operate smoothly or fails to wind the bobbin evenly.
- Cause of the Problem: Misalignment or damage to the bobbin winding mechanism can cause malfunction during bobbin winding.
- Troubleshooting Step-by-Step:
- Check the bobbin winding mechanism for any signs of misalignment or damage.
- Ensure the bobbin winder is properly engaged and aligned with the bobbin.
- Clean the bobbin winding area to remove any debris or obstruction that may hinder the winding process.
- If the problem persists, consider lubricating the bobbin winding mechanism or contacting customer support for further assistance.
23. Thread Spool Unwinding – Thread Spool Holder Tension
- Description of the Problem: The thread spool unwinds too quickly or unevenly, causing tension issues during sewing.
- Cause of the Problem: Insufficient tension on the thread spool holder can cause the thread to unwind too quickly or unevenly.
- Troubleshooting Step-by-Step:
- Adjust the tension on the thread spool holder to provide enough resistance for smooth thread unwinding.
- Ensure the thread spool is properly seated on the spool holder and that the thread is feeding correctly.
- If necessary, clean the thread spool holder and surrounding area to remove any debris that may affect tension.
- Consider using a thread net or cap to help control thread unwinding, especially for slippery or lightweight threads.
24. Button Attachment Issues – Presser Foot Alignment
- Description of the Problem: The sewing machine struggles to attach buttons securely, resulting in loose or uneven buttonholes.
- Cause of the Problem: Misalignment of the presser foot with the button attachment mechanism can cause issues during button attachment.
- Troubleshooting Step-by-Step:
- Check the alignment of the presser foot with the button attachment mechanism.
- Ensure the button attachment foot is securely attached to the machine and properly aligned with the buttons.
- Adjust the presser foot pressure and stitch settings according to the fabric and button type being used.
- If button attachment issues persist, consider practicing on scrap fabric or consulting the machine’s manual for advanced troubleshooting.
25. Thread Cutter Malfunction – Blade Adjustment
- Description of the Problem: The thread cutter function of the sewing machine does not cut the thread cleanly or consistently.
- Cause of the Problem: Misalignment or damage to the thread cutter blade can cause malfunction during thread cutting.
- Troubleshooting Step-by-Step:
- Inspect the thread cutter blade for any signs of misalignment, dullness, or damage.
- Adjust the blade alignment according to the machine’s manual to ensure clean and consistent thread cutting.
- Clean the thread cutter area to remove any debris or obstruction that may affect blade movement.
- If the problem persists, consider replacing the thread cutter blade or contacting customer support for further assistance.
Here you can find all the
parts and accessories for the Husqvarna Viking Viva
guaranteed to fit your sewing machine
Husqvarna Viking Viva Sewing Machine Manual
The operating instructions for the Husqvarna Viking Viva sewing machine can be found on the manufacturer’s website. Please visit the official Husqvarna Viking website and navigate to the support or downloads section to access the manual for your specific model.
Husqvarna Viking Viva FAQ
1. How do I adjust the tension on the Husqvarna Viking Viva?
To adjust the tension on the Husqvarna Viking Viva sewing machine, locate the tension dial on the machine. Turn the dial clockwise to increase tension and counterclockwise to decrease tension. It’s recommended to test the tension adjustments on scrap fabric to achieve the desired results.
2. What should I do if the stitches on my Husqvarna Viking Viva are skipping?
If stitches are skipping on the Husqvarna Viking Viva, first check the needle for any signs of damage or dullness. Replace the needle if necessary. Additionally, ensure that the thread is properly threaded through the machine and that the tension settings are appropriate for the fabric being sewn. If the problem persists, consider adjusting the machine’s stitch length or consulting the manual for further troubleshooting.
3. How do I clean and maintain my Husqvarna Viking Viva sewing machine?
To clean and maintain the Husqvarna Viking Viva sewing machine, start by unplugging the machine and removing the needle and presser foot. Use a soft brush or lint roller to remove any dust, lint, or debris from the machine’s exterior and interior components. Lubricate the machine’s moving parts as recommended in the manual. It’s also important to regularly change the needle and clean the bobbin area to ensure optimal performance.
Conclusion
It’s important to remember that troubleshooting sewing machine issues can sometimes be complex. Always refer to the manual, contact customer service, or visit a service center whenever possible if you encounter problems with your Husqvarna Viking Viva. These resources can provide valuable assistance and ensure that your sewing machine operates smoothly for years to come.
Husqvarna Viking Victoria Common Problems