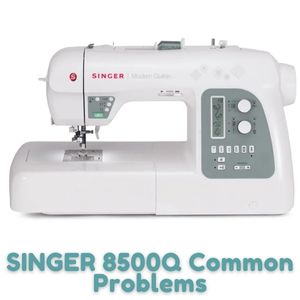
SINGER 8500Q Common Problems and Troubleshooting
Are you having trouble getting your Singer 8500Q Sewing and Quilting Machine up and running? No need to worry any longer! Our comprehensive guide has all the answers that can help resolve any issues preventing it from functioning.
Just a few clicks away lies our resource with effective solutions for common problems of the Singer 8500Q, so you can get back to sewing in no time. Empower yourself now by unlocking this helpful tool and take charge of fixing your machine.
Common SINGER 8500Q bobbin winding problems. Bobbin winder not spinning
Having trouble with your SINGER 8500Q’s bobbin winding? It could be because of either a frayed tire or an inaccurate winder assembly adjustment. To make sure that all repairs go smoothly, don’t forget to double-check the power switch is correctly in the “On” position before you begin! That way, you can guarantee efficient and successful maintenance work every time.
Troubleshooting Bobbin winder problems on the SINGER 8500Q
If you are having troubles with your SINGER 8500Q bobbin, carefully and slowly unscrew the two bolts that keep its winding system in place and move it nearer to the handwheel. Do not make any drastic changes or adjustments as this could create other spinning issues.
By performing a quick visual assessment, you can detect any obvious indications of wear on the rubber tire – don’t procrastinate and replace it right away for maximum success! Once replaced, precisely adjust its position until your machine is running smoothly again. Now, with these simple steps in place, get ready to experience restored excellence from your machine.
SINGER 8500Q Sewing Machine Tension Problems
If you are a beginner, the SINGER 8500Q sewing machine is an excellent choice as it offers user-friendly features and simple navigation. However, if not properly used or with too much tension on the bobbin case, problems such as bunched upper threading may occur; so be sure to address these issues swiftly for professional results.
Troubleshooting tension problems on the SINGER 8500Q
If the tension on your SINGER 8500Q sewing machine is not functioning correctly, there are some quick and easy steps you can take to restore it:
- If you want to ensure a flawless stitching experience, start by making sure your needle is properly threaded and the bobbin thread has been adequately wound.
- Additionally, make sure all tension discs are in the correct position and adjust them as needed for optimal results.
- Moreover, it’s important to select an appropriate-sized needle based on the fabric being sewn so that any potential tension issues can be avoided.
- In conclusion, precise needle threading combined with perfectly placed tension disks along with an ideal-sized needle according to material type will undoubtedly guarantee your success!
Common SINGER 8500Q fabric problem
Why is my SINGER 8500Q Sewing Machine not moving the fabric? Is your Machine failing to move the fabric? Don’t worry – this can usually be caused by an incorrect thread tension, a misinterpretation of instructions or simply too much material. By gaining knowledge on these common issues and taking action right away, it’ll be possible for you to get back in business without delay.
With just a bit of understanding, any sewing project will become easier than ever before. So what are you waiting for? Take this chance today and triumph over potential obstacles with confidence.
Troubleshooting fabric movement problems on the SINGER 8500Q
- Before beginning, it’s important to inspect the thread as outlined in the manual or with a regulating knob.
- Also, double check that your fabric pieces are not too thick and have been threaded into the machine correctly.
- To ensure uninterrupted performance of all components on your device, regular maintenance is key.
- Performing an inspection every few weeks can help maintain peak operation and prevent any movement issues from arising.
Common SINGER 8500Q stitch problems
The SINGER 8500Q Machine is renowned for its endurance and stability, thrilling craftspeople around the world. Even if adjusting stitch length or utilizing zigzag functions appear complex at first glance, with a few basics and advice you will soon know how to use them correctly. Any loose or tight stitching issues can be quickly remedied as well.
Troubleshooting SINGER 8500Q stitching problems
To make the most of your SINGER 8500Q, it is critical that you adjust all settings to match each project and select needles suitable for every fabric. Additionally, be sure to keep up with maintenance tasks like clearing out lint from the feed dog area and replacing worn-out needles. With careful customization, a focus on upkeep and some troubleshooting skills in place, you can ensure maximal success with this sewing machine.
SINGER 8500Q breaking needles
Having trouble with your SINGER 8500Q Sewing Machine? Does it seem like the needles keep breaking? To ensure optimal performance, it is essential to keep your Machine in top condition.
Regularly clear away lint from the feed dog area and adjust thread settings for various fabric types. Additionally, swap out old needles with new ones of an appropriate size to reduce problems and avoid broken needles down the line. By following these steps you will have a seamless sewing experience every time.
Troubleshooting SINGER 8500Q Needle Problems
To ensure optimal performance of your Singer 8500Q sewing machine, it is essential to properly maintain the device.
- Start by examining the bobbin case and assessing if there are any obstructions, misalignments or irregularities; adjusting both presser foot tension and thread tension as needed.
- Choose a needle size suitable for your fabric type – remember to keep it lubricated regularly with oil.
- Lastly, modify stitch length depending on each project in order to reduce pressure on all components of your machine for flawless operation.
With these practical steps, you’ll be able to fix any needle difficulties that arise with your Singer 8500Q sewing machine.
SINGER 8500Q upper thread breaking
The SINGER 8500Q Sewing Machine could be prone to upper thread breakage for a variety of causes. These can include incorrect needle installation, improper tension settings, outdated needles, inadequate bottom thread tensioning, unsatisfactory bobbin winding, and issues with the embroidery design data system parameter.
In order to avoid any further harm or damage to the machine, it is important to properly address these underlying factors before utilizing the SINGER 8500Q sewing machine again. By doing this, you can ensure that your machine operates at peak performance levels and stays up and running smoothly.
This will help prevent any more issues related to upper thread breakage from occurring in future use of the machine as well.
Troubleshooting SINGER 8500Q Upper thread breakage
To ensure that breaking of the upper thread on a SINGER 8500Q Sewing Machine is avoided, setting up and using the machine properly must be done. This includes installing the right needle and winding the bobbin correctly as well as verifying any embroidery data design system settings.
If threads do break, rethreading should be completed following instructions then checking and adjusting the tension for both upper and lower thread. Additionally, use an appropriate bobbin with a roughly 80% full winding and make sure fabric is correctly held taut in its frame when stitching.
Finally, remove loose threads from the hook area or knots/tangles from thread that has been used before replacing it if necessary. By doing all this one can resolve any breaking of the upper thread issues.
Common SINGER 8500Q bobbin thread problems
SINGER 8500Q bobbin thread problems can lead to thread breakage and other machine issues. Here are some common ones and ways to fix them.
Troubleshooting SINGER 8500Q bobbin thread problems
- Wrong Type of Bobbin – If the bobbin being used is not compatible with the SINGER 8500Q sewing machine, it may cause thread breakage. To prevent this, always be sure to use the correct type of bobbin for your machine.
- Bobbin Thread is Low or Out – If the bobbin thread is running low or out, it can cause thread breakage. Make sure that there is an adequate amount of thread on the bobbin before beginning a project.
- Bobbin is Overwound – An overwound bobbin can create too much tension on the thread, resulting in breakages. To prevent this, make sure to wind the bobbin properly and not overfill it.
- Bobbin Case Not Properly Inserted into the Machine – If the bobbin case is not correctly inserted into the machine, it can cause thread breakage. Be sure that the bobbin case is properly inserted before starting a project.
- Bobbin Tail Too Short – If the tail of the bobbin is too short or worn, it can put too much tension on the thread and lead to breaks. To fix this, use a new bobbin with a longer tail.
- Improper Bobbin Tension or Dirty Bobbin Case – If the bobbin tension is incorrect or the bobbin case is dirty, it can cause thread breakage. Adjust the bobbin tension and make sure that the area around the bobbin case is clean before starting a project.
- Damaged Bobbin Case – If the bobbin case is damaged, it can lead to thread breakage. Replace the bobbin case if it is damaged or not functioning properly.
By checking for these common issues and taking steps to fix them, you can help prevent bobbin thread problems and ensure smooth operation of your machine.
SINGER 8500Q Keep Jamming
Jamming on the SINGER 8500Q sewing machine is a common problem that can occur due to several different causes. Tangled thread, uneven fabric feeding and build ups of lint or dust are all potential culprits. The needle may also hit something inside the machine, so always be aware when using it.
Troubleshooting Jamming Problems on the SINGER 8500Q
- To solve this issue, first refer to the troubleshooting steps in the user manual, or follow the instructions in this article. If these methods don’t work, take your machine to a professional repair service.
- To prevent jamming, regularly clean out the lint trap and wipe down the outside of the machine with a soft cloth.
- Additionally, oiling all moving parts as much as necessary can help keep them running smoothly. Refer to the manual for instructions on which parts need to be oiled and how frequently they should be done.
Following these simple steps can help prevent any future jamming issues with your SINGER 8500Q sewing machine.
SINGER 8500Q sewing machine bobbin tension problems
Bobbin tension problems are common in SINGER 8500Q sewing machines and can be caused by a number of factors, including improper thread installation or an improperly adjusted needle plate. Fortunately, there are several easy solutions to fix this issue.
Troubleshooting SINGER 8500Q bobbin tension problems
- The first step is to make sure that the bobbin is properly installed. It should be inserted in the machine with the thread running in a counterclockwise direction. The bobbin case should also be correctly aligned so that the tension spring is facing up, and the black tab should be lined up with the notch in the middle of the case.
- Next, make sure that your needle plate is properly adjusted. This can be done by loosening the screw on the needle plate and gently moving it up or down until it’s even with the feed dog.
- If these steps don’t resolve your bobbin tension issues, you may need to adjust the tension dial on the side of your machine. This can be done by simply turning it clockwise until you find the proper tension.
- Finally, if all else fails, try replacing your bobbin case with a new one. This should resolve any lingering problems that you may have had with the old one.
By following these steps, you should be able to easily solve any bobbin tension problems you may experience while using a SINGER 8500Q sewing machine.
SINGER 8500Q bobbin holder problems
SINGER 8500Q Sewing Machine Bobbin Holder Came Out? The sewing machine may experience problems with its bobbin case. This typically occurs when the bobbin holder is removed and re-inserted, only to find it will not fit back into place. The most likely causes of this problem are dirt, worn-out bobbin cases, or incorrect bob cases for the machine model.
Troubleshooting SINGER 8500Q bobbin holder problems
In order to address this issue, check whether or not the bobbin holder’s finger is properly seated in the small groove located in the needle plate. It may be helpful to slightly adjust its position by gently pressing down on it with a pencil eraser while simultaneously pushing up on the bobbin case latch with a pin.
If this does not work, the bobbin case may need to be cleaned. This can be done by taking a cotton swab and gently wiping around the inside of the bobbin holder’s latch area, as well as the needle plate groove that holds it in place. Additionally, use a compressed air canister or an air compressor to blow out any dust or debris that may have accumulated.
It is also important to ensure the bobbin case being used is compatible with the SINGER 8500Q sewing machine model. If a different type of bobbin case is being utilized, it may not fit properly into place and cause further issues. To avoid this issue, only use bobbins specifically designed for the SINGER 8500Q.
SINGER 8500Q Sewing machine parts
The SINGER 8500Q sewing machine may experience problems with parts and components due to normal wear and tear, improper use, or age. If any of these problems arise, it is important to identify the cause of the issue quickly, in order to prevent further damage to your machine.
For more information about the most common problems with parts and components of the sewing machine, as well as the causes of these problems and how to fix them, read our other article.
It is worth noting that the most common problems with SINGER 8500Q parts include the following problems:
SINGER 8500Q Sewing machine presser foot problems
For more information about the most common problems with presser foots of the SINGER 8500Q sewing machine, as well as the causes of these problems and how to fix them read in this article of ours.
SINGER 8500Q Sewing machine motor problems
For more information about the most common problems with machine motor of the SINGER 8500Q sewing machine, as well as the causes of these problems and how to fix them read in this article of ours.
SINGER 8500Q Sewing machine belt problems
For more information about the most common problems with belt of the SINGER 8500Q sewing machine, as well as the causes of these problems and how to fix them read in this article of ours.
SINGER 8500Q Sewing machine thread cutter problems
For more information about the most common problems with thread cutter of the sewing machine, as well as the causes of these problems and how to fix them read in this article of ours.
Hand wheel problems on SINGER 8500Q sewing machine
For more information about the most common problems with hand wheel of the SINGER 8500Q sewing machine, as well as the causes of these problems and how to fix them read in this article of ours.
Table: SINGER 8500Q Sewing Machine Troubleshooting Guide
Here’s a brief summary table of the common problems and troubleshooting steps for the SINGER 8500Q sewing machine:
| Problem | Troubleshooting Steps |
|---|---|
| Bobbin Winding Issues | – Check power switch is in the “On” position – Inspect for frayed tire or winder assembly adjustment issues – Unscrew bolts, adjust position carefully without drastic changes |
| Sewing Machine Tension Problems | – Ensure needle is properly threaded, bobbin well-wound – Check and adjust tension discs – Choose appropriate needle size based on fabric type |
| Fabric Movement Problems | – Inspect thread and regulating knob as per the manual – Confirm correct threading of fabric pieces – Regular maintenance for optimal performance |
| Stitch Problems | – Adjust settings for each project, use suitable needles for different fabrics – Clear lint, replace worn-out needles |
| Breaking Needles | – Clear lint from feed dog area, adjust thread settings – Use new needles of appropriate size – Regularly lubricate needle with oil |
| Upper Thread Breaking | – Address needle installation, tension settings, and bobbin winding issues – Verify embroidery design system parameter settings |
| Bobbin Thread Problems | – Use correct bobbin type – Ensure adequate thread on the bobbin – Avoid overwinding the bobbin – Properly insert the bobbin case into the machine – Check bobbin tail length and cleanliness of the bobbin case |
| Machine Jamming | – Refer to user manual for troubleshooting steps – Regularly clean lint trap and machine exterior – Oil moving parts as instructed |
| Bobbin Tension Problems | – Ensure proper bobbin installation in counterclockwise direction – Adjust needle plate position if needed – Tweak tension dial if required – Replace bobbin case if problems persist |
| Bobbin Holder Problems | – Check if bobbin holder’s finger is seated properly in the groove – Gently adjust position if necessary – Clean bobbin case and surrounding areas – Use compatible bobbin cases designed for SINGER 8500Q |
| Sewing Machine Parts Issues | – Identify and fix problems promptly to prevent further damage – Regular maintenance to address wear and tear |
| Presser Foot Problems | – Refer to dedicated article for specific presser foot issues |
| Motor Problems | – Refer to dedicated article for specific motor issues |
| Belt Problems | – Refer to dedicated article for specific belt issues |
| Thread Cutter Problems | – Refer to dedicated article for specific thread cutter issues |
| Hand Wheel Problems | – Refer to dedicated article for specific hand wheel issues |
These troubleshooting steps cover a range of issues, providing guidance for users facing problems with their SINGER 8500Q sewing machine.
SINGER 8500Q Manual
The instruction manual for the SINGER 8500Q sewing machine can be found here.
FAQ
How to Change the Tension Assembly On a SINGER 8500Q?
Adjusting the tension assembly of a Singer 8500Q requires skill and experience. It’s best to buy the entire unit rather than individual components, as it will cost less and be easier to install. Before installing, inspect to ensure factory settings are correct, adjusting if needed by gently lifting and turning the spring until bar fits into groove.
Maintain distance between spring and bar at around 22 millimeters (1/8th of an inch) apart, with the bar aligned with line for ideal tension. Test and adjust as necessary.
Why is my sewing machine not threading my bobbin?
Your sewing machine may not be threading the bobbin correctly due to an incorrectly positioned thread guide or a misaligned spool pin. Check that your thread guide is aligned with the groove on the bobbin case, and make sure your spool pin is in correct position.
Why is my bobbin thread looping underneath?
Bobbin thread looping underneath can be caused by incorrect tension, a dull needle, or the thread not being wound correctly on the bobbin. Check that you are using the correct size and type of needle, adjust the bobbin case tension if necessary, and make sure your bobbin is properly wound.
What causes thread to bunch up underneath when sewing?
Thread bunching underneath when sewing can be caused by incorrect tension or a dull needle. Check that your thread tension is set correctly and use the correct size and type of needle for your project.
How do I get my sewing machine to pick up the bobbin thread?
To get your sewing machine to pick up the bobbin thread, ensure that the presser foot is in its raised position, raise the bobbin thread by turning the hand wheel towards you, and place your fabric under the presser foot. Lower the presser foot and begin sewing.
Conclusion. SINGER 8500Q troubleshooting
If you’ve been using the SINGER 8500Q sewing machine for a while, it’s likely that you may have encountered some difficulties. To help troubleshoot these issues, we have gathered together the most common problems associated with this type of device and provided brief remedies for each one. If you need more information about those topics and their solutions, please take a look at our additional articles!
By using what’s provided in this article alongside any other content found here at our website, you can keep your SINGER 8500Q sewing machine running smoothly for many years ahead.