Stitch Length: Best, Standard & How to Adjust
In the realm of machine sewing, determining the ideal stitch length holds significant importance. This guide is tailored to provide valuable insights for seamstresses, offering recommendations for the optimal stitch length based on fabric type and intended purpose.
Sewing machines typically feature a stitch regulator, and the stitch length is commonly measured in millimeters. Delving into the nuances of how these small measurements impact your sewing is essential knowledge for maximizing the capabilities of your sewing machine.
Now, let’s explore the best stitch lengths and learn how to adjust them for impeccable sewing results.
Stitch Length Tutorial
What Is Stitch Length?
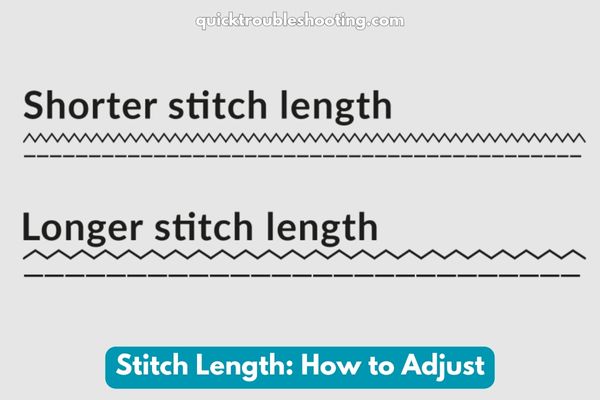
Stitch length refers to the distance between one needle entry point and the next on a sewing machine. This setting, displayed on the stitch regulator, can vary from very small to longer stitches.
In essence, smaller stitches allow for more stitches in a defined space, creating a tighter and closer pattern—ideal for delicate fabrics and intricate corners. On the other hand, longer stitches are advantageous for tasks like basting and gathering, accommodating thicker fabrics and multiple layers.
It’s essential to test stitch length on a fabric scrap and check tension, ensuring optimal results for any sewing project.
How Does A Sewing Machine Adjust Stitch Length?
A sewing machine adjusts stitch length by utilizing feed dogs positioned beneath the needle. These feed dogs play a crucial role in modifying the amount of fabric pushed through the machine, thereby determining the length of the subsequent stitch.
Understanding Feed Dogs
Feed dogs are small, tooth-like mechanisms located beneath the needle plate on a sewing machine. These feed dogs work in coordination with the presser foot to move the fabric smoothly through the machine during the stitching process.
Role of Feed Dogs in Stitch Length Adjustment
The key to adjusting stitch length lies in how the feed dogs operate. As the feed dogs move, they engage with the fabric, controlling the amount and rate at which the material advances under the needle.
Modifying Fabric Movement
To alter the stitch length, the sewing machine adjusts the movement of the feed dogs. When a shorter stitch length is desired, the feed dogs move the fabric a smaller distance between each needle penetration. Conversely, for longer stitches, the feed dogs increase the fabric movement, creating a larger gap between successive needle entries.
Stitch Length Mechanism
The modification in feed dog movement directly influences the length of the stitch formed by the sewing machine. By regulating the feed dog action, the sewing machine achieves precision in stitch length adjustments, allowing for versatility in sewing different fabrics and meeting varied project requirements.
Impact on Sewing Process
This adjustment is vital for achieving the desired results in sewing projects.
- Shorter stitches are often preferred for delicate fabrics, intricate details, or when sewing around corners.
- Longer stitches, on the other hand, may be suitable for tasks like basting, gathering, or when working with thicker materials.
Integration with Machine Controls
- On modern sewing machines, the control over feed dog movement and, consequently, stitch length can be managed through the machine’s settings.
- Some machines feature mechanical dials, while others utilize computerized screens to provide a user-friendly interface for adjusting stitch length.
Understanding how a sewing machine utilizes feed dogs to modify fabric movement and control stitch length empowers users to achieve precision and customization in their sewing projects. This fundamental mechanism is at the core of creating well-crafted and professionally finished stitches.
How To Change Stitch Length
Adjusting the stitch length on your sewing machine involves a straightforward process. Here’s a detailed step-by-step guide:
- Locate the Stitch Length Selector: Begin by identifying the stitch length selector on your sewing machine. This is a crucial component responsible for regulating the distance between stitches.
- Check the Range: Examine the stitch length range, which typically varies from 0 to 4.0mm on most sewing machines. This range allows you to customize the stitch length according to your specific sewing needs.
- Mechanical Dial or Computerized Screen: Depending on the sophistication of your sewing machine, you’ll either find a mechanical dial or a computerized screen for adjusting the stitch length.
- Mechanical Dial: Rotate the dial to the desired stitch length. Smaller numbers indicate shorter stitches, while larger numbers represent longer stitches.
- Computerized Screen: Navigate through the machine’s menu using the touchscreen or buttons to set the preferred stitch length.
- Preset Buttons on Simpler Machines: If you have a simpler sewing machine, it might be equipped with preset buttons for different stitch lengths. These buttons eliminate the need for manual adjustments and provide a quick solution for common stitch lengths.
- Customize According to Project Requirements: Consider the requirements of your sewing project when adjusting the stitch length.
- For delicate fabrics, intricate corners, or detailed work, opt for shorter stitches.
- Longer stitches are suitable for tasks like basting, gathering, or working with thicker fabrics and multiple layers.
- Test on Scrap Fabric: Before starting your actual sewing project, it’s advisable to test the adjusted stitch length on a scrap piece of fabric. This ensures that the chosen stitch length complements the fabric and achieves the desired result.
By following these detailed steps, you can confidently and precisely adjust the stitch length on your sewing machine, tailoring it to meet the specific demands of each sewing endeavor.
Stitch Length – Conversion Table
For those dealing with stitch length measurements in millimeters and needing to convert to stitches per inch, a useful conversion table is provided. Since older sewing patterns may reference stitches per inch, here’s a quick guide:
Stitch Length MM to Stitches Per Inch Conversion:
| Stitch Length (MM) | Stitches Per Inch |
|---|---|
| 0.5 mm | 5 stitches per inch |
| 1.0 mm | 25 stitches per inch |
| 1.5 mm | 17 stitches per inch |
| 2.0 mm | 13 stitches per inch |
| 2.5 mm | 10 stitches per inch |
| 3.0 mm | 8.5 stitches per inch |
| 3.5 mm | 7 stitches per inch |
| 4.0 mm | 6.5 stitches per inch |
| 4.5 mm | 5.5 stitches per inch |
| 5.0 mm | 5 stitches per inch |
Remember, when converting from millimeters to stitches per inch, use the formula:
25.4 mm length = stitches per inch
This conversion table simplifies the process, especially when working with older sewing patterns that rely on stitches per inch measurements.
What should my stitch length be?
Choosing the right stitch length is crucial for achieving optimal sewing results, and it depends on various factors such as the type of fabric, the purpose of the stitches, and the thickness of the thread. Here are detailed guidelines to help you determine the ideal stitch length for your specific needs:
| Choosing the Right Stitch Length Guidelines | |
|---|---|
| 1. Type Of Fabric: | |
| Light & Sheer Fabrics | Use a shorter stitch length, typically ranging from 1.5 to 2mm. Examples include silk, chiffon, and lightweight fabrics. |
| Medium-weight Fabrics | Opt for the standard stitch length, typically between 2.0 to 2.5mm. Suitable for fabrics of moderate thickness. |
| Heavy-weight Fabrics and Quilts | Choose a longer stitch length, ranging from 3.0 to 4.0mm. Ideal for sewing layers of heavy fabrics or quilting projects. |
| Leather and Vinyl | Use longer stitches (3.0 to 4.0mm) to prevent perforation caused by closely spaced needle holes. |
| 2. Purpose Of The Stitch: | |
| Basting | Utilize the longest stitch length (5mm or up to 7mm on some machines) for easy removal. |
| Top Stitching and Decorative Stitches | Opt for a longer stitch, typically between 2.5 to 3.5mm, depending on the fabric type. |
| Machine Gathering | Use a longer stitch length, around 4.0 to 5mm, for effective gathering. |
| Paper Piercing | Choose a very small stitch length, approximately 1.3 to 1.6mm. |
| Quilting | For regular quilting, a medium stitch length of 2.5 to 3.5mm is suitable. Free motion quilting doesn’t require a specific stitch length, as the feed dogs are dropped, allowing the quilt to move freely. |
| 3. Thickness Of The Thread: | |
| Thicker Threads | Opt for a longer stitch length, typically ranging from 3.0 to 4.0mm. |
| Thinner Threads like Silk | Use a shorter stitch length, usually between 2.5 to 3.5mm. |
| Metallic and Rayon Threads | Choose a longer stitch length (3.0 to 4.0mm) to accommodate these specialty threads. |
| Invisible Threads (Mono Filament) | A shorter stitch length of 2.5 to 3.5mm is suitable for invisible or monofilament threads. |
By considering these guidelines based on fabric type, stitching purpose, and thread thickness, you can make informed decisions when setting your stitch length, ensuring precision and success in your sewing projects.
Recommended Sewing Machine Stitch Lengths
The stitch length you opt for is influenced by specific terminologies and techniques. It is advisable to refer to your sewing machine manual and, if needed, bring along a list of inquiries when attending lessons or demonstrations offered by your sewing machine agent, especially when introducing a new machine model.
Encountering terms in your sewing patterns may raise questions about how they correlate with your sewing machine’s stitch length. Here, we’ll explore these terms and guide you on how to align them with the appropriate stitch length settings on your machine.
Stitch Length Chart
Below is a table summarizing the stitch length information provided in the comprehensive guide:
| Sewing Technique | Recommended Stitch Length Range |
|---|---|
| Standard Stitch | 2.5-3.0mm |
| Top Stitching | 2.0-4.0mm (up to 4.0mm for thick threads) |
| Basting | 4.0mm |
| Stay Stitching | 2.5mm |
| Curves | 2.0-2.5mm |
| Gathering | 4.0mm |
| Dart | 1.0-2.5mm |
| Zig-Zag (Short) | 0.5-1.0mm (for buttonholes, appliqué) |
| Zig-Zag (Long) | 2.0mm (for finishing seams) |
| Zig-Zag Elastic (Moderate) | 2.0-3.0mm (for swimwear, leotards) |
| Decorative Stitching (Long) | 4.0mm |
| Quilting Layers | 2.5-3.5mm |
| Quilt Block Seams | 1.5-2.0mm |
This table serves as a quick reference guide for selecting the appropriate stitch length based on different sewing techniques.
What Is A Standard Stitch Length?
A standard stitch length serves as the fundamental straight stitch employed by all sewing machines for typical seams and fabric joining purposes. While this primary straight stitch length may be adjusted to accommodate various fabric weights and types, it typically falls within the range of 2.5 to 3.0mm.
In essence, the standard stitch length of 2.5 to 3.0mm provides a versatile and commonly used setting for achieving stable and secure seams across a variety of sewing projects.
Standard stitch length = 2.5-3.0
Top Stitching Stitch Length
The topstitching stitch length plays a pivotal role in enhancing the aesthetics and structural integrity of a garment. Topstitching is a decorative sewing technique characterized by stitches sewn parallel to seam lines or along the edges of collars and cuffs. This decorative stitch serves multiple purposes, such as outlining garment features or reinforcing seams in a visually appealing manner.
When determining the topstitching stitch length, it is essential to consider factors such as fabric weight and the thickness of the seam or area to be topstitched. The optimal topstitching length typically falls within the range of 2.0 to 4.0mm. This variability allows for customization, ensuring that the topstitching complements the specific characteristics of the fabric and the desired decorative effect.
In instances where thicker threads are employed for topstitching, a longer stitch length of around 4.0 is recommended. This accommodates the thickness of the thread and contributes to the overall visual impact of the topstitched elements.
In summary, the topstitching stitch length, ranging from 2.0 to 4.0mm, provides flexibility for creating both visually appealing and structurally sound decorative stitches in various sewing projects.
Topstitch stitch length = 2.0-4.0
Basting Stitch Lengths
A basting stitch length is a crucial component in sewing, serving as a temporary stitch designed to hold fabric pieces together temporarily. The distinctive feature of a basting stitch is its longer length, facilitating easy removal once its intended purpose, such as holding fabric layers in place during fitting or before permanent stitching, has been fulfilled.
Irrespective of the fabric type, the basting stitch length is universally set as the longest available on your sewing machine. Typically, this length is around 4.0mm. The elongated nature of the basting stitch is intentional, allowing for quick and straightforward removal without leaving a lasting mark on the fabric.
In summary, a basting stitch with a length of 4.0mm is a valuable tool in sewing, providing a temporary hold that can be effortlessly undone, making it an indispensable technique in the process of achieving precise and well-fitted garments.
Basting stitch length = 4.0
Stay Stitching Stitch Length
A stay stitching stitch length is a crucial element in garment construction, serving the purpose of preventing fabric distortion or stretching after pattern pieces have been cut. This technique is particularly valuable in maintaining the stability of specific areas, such as necklines, before additional construction steps, like attaching facings, take place.
Stay stitching involves sewing a line of stitches around a designated area, and one common application is around a neckline. This strategic stitching helps the neckline maintain its shape and prevents undesirable stretching or distortion that could occur during the construction process.
The recommended stay stitching stitch length is typically shorter, often set at 2.5. This relatively compact stitch length is chosen to effectively secure the fabric and minimize the risk of distortion, ensuring that the garment retains its intended shape throughout subsequent sewing steps.
In summary, stay stitching with a stitch length of 2.5 is a valuable practice for preserving the structural integrity of fabric pieces and achieving precise, well-fitted garments.
Staystitch length = 2.5
Curves Stitch Lengths
The stitch length employed when sewing curves plays a crucial role in achieving smooth and well-defined curve lines in your garments. Opting for a shorter stitch length is a key strategy in enhancing the precision and aesthetic appeal of curved seams.
When dealing with curves, particularly in areas like pockets that are integral parts of seams in garments such as pants or skirts, a smaller stitch length is advantageous. The rationale behind this choice is rooted in the frequent use of pockets, where a smaller stitch proves less prone to coming undone, ensuring the longevity and durability of the seam.
A recommended range for curve stitch length is typically between 2.0 to 2.5mm. This range strikes a balance between securing the seam effectively and allowing for the flexibility needed to navigate the curves seamlessly. Before finalizing your stitch length, it’s advisable to conduct a test within this range to ensure that the selected length achieves the desired smoothness and stability in your curved seams.
In essence, a curve stitch length of 2.0 is a valuable consideration when aiming for impeccably crafted curves, ensuring both the functionality and longevity of garments, particularly in areas that experience regular wear and stress, such as pockets.
Curve stitch length = 2.0
Gathering Stitch Lengths
A gathering stitch length is a crucial element in the technique of gathering, a highly useful method for creating decorative frills and ruffles in sewing projects. When implementing gathering, the stitch length assumes a pivotal role in achieving the desired fullness and even distribution of fabric folds.
To create effective gathers, it is common to use a longer stitch length. Typically, a double or triple row of long stitches is sewn in parallel along the fabric, and these stitches are then pulled together to create the desired gathers. This approach not only enhances the volume and fullness of the gathered fabric but also contributes to the strength and security of the gathered sections.
In most instances, the recommended gathering stitch length is around 4.0. This longer stitch length provides the necessary slack for easy manipulation of the fabric during the gathering process. It is important to note that using multiple rows of gathering stitches enhances the stability and durability of the gathered fabric.
In summary, a gathering stitch length of 4.0 proves instrumental in the creation of frills and ruffles, ensuring that the gathering process is not only effective in achieving the desired aesthetics but also results in a secure and well-supported gathered fabric.
Gathering stitch length = 4.0
Dart Stitch Length
The dart stitch length is a critical consideration when employing the dressmaking technique of sewing darts. Darts are integral to creating shape and contour in garments, and utilizing different stitch lengths strategically contributes to the effectiveness of this sewing method. One advantageous approach involves initiating the dart with a normal stitch length and gradually transitioning to a shorter stitch length towards the tip.
Commencing the dart with a standard stitch length allows for secure stitching along its length, while transitioning to a shorter stitch length at the tip serves a specific purpose. Ending the dart with smaller stitches at the tip eliminates the need for backstitching, a technique that could potentially create bulk and compromise the precision of the dart. Instead, the smaller stitches at the tip are tied off, ensuring a firm and secure finish.
The recommended dart stitch length typically falls within the range of 1.0 to 2.5. This range accommodates the need for longer stitches along the length of the dart and shorter, more compact stitches at the tip. The combination of stitch lengths not only enhances the overall structural integrity of the dart but also contributes to a clean and professional finish in dressmaking.
In summary, the dart stitch length of 1.0 to 2.5 is a strategic choice, enabling the creation of well-defined darts with secure tips, and eliminating the need for backstitching while maintaining precision and elegance in garment construction.
Dart stitch length = 1.0-2.5
Stitch Lengths And Zig-Zag
Understanding stitch lengths and zig-zag settings provides a versatile range of options for achieving various effects in sewing. The combination of stitch length adjustments and the incorporation of zig-zag stitches allows for creative and functional outcomes in different aspects of garment construction. Here’s a detailed exploration of how stitch lengths and zig-zag work together:
- Short Stitch Lengths (0.5-1mm):
- Buttonholes: Utilizing short stitch lengths is crucial for creating precise and secure buttonholes. The compact stitches ensure durability and neatness, key elements in functional buttonhole construction.
- Appliqué: Short stitch lengths are also employed in appliqué work, contributing to the detailed and fine stitching required for attaching appliqué pieces securely to the fabric.
- Longer Stitch Lengths (2.0mm): Finishing Seams: When dealing with fabric that is prone to fraying, longer stitch lengths around 2.0mm are effective for finishing seams. This prevents excessive fraying and reinforces the edges of the fabric for increased durability.
- Stitch Lengths (2.0-3.0) for Zig-Zag Elastic: Swimwear and Leotards: Zig-zag stitches with moderate lengths (2.0-3.0) are commonly used for attaching elastic to the edges of swimwear and leotards. This application provides both stretch and secure stitching, essential for these types of garments.
- Longer Stitch Lengths (4.0): Decorative Stitching: Extended stitch lengths, around 4.0, are employed for decorative stitching. This allows for creative embellishments and detailing on garments, enhancing their visual appeal without compromising structural integrity.
By adjusting stitch lengths and incorporating zig-zag stitches, sewers can customize their approach based on the specific requirements of each sewing project. This dynamic combination offers a wide range of possibilities, from functional applications like buttonholes to decorative elements that elevate the overall design of the garment.
Quilting Stitch Lengths
Quilting stitch lengths play a pivotal role in achieving the desired results when working on quilting projects. The specific stitch length chosen depends on the phase of quilting and the desired outcome.
Longer Stitch Lengths (2.5 to 3.5) for Quilting Layers:
- Quilting Through Multiple Layers: Quilting often involves sewing through numerous layers of fabric and batting. To accommodate these layers and ensure a secure and visually appealing quilting outcome, longer stitch lengths ranging from 2.5 to 3.5 are commonly recommended.
- Testing on a Scrap: It’s advisable to test the chosen quilting stitch length on a scrap of quilting fabric to ensure that the stitches are even and that there’s no puckering. This test helps in fine-tuning the stitch length before working on the actual quilt.
Walking Foot for Quilting:
- Reducing Puckering: When quilting, especially through multiple layers, the use of a walking foot is highly beneficial. A walking foot helps feed the layers evenly, reducing the likelihood of puckering and ensuring smooth quilting results.
- Enhancing Precision: The walking foot is particularly effective in preventing the shifting of layers, contributing to the precision and alignment of quilting stitches.
Best Sewing Machine Walking Feet for Quilting
Here’s a table featuring types and brands of sewing machine walking feet specifically designed for quilting:
| Walking Foot Type | Recommended Brands |
|---|---|
| Universal Walking Foot | Dritz, Distinctive |
| Even Feed Walking Foot | Janome, Brother, Singer |
| Open Toe Walking Foot | Bernina, HONEYSEW |
| Adjustable Guide Walking Foot | Pfaff, Madam Sew |
| Quilting Guide Bar Walking Foot | YEQIN, HONEYSEW |
| 1/4 Inch Quilting Foot | Brother, Baby Lock |
| Stitch-in-the-Ditch Walking Foot | HONEYSEW, Distinctive |
| Free Motion Quilting Foot | Janome, Bernina, Juki |
| Clear View Quilting Foot | HONEYSEW, Distinctive |
| Spring-Loaded Quilting Foot | DREAMSTITCH, Distinctive |
Please note that availability may vary, and it's essential to check compatibility with your specific sewing machine model. Additionally, individual preferences and project requirements may influence your choice of a walking foot for quilting. Always refer to your sewing machine manual and the walking foot manufacturer's recommendations for proper usage and maintenance.
Shorter Stitch Lengths (1.5 to 2.0) for Quilt Block Seams:
- Quilt Block Assembly: When sewing quilt blocks together, smaller stitch lengths ranging from 1.5 to 2.0 are recommended. These shorter stitches contribute to tight seams, ensuring the durability and structural integrity of the quilt blocks.
- Securing Seams: The use of shorter stitch lengths in assembling quilt blocks helps secure seams tightly, preventing fraying and maintaining the stability of the overall quilt structure.
In summary, the choice of quilting stitch lengths is nuanced and depends on the specific phase of quilting. Longer stitches are ideal for quilting through multiple layers, while shorter stitches are recommended for assembling quilt blocks. Incorporating a walking foot in the quilting process enhances precision and reduces puckering, contributing to the overall success of quilting projects.
Quilting block stitch length = 1.5-2.0
Stitch Length And Decorative Stitches
The relationship between stitch length and decorative stitches in sewing machines is an essential consideration for those looking to add creative flair to their projects. While many machines come with predetermined stitch lengths for decorative stitches, some models offer the flexibility of adjusting these lengths to achieve customized effects. Here’s a detailed exploration of the interplay between stitch length and decorative stitches:
Predetermined Stitch Lengths for Decorative Stitches:
- Many sewing machines come pre-programmed with set stitch lengths for their decorative stitches. These predetermined lengths are specifically calibrated to produce optimal results for each decorative stitch pattern.
- These set lengths are often designed to ensure the accuracy and precision of decorative elements, maintaining the intended aesthetic appeal of the stitch pattern.
Variable Lengths for Some Decorative Stitches:
- Some sewing machines provide users with the ability to adjust the length of certain decorative stitches. This versatility allows for a more customized approach, enabling sewers to experiment with different stitch lengths to achieve unique and personalized decorative effects.
- Consultation of the sewing machine manual is key to identifying which decorative stitches on a particular machine have adjustable lengths. This information empowers users to make informed choices based on the capabilities of their specific sewing machine.
Consulting the Sewing Manual:
- For users seeking to explore variable lengths for decorative stitches, consulting the sewing machine manual is essential. The manual provides comprehensive information about the adjustable features of each decorative stitch, guiding users on how to modify stitch lengths for desired effects.
- Understanding the manual’s instructions ensures that users maximize the creative potential of their sewing machine, utilizing adjustable stitch lengths to achieve the desired decorative outcomes.
In summary, the interplay between stitch length and decorative stitches offers a spectrum of creative possibilities. While some machines come with predetermined lengths for these stitches, the ability to adjust lengths for certain patterns empowers sewers to infuse a personalized touch into their projects.
By referring to the sewing machine manual, users can unlock the full potential of their machine’s decorative stitching capabilities.
Knit Fabric Stitch Lengths
Stitching knit fabrics poses unique challenges due to their stretchy nature, requiring specific considerations to achieve optimal results. Here’s a detailed exploration of stitch lengths for working with knit fabrics:
Avoiding Straight Stitches for Knit Fabrics:
- Stretchy Nature of Knit Fabrics: Knit fabrics, known for their inherent stretchiness, do not pair well with straight stitches as they may compromise the fabric’s ability to stretch.
- Preferred Stitches: While it’s generally not recommended to use a straight stitch on knit fabrics, there may be circumstances where it becomes necessary to do so.
Longer Stitch Lengths for Knit Fabrics:
- Reducing Puckering: When compelled to use a straight stitch on knit fabrics, opting for a longer stitch length is advisable. Longer stitches help minimize puckering and tension issues that can arise when sewing stretchy fabrics.
- Gently Stretching as You Sew: To enhance the sewing process and accommodate the stretchiness of knit fabrics, gently stretching the fabric as you sew can contribute to smoother stitching and reduce the likelihood of unwanted puckering.
Testing Stitch Length on Scrap Fabric:
- Trial and Error: As with any sewing project, it’s essential to conduct a test on a scrap piece of the actual knit fabric being used. This allows for adjustments and fine-tuning of the stitch length to achieve the desired results.
- Ensuring Even Stitches: Testing on a scrap helps determine the optimal stitch length that minimizes puckering while ensuring even and secure stitches on the knit fabric.
In summary, while straight stitches are generally not recommended for knit fabrics, there may be instances where it becomes necessary. In such cases, opting for longer stitch lengths, along with gently stretching the fabric as you sew, can mitigate potential issues like puckering.
Conducting tests on scrap fabric ensures that the chosen stitch length achieves the desired balance of stability and stretchability for the specific knit fabric being used.
Fixing Uneven Stitch Lengths
Encountering uneven stitch lengths during sewing can be a common issue, but understanding the underlying reasons and employing appropriate solutions can lead to smoother and more consistent stitching. Here are several reasons for uneven stitch lengths and practical steps to address them:
Variable Fabric Thicknesses:
- Issue: Sewing over thicker seams, such as when working on the hem of jeans, can lead to uneven stitches.
- Solution: Consider using a walking foot, which aids in feeding the fabric through the machine more evenly. The walking foot’s mechanism helps manage variable fabric thicknesses, ensuring a consistent stitch length across different layers.
Sewing Lycra and Spandex:
- Issue: Fabrics like Lycra and Spandex, with shiny or sticky surfaces, may impede even fabric feeding, resulting in uneven stitches.
- Solution: Utilize a walking foot or a Teflon foot. These specialized feet are designed to glide over sticky or challenging fabrics, promoting smoother feeding and preventing uneven stitch lengths.
Sewing Light Fabrics:
- Issue: When working with sheer or light fabrics, using a long stitch length can cause puckering and an uneven appearance.
- Solution: Opt for much shorter stitches when sewing light fabrics. Shorter stitches provide better control and prevent puckering, resulting in a more even and polished finish.
General Tips for Fixing Uneven Stitch Lengths:
- Check Tension Settings: Incorrect tension settings can contribute to uneven stitches. Ensure that your sewing machine’s tension is properly adjusted for the chosen fabric.
- Machine Maintenance: Regularly clean and maintain your sewing machine. A clean and well-lubricated machine operates more smoothly, reducing the likelihood of stitch irregularities.
- Test on Scrap Fabric: Before sewing your actual project, test the chosen stitch length on a scrap piece of the same fabric to identify and address any potential issues.
In summary, addressing uneven stitch lengths involves identifying the specific cause and implementing targeted solutions. Whether it’s adapting to variable fabric thicknesses, using specialized feet, adjusting stitch lengths for specific fabrics, or ensuring proper machine maintenance, these proactive measures contribute to achieving consistent and professional-looking stitches in your sewing projects.
Conclusion: Sewing Machine Stitch Length
In conclusion, understanding the nuances of stitch length is crucial for achieving optimal results in sewing projects. Selecting the best stitch length involves considering factors such as fabric type, project purpose, and thread thickness. Standard stitch lengths provide a versatile starting point, while adjustments cater to specific needs.
Whether sewing delicate fabrics, quilting layers, or creating decorative stitches, mastering stitch length enhances overall precision and quality. The ability to adjust and fine-tune stitch length, coupled with awareness of techniques to fix uneven lengths, empowers seamstresses to optimize their sewing machine’s capabilities and elevate the quality of their craftsmanship.