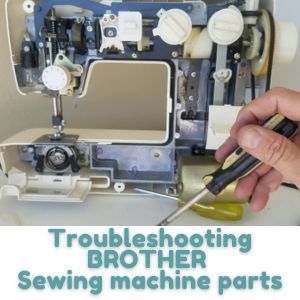
Troubleshooting BROTHER Sewing machine parts
A Brother sewing machine can be a valuable tool for anyone who loves to sew. However, like any other machine, it may develop some problems over time. Troubleshooting these problems can be frustrating, especially if you are not familiar with the various parts of the machine. Fortunately, with some basic knowledge and troubleshooting tips, you can easily fix most issues and get back to sewing in no time.
List of the 10 Commonly Broken BROTHER Sewing Machine Parts
Here is a list of parts and components of the BROTHER sewing machine that may commonly break or need replacement over time:
- Needle: The needle is a delicate and crucial part of the sewing machine that can easily break, bend, or become dull with use.
- Bobbin case: The bobbin case is responsible for holding the bobbin in place and can wear out or become damaged with frequent use.
- Tension discs: The tension discs are responsible for regulating the tension of the thread as it moves through the machine and can wear out or become damaged over time.
- Feed dogs: The feed dogs are responsible for moving the fabric through the machine and can become worn or damaged with frequent use.
- Spool pin and holder: The spool pin and holder are responsible for holding the thread spool in place and can become loose, bent, or broken over time.
- Presser foot and lever: The presser foot and lever are responsible for holding the fabric in place as it moves through the machine and can become worn or damaged with frequent use.
- Stitch length adjustment: The stitch length adjustment controls the length of the stitches and can become stuck or malfunction over time.
- Take-up lever: The take-up lever is responsible for moving the thread through the machine and can become worn or damaged with frequent use.
- Reverse lever: The reverse lever is responsible for reversing the direction of the stitches and can become stuck or malfunction over time.
- Sewing light: The sewing light illuminates the sewing area and can burn out or malfunction over time.
Common BROTHER Sewing machine parts problems and solution
If you own a BROTHER sewing machine, you may encounter problems with some of its parts from time to time. In this article, we will discuss the most common BROTHER sewing machine parts problems and provide solutions to fix them.
BROTHER sewing machine motor problems
BROTHER sewing machine motor problems can manifest as the motor not starting, running erratically, or making unusual noises.
Causes of the BROTHER Sewing machine motor problems
BROTHER sewing machine motor problems can be caused by a number of issues, including worn out motor brushes, a damaged or faulty motor belt, a malfunctioning foot pedal or power cord, or a problem with the motor itself.
Troubleshooting BROTHER Sewing machine motor problems
To troubleshoot BROTHER Sewing machine motor problems, follow these steps:
- Check the foot pedal and power cord: make sure that they are both properly connected and not damaged.
- Check the motor belt: make sure that the belt is properly installed and not loose or damaged. If it is, replace the belt.
- Check the motor brushes: remove the motor cover and check the carbon brushes. If they are worn out or damaged, replace them.
- Check the motor itself: if none of the above steps solve the problem, the motor may be faulty and need to be replaced or repaired.
BROTHER sewing machine belt problems
BROTHER sewing machine belt problems can manifest as the machine not sewing or the belt making unusual noises while in use.
Causes of the BROTHER Sewing machine belt problems
BROTHER sewing machine belt problems can be caused by a number of issues, including improper installation, wear and tear, or damage to the belt.
Troubleshooting BROTHER Sewing machine belt problems
To troubleshoot BROTHER Sewing machine belt problems, follow these steps:
- Turn off the machine and unplug it.
- Remove the motor cover and inspect the belt for any signs of wear or damage. If it is worn or damaged, replace the belt.
- Check the belt tension: if the belt is loose, adjust the tension by loosening the motor mount screws and moving the motor slightly closer to the belt. Tighten the screws when the belt is properly tensioned.
- Check the belt alignment: make sure that the belt is properly aligned with the motor pulley and the handwheel pulley. If it is not, adjust the position of the motor slightly until the belt is aligned properly.
- Test the machine: after making any adjustments, test the machine to see if the problem has been resolved. If not, further troubleshooting may be required.
BROTHER sewing machine presser foot problems
BROTHER sewing machine presser foot problems can manifest as the foot not moving up and down properly, not staying in place, or not exerting enough pressure on the fabric.
Causes of the BROTHER Sewing machine presser foot problems
BROTHER sewing machine presser foot problems can be caused by a number of issues, including:
- An improperly installed presser foot
- A damaged or worn out presser foot
- A malfunctioning presser foot lever or spring
- Dirt or debris stuck in the presser foot mechanism
- A problem with the feed dogs or stitch length settings
- A problem with the tension settings
Troubleshooting BROTHER Sewing machine presser foot problems
To troubleshoot BROTHER Sewing machine presser foot problems, follow these steps:
- Turn off the machine and unplug it.
- Remove the presser foot and clean the area around the foot and the presser foot holder with a soft brush.
- Check the presser foot for any signs of damage, such as cracks or worn-out rubber. If it is damaged, replace it.
- Check the presser foot lever and spring to ensure that they are working properly. If they are not, replace them.
- Check the feed dogs and stitch length settings to ensure that they are properly set for the fabric you are sewing.
- Check the tension settings to ensure that they are properly adjusted for the thread and fabric you are using.
- Reinstall the presser foot and test the machine to see if the problem has been resolved. If not, further troubleshooting may be required.
How To Fix Presser Foot On BROTHER
To fix a presser foot on a BROTHER sewing machine, follow these steps:
- Turn off the machine and unplug it.
- Remove the presser foot from the machine.
- Check the presser foot for any signs of damage, such as cracks or worn-out rubber. If it is damaged, replace it.
- Clean the area around the foot and the presser foot holder with a soft brush.
- Reinstall the presser foot, making sure that it is properly installed and secured.
- Test the machine to see if the problem has been resolved. If not, further troubleshooting may be required.
BROTHER sewing machine thread cutter problems
BROTHER sewing machine thread cutter problems can manifest as the cutter not working properly, leaving thread tails, or not cutting the thread at all.
Causes of the BROTHER Sewing machine thread cutter problems
BROTHER sewing machine thread cutter problems can be caused by a number of issues, including:
- A dull or damaged blade
- Misaligned or improperly installed blade
- Dirt or debris stuck in the cutter mechanism
- A problem with the cutter motor or wiring
Troubleshooting BROTHER Sewing machine thread cutter problems
To troubleshoot BROTHER Sewing machine thread cutter problems, follow these steps:
- Turn off the machine and unplug it.
- Clean the area around the cutter blade with a soft brush, removing any debris or thread that may be stuck in the mechanism.
- Check the blade for any signs of damage, such as nicks or dullness. If it is damaged, replace it.
- Check the alignment of the blade and ensure that it is properly installed.
Hand wheel problems on BROTHER sewing machine
Hand wheel problems on BROTHER sewing machine can manifest as the wheel being difficult to turn, not turning at all, or turning in only one direction.
Causes of the BROTHER Sewing machine hand wheel problems
BROTHER Sewing machine hand wheel problems can be caused by a number of issues, including:
- A jammed or stuck thread in the bobbin case or needle area
- Dirt or debris stuck in the hand wheel mechanism
- A loose or damaged belt
- A problem with the motor or wiring
Troubleshooting BROTHER Sewing machine hand wheel problems. How To Fix BROTHER Sewing Machine Handwheel
To troubleshoot BROTHER Sewing machine hand wheel problems and fix the hand wheel, follow these steps:
- Turn off the machine and unplug it.
- Remove the needle and the bobbin case from the machine.
- Look for any jammed or stuck thread in the needle area or bobbin case, and remove it using a pair of tweezers.
- Clean the area around the hand wheel and the machine with a soft brush, removing any dirt or debris that may be stuck in the mechanism.
- Check the belt to ensure that it is not loose or damaged. If it is, tighten or replace it.
- Check the motor and wiring for any signs of damage or wear. If there is any damage, replace the motor or wiring as necessary.
- Test the machine to see if the problem has been resolved. If not, further troubleshooting may be required.
BROTHER sewing machine Foot Pedal, Power Cord and Switch problems
BROTHER sewing machine Foot Pedal, Power Cord and Switch problems can manifest as the machine not turning on or turning off unexpectedly, or the foot pedal not working properly.
Causes of the BROTHER sewing machine Foot Pedal, Power Cord and Switch problems
BROTHER sewing machine Foot Pedal, Power Cord and Switch problems can be caused by a number of issues, including:
- A damaged or loose power cord
- A damaged switch or foot pedal
- Loose connections or wiring
- A malfunctioning power supply or control board
Troubleshooting BROTHER sewing machine Foot Pedal, Power Cord and Switch problems
To troubleshoot BROTHER sewing machine Foot Pedal, Power Cord and Switch problems, follow these steps:
- Turn off the machine and unplug it.
- Check the power cord for any damage or looseness, and replace or tighten it as necessary.
- Check the switch and foot pedal for any damage or loose connections. If they are damaged, replace them.
- Check the wiring and connections to ensure that they are tight and secure.
- Check the power supply and control board for any signs of damage or malfunction. If there is any damage, replace the power supply or control board as necessary.
- Test the machine to see if the problem has been resolved. If not, further troubleshooting may be required.
BROTHER sewing machine Reverse Lever problems
BROTHER sewing machine Reverse Lever problems can manifest as the lever being stuck or not engaging when pressed, preventing the machine from sewing in reverse.
Causes of the BROTHER sewing machine Reverse Lever problems
BROTHER sewing machine Reverse Lever problems can be caused by a number of issues, including:
- A buildup of dirt or debris around the lever mechanism
- A loose or damaged spring that controls the lever
- A problem with the lever mechanism itself, such as a bent or broken lever
Troubleshooting BROTHER sewing machine Reverse Lever problems
To troubleshoot BROTHER sewing machine Reverse Lever problems, follow these steps:
- Turn off the machine and unplug it.
- Look for any dirt or debris that may be stuck in the lever mechanism, and clean it out with a soft brush or cloth.
- Check the spring that controls the lever to ensure that it is not loose or damaged. If it is, tighten or replace it.
- Check the lever mechanism itself for any signs of damage, such as a bent or broken lever. If there is any damage, replace the lever.
- Test the machine to see if the problem has been resolved. If not, further troubleshooting may be required.
BROTHER sewing machine Spool Pin and Holder problems
BROTHER sewing machine Spool Pin and Holder problems can manifest as the spool falling off the holder or not fitting properly, causing the thread to tangle or break.
Causes of the BROTHER sewing machine Spool Pin and Holder problems
BROTHER sewing machine Spool Pin and Holder problems can be caused by a number of issues, including:
- A loose or damaged spool pin
- A damaged spool holder
- An incorrect spool size or type being used
- A buildup of dirt or debris around the spool pin or holder
Troubleshooting BROTHER sewing machine Spool Pin and Holder problems
To troubleshoot BROTHER sewing machine Spool Pin and Holder problems, follow these steps:
- Turn off the machine and unplug it.
- Remove the spool pin and holder from the machine and inspect them for any damage. If they are damaged, replace them.
- Check that the correct spool size and type is being used. If not, switch to the correct spool size or type.
- Look for any dirt or debris that may be stuck around the spool pin or holder, and clean it out with a soft brush or cloth.
- Check that the spool pin is properly inserted into the spool holder and that the holder is properly inserted into the machine. If they are not, adjust them accordingly.
- Test the machine to see if the problem has been resolved. If not, further troubleshooting may be required.
BROTHER sewing machine Pattern Selector problems
The pattern selector on a BROTHER sewing machine is not working or is difficult to adjust.
Causes of the BROTHER sewing machine Pattern Selector problems
- Dirt, lint, or debris may be obstructing the mechanism of the pattern selector.
- The pattern selector may be worn or damaged due to extensive use.
- The machine may need to be oiled or lubricated.
Troubleshooting BROTHER sewing machine Pattern Selector problems
- Turn off the sewing machine and unplug it.
- Remove the presser foot and the needle.
- Remove the cover of the machine to access the pattern selector.
- Inspect the pattern selector for any visible damage or obstruction caused by dirt or lint.
- Clean the pattern selector and the surrounding area with a soft brush or a lint roller.
- Lubricate the pattern selector with a drop of sewing machine oil.
- Move the pattern selector back and forth to distribute the oil.
- Replace the cover and the needle, and plug in the machine.
- Turn on the machine and test the pattern selector to see if it is working correctly.
BROTHER sewing machine Stitch Length Adjustment problems
The stitch length adjustment on a BROTHER sewing machine is not working or is difficult to adjust.
Causes of the BROTHER sewing machine Stitch Length Adjustment problems
- Dirt, lint, or debris may be obstructing the mechanism of the stitch length adjustment.
- The stitch length adjustment may be worn or damaged due to extensive use.
- The machine may need to be oiled or lubricated.
- The stitch length adjustment may be set to a particular setting that is not suitable for the current sewing project.
Troubleshooting BROTHER sewing machine Stitch Length Adjustment problems
- Turn off the sewing machine and unplug it.
- Remove the presser foot and the needle.
- Locate the stitch length adjustment on the machine.
- Inspect the stitch length adjustment for any visible damage or obstruction caused by dirt or lint.
- Clean the stitch length adjustment and the surrounding area with a soft brush or a lint roller.
- Lubricate the stitch length adjustment with a drop of sewing machine oil.
- Move the stitch length adjustment back and forth to distribute the oil.
- Set the stitch length adjustment to the desired setting for the current sewing project.
- Replace the needle and the presser foot, and plug in the machine.
- Turn on the machine and test the stitch length adjustment to see if it is working correctly.
BROTHER sewing machine Needle and Needle Clamp problems
- The needle is not picking up the thread or is breaking frequently
- The needle clamp is loose and the needle is not held securely
- The needle is hitting the presser foot or the needle plate
Causes of the BROTHER sewing machine Needle and Needle Clamp problems
- The needle is inserted incorrectly
- The needle is bent or damaged
- The needle clamp screw is loose
- The wrong size or type of needle is being used
- The needle is not properly aligned with the needle clamp
- The presser foot is not installed properly
- The needle plate is not installed properly
- The machine is not threaded correctly
Troubleshooting BROTHER sewing machine Needle and Needle Clamp problems
- Turn off the machine and unplug it from the power source.
- Remove the needle and the needle clamp from the machine.
- Check the needle for any signs of damage or bending. If the needle is damaged, replace it with a new one of the correct size and type for the fabric being sewn.
- Check the needle clamp screw and make sure it is tight. If it is loose, use a screwdriver to tighten it.
- Reinsert the needle into the needle clamp, making sure it is pushed all the way up and tightened securely.
- Check the presser foot and the needle plate to make sure they are installed correctly.
- Check the threading of the machine and make sure it is done correctly, following the threading diagram in the manual.
- Turn the machine back on and try sewing again, checking to see if the needle is picking up the thread and stitching correctly. If the problem persists, refer to the manual or contact a repair technician for further assistance.
BROTHER sewing machine Take-Up Lever problems
The take-up lever on a BROTHER sewing machine moves up and down with difficulty, or it may not move at all.
Causes of the BROTHER sewing machine Take-Up Lever problems
Some of the common causes of BROTHER sewing machine take-up lever problems are as follows:
- Buildup of lint, dirt, and debris in the lever mechanism
- Loose or damaged take-up lever screw
- Damaged take-up lever spring
- Improperly lubricated take-up lever mechanism
- Broken or damaged timing belt or gear
- Malfunctioning motor
Troubleshooting BROTHER sewing machine Take-Up Lever problems
Here are some troubleshooting steps to try if you’re experiencing problems with the take-up lever on your BROTHER sewing machine:
- Turn off and unplug the sewing machine to prevent any accidental injury.
- Remove the needle and presser foot to gain access to the take-up lever mechanism.
- Clean the take-up lever mechanism using a small brush or a vacuum cleaner to remove any dirt, lint, or debris.
- Check the take-up lever screw and tighten it if it’s loose. If the screw is damaged, replace it with a new one.
- Inspect the take-up lever spring and replace it if it’s damaged or broken.
- Lubricate the take-up lever mechanism with a drop of sewing machine oil.
- Check the timing belt or gear for damage or breakage. If they’re damaged, replace them with new ones.
- Turn the handwheel manually and check the take-up lever movement. If the lever still doesn’t move smoothly, the motor may be malfunctioning. In this case, it’s best to take the sewing machine to a qualified technician for repair.
BROTHER sewing machine Presser Dial problems
The feed dog is not moving or is not feeding the fabric through the sewing machine.
Causes of the BROTHER sewing machine Feed Dog problems
- The feed dog is clogged with dust, lint, or debris.
- The feed dog height may be too low or high.
- The feed dog teeth may be worn or damaged.
- The feed dog adjustment mechanism may be loose or out of alignment.
- The presser foot pressure may be too low or high.
- The machine is not threaded properly.
Troubleshooting BROTHER sewing machine Feed Dog problems
Step 1:
- Clean the feed dog
- Turn off the machine and unplug it.
- Remove the needle and the presser foot.
- Use a small brush or a lint roller to remove any lint, dust, or debris from the feed dog.
- Use canned air to blow out any remaining debris.
- Reattach the presser foot and needle.
Step 2:
- Adjust the feed dog height
- Turn off the machine and unplug it.
- Remove the needle and the presser foot.
- Locate the feed dog height adjustment mechanism (check the user manual for details).
- Adjust the feed dog height as needed.
- Reattach the presser foot and needle.
Step 3:
- Check the feed dog teeth
- Turn off the machine and unplug it.
- Remove the needle and the presser foot.
- Inspect the feed dog teeth for any signs of wear or damage.
- If the teeth are worn or damaged, they will need to be replaced.
- Reattach the presser foot and needle.
Step 4:
- Check the feed dog adjustment mechanism
- Turn off the machine and unplug it.
- Remove the needle and the presser foot.
- Locate the feed dog adjustment mechanism (check the user manual for details).
- Check that the mechanism is tight and in alignment.
- Adjust the mechanism as needed.
- Reattach the presser foot and needle.
Step 5:
- Adjust the presser foot pressure
- Turn off the machine and unplug it.
- Remove the needle and the presser foot.
- Locate the presser foot pressure adjustment mechanism (check the user manual for details).
- Adjust the presser foot pressure as needed.
- Reattach the presser foot and needle.
Step 6:
- Check the threading
- Turn off the machine and unplug it.
- Remove the needle and the presser foot.
- Rethread the machine according to the user manual.
- Reattach the presser foot and needle.
If none of these troubleshooting steps work, it may be necessary to take the machine to a professional for repair or maintenance.
BROTHER sewing machine Throat Plate problems
The throat plate, also known as the needle plate, is the metal plate that covers the bobbin case and feed dogs. It can become damaged, bent or scratched over time, which can cause stitching problems such as skipped stitches, uneven stitches or fabric puckering.
Causes of the BROTHER sewing machine Throat Plate problems
- The throat plate may have become bent or damaged if it has been dropped or hit by something heavy.
- Needle strikes on the throat plate can cause scratches or dents.
- A buildup of lint or debris around the feed dogs and bobbin area can cause the throat plate to become clogged, which can affect the machine’s performance and cause stitching problems.
- Incorrectly installed or mismatched throat plates can also cause problems with stitching.
Troubleshooting BROTHER sewing machine Throat Plate problems
- First, remove the throat plate from the machine and clean any debris or lint that may have accumulated around the feed dogs and bobbin area. You can use a small brush or a vacuum cleaner to do this.
- Inspect the throat plate for any signs of damage, such as dents, scratches or warping. If you notice any of these issues, the throat plate may need to be replaced.
- If the throat plate is simply dirty or clogged, clean it with a soft cloth and mild soap or sewing machine oil, then dry it thoroughly.
- If the throat plate is misaligned or not sitting flush with the machine, try removing it and reinstalling it, making sure it is securely in place.
- If the stitching problems persist even after cleaning and reinstalling the throat plate, it may be necessary to take the machine to a qualified technician for further diagnosis and repair.
BROTHER sewing machine Sewing Light problems
The sewing machine light is an essential part of the machine that provides illumination while you sew. If the light is not working, it can be difficult to see your work, leading to mistakes and eye strain.
Causes of the BROTHER sewing machine Sewing Light problems
- The bulb may be burnt out and need to be replaced.
- The wiring connecting the light to the machine may have become loose or disconnected.
- A blown fuse or circuit breaker may be responsible for the light not working.
- A faulty switch or connection may also be responsible for the light not turning on.
Troubleshooting BROTHER sewing machine Sewing Light problems
- Begin by checking if the bulb is burnt out. If it is, replace it with a new bulb. Make sure to use the appropriate wattage and type of bulb recommended by the manufacturer.
- Check the wiring connecting the light to the machine. Make sure that it is securely connected and not damaged in any way.
- Check the fuse or circuit breaker. If the fuse is blown, replace it with a new one of the same rating. If the circuit breaker has been tripped, reset it.
- If the bulb, wiring and fuse are all working properly, then there may be a problem with the switch or the connection. In this case, it is best to take the machine to a qualified technician for further diagnosis and repair.
BROTHER sewing machine Presser Foot Lever problems
The presser foot lever is not functioning correctly. It may not lift the presser foot, or the foot may not lower all the way down.
Causes of the BROTHER sewing machine Presser Foot Lever problems
- The presser foot is stuck
- The presser foot pressure is too high or too low
- The presser foot bar is bent or damaged
Troubleshooting BROTHER sewing machine Presser Foot Lever problems
Step-by-Step Instructions:
- Turn off the sewing machine and unplug it from the power source.
- Remove the presser foot and clean the area around the presser foot lever, making sure that there is no debris or thread stuck in the mechanism.
- Check the presser foot pressure. If the pressure is too high or too low, adjust it accordingly.
- Check the presser foot bar for damage. If it is bent or damaged, it will need to be replaced by a professional.
- Try lifting and lowering the presser foot lever to see if it functions properly. If it still doesn’t work, contact a BROTHER authorized service center for repair.
BROTHER sewing machine Slide Plate problems
The slide plate is not functioning correctly. It may be stuck, or it may not move smoothly.
Causes of the BROTHER sewing machine Slide Plate problems
- Debris or thread is stuck in the slide plate mechanism.
- The slide plate is misaligned or damaged.
Troubleshooting BROTHER sewing machine Slide Plate problems
Step-by-Step Instructions:
- Turn off the sewing machine and unplug it from the power source.
- Remove the needle and presser foot to access the slide plate mechanism.
- Clean the area around the slide plate mechanism, making sure that there is no debris or thread stuck in the mechanism.
- Check the slide plate for damage. If it is misaligned or damaged, it will need to be replaced by a professional.
- Try moving the slide plate to see if it functions properly. If it still doesn’t work, contact a BROTHER authorized service center for repair.
BROTHER sewing machine Bobbin Case problems
- Bobbin case doesn’t fit properly
- Bobbin case pops out during sewing
- Bobbin thread jams frequently
Causes of the BROTHER sewing machine Bobbin Case problems
- Bobbin case is damaged or worn out
- Bobbin case is not installed correctly
- Bobbin case is not the correct size for the machine
Troubleshooting BROTHER sewing machine Bobbin Case problems
Step 1: Turn off the sewing machine and unplug it.
Step 2: Remove the bobbin case from the machine.
Step 3: Inspect the bobbin case for any signs of damage or wear.
Step 4: Replace the bobbin case if it is damaged or worn out.
Step 5: Reinstall the bobbin case, making sure it is inserted correctly.
Step 6: Check that the bobbin case fits snugly in the machine.
Step 7: If the bobbin case is the wrong size for the machine, replace it with the correct one.
BROTHER sewing machine Bobbin problems
- Bobbin thread keeps breaking
- Bobbin thread is loose or uneven
- Bobbin thread is not winding properly
Causes of the BROTHER sewing machine Bobbin problems
- Bobbin is not inserted correctly
- Bobbin is the wrong size or type for the machine
- Bobbin is not threaded correctly
- Tension on the bobbin is too loose or too tight
- Bobbin winder is not working properly
Troubleshooting BROTHER sewing machine Bobbin problems
Step 1: Turn off the sewing machine and unplug it.
Step 2: Remove the bobbin from the machine.
Step 3: Check that the bobbin is inserted correctly and is the right size for the machine.
Step 4: Reinsert the bobbin, making sure it is threaded correctly.
Step 5: Check that the tension on the bobbin is set correctly – it should be tight enough to hold the thread in place, but not so tight that it won’t unwind.
Step 6: If the bobbin thread is still breaking or loose, adjust the tension on the bobbin until it is correct.
Step 7: If the bobbin thread is not winding properly, make sure the bobbin winder is engaged and that the thread is winding onto the bobbin evenly.
Step 8: If the bobbin winder is not working properly, refer to the machine’s user manual or take it to a repair shop for assistance.
BROTHER sewing machine Bobbin Winder problems
If you are having problems with your Brother sewing machine’s bobbin winder, it may not be winding the bobbin correctly or at all.
Causes of the BROTHER sewing machine Bobbin Winder problems
- The bobbin winder tire may be worn out or damaged.
- The bobbin winder shaft may be bent or damaged.
- The bobbin winding mechanism may be dirty or clogged with lint.
- The bobbin winder may be improperly adjusted.
Troubleshooting BROTHER sewing machine Bobbin Winder problems
- Turn off the sewing machine and unplug it from the power source.
- Remove the bobbin from the bobbin winder.
- Check the bobbin winder tire for signs of wear or damage. If the tire is worn or damaged, replace it.
- Check the bobbin winder shaft for any signs of bending or damage. If the shaft is bent or damaged, it will need to be replaced.
- Clean the bobbin winding mechanism with a soft brush or cloth to remove any lint or debris.
- Check the bobbin winder tension and adjust it if necessary. Refer to your sewing machine manual for instructions on how to adjust the bobbin winder tension.
- If none of the above steps solve the problem, it may be necessary to take the sewing machine to a professional repair technician for further diagnosis and repair.
10 Common Problems with BROTHER Sewing Machines
In addition to the common problems listed above, BROTHER sewing machines can also experience the following issues:
- Stitch Problems
- Upper thread breaking
- Breaking needles problems
- Bobbin winding problems
- Bobbin thread problems
- Bobbin holder problems
- Bobbin tension problems
- Sewing Machine Keep Jamming
- Tension problems
- Sewing machine not feeding fabric
FAQ
What are the most commonly replaced parts in a BROTHER sewing machine?
The most commonly replaced parts in a BROTHER sewing machine are the needles, bobbins, and presser feet.
Can I use third-party parts for my BROTHER sewing machine?
While it is possible to use third-party parts for your BROTHER sewing machine, it is recommended to use genuine BROTHER parts to ensure the best performance and avoid any potential compatibility issues.
How do I know if a specific part is compatible with my BROTHER sewing machine model?
You can refer to your BROTHER sewing machine manual or contact the manufacturer for information on compatible parts for your specific model.
How often should I replace the parts in my BROTHER sewing machine?
The frequency of part replacement varies depending on usage and wear and tear. However, it is generally recommended to replace needles and bobbins after every project, and to inspect other parts such as the presser feet and throat plate for any signs of damage or wear.
Can I perform repairs on my BROTHER sewing machine parts myself?
While some repairs may be simple enough for an experienced user to handle, it is recommended to have any significant repairs or replacements done by a professional technician to ensure the safety and proper functioning of your BROTHER sewing machine.
Conclusion. Troubleshooting BROTHER Sewing machine parts
In conclusion, troubleshooting Brother sewing machine parts is not as daunting as it may seem. With a basic understanding of the machine and some simple troubleshooting tips, you can easily fix most issues that may arise.
Remember to always refer to the machine’s manual and seek professional help if necessary. By taking care of your Brother sewing machine and addressing any issues promptly, you can ensure that it will continue to be a reliable tool for your sewing projects for years to come.