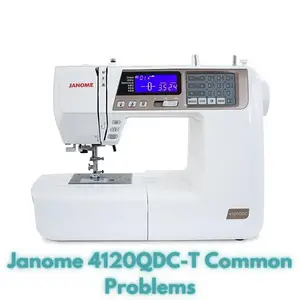
Janome 4120QDC-T Common Problems and Troubleshooting
The Janome 4120QDC-T sewing machine is a versatile and feature-packed computerized sewing machine designed to cater to various sewing needs, from everyday tasks to high-fashion and quilting projects.
In this article, we will explore common problems that users might encounter while using the Janome 4120QDC-T and provide troubleshooting solutions to address these issues.
Janome 4120QDC-T Overview
The Janome 4120QDC-T is a powerful sewing machine with a plethora of features. It boasts 120 built-in stitches, including 7 buttonholes, making it suitable for a wide range of sewing tasks. The machine comes equipped with a Full LCD Screen, Automatic Thread Cutter, On-Screen Stitch Editing, and more, catering to both beginners and experienced sewists. Here are some key product details and features:
Product Details
- Dimensions: 12″D x 19.8″W x 16″H
- Item Weight: 22.4 Pounds
- Power Source: Electric
- Is Electric: Yes
Features
- 120 Built-In Sewing Stitches with a Built-In Alphabet
- Built-In Automatic Needle Threader
- Easy to Use Control Panel with LCD Panel
- Jam Proof Easy-Set Top-Loading Bobbin System
- Handy Function Buttons
- Comes With an Incredible Amount of Accessories
- Additional Quilting Attachment Kit Included
- And many more…
Table: Janome 4120QDC-T Specifications
| Maximum Stitch Width | 7mm |
|---|---|
| Maximum Stitch Length | 5mm |
| Feed Dog | 7-piece feed dog |
Causes of Common Problems with the Janome 4120QDC-T
This section will delve into various common problems that users may encounter when using the Janome 4120QDC-T sewing machine. We will provide detailed solutions for each problem, helping you troubleshoot and enjoy a seamless sewing experience.
Common Problems and Troubleshooting for Janome 4120QDC-T
Problem 1: Thread Breakage During Sewing
Cause: Thread breakage can occur due to various reasons, such as improper threading or tension settings.
Troubleshooting:
- Re-thread the machine following the threading diagram provided in the user manual.
- Check the tension settings; adjust them to the recommended settings for the selected fabric.
- Inspect the needle for any damage or bending; replace it if necessary.
- Clean the machine, especially the bobbin area, to remove any lint or debris that might be causing the thread to break.
Problem 2: Uneven Stitching
Cause: Uneven stitching can result from incorrect presser foot pressure, improper feeding, or inconsistent tension.
Troubleshooting:
- Check the presser foot pressure; adjust it according to the fabric thickness.
- Ensure the fabric is feeding evenly by guiding it gently while sewing.
- Re-check the tension settings; make sure the upper and lower thread tensions are balanced.
- Inspect the feed dogs for any debris or obstruction; clean them if needed.
Problem 3: Bobbin Thread Jams
Cause: Bobbin thread jams can occur if the bobbin is not wound correctly, or there’s a buildup of lint in the bobbin area.
Troubleshooting:
- Remove the bobbin and re-wind it, ensuring it’s wound evenly and correctly.
- Clean the bobbin area, removing any lint or tangled thread.
- Check the bobbin case for any damage; replace it if needed.
- Use high-quality thread and a proper bobbin for optimal results.
Problem 4: Skipped Stitches
Cause: Skipped stitches can result from a dull or bent needle, incorrect needle size, or improper threading.
Troubleshooting:
- Replace the needle with a new one; ensure it’s the correct size for the fabric being used.
- Check the needle insertion; make sure it’s inserted all the way up and correctly.
- Re-thread the machine, following the proper threading sequence.
- Slow down the sewing speed, as sewing too fast can cause stitches to be skipped.
Problem 5: Fabric Not Feeding Properly
Cause: Poor fabric feeding can occur due to a dirty feed dog, incorrect presser foot, or improper fabric handling.
Troubleshooting:
- Clean the feed dogs and the throat plate to remove any lint or debris.
- Use the appropriate presser foot for the fabric type; consider using a walking foot for challenging fabrics.
- Guide the fabric gently and evenly while sewing to ensure smooth feeding.
- Check for any obstructions or entangled threads around the feed dog area.
Problem 6: Thread Bunching on the Underside of Fabric
Cause: Thread bunching on the underside is often due to incorrect threading, incorrect bobbin placement, or a bobbin tension issue.
Troubleshooting:
- Rethread the machine, ensuring the upper thread is correctly threaded through all guides and tension discs.
- Check the bobbin placement; ensure it’s inserted correctly and rotating in the right direction.
- Adjust the bobbin tension if necessary, following the user manual’s instructions.
- Clean the bobbin case and the area around it to remove any lint or debris that might be causing the issue.
Problem 7: Machine Making Unusual Noises
Cause: Unusual noises can be caused by a loose part, foreign object in the machine, or a mechanical issue.
Troubleshooting:
- Stop the machine immediately and turn it off; inspect for any loose screws or parts.
- Check for any debris or foreign objects in the machine, especially around the bobbin area.
- If the noise persists, consult the user manual for guidance on troubleshooting mechanical issues or contact customer support.
Problem 8: LCD Screen Not Displaying Properly
Cause: Issues with the LCD screen can stem from loose connections, electrical problems, or software glitches.
Troubleshooting:
- Check the power connection and ensure the machine is properly plugged in.
- Try turning the machine off and then on again to reset the screen.
- If the issue continues, consult the user manual for any LCD-related troubleshooting steps.
- If the screen remains non-functional, contact customer support for assistance.
Problem 9: Automatic Needle Threader Not Working
Cause: The needle threader might malfunction due to misalignment or damage.
Troubleshooting:
- Check if the needle is inserted correctly and not bent.
- Ensure the needle threader mechanism is aligned properly with the needle eye.
- If the issue persists, refer to the user manual for specific troubleshooting steps related to the needle threader.
- If necessary, thread the needle manually or consider seeking professional repair.
Problem 10: Stitches Skipping or Looping
Cause: Skipping or looping stitches can result from incorrect threading, incorrect needle size, or tension imbalance.
Troubleshooting:
- Re-thread the machine, ensuring proper thread path through all guides and tension discs.
- Check that the needle is the correct size and type for the fabric being used.
- Balance the upper and lower thread tensions by adjusting the tension settings as needed.
- If the problem persists, examine the needle; it might be dull or damaged and require replacement.
Problem 11: Uneven Feed of Thick Fabrics
Cause: Uneven feeding of thick fabrics can be caused by inadequate presser foot pressure or incorrect needle choice.
Troubleshooting:
- Adjust the presser foot pressure to a higher setting to ensure better contact with the fabric.
- Use a larger needle size appropriate for thick fabrics to prevent resistance while sewing.
- Slow down the sewing speed when working with heavy materials to maintain control.
- Consider using a walking foot attachment for challenging fabrics to enhance feeding.
Problem 12: Thread Tangles around Bobbin Case
Cause: Thread tangling around the bobbin case can occur due to improper threading, incorrect bobbin placement, or bobbin tension issues.
Troubleshooting:
- Rethread the machine, ensuring the upper thread is correctly threaded through all guides and tension discs.
- Check that the bobbin is inserted correctly and rotates in the right direction.
- Examine the bobbin tension; adjust it gradually if needed, referring to the user manual.
- Clean the bobbin area thoroughly to remove any tangled threads or debris.
Problem 13: Fabric Puckering
Cause: Fabric puckering can result from excessive tension, incorrect presser foot, or improper handling of delicate fabrics.
Troubleshooting:
- Reduce the tension settings to allow the fabric to feed more smoothly.
- Ensure you’re using the appropriate presser foot for the fabric type.
- Use a stabilizer or interfacing for delicate fabrics to prevent stretching and puckering.
- Practice sewing on scrap fabric to find the right combination of settings before working on your project.
Problem 14: Thread Keeps Breaking
Cause: Frequent thread breakage can result from a variety of factors, including incorrect threading, needle issues, or insufficient lubrication.
Troubleshooting:
- Re-thread the machine, ensuring you follow the proper threading sequence.
- Check the needle for damage or bending; replace it if needed.
- Apply a drop of sewing machine oil to the appropriate points as recommended in the user manual.
- Use high-quality thread appropriate for your project; cheap or old thread can lead to breakage.
Problem 15: Needle Hits the Presser Foot
Cause: The needle hitting the presser foot can occur if the needle is inserted incorrectly or if the presser foot is not properly attached.
Troubleshooting:
- Ensure the needle is inserted all the way up and facing the correct direction.
- Check that the presser foot is securely attached and properly aligned with the needle.
- Use the appropriate presser foot for the selected stitch; some stitches require specific presser feet.
- If the issue persists, consult the user manual for guidance on adjusting the needle position.
Problem 16: Fabric Not Advancing
Cause: The fabric not advancing could be due to an issue with the feed dogs, presser foot pressure, or fabric handling.
Troubleshooting:
- Check if the feed dogs are engaged; some stitches require them to be lowered.
- Adjust the presser foot pressure if the fabric isn’t moving as it should.
- Ensure you’re guiding the fabric gently and not holding it too tightly while sewing.
- Clean the feed dogs and the throat plate to remove any lint that might be obstructing movement.
Problem 17: Thread Keeps Getting Caught in Bobbin Area
Cause: Thread getting caught in the bobbin area can result from improper threading, incorrect bobbin placement, or a damaged bobbin case.
Troubleshooting:
- Rethread the machine carefully, ensuring proper threading through all guides and tension discs.
- Check that the bobbin is inserted correctly and is unwinding in the proper direction.
- Inspect the bobbin case for any damage or rough edges; replace it if necessary.
- Make sure the bobbin case is properly seated and securely in place.
Problem 18: Machine Jams While Backstitching
Cause: Jams while backstitching can occur due to incorrect needle position or tension settings.
Troubleshooting:
- Ensure the needle is raised to its highest position before switching to backstitching.
- Check the tension settings; adjusting them slightly might prevent jamming during backstitching.
- Slow down the sewing speed while backstitching to reduce the risk of jams.
- Practice on scrap fabric to get a feel for the machine’s behavior during backstitching.
Problem 19: Stitches Are Too Loose
Cause: Stitches being too loose can result from inadequate upper thread tension or incorrect bobbin tension.
Troubleshooting:
- Increase the upper thread tension gradually until the stitches appear balanced.
- Check the bobbin tension; adjust it slightly if needed, referring to the user manual.
- Ensure you’re using the correct thread weight and type for your project.
- Practice on scrap fabric to find the optimal tension settings before working on your project.
Problem 20: Needle Threader Won’t Engage
Cause: The needle threader might not engage properly due to misalignment or damage.
Troubleshooting:
- Check if the needle is inserted correctly and fully up in the highest position.
- Ensure the needle threader mechanism is aligned correctly with the needle eye.
- Refer to the user manual for any specific steps related to troubleshooting the needle threader.
- If the issue persists, thread the needle manually or consider seeking professional repair.
Problem 21: Uneven Stitch Length
Cause: Uneven stitch lengths can occur due to inconsistent machine speed, improper tension settings, or fabric manipulation.
Troubleshooting:
- Maintain a consistent sewing speed while stitching to achieve even stitch lengths.
- Re-check and balance the tension settings for both upper and lower threads.
- Guide the fabric evenly without pulling or pushing it, which can affect stitch length.
- Practice on scrap fabric to find the right combination of speed and tension before sewing on your project.
Problem 22: Machine Freezes or Stops Mid-Stitch
Cause: Machine freezing or stopping unexpectedly can result from power issues, software glitches, or a mechanical problem.
Troubleshooting:
- Check the power supply and ensure the machine is properly plugged in and turned on.
- Turn off the machine and then back on to reset any software glitches.
- Inspect the machine for any obstructions or tangled threads that might be causing the stoppage.
- If the problem persists, consult the user manual for guidance on addressing mechanical issues.
Problem 23: Needle Breakage
Cause: Needles can break due to various reasons, such as using the wrong needle type, sewing over pins, or sewing through thick layers.
Troubleshooting:
- Ensure you’re using the correct needle type and size for the fabric and thread being used.
- Remove any pins from the fabric before sewing to prevent needle breakage.
- Consider using a walking foot or a denim needle when sewing through thick layers.
- Guide the fabric gently to prevent bending or forcing the needle while sewing.
Problem 24: Needle Thread Fraying or Shredding
Cause: Needle thread fraying can occur due to using old or poor-quality thread, incorrect needle size, or tension imbalance.
Troubleshooting:
- Use high-quality thread suitable for your sewing project to prevent fraying.
- Ensure the needle size matches the thread weight and fabric being used.
- Balance the upper and lower thread tensions to prevent excessive strain on the thread.
- Clean the machine, especially the tension discs, to prevent buildup that can cause thread issues.
Problem 25: Fabric Slipping or Bunching Up
Cause: Fabric slipping or bunching can result from improper presser foot pressure, incorrect needle, or lack of fabric control.
Troubleshooting:
- Adjust the presser foot pressure according to the fabric thickness to prevent slipping.
- Ensure the needle is appropriate for the fabric type and thickness.
- Guide the fabric smoothly and evenly while sewing to prevent bunching.
- Consider using a walking foot or a non-stick foot for slippery fabrics to enhance control.
Janome 4120QDC-T Sewing Machine User Reviews
Here, we’ll take a look at user reviews of the Janome 4120QDC-T sewing machine. Please note that the following summaries are based on user feedback and do not include reviews related to shipping, warranty, or customer service issues.
Positive Reviews from Janome 4120QDC-T Users
- Some users were satisfied with the following parameters associated with the Janome 4120QDC-T sewing machine:
- Adjustable tension that allows for optimal stitch quality.
- Clear and easy-to-follow instructional materials, including a booklet and instructional video.
- Inclusion of an extension table that is easy to attach and detach, providing additional workspace.
- Smooth and consistent stitch performance, suitable for both beginner and experienced sewers.
- Convenient features like automatic thread cutting, lock stitch, and start/stop buttons for efficient sewing.
Negative User Reviews of the Janome 4120QDC-T
- Some users were not satisfied with the following problems associated with the Janome 4120QDC-T sewing machine:
- Tension issues, leading to uneven stitches and thread breakage.
- Problems with the automatic embroidery and pattern functions, resulting in misaligned and distorted designs.
- Difficulty with free-motion quilting due to tension and stitch quality problems.
- Issues with the locking stitch function and some automatic stitches not working consistently.
- Complaints about the complexity of the machine, particularly for those new to computerized sewing.
- Reports of noises, rattling, and clunking sounds during sewing, affecting overall sewing experience.
It’s important to note that individual experiences can vary, and some users might encounter issues while others have a positive experience. The majority of users expressed satisfaction with the Janome 4120QDC-T sewing machine’s features and performance.
Based on user reviews, the Janome 4120QDC-T sewing machine generally received positive feedback for its adjustable tension, clear instructional materials, convenient features, and stitch quality. While some users encountered issues such as tension problems and difficulties with specific functions, the overall satisfaction level among customers appears to be high.
Janome 4120QDC-T Sewing Machine Manual
The operating instructions for the Janome 4120QDC-T sewing machine can be found on the manufacturer’s website. The manual provides detailed information on how to set up, use, and maintain your sewing machine, as well as troubleshooting tips for common issues.
Frequently Asked Questions
Q: How can I adjust the tension on my Janome 4120QDC-T sewing machine?
A: To adjust the tension, use the tension dial on your machine. For the upper thread tension, turning the dial clockwise increases tension, while turning it counterclockwise decreases tension. For the lower bobbin tension, refer to your manual for instructions on adjusting it if necessary.
Q: Why is my needle thread breaking frequently?
A: Frequent needle thread breaks can be caused by various factors. Check if the needle is correctly installed, the thread is threaded properly, and the needle is suitable for the fabric and thread being used. Ensure the tension is balanced, and there are no obstructions or burrs in the needle path.
Q: How do I troubleshoot uneven stitches?
A: Uneven stitches may result from inconsistent fabric feeding, incorrect tension settings, or a bent needle. Ensure the presser foot pressure is adjusted correctly for the fabric thickness, balance the upper and lower thread tensions, and use a new, straight needle suitable for the fabric.
Q: What should I do if the machine freezes during sewing?
A: If the machine freezes or stops unexpectedly, check the power supply and make sure the machine is properly plugged in. Try turning the machine off and back on to reset any software glitches. Inspect the machine for any obstructions or tangled threads that may be causing the issue.
Q: Why is my machine making unusual noises?
A: Unusual noises can be due to several reasons, including loose parts, tangled threads, or mechanical issues. Check for any loose screws or parts and make sure all components are properly tightened. Clean the machine and remove any lint or debris that might be causing the noise.
Conclusion
Always refer to the manual, customer service, or a service center whenever possible if there is a problem with your Janome 4120QDC-T sewing machine. Proper maintenance, correct usage, and following manufacturer guidelines can help ensure a smooth sewing experience and resolve issues effectively.
Janome 4300QDC-B Common Problems
JUCVNB SWNGM01-SBN Mini Portable for Beginners and Kids Common Problems
JUCVNB Mini Small Portable for Beginners and Kids Common Problems