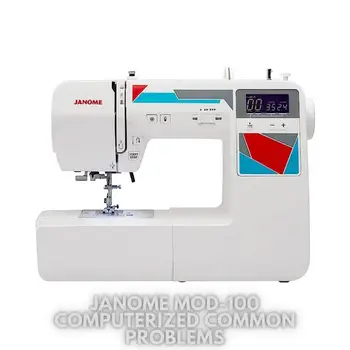
Janome MOD-100 Computerized Common Problems and Troubleshooting
Are you facing some issues with your Janome MOD-100 Computerized Sewing Machine? Don’t worry; we’ve got you covered! In this article, we’ll address common problems that users might encounter while using the Janome MOD-100 Computerized Sewing Machine and provide troubleshooting tips to help you get back to your sewing projects with ease.
Janome MOD-100 Computerized Overview
The Janome MOD-100 Computerized Sewing Machine is part of the complete Mod line, which includes 7 sewing machines, each with its own set of features. The MOD-100 model comes with 100 built-in stitches, including 7 one-step buttonholes, making it a versatile tool for unleashing your creative abilities. Whether you’re sewing modern garments, home decor, or quilts, the MOD-100 ensures your projects are conquered with power, precision, and confidence.
Key Features:
- 100 Built-In Stitches, including 7 One-Step Buttonholes
- Drop Feed and Accessories
- Easy Threading with One-Hand Needle Threader and Specialty Metal Needle Plate
- Top Drop-In Bobbin with Clear Cover and 7-Piece Feed Dog System
- Convenience Buttons: Start/Stop Button, Reverse, Locking Stitch, and Needle Up/Down
- Backlit LCD Display with Easy Navigation Keys
- Free Arm and Drop Feed
- Horizontal, full rotary hook bobbin system
- 200 built-in stitches 12 Buttonholes, Alphabet Stitches
- Adjustable thread tension control
- Built-in Needle threader
- Snap-On Presser Feet (6 included)
- Memorized needle up/down
- 7-Piece Feed Dog System and Drop Feed for darning or freehand embroidery
Product Details and Specifications
| Brand | Janome |
|---|---|
| Color | White |
| Material | Plastic, Metal |
| Product Dimensions | 7″D x 15″W x 12″H |
| Item Weight | 12.7 Pounds |
| Power Source | Air Powered |
| Is Electric | Yes |
| ASIN | B01BG1R84M |
| Item Model Number | -P |
| Customer Reviews | 4.5 out of 5 stars (247 ratings) |
| Best Sellers Rank | #71,716 in Arts, Crafts & Sewing (See Top 100 in Arts, Crafts & Sewing) |
| Rank in Sewing Machines | #173 |
| Is Discontinued By Manufacturer | No |
| Specifications | Certified frustration-free |
| Assembly Required | No |
| Warranty Description | 25-year limited. |
| Batteries Required | No |
| Included Components | Zigzag Foot |
Causes of Common Problems with the Janome MOD-100 Computerized
This section will address the possible problems and solutions related to the Janome MOD-100 Computerized Sewing Machine. If you’ve been facing issues while using this sewing machine, read on to find troubleshooting tips and get back to your sewing projects smoothly.
Common Problems with the Janome MOD-100 Computerized
1. Stitch Skipping – Cause and Troubleshooting
Description of the Problem: Stitch skipping occurs when the sewing machine fails to create consistent and complete stitches, resulting in uneven or missing portions in your fabric.
Cause of the Problem: Stitch skipping can be caused by incorrect threading, improper needle installation, or a bent needle.
Troubleshooting Step-by-Step:
- Ensure proper threading of the machine, following the threading diagram in the user manual.
- Check the needle for any damage or bending. Replace the needle with a new one if necessary.
- Make sure the needle is correctly installed and facing the correct direction.
- Try using a different thread that is suitable for the fabric you are sewing.
2. Bobbin Jamming – Cause and Troubleshooting
Description of the Problem: Bobbin jamming occurs when the thread in the bobbin area gets tangled or stuck, disrupting the sewing process.
Cause of the Problem: Bobbin jamming can happen due to incorrect bobbin placement, improperly wound bobbin, or using low-quality thread.
Troubleshooting Step-by-Step:
- Remove the bobbin and clean any thread or lint that may be causing the jam.
- Check the bobbin for proper winding and ensure it is correctly inserted into the bobbin case.
- Use high-quality thread to prevent thread breakage and tangling.
- Adjust the tension settings if needed to ensure proper thread flow.
3. Thread Breaking – Cause and Troubleshooting
Description of the Problem: The thread frequently breaks while sewing, interrupting the stitching process.
Cause of the Problem: Thread breaking can be caused by incorrect threading, tangled thread, or tension issues.
Troubleshooting Step-by-Step:
- Check the threading path and rethread the machine properly.
- Remove any tangles or knots from the thread spool and bobbin area.
- Ensure the tension settings are adjusted correctly for the type of fabric you are using.
- Use a higher-quality thread and needle suitable for your fabric.
4. Uneven Stitch Length – Cause and Troubleshooting
Description of the Problem: The stitch length varies inconsistently, resulting in uneven-looking seams.
Cause of the Problem: Uneven stitch length can be caused by incorrect machine settings or a malfunctioning feed dog.
Troubleshooting Step-by-Step:
- Check the stitch length settings and adjust them as needed.
- Make sure the feed dogs are engaged and functioning correctly.
- Verify that the fabric is moving smoothly under the presser foot. Ensure there are no obstructions or fabric bunching up.
- Consider using a walking foot or an even-feed foot for improved fabric feeding.
5. Needle Breakage – Cause and Troubleshooting
Description of the Problem: The needle frequently breaks during sewing, causing frustration and halting your progress.
Cause of the Problem: Needle breakage can occur due to using the wrong needle size, hitting pins or hard objects, or the needle being inserted incorrectly.
Troubleshooting Step-by-Step:
- Ensure you are using the correct needle size and type for the fabric you are sewing.
- Check the needle plate and remove any pins or debris that might cause the needle to hit them.
- Insert the needle properly, making sure it is fully seated and facing the right direction.
- Lower the needle carefully, avoiding hitting it against the presser foot or the needle plate.
6. Thread Tension Issues – Cause and Troubleshooting
Description of the Problem: Uneven or messy stitches on both sides of the fabric can be observed, indicating thread tension problems.
Cause of the Problem: Incorrect thread tension settings, threading errors, or lint buildup in the tension discs can cause this issue.
Troubleshooting Step-by-Step:
- Check the thread tension settings and adjust them according to the fabric and thread being used.
- Re-thread the machine properly, ensuring the thread is passing through all the necessary guides and tension discs.
- Clean the tension discs and surrounding areas to remove any lint or debris that may affect tension.
- Test the tension with a scrap piece of fabric before starting your sewing project.
7. Jammed Automatic Needle Threader – Cause and Troubleshooting
Description of the Problem: The automatic needle threader fails to work correctly, making it challenging to thread the needle efficiently.
Cause of the Problem: The needle threader mechanism may be misaligned, or there could be an obstruction hindering its operation.
Troubleshooting Step-by-Step:
- Double-check the threading path and ensure the needle is in the correct position for the automatic needle threader.
- Gently inspect the needle threader for any misalignments or obstructions, such as stray threads or lint.
- Try manually threading the needle using the conventional method if the automatic threader continues to malfunction.
- If the problem persists, consult the user manual for further instructions or consider seeking professional assistance.
8. Limited Lighting – Cause and Troubleshooting
Description of the Problem: Inadequate lighting around the needle area makes it difficult to sew accurately, especially in dimly lit environments.
Cause of the Problem: The built-in light may be dim or malfunctioning.
Troubleshooting Step-by-Step:
- Check the lightbulb to see if it needs replacement.
- If the bulb is functioning, but the lighting is still insufficient, consider using an external sewing machine light or working under better lighting conditions.
- Ensure the light source is properly positioned and not obstructed by the presser foot or any accessories.
9. Limited Stitch Selection Display – Cause and Troubleshooting
Description of the Problem: The stitch selection display on the backlit LCD may not show all the available stitches or might not function correctly.
Cause of the Problem: This issue could arise due to a faulty LCD screen or a software glitch.
Troubleshooting Step-by-Step:
- Reset the sewing machine by turning it off and then on again to see if the display returns to normal.
- Check for any visible physical damage to the LCD screen or surrounding components.
- If the problem persists, consult the user manual for troubleshooting tips related to the display.
- Contact the manufacturer’s customer support if the issue remains unresolved.
10. Loud Noise While Sewing – Cause and Troubleshooting
Description of the Problem: Unusual or loud noises are produced during sewing, affecting the smoothness of the sewing process.
Cause of the Problem: A noisy sewing machine can be caused by various factors, such as a misaligned part, lack of lubrication, or a loose component.
Troubleshooting Step-by-Step:
- Stop sewing immediately if you notice unusual noises and turn off the machine.
- Inspect the sewing machine for any visible signs of misalignment or loose parts.
- Follow the user manual’s instructions for oiling or lubricating the machine, as lack of lubrication can contribute to the noise.
- If the noise persists, discontinue use and seek professional repair services.
11. Bobbin Thread Showing on the Top – Cause and Troubleshooting
Description of the Problem: The bobbin thread is visible on the top side of the fabric, affecting the appearance of your stitches.
Cause of the Problem: Incorrect bobbin threading or incorrect tension settings can cause the bobbin thread to show on the top.
Troubleshooting Step-by-Step:
- Check the bobbin threading to ensure it is correctly wound and placed in the bobbin case.
- Adjust the bobbin tension if your sewing machine allows for bobbin tension adjustments.
- Review the upper thread tension settings to ensure they match the fabric and thread being used.
- Test the stitching on a scrap fabric to ensure the issue is resolved before continuing with your project.
12. Skipped Stitches – Cause and Troubleshooting
Description of the Problem: The sewing machine skips stitches intermittently while sewing, resulting in incomplete lines of stitches.
Cause of the Problem: Skipped stitches can be caused by a dull needle, using the wrong needle for the fabric, or the machine running at excessive speed.
Troubleshooting Step-by-Step:
- Replace the needle with a new one, ensuring it is the appropriate size and type for the fabric.
- Reduce the sewing machine’s speed to a moderate level, especially when sewing through thicker fabrics.
- Check the needle plate for any burrs or damage that may be contributing to skipped stitches.
- Experiment with different needle types (e.g., ballpoint, sharp) to find the best match for your fabric.
13. Uneven Feed Dog Movement – Cause and Troubleshooting
Description of the Problem: The feed dogs do not move smoothly or evenly, causing the fabric to feed unevenly during sewing.
Cause of the Problem: Dust, lint, or debris accumulation in the feed dog area or a damaged feed dog can cause uneven movement.
Troubleshooting Step-by-Step:
- Clean the feed dogs and their surrounding area thoroughly to remove any lint or debris.
- Manually move the feed dogs up and down to check for any irregularities or resistance.
- If the feed dogs are damaged, consult the user manual for information on replacing them or seek professional repair.
- Ensure the presser foot is properly attached and not obstructing the feed dog movement.
14. Thread Looping Under the Fabric – Cause and Troubleshooting
Description of the Problem: Loops or knots of thread appear underneath the fabric during sewing, affecting the quality of the stitches.
Cause of the Problem: This issue can be caused by incorrect threading, improper bobbin placement, or incorrect tension settings.
Troubleshooting Step-by-Step:
- Re-thread the machine carefully, making sure the thread is passing through all the necessary guides and tension discs.
- Check the bobbin to ensure it is correctly inserted into the bobbin case and wound evenly.
- Adjust the upper thread tension to match the fabric and thread being used.
- Ensure there are no tangles or obstructions in the thread path, both on the top and bobbin sides.
15. Fabric Not Feeding – Cause and Troubleshooting
Description of the Problem: The fabric does not move forward or feed through the machine while sewing.
Cause of the Problem: Issues with the presser foot pressure, feed dogs, or uneven fabric thickness can lead to this problem.
Troubleshooting Step-by-Step:
- Check the presser foot pressure settings and adjust them accordingly to ensure proper fabric feeding.
- Verify that the feed dogs are up and engaged in moving the fabric forward.
- Use a fabric stabilizer or a walking foot attachment for smoother feeding, especially when dealing with thick or slippery fabrics.
- Ensure the fabric is positioned correctly under the presser foot and that it is not being held too tightly by the presser foot.
16. Needle Threader Misalignment – Cause and Troubleshooting
Description of the Problem: The needle threader mechanism is misaligned, making it challenging to thread the needle accurately.
Cause of the Problem: Continuous use or accidental mishandling can lead to the misalignment of the needle threader.
Troubleshooting Step-by-Step:
- Gently inspect the needle threader for any visible misalignments or damages.
- If possible, attempt to realign the needle threader to its original position.
- Refer to the sewing machine’s user manual for specific instructions on correcting needle threader misalignment.
- If you are unable to resolve the issue, consider seeking professional assistance for repairs.
17. Thread Jamming in Bobbin Area – Cause and Troubleshooting
Description of the Problem: Threads get entangled or jammed in the bobbin area, halting the sewing process.
Cause of the Problem: Incorrect bobbin placement, using the wrong bobbin, or improper bobbin winding can cause thread jamming.
Troubleshooting Step-by-Step:
- Remove the bobbin and clean any thread or lint that may be causing the jam.
- Check the bobbin to ensure it is the correct size and type for the sewing machine.
- Re-wind the bobbin following the proper winding technique recommended in the user manual.
- Double-check the bobbin placement and ensure it is inserted correctly into the bobbin case.
18. Incorrect Bobbin Tension – Cause and Troubleshooting
Description of the Problem: The bobbin thread is too loose or too tight, causing uneven or skipped stitches.
Cause of the Problem: Incorrect bobbin tension settings or incorrectly wound bobbins can lead to this issue.
Troubleshooting Step-by-Step:
- Adjust the bobbin tension using the tension screw on the bobbin case to achieve the desired tension.
- Test the stitching on a scrap fabric after each adjustment to ensure the tension is correctly set.
- Ensure the bobbin is correctly wound, with an even and consistent thread tension.
- If you are unsure about adjusting bobbin tension, refer to the user manual or seek assistance from a sewing machine expert.
19. Needle Positioning Inaccuracy – Cause and Troubleshooting
Description of the Problem: The needle does not stop at the desired position (up or down) as per the selected setting.
Cause of the Problem: This issue can arise due to a faulty needle positioning sensor or incorrect machine settings.
Troubleshooting Step-by-Step:
- Check the needle positioning settings and ensure they are correctly configured according to your preference.
- Inspect the needle positioning sensor for any damages or irregularities that may be affecting its operation.
- Reset the sewing machine to its default settings and reconfigure the needle positioning options.
- If the problem persists, consult the user manual for further troubleshooting or consider professional repair.
20. Presser Foot Pressure Problems – Cause and Troubleshooting
Description of the Problem: The presser foot applies too much or too little pressure on the fabric, causing uneven stitches.
Cause of the Problem: The presser foot pressure may not be adjusted correctly or there could be an issue with the presser foot mechanism.
Troubleshooting Step-by-Step:
- Adjust the presser foot pressure according to the fabric thickness and type by using the pressure adjustment dial (if available).
- Ensure the presser foot is attached securely and correctly to the presser foot holder.
- Inspect the presser foot mechanism for any damages or obstructions that may affect its operation.
- If you are unable to achieve the desired presser foot pressure, consider using an alternative presser foot suitable for the fabric or seek professional assistance.
21. Thread Fraying or Breaking – Cause and Troubleshooting
Description of the Problem: The thread frequently frays or breaks during sewing, leading to interrupted stitching.
Cause of the Problem: Thread fraying or breaking can be caused by using low-quality thread, incorrect needle size, or the thread path being obstructed.
Troubleshooting Step-by-Step:
- Replace the thread with a higher-quality thread suitable for the fabric you are using.
- Ensure the needle size is appropriate for the thread and fabric combination.
- Check the thread path for any obstructions or tangles that may be causing the thread to fray or break.
- Adjust the thread tension if necessary to prevent excessive pulling on the thread.
22. Uneven Needle Depth – Cause and Troubleshooting
Description of the Problem: The needle penetrates the fabric unevenly, resulting in varying stitch lengths.
Cause of the Problem: Uneven needle depth can be caused by a bent needle, incorrect needle insertion, or a damaged needle bar.
Troubleshooting Step-by-Step:
- Inspect the needle for any bending or damage, and replace it with a new one if necessary.
- Ensure the needle is inserted correctly and securely into the needle holder.
- Check the needle bar for any visible damages that may affect its up and down movement.
- If the problem persists, consider seeking professional repair to address any internal issues with the needle bar mechanism.
23. Fabric Puckering – Cause and Troubleshooting
Description of the Problem: The fabric gathers or puckers around the stitched area, affecting the overall finish of the project.
Cause of the Problem: Fabric puckering can occur due to improper tension settings, using the wrong needle, or sewing with excessive speed.
Troubleshooting Step-by-Step:
- Adjust the upper thread tension to achieve a balanced tension suitable for the fabric.
- Ensure you are using the correct needle type and size for the fabric you are sewing.
- Slow down your sewing speed, especially when working with delicate or lightweight fabrics.
- Use a stabilizer or interfacing material to support the fabric during sewing and minimize puckering.
24. Thread Accumulation Under the Needle Plate – Cause and Troubleshooting
Description of the Problem: Thread and lint accumulate under the needle plate, affecting the smooth movement of the fabric.
Cause of the Problem: This issue can be caused by inadequate cleaning, incorrect bobbin insertion, or using low-quality thread.
Troubleshooting Step-by-Step:
- Regularly clean the area under the needle plate to remove any accumulated thread, lint, or debris.
- Check the bobbin to ensure it is correctly placed in the bobbin case and wound evenly.
- Use high-quality thread to reduce the chances of excessive lint accumulation during sewing.
- If the problem persists, consider using a lint brush or seek professional assistance for thorough cleaning and maintenance.
25. Limited Stitch Width Adjustment – Cause and Troubleshooting
Description of the Problem: The stitch width adjustment feature is not functioning correctly, restricting the variety of stitch widths available.
Cause of the Problem: This issue can arise due to a mechanical malfunction or a software glitch affecting the stitch width settings.
Troubleshooting Step-by-Step:
- Restart the sewing machine to see if the stitch width adjustment returns to normal.
- Verify that the stitch width setting is correctly configured according to your preference.
- Refer to the user manual for instructions on troubleshooting stitch width adjustment issues.
- If the problem persists, consider seeking professional repair to address any mechanical or software-related problems.
Janome MOD-100 Computerized Sewing Machine User Reviews
Positive Reviews from Janome MOD-100 Computerized Sewing Machine Users
After analyzing various user reviews available online from sites like Walmart, it is evident that many customers have expressed satisfaction with the Janome MOD-100 Computerized Sewing Machine. Here are some positive experiences associated with this sewing machine:
- Some users were satisfied with the ease of use and user-friendly interface of the Janome MOD-100. They found it straightforward to operate, even for beginners, making it an ideal choice for those new to sewing.
- Several customers praised the machine’s sturdy build and heavy-duty performance. They appreciated its reliability and ability to handle different sewing projects, including quilting and piecing jobs.
- Many users found the Janome MOD-100 to be a great value for money. They were delighted with the competitive price they paid for a computerized sewing machine that exceeded their expectations in terms of features and performance.
- Some customers were pleased with the variety of built-in stitches and one-step buttonholes, allowing them to explore their creativity and complete various sewing projects with ease.
- Users also mentioned that the sewing machine operated quietly, providing a pleasant sewing experience without the noise typically associated with some machines.
Negative User Reviews of the Janome MOD-100 Computerized Sewing Machine
While the majority of users expressed satisfaction with the Janome MOD-100, there were some negative experiences reported as well. Here are some of the issues raised by certain customers:
- Some users encountered difficulties with the automatic needle threader. They found it challenging to align properly, leading to frustration during the threading process.
- A few customers experienced thread jamming in the bobbin area, causing interruptions in their sewing projects and requiring frequent cleaning to resolve the issue.
- There were reports of occasional tension issues, resulting in uneven stitches and requiring adjustments and trial-and-error to achieve the desired stitch quality.
- While the majority found the sewing machine’s computerized features beneficial, a few users struggled with the learning curve associated with these advanced functions.
- Some users faced difficulties with the stitch width adjustment feature, as it occasionally malfunctioned or did not provide the full range of stitch width options.
All the information presented in this section is derived from user reviews available on Walmart’s website.
Overall, the Janome MOD-100 Computerized Sewing Machine received a high level of positive feedback from customers. The majority of users were satisfied with its performance, ease of use, and value for money.
While a few negative experiences were reported, they represent a smaller proportion of overall feedback. Users who encountered issues mentioned that the benefits and functionality of the sewing machine outweighed these minor drawbacks.
Janome MOD-100 Computerized Common Problems
Janome MOD-200 Fully-Featured Computerized Common Problems
Janome Blue Couture Easy-to-Use Common Problems
Janome MOD-100 Computerized Sewing Machine Manual
The operating instructions and user manual for the Janome MOD-100 Computerized Sewing Machine can be found on the manufacturer’s website. For detailed guidance on setting up, using, and maintaining the sewing machine, users are encouraged to visit the official Janome website and refer to the comprehensive manual provided by the company.
Janome MOD-100 Computerized Frequently Asked Questions
1. How do I thread the Janome MOD-100 Sewing Machine?
Threading the Janome MOD-100 is a simple process. Start by following the numbered guides on the machine to thread the upper thread correctly. Next, wind the bobbin and insert it into the bobbin case, making sure the thread is feeding in the right direction. Lastly, use the built-in needle threader for easy needle threading.
2. Can I adjust the stitch length and width on the Janome MOD-100?
Yes, the Janome MOD-100 allows you to adjust both stitch length and width. Use the stitch length dial to choose the desired stitch length, and the stitch width dial to adjust the width for certain stitch patterns, such as zigzag or decorative stitches.
3. How can I troubleshoot thread tension issues?
If you encounter thread tension problems, start by checking the upper thread tension setting. Adjust it to match the fabric and thread you are using. Additionally, ensure the thread is correctly threaded through all the guides and tension discs. If the issue persists, try cleaning the tension discs and surrounding areas to remove any lint or debris that may affect tension.
4. What type of needle should I use with the Janome MOD-100?
The Janome MOD-100 is compatible with various needle types, such as universal, ballpoint, or sharp needles. The type of needle you should use depends on the fabric you are sewing. For woven fabrics, use a universal needle, and for knits, use a ballpoint needle to prevent fabric snags and damage.
5. My Janome MOD-100 is making loud noises while sewing. What should I do?
Loud or unusual noises during sewing may indicate an issue with the machine. Stop sewing immediately and turn off the machine. Inspect the sewing machine for any visible signs of misalignment, loose parts, or obstructions. If you are unable to identify the problem, it is recommended to seek professional assistance for proper diagnosis and repair.
Conclusion
Whenever you encounter any problems or issues with your Janome MOD-100 Computerized Sewing Machine, it is essential to consult the user manual, contact customer service, or visit an authorized service center for assistance.
The user manual contains valuable information on setup, operation, and troubleshooting, while customer service and service centers can provide expert guidance and solutions to resolve any concerns effectively.