SINGER S0100 Common Problems and Troubleshooting
Welcome to the comprehensive guide for troubleshooting common problems with your SINGER S0100 sewing machine. As a proud owner of the SINGER S0100, it’s important to be aware of potential issues that may arise during your sewing projects. This article will provide you with insights into common problems and their solutions, ensuring a smooth sewing experience tailored to your machine model.
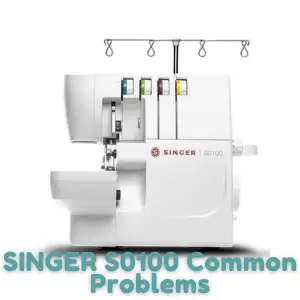
SINGER S0100 Overview
The SINGER S0100 Serger Overlock Machine is a versatile tool designed to elevate your sewing projects. With its 2/3/4 thread capacity, this machine offers adaptability to various sewing needs. It operates at a professional speed of up to 1300 stitches per minute, allowing for faster and efficient results.
One remarkable feature is the Lower Looper LED Light, enhancing visibility for easier threading. The machine offers 6 different stitch types, ensuring that every project gets the perfect stitch. Its free arm design is handy for tasks like overlocking cuffs, pant hems, and circular seams.
Product Details and Features
| Product Dimensions | 1.1 x 9.7 x 6.5 inches |
| Item model number | S0100 Overlock Serger |
| ASIN | B08PH67YFP |
| Customer Reviews | 4.5 out of 5 stars (501 ratings) |
| Best Sellers Rank | #37,938 in Arts, Crafts & Sewing (See Top 100 in Arts, Crafts & Sewing) |
| Item Weight | 16.06 pounds |
| Manufacturer | SINGER |
| Language | English |
| Country of Origin | China |
| Date First Available | December 2, 2020 |
Causes of Common Problems with the SINGER S0100
In the following sections, we will delve into potential problems you might encounter with your SINGER S0100 sewing machine and provide practical solutions to address these issues. By understanding these common challenges, you’ll be better equipped to make the most of your S0100 and ensure seamless sewing experiences.
Common Problems and Troubleshooting for the SINGER S0100
1. Thread Breakage During Sewing
Description of the Problem: One common issue you might encounter with your SINGER S0100 is thread breakage during sewing. This can be frustrating and disrupt your sewing workflow.
Cause of the Problem: Thread breakage can occur due to incorrect threading, a damaged needle, or tension imbalances in the machine.
Troubleshooting: Follow these steps to address the issue:
- Recheck the threading of all threads, ensuring they are correctly inserted in their respective guides.
- Inspect the needle for any signs of damage or bending, and replace if necessary.
- Adjust the tension settings for both the upper and lower loopers as per the machine’s manual.
2. Uneven Stitches
Description of the Problem: Uneven stitches can mar the appearance of your sewing projects, making them look less professional.
Cause of the Problem: Uneven stitches may result from improper tension settings, an incorrectly installed needle, or a misaligned presser foot.
Troubleshooting: Resolve the issue using these steps:
- Check the tension settings for both the upper and lower loopers and adjust them as needed.
- Ensure that the needle is inserted correctly, with the flat side facing the back of the machine.
- Examine the presser foot alignment and adjust it to ensure even fabric feeding.
3. Fabric Jamming in the Feed Dogs
Description of the Problem: Fabric getting stuck in the feed dogs can hinder the sewing process and potentially damage the material.
Cause of the Problem: Fabric jamming can occur if the feed dogs are misaligned, the stitch length is too short, or the fabric is not properly guided.
Troubleshooting: Address the issue by following these steps:
- Check the alignment of the feed dogs and make sure they are positioned correctly for smooth fabric feeding.
- Increase the stitch length to prevent the fabric from getting caught in the feed dogs.
- Ensure that the fabric is guided evenly and not pulled excessively as you sew.
4. Skipping Stitches
Description of the Problem: Skipping stitches can lead to weak seams and compromised garment construction.
Cause of the Problem: Skipping stitches may result from a dull or bent needle, improper thread tension, or a malfunctioning looper.
Troubleshooting: Rectify the issue using these steps:
- Replace the needle with a new, sharp one that is appropriate for the fabric you are sewing.
- Check and adjust the thread tension to ensure proper engagement between threads.
- Examine the looper for any obstructions or damage, and clean or replace it as needed.
5. Fabric Not Feeding Properly
Description of the Problem: Improper fabric feeding can lead to uneven stitching and frustration during sewing.
Cause of the Problem: Fabric not feeding properly may be due to a misaligned presser foot, tension issues, or a worn-out feed dog.
Troubleshooting: Resolve the issue with these steps:
- Check the alignment of the presser foot and adjust it to ensure smooth fabric feeding.
- Ensure that the thread tension is properly balanced to prevent fabric resistance.
- If the feed dog is worn, consider replacing it with a new one to improve fabric traction.
6. Excessive Noise During Operation
Description of the Problem: Excessive noise while sewing can be distracting and indicate underlying issues.
Cause of the Problem: Loud noises may stem from a misaligned part, a loose screw, or lack of lubrication in moving components.
Troubleshooting: Address the issue by following these steps:
- Turn off the machine and inspect for any loose parts or screws. Tighten them as needed.
- If a specific part seems misaligned, consult the manual for proper adjustment instructions.
- Lubricate moving parts according to the manufacturer’s recommendations to reduce friction and noise.
7. Tangled Threads on the Underside
Description of the Problem: Threads tangling on the underside of the fabric can result in messy stitching and fabric damage.
Cause of the Problem: Thread tangling may occur due to improper threading, incorrect bobbin placement, or lint buildup in the bobbin area.
Troubleshooting: Rectify the issue using these steps:
- Re-thread both the upper and lower loopers, ensuring they follow the correct threading paths.
- Check that the bobbin is inserted in the correct orientation and that the bobbin case is properly installed.
- Clean the bobbin area of any lint or debris that may be causing thread tangling.
8. Uneven Fabric Feed
Description of the Problem: Uneven fabric feeding can result in uneven stitches and fabric distortion.
Cause of the Problem: Uneven fabric feeding may be caused by a damaged presser foot, incorrect presser foot pressure, or an issue with the feed dog mechanism.
Troubleshooting: Resolve the issue with these steps:
- Inspect the presser foot for any damage and replace it if necessary.
- Adjust the presser foot pressure according to the fabric type and thickness you’re working with.
- If the feed dog mechanism is malfunctioning, consult the manual for guidance on adjustment or repair.
9. Fabric Puckering
Description of the Problem: Fabric puckering leads to unsightly wrinkling and gathers in the fabric, affecting the final appearance of the project.
Cause of the Problem: Fabric puckering may result from excessive tension, improper stitch settings, or using the wrong needle for the fabric type.
Troubleshooting: Address the issue by following these steps:
- Adjust the thread tension to a lower setting to reduce fabric tension during stitching.
- Ensure you’re using appropriate stitch settings for the fabric type and project.
- Choose a needle that matches the fabric type and thickness to prevent unnecessary puckering.
10. Needle Breakage
Description of the Problem: Needle breakage can disrupt your sewing process and potentially damage the fabric.
Cause of the Problem: Needle breakage can occur due to using the wrong needle size, sewing over thick seams, or an improperly installed needle.
Troubleshooting: Rectify the issue using these steps:
- Ensure you’re using the correct needle size and type for the fabric you’re sewing.
- When encountering thick seams, sew slowly and manually turn the handwheel to prevent excessive stress on the needle.
- Check that the needle is inserted correctly and securely in the needle holder.
11. Uneven Stitch Length
Description of the Problem: Uneven stitch length can lead to an inconsistent appearance in your sewing projects.
Cause of the Problem: Uneven stitch length may result from incorrect tension settings, a bent needle, or a malfunctioning feed dog mechanism.
Troubleshooting: Address the issue by following these steps:
- Check and adjust the tension settings for both the upper and lower loopers to ensure even stitches.
- Replace the needle if it is bent or damaged, as it can affect stitch formation.
- If the feed dog mechanism is not working properly, consult the manual for guidance on repair or adjustment.
12. Fabric Skipping Stitches
Description of the Problem: Fabric skipping stitches can result in gaps in your seams and compromise the integrity of your sewing projects.
Cause of the Problem: Skipping stitches may occur due to incorrect needle threading, a dull needle, or improper tension settings.
Troubleshooting: Rectify the issue using these steps:
- Check the needle threading to ensure all threads are properly guided through the machine.
- Replace the needle with a new, sharp one if it’s dull or bent.
- Adjust the tension settings, ensuring proper balance between the upper and lower loopers.
13. Fabric Not Feeding Under the Presser Foot
Description of the Problem: Fabric not feeding smoothly under the presser foot can lead to uneven stitching and frustration.
Cause of the Problem: This issue may arise due to a misaligned presser foot, an improperly adjusted feed dog, or a tangled thread obstructing the fabric’s movement.
Troubleshooting: Resolve the issue with these steps:
- Check the alignment of the presser foot and adjust it to ensure the fabric is fed evenly.
- Inspect the feed dog mechanism for any misalignment or improper adjustment, and make necessary corrections.
- Clear any tangled threads or debris that might be obstructing the fabric’s movement.
14. Uneven Thread Tension
Description of the Problem: Uneven thread tension can result in visible loops or uneven stitches on the fabric.
Cause of the Problem: Uneven thread tension may be caused by incorrect threading, worn-out tension discs, or debris in the tension assembly.
Troubleshooting: Address the issue by following these steps:
- Re-thread the machine carefully, ensuring that threads are correctly positioned in their respective tension discs.
- If the tension discs are worn, consider having them replaced to ensure consistent tension.
- Clean the tension assembly to remove any lint, dust, or debris that might be affecting tension control.
15. Fabric Gathering in the Feed Dogs
Description of the Problem: Fabric gathering in the feed dogs can result in bunched-up fabric and uneven stitching.
Cause of the Problem: Fabric gathering may occur due to incorrect tension settings, a malfunctioning feed dog mechanism, or inadequate fabric guiding.
Troubleshooting: Rectify the issue using these steps:
16. Needle Thread Bunching Underneath
Description of the Problem: Needle thread bunching underneath the fabric can lead to messy stitching and uneven seam lines.
Cause of the Problem: Needle thread bunching may occur due to incorrect threading, a tangled bobbin thread, or a misaligned bobbin case.
Troubleshooting: Address the issue by following these steps:
- Re-thread both the upper thread and the bobbin thread, ensuring they are properly guided.
- Check for any tangles or knots in the bobbin thread and clear them before sewing.
- Inspect the bobbin case alignment and make adjustments as necessary to ensure smooth thread flow.
17. Stitches Skipping on Thick Fabrics
Description of the Problem: Skipping stitches when sewing thick fabrics can lead to weak seams and uneven stitching.
Cause of the Problem: Stitch skipping on thick fabrics may result from using the wrong needle size, inadequate presser foot pressure, or improper tension settings.
Troubleshooting: Rectify the issue using these steps:
- Use a larger and stronger needle designed for sewing heavy fabrics.
- Adjust the presser foot pressure to ensure proper fabric feeding without excessive resistance.
- Check and adjust the thread tension to accommodate the thickness of the fabric.
18. Uneven Cutting of Fabric Edges
Description of the Problem: Uneven cutting of fabric edges while overlocking can result in uneven seams and compromised project quality.
Cause of the Problem: Uneven fabric cutting may occur due to a dull or misaligned cutting blade, improper feed, or incorrect fabric placement.
Troubleshooting: Address the issue by following these steps:
- Check the cutting blade for sharpness and replace it if it’s dull.
- Inspect the alignment of the cutting blade to ensure it’s properly positioned for even cutting.
- Ensure that the fabric is fed smoothly and evenly under the cutting blade.
19. Thread Jamming in the Bobbin Area
Description of the Problem: Thread jamming in the bobbin area can lead to tangled threads and fabric damage.
Cause of the Problem: Thread jamming may result from using an incorrect bobbin size, improperly wound bobbins, or debris in the bobbin case.
Troubleshooting: Resolve the issue with these steps:
- Use the correct bobbin size and type as specified in the machine’s manual.
- Ensure that bobbins are wound evenly and inserted into the bobbin case with the correct orientation.
- Clean the bobbin case area of any lint, debris, or tangled threads that might be causing the jamming.
20. Inconsistent Tension Between Threads
Description of the Problem: Inconsistent tension between threads can result in unsightly seams and compromised stitch quality.
Cause of the Problem: Inconsistent tension may arise from unequal tension settings, incorrect threading sequence, or damaged tension components.
Troubleshooting: Rectify the issue using these steps:
- Ensure that both upper and lower loopers have balanced tension settings.
- Follow the correct threading sequence as outlined in the machine’s manual.
- Inspect the tension components for any damage or defects, and replace if necessary.
21. Fabric Fraying at the Edges
Description of the Problem: Fabric fraying at the edges can lead to messy and unstable seams.
Cause of the Problem: Fabric fraying may occur due to using the wrong stitch type, inadequate stitch width, or a dull cutting blade.
Troubleshooting: Address the issue by following these steps:
- Choose a suitable stitch type that helps prevent fabric fraying, such as a zigzag or overlock stitch.
- Adjust the stitch width to ensure that the stitches fully encapsulate the fabric edges.
- If the cutting blade is dull, replace it to ensure clean and effective fabric trimming.
22. Excessive Fabric Pulling or Dragging
Description of the Problem: Excessive fabric pulling or dragging can result in uneven stitches and fabric distortion.
Cause of the Problem: Excessive fabric pulling may result from improper fabric guiding, tension issues, or a malfunctioning presser foot lifter.
Troubleshooting: Resolve the issue with these steps:
- Ensure that you’re guiding the fabric smoothly without pulling or stretching it as you sew.
- Check and adjust the thread tension to prevent excessive resistance on the fabric.
- If the presser foot lifter is not working properly, consult the manual for guidance on repair or adjustment.
23. Inconsistent Seam Width
Description of the Problem: Inconsistent seam width can result in uneven seams and compromised project quality.
Cause of the Problem: Inconsistent seam width may arise from variations in sewing speed, improper fabric guiding, or an unstable presser foot pressure.
Troubleshooting: Rectify the issue using these steps:
- Maintain a consistent sewing speed to ensure uniform seam width throughout the project.
- Guide the fabric evenly and steadily under the presser foot as you sew.
- Adjust the presser foot pressure to ensure stable fabric feeding and consistent seam width.
24. Fabric Not Feeding in a Straight Line
Description of the Problem: Fabric not feeding in a straight line can result in crooked stitching and misaligned seams.
Cause of the Problem: This issue may arise from a misaligned presser foot, an uneven fabric pull, or a malfunctioning feed dog mechanism.
Troubleshooting: Address the issue by following these steps:
- Check the alignment of the presser foot and adjust it to ensure straight fabric feeding.
- Guide the fabric evenly and consistently to prevent it from drifting off course.
- Inspect the feed dog mechanism for any misalignment or malfunction, and address the issue as needed.
25. Incorrect Thread Tension Settings
Description of the Problem: Incorrect thread tension settings can lead to visible loops, uneven stitches, and compromised stitch quality.
Cause of the Problem: Incorrect thread tension settings may result from human error, changes in thread type, or a lack of understanding about tension adjustment.
Troubleshooting: Rectify the issue using these steps:
- Review the machine’s manual to understand the recommended tension settings for different types of stitches and fabrics.
- Experiment with tension adjustments on scrap fabric to find the optimal settings for your specific project.
- Make gradual changes to the tension settings and test the stitches until you achieve balanced tension.
SINGER S0100 Sewing Machine User Reviews
Here, we delve into the user reviews of the SINGER S0100 sewing machine, gathering insights from various online sources. Please note that the following feedback is based on reviews from Walmart.
Positive Reviews from SINGER S0100 Users
- Many users were satisfied with the following aspects of the SINGER S0100 sewing machine:
- The machine’s strength and quality, contributing to excellent sewing performance.
- Appreciation for the machine’s ability to handle various stitching needs, from basic to intricate projects.
- Praise for the machine’s ease of use, suitable for both beginners and experienced sewists.
- Positive feedback about the machine’s appearance, noting that it closely resembled its advertised pictures.
- The included presser foot was highlighted as a useful accessory.
- These positive experiences underline the SINGER S0100’s versatility, durability, and suitability for different skill levels.
Negative User Reviews of the SINGER S0100
- Some users were not satisfied with the following problems associated with the SINGER S0100 sewing machine:
- Challenges in threading the machine’s up and down needles, with the cutter obstructing the right needle.
- Issues with the thread holder not staying up, leading to frustration during use.
- Reports of defective units, with loops being uneven and not functioning as expected.
- Concerns about missing accessories, despite being shown in product pictures and descriptions.
- Difficulties in learning to use the machine due to the absence of a manual.
- These negative experiences highlight areas where the SINGER S0100 fell short, including threading challenges, accessories, and overall usability.
Based on the reviews, it’s apparent that the majority of users expressed satisfaction with the SINGER S0100 sewing machine, citing its strength, quality, and versatility as key strengths.
SINGER S0100 Sewing Machine Manual
If you’re looking for the operating instructions for the SINGER S0100 sewing machine, you can find them on the manufacturer’s official website. The manual provides detailed guidance on setting up and using the machine, threading, stitch selection, maintenance, and troubleshooting.
Frequently Asked Questions about the SINGER S0100 Sewing Machine
1. How do I thread the SINGER S0100 sewing machine?
Threading the SINGER S0100 involves following a specific path through various threading points. Refer to the user manual for detailed step-by-step instructions on proper threading to ensure smooth and accurate stitching.
2. What can I do if the stitches on my fabric are uneven?
Uneven stitches may be caused by incorrect tension settings, a bent needle, or fabric feed issues. First, check and adjust the tension settings as per the manual. Ensure you’re using a straight and undamaged needle and inspect the fabric feed mechanism for any obstructions.
3. Why does the thread keep breaking while sewing?
Thread breakage can result from various factors, including improper tension, using old or low-quality thread, or incorrect needle size. Re-thread the machine, ensure correct tension settings, use high-quality thread, and make sure the needle matches the fabric type and thickness.
4. How can I prevent fabric from puckering while sewing?
Puckering can occur due to excessive tension, incorrect stitch length, or using the wrong needle type. Adjust the tension to a balanced setting, choose an appropriate stitch length, and make sure you’re using the correct needle for the fabric you’re working with.
5. Why is the fabric not feeding smoothly under the presser foot?
If the fabric isn’t feeding properly, check the presser foot pressure and make sure it’s not too tight. Ensure the fabric is properly guided and avoid pulling it forcefully, as this can lead to feeding issues. Clean the feed dog area from lint and debris for smooth fabric movement.
Conclusion
When encountering problems with your SINGER S0100 sewing machine, remember that the user manual is a valuable resource for troubleshooting and maintenance. Additionally, if issues persist, don’t hesitate to contact customer service or visit a service center for professional assistance and guidance.