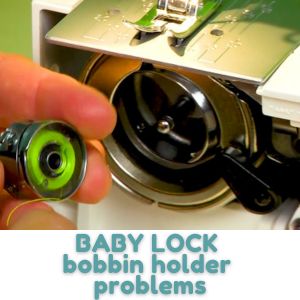
Solving Problems with BABY LOCK Sewing Machine Bobbin Holder
Having trouble with your BABY LOCK sewing machine bobbin holder? You’re not alone. Many people have experienced problems with their BABY LOCK sewing machine bobbin holder, from difficulty threading the bobbin to the bobbin holder not spinning properly. Fortunately, there are a few simple steps you can take to troubleshoot and fix the problem. In this article, we’ll discuss the common issues associated with BABY LOCK sewing machine bobbin holders and how to resolve them.
Common Causes of Baby Lock Sewing Machine Bobbin Holder Problems
- Improper threading of the bobbin
- Incorrect tension settings
- Not using the correct bobbin type for a Baby Lock machine
- Not winding the bobbin correctly
- Not using the correct needle size
- Not using the correct thread type
- Not cleaning the bobbin holder regularly
- Not replacing the bobbin holder when worn
- Not using the correct presser foot
- Not using the correct stitch length or width
Troubleshooting BABY LOCK Sewing Machine Bobbin Holder Problems
This section will provide an overview of common bobbin holder problems that can occur with BABY LOCK sewing machines, as well as how to troubleshoot and resolve them. We will discuss issues such as bobbin holder jamming, bobbin holder not spinning, and bobbin holder not winding correctly. We will also provide tips on how to properly maintain and care for your bobbin holder to ensure it works properly.
Improper Threading of the Bobbin on a BABY LOCK Sewing Machine
Threading the bobbin on a BABY LOCK sewing machine is an important step in the sewing process. If the bobbin is not threaded properly, it can cause a variety of problems, such as skipped stitches, thread tangles, and uneven tension. Fortunately, it is easy to fix an improperly threaded bobbin with a few simple steps.
Examples of Improper Threading
There are several ways that the bobbin can be improperly threaded. Some of the most common examples include:
- Threading the bobbin incorrectly through the tension disk.
- Threading the bobbin incorrectly through the bobbin case.
- Not winding the bobbin correctly.
- Not securing the bobbin thread correctly.
Step-by-Step Instructions for Fixing an Improperly Threaded Bobbin on a BABY LOCK Sewing Machine
Follow these steps to fix an improperly threaded bobbin on a BABY LOCK sewing machine:
- Remove the bobbin from the bobbin case.
- Check the threading of the bobbin. Make sure that the thread is correctly threaded through the tension disk and the bobbin case.
- If the thread is not correctly threaded, re-thread the bobbin.
- Wind the bobbin correctly. Make sure that the thread is wound evenly and securely.
- Secure the bobbin thread. Make sure that the thread is securely tucked into the bobbin case.
Incorrect Tension Settings on a Baby Lock Sewing Machine
Having the correct tension settings on your Baby Lock sewing machine is essential for achieving the best results when sewing. If the tension settings are incorrect, it can cause problems such as skipped stitches, uneven stitches, and puckering of the fabric. Fortunately, it is relatively easy to adjust the tension settings on a Baby Lock sewing machine.
Examples of Incorrect Tension Settings
- Skipped stitches
- Uneven stitches
- Puckering of the fabric
- Loose stitches
- Tight stitches
Step-by-Step Instructions for Adjusting Tension Settings on a Baby Lock Sewing Machine
- Turn the power switch off and unplug the machine.
- Locate the tension control dial on the top of the machine. It is usually located near the needle.
- Turn the tension control dial to the left to loosen the tension, or to the right to tighten the tension.
- Thread the machine with the same thread you will be using for your project.
- Test the tension settings by sewing a few stitches on a scrap piece of fabric.
- If the stitches are too loose, turn the tension control dial to the right to tighten the tension. If the stitches are too tight, turn the tension control dial to the left to loosen the tension.
- Continue to adjust the tension control dial until the stitches are even and the fabric is not puckering.
- Once the tension settings are correct, you can begin sewing your project
Not Using the Correct Bobbin Type on a Baby Lock Sewing Machine
Using the wrong bobbin type on a Baby Lock sewing machine can cause a variety of problems, including tension issues, skipped stitches, and thread breakage. It is important to use the correct bobbin type for your machine to ensure that your sewing projects turn out as expected.
Examples of Bobbin Types
The most common bobbin types for Baby Lock sewing machines are Class 15, Class 66, and L-style. Class 15 bobbins are the most common type and are used in most Baby Lock machines. Class 66 bobbins are slightly larger than Class 15 bobbins and are used in some Baby Lock machines. L-style bobbins are used in some Baby Lock machines that have a top-loading bobbin case.
Step-by-Step Instructions for Identifying the Correct Bobbin Type
- Check the manual for your Baby Lock sewing machine. The manual should indicate the type of bobbin that is compatible with your machine.
- If you do not have the manual, you can look up the model number of your machine online. The model number should indicate the type of bobbin that is compatible with your machine.
- If you are still unsure, you can take the bobbin case out of your machine and compare it to the bobbins available at your local sewing store. The bobbin case should indicate the type of bobbin that is compatible with your machine.
Step-by-Step Instructions for Replacing the Bobbin
Remove the bobbin case from the machine. To do this, you will need to open the bobbin cover and remove the bobbin case.
Not Winding the Bobbin Correctly
Not winding the bobbin correctly is a common issue when using a sewing machine. It can cause threading problems, tension issues, and even breakage of the thread. Fortunately, it is an easy problem to fix with the right instructions.
Examples of Not Winding the Bobbin Correctly
- The bobbin is not wound evenly.
- The bobbin is wound too tightly.
- The bobbin is wound too loosely.
- The bobbin is wound with the wrong type of thread.
Step-by-Step Instructions for Winding the Bobbin on a BABY LOCK Sewing Machine
- Raise the presser foot.
- Remove the bobbin from the bobbin case.
- Place the bobbin on the bobbin winder spindle.
- Pull the thread through the bobbin winder tension disc.
- Press the bobbin winder lever to the right.
- Press the foot controller to start winding the bobbin.
- When the bobbin is full, press the bobbin winder lever to the left.
- Cut the thread and remove the bobbin from the bobbin winder spindle.
- Place the bobbin in the bobbin case.
- Lower the presser foot.
By following these steps, you can easily wind the bobbin correctly on your BABY LOCK sewing machine.
Not Using the Correct Needle Size on a Baby Lock Sewing Machine
Using the wrong needle size on a Baby Lock sewing machine can cause a variety of problems, from skipped stitches to broken needles. It is important to use the correct needle size for the fabric and thread you are using. Here is a guide to help you select the right needle size for your Baby Lock sewing machine.
Examples of Needle Sizes
Needles come in a variety of sizes, ranging from 8/60 to 18/110. The first number is the European size, and the second number is the American size. The higher the number, the thicker the needle.
- 8/60: This is the smallest needle size and is used for lightweight fabrics such as chiffon and organza.
- 11/80: This is a medium-sized needle and is used for fabrics such as cotton, linen, and silk.
- 14/90: This is a larger needle and is used for heavier fabrics such as denim and canvas.
- 18/110: This is the largest needle size and is used for very heavy fabrics such as upholstery fabric.
Step-by-Step Instructions for Changing the Needle Size on a Baby Lock Sewing Machine
Changing the needle size on a Baby Lock sewing machine is a simple process. Here are the steps to follow:
- Turn off the machine and unplug it from the power source.
- Loosen the needle clamp screw and remove the old needle.
- Insert the new needle into the needle clamp, making sure the flat side of the needle is facing the back of the
Not Using the Correct Thread Type with a BABY LOCK
Using the wrong thread type with a BABY LOCK sewing machine can cause a variety of problems, from skipped stitches to thread breakage. It is important to use the correct thread type for your machine to ensure that your sewing projects turn out as expected.
Examples of Thread Types
There are several different types of thread available for use with a BABY LOCK sewing machine. These include:
- Polyester thread
- Cotton thread
- Metallic thread
- Nylon thread
- Rayon thread
Step-by-Step Instructions for Fixing the Problem
If you are having problems with your BABY LOCK sewing machine due to using the wrong thread type, follow these steps to fix the problem:
- Check the manual for your BABY LOCK sewing machine to determine the correct thread type for your machine.
- Purchase the correct thread type for your machine.
- Thread the machine with the correct thread type.
- Test the machine to make sure it is working properly.
By following these steps, you should be able to fix the problem of not using the correct thread type with your BABY LOCK sewing machine.
Not Cleaning the Bobbin Holder Regularly
Not cleaning the bobbin holder regularly can cause a variety of problems with your sewing machine. It can cause the thread to become tangled, the fabric to bunch up, and the stitches to be uneven. It can also cause the machine to jam or break down. Fortunately, it is easy to clean the bobbin holder and keep your machine running smoothly.
Step-by-Step Instructions for Cleaning a BABY LOCK Bobbin Holder
- Unplug the machine from the power source.
- Remove the bobbin holder from the machine.
- Using a soft cloth, gently wipe away any lint or dust from the bobbin holder.
- Using a small brush, such as a toothbrush, gently brush away any lint or dust from the bobbin holder.
- Using a cotton swab, gently clean the bobbin holder.
- Replace the bobbin holder in the machine.
- Plug the machine back into the power source.
By following these steps, you can ensure that your BABY LOCK bobbin holder is clean and free of lint and dust. This will help keep your machine running smoothly and prevent any problems with your stitches.
Not Replacing the Bobbin Holder When Worn: A Guide for Baby Lock Sewing Machines
The bobbin holder is an essential part of any sewing machine, and it is important to replace it when it becomes worn. If you have a Baby Lock sewing machine, it is important to know how to replace the bobbin holder when it becomes worn. This guide will provide a detailed description, examples, and step-by-step instructions on how to replace the bobbin holder on a Baby Lock sewing machine.
What is a Bobbin Holder?
A bobbin holder is a small metal or plastic piece that holds the bobbin in place in the sewing machine. It is usually located in the lower part of the machine, near the needle. The bobbin holder is responsible for keeping the bobbin in place while the machine is in use, and it is important to replace it when it becomes worn.
Signs of a Worn Bobbin Holder
There are several signs that indicate a worn bobbin holder. These include:
- The bobbin holder is loose or wobbly.
- The bobbin holder is cracked or broken.
- The bobbin holder is not securely holding the bobbin in place.
- The bobbin holder is not spinning properly.
Replacing the Bobbin Holder on a Baby Lock Sewing Machine
Replacing the bobbin holder on a Baby Lock sewing machine is a relatively simple process. Here are the steps to follow:
- Unplug the machine from the power source.
- Remove the bobbin holder from the
Not Using the Correct Presser Foot with a Baby Lock Sewing Machine
Using the wrong presser foot on your Baby Lock sewing machine can cause a variety of problems, from uneven stitches to fabric bunching up. It is important to use the correct presser foot for the type of stitch you are trying to make. Here are some tips on how to fix this issue.
Examples of Incorrect Presser Foot Usage
- Using a straight stitch presser foot for a zigzag stitch.
- Using a zigzag presser foot for a buttonhole stitch.
- Using a buttonhole presser foot for a blind hem stitch.
Step-by-Step Instructions for Fixing the Issue
- Turn off the machine and unplug it from the power source.
- Remove the current presser foot from the machine.
- Check the manual or online resources to determine the correct presser foot for the type of stitch you are trying to make.
- Attach the correct presser foot to the machine.
- Plug the machine back in and turn it on.
- Test the stitch to make sure it is working correctly.
By following these steps, you can ensure that you are using the correct presser foot for your Baby Lock sewing machine and avoid any issues with your stitches.
Not Using the Correct Stitch Length or Width
Using the wrong stitch length or width can cause a variety of problems with your sewing project. It can cause uneven stitches, puckering, and even skipped stitches. Fortunately, it is easy to fix this issue with the right tools and techniques.
Examples of Incorrect Stitch Length or Width
- Using a stitch length that is too short or too long for the fabric.
- Using a stitch width that is too wide or too narrow for the fabric.
- Using a stitch length or width that is not appropriate for the type of fabric being sewn.
Step-by-Step Instructions for Fixing Incorrect Stitch Length or Width
- Set up your BABY LOCK sewing machine according to the instructions in the user manual.
- Select the stitch you want to use and adjust the stitch length and width settings to the appropriate settings for the fabric you are using.
- Test the stitch on a scrap piece of fabric to make sure it looks correct.
- If the stitch looks correct, proceed with your sewing project.
- If the stitch does not look correct, adjust the stitch length and width settings until the stitch looks correct.
By following these steps, you can easily fix any issues with incorrect stitch length or width on your BABY LOCK sewing machine.
Tips for Preventing BABY LOCK Sewing Machine Bobbin Holder Problems
Regular Maintenance
- Clean the bobbin holder regularly with a soft cloth and mild detergent.
- Check the bobbin holder for any signs of wear or damage.
- Replace any worn or damaged parts immediately.
- Lubricate the bobbin holder with a light machine oil.
Proper Use
- Always use the correct type of bobbin for your machine.
- Make sure the bobbin is properly inserted into the bobbin holder.
- Do not overfill the bobbin holder.
- Do not force the bobbin holder into the machine.
- Do not use the machine if the bobbin holder is damaged or worn.
Troubleshooting
If you experience any problems with your BABY LOCK sewing machine bobbin holder, the following tips may help:
- Check the bobbin holder for any signs of wear or damage.
- Make sure the bobbin is properly inserted into the bobbin holder.
- Check the tension of the bobbin holder.
- Check the tension of the thread.
- Check the tension of the needle.
- Check the tension of the fabric.
Conclusion
By following these tips, you can help prevent BABY LOCK sewing machine bob
8 Other Problems with Sewing Machine BABY LOCK
In addition to the problems already mentioned in this article, there are a few other issues that can arise with the BABY LOCK sewing machine.
- Breaking needles problems
- Sewing machine parts problems
- Bobbin winding problems
- Stitch problems
- Bobbin thread problems
- Bobbin tension problems
- Sewing Machine Keep Jamming
- Tension problems
FAQ
What is a bobbin holder?
A bobbin holder is a device that holds the bobbin in place while you sew. It is usually located on the side of the sewing machine and is used to keep the bobbin in place while you sew.
What are some common problems with BABY LOCK bobbin holders?
- The bobbin holder may become loose or wobbly.
- The bobbin holder may become stuck or jammed.
- The bobbin holder may not be properly aligned.
- The bobbin holder may not be securely attached to the machine.
How can I fix a loose or wobbly bobbin holder?
If your bobbin holder is loose or wobbly, you can try tightening the screws that hold it in place. If the screws are already tight, you may need to replace the bobbin holder.
How can I fix a stuck or jammed bobbin holder?
If your bobbin holder is stuck or jammed, you can try gently tapping it with a hammer or other tool to loosen it. If this does not work, you may need to replace the bobbin holder.
How can I fix an improperly aligned bobbin holder?
If your bobbin holder is not properly aligned, you can try adjusting the screws that hold it in place. If the screws are already tight, you may need to replace the bobbin holder.
Conclusion
The
Baby Lock sewing machine bobbin holder is a great tool for any sewer, but it can be prone to problems. Fortunately, there are a few simple steps you can take to troubleshoot and fix any issues you may be having. First, make sure the bobbin holder is properly installed and that the bobbin is correctly inserted.
If the bobbin holder is not properly installed, it can cause the bobbin to jam or not spin correctly. Additionally, make sure the bobbin is not overfilled, as this can also cause problems. Finally, if the bobbin holder is still not working properly, it may need to be replaced.
By following these steps, you can easily troubleshoot and fix any issues you may be having with your Baby Lock sewing machine bobbin holder. With a little bit of patience and attention to detail, you can get your sewing machine back up and running in no time.