Brother PE535 Common Problems and Troubleshooting
In this comprehensive article, we aim to explore potential challenges that may arise while using the Brother PE535 sewing machine. Alongside these issues, we are committed to providing practical and effective solutions to address them.
Our main objective is to offer valuable assistance in troubleshooting any problems that might occur during your sewing projects with this particular machine.
The Brother PE535 sewing machine is renowned for its versatility and rich set of features, enabling you to unleash your creativity and achieve precise and stunning designs. However, like any advanced equipment, encountering occasional hiccups during its operation is natural.
We understand the frustration that such difficulties can bring, especially when you are deeply engrossed in your sewing projects. But, rest assured, we are here to fully support you throughout the troubleshooting process.
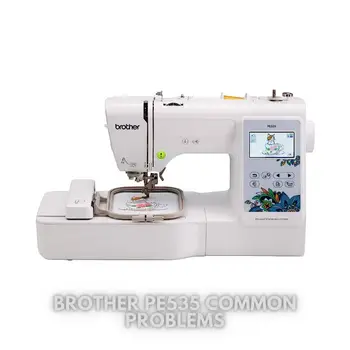
Brother PE535 Overview
Product Description
This embroidery machine offers multiple custom embroidery features that help make embroidery easy and fun. The PE535 features a 4” x 4” embroidery area, 80 built-in designs, 10 frame patterns, and 9 unique font styles (6 English, 3 Japanese) for lettering and monogramming. The PE535 embroidery machine also includes a built-in memory function that permits you to import designs from a USB memory stick via the USB port.
The large LCD color touchscreen permits you to see your designs in color prior to stitching them. A unique Embroidery Pattern Drag and Drop feature allows you to move and position your embroidery design on the display with just the touch of your finger. Also included with this embroidery machine are tutorial videos and an easy needle threading system to help you get started.
Product Details and Features
| Brand | Brother |
|---|---|
| Color | Large 3.2″ LCD Touchscreen, USB Port |
| Material | Plastic, Metal |
| Product Dimensions | 7.8″D x 16.5″W x 12″H |
| Item Weight | 14.99 Pounds |
| Power Source | Corded Electric |
| Is Electric | Yes |
| Item model number | PE535 |
| ASIN | B07CCKSX2X |
| Customer Reviews | 4.5 out of 5 stars (1,472 ratings) |
| Best Sellers Rank | #16,466 in Arts, Crafts & Sewing (See Top 100 in Arts, Crafts & Sewing) #4 in Embroidery Machines |
| Manufacturer | Brother |
| Country of Origin | Vietnam |
With a 4” x 4” embroidery area, 80 built-in designs, 10 frame patterns, and 9 unique font styles (6 English, 3 Japanese) for lettering and monogramming, the PE535 is a versatile embroidery companion. Importing designs from a USB memory stick via the USB port is made possible with the built-in memory function.
The large LCD color touchscreen allows you to visualize your designs in color before stitching, and the Embroidery Pattern Drag and Drop feature makes positioning designs easy with just the touch of your finger. Tutorial videos and an easy needle threading system are included to help you get started on your embroidery projects.
With the Brother PE535, adding new embellishments to clothing, personalizing belongings with custom designs and lettering, or creating custom gifts for friends and family becomes a breeze. The package also includes an instructional DVD, a bilingual user manual, a 25-year limited warranty, and technical support for the life of the product.
Causes of Common Problems with the Brother PE535
This section will address possible problems and their solutions related to the Brother PE535 embroidery machine.
Common Problems and Troubleshooting for Brother PE535
1. Thread Breakage – Needle Thread Breaking During Embroidery
Description: One of the common issues with the Brother PE535 is the needle thread breaking while performing embroidery tasks. This can be frustrating and disrupt the embroidery process.
Cause of the problem: Thread breakage is often caused by improper tension settings, incorrect needle size, or using low-quality thread that is prone to snapping.
Troubleshooting: Follow these steps to resolve the thread breakage issue:
- Check the tension settings on the machine. Adjust the tension if needed and ensure that the thread flows smoothly without being too loose or too tight.
- Use the appropriate needle size for the type of fabric being used. A needle that is too small or too large for the fabric can lead to thread breakage.
- Ensure that high-quality embroidery thread is being used. Cheap or old thread may be more prone to breakage.
- Inspect the needle for any burrs or damage and replace it if necessary.
- Re-thread the machine, making sure the thread is properly seated in the tension discs and the needle eye.
2. Bobbin Thread Tension Issues – Uneven Stitches on the Underside of Embroidery
Description: Uneven or loose stitches on the underside of embroidery designs are a common issue with the Brother PE535.
Cause of the problem: The bobbin thread tension may not be properly adjusted, leading to inconsistent stitches on the backside of the embroidery.
Troubleshooting: Follow these steps to address bobbin thread tension issues:
- Ensure that the bobbin is wound correctly and inserted into the bobbin case smoothly.
- Check the bobbin tension by pulling the thread through the bobbin case. It should offer some resistance, but the thread should still come out with a gentle pull.
- If the tension is too loose, adjust the small screw on the bobbin case slightly clockwise. If it’s too tight, adjust it slightly counterclockwise.
- Test the tension adjustment by stitching on a piece of scrap fabric until the stitches on both sides look balanced.
3. Embroidery Design Misalignment – Design Not Stitching in the Intended Position
Description: Some users may face issues with their embroidery design not stitching in the intended position on the fabric, leading to misalignment.
Cause of the problem: Misalignment is often caused by incorrect design placement or an issue with the calibration of the embroidery machine.
Troubleshooting: Follow these steps to fix the embroidery design misalignment:
- Ensure that the fabric is properly hooped and securely placed in the machine before starting the embroidery process.
- Check the design placement on the machine’s LCD touchscreen to ensure it is correctly positioned before stitching.
- If the design is misaligned, reposition it using the Embroidery Pattern Drag and Drop feature on the touchscreen.
- Calibrate the machine to ensure it accurately stitches the design in the intended location. Refer to the user manual for calibration instructions.
4. Thread Nesting – Buildup of Excess Thread Underneath Embroidery
Description: Thread nesting, also known as thread buildup, occurs when excess thread accumulates underneath the embroidery, resulting in messy and tangled stitches.
Cause of the problem: Thread nesting is usually caused by incorrect threading, bobbin issues, or using low-quality thread.
Troubleshooting: Follow these steps to address thread nesting:
- Check the threading path of the machine and ensure that the thread is passing through all the correct guides and tension discs.
- Clean the bobbin case area and make sure there are no thread tangles or debris.
- Use high-quality embroidery thread and avoid using old or cheap thread that may contribute to nesting.
- Adjust the tension settings if necessary to ensure the thread flows smoothly without creating tangles.
5. Skipped Stitches – Embroidery Designs with Missing Stitches
Description: Some users may encounter issues where the embroidery machine skips stitches, resulting in incomplete designs.
Cause of the problem: Skipped stitches can be caused by a few factors, including incorrect needle size, dull needles, or issues with the fabric tension.
Troubleshooting: Follow these steps to address skipped stitches:
- Ensure that the correct needle size and type are being used for the chosen fabric.
- Check the needle for any signs of dullness or damage, and replace it with a new needle if necessary.
- Re-thread the machine and ensure that the thread is properly seated in the tension discs and the needle eye.
- Verify that the fabric is securely hooped and there is enough tension to prevent fabric shifting during embroidery.
6. Embroidery Machine Freezing – Unresponsive Touchscreen
Description: Some users may experience the embroidery machine freezing, with the touchscreen becoming unresponsive to touch commands.
Cause of the problem: This issue can occur due to software glitches or memory overload.
Troubleshooting: Follow these steps to resolve the freezing issue:
- Turn off the machine and unplug it from the power source for a few minutes, then restart it.
- If the problem persists, update the machine’s firmware to the latest version.
- Check the embroidery design’s complexity and reduce it if it’s too intricate to avoid overloading the memory.
- Perform a factory reset on the machine to clear any software issues.
7. Bobbin Winding Problems – Bobbin Not Winding Properly
Description: Some users may encounter issues with the bobbin not winding properly during the winding process.
Cause of the problem: Bobbin winding problems can be caused by incorrect bobbin placement or tension issues.
Troubleshooting: Follow these steps to address bobbin winding problems:
- Ensure that the bobbin is placed correctly on the winding spindle and that the thread is threaded through the correct guides.
- Check the bobbin tension, adjusting the small screw on the bobbin case if needed.
- Make sure the bobbin winder is engaged properly before starting the winding process.
- If the problem persists, try using a different bobbin and thread to see if it resolves the issue.
8. Thread Jamming in the Bobbin Area – Unable to Sew Smoothly
Description: Thread jamming in the bobbin area is a common issue that can disrupt smooth sewing and embroidery.
Cause of the problem: Thread jamming can be caused by lint buildup, improper threading, or issues with the bobbin case.
Troubleshooting: Follow these steps to resolve thread jamming issues:
- Clean the bobbin case area thoroughly to remove any lint or debris that may be causing the jam.
- Re-thread the machine, ensuring that the thread is properly seated in the tension discs and the bobbin is correctly wound and inserted.
- Check the bobbin case for any signs of damage or wear, and replace it if necessary.
- Adjust the tension settings if needed to prevent the thread from getting caught in the bobbin area.
9. Embroidery Design Not Displaying Properly on Screen
Description: Some users may encounter issues with the embroidery design not displaying correctly on the machine’s LCD touchscreen.
Cause of the problem: This issue can be caused by design file compatibility or a problem with the machine’s software.
Troubleshooting: Follow these steps to address display issues with embroidery designs:
- Ensure that the design file format is compatible with the Brother PE535. Convert the design to a compatible format if necessary.
- Check for any updates or patches for the machine’s software and install them to resolve any display-related bugs.
- Test the design on a different embroidery machine or computer to see if the issue persists, which can help determine if the problem is with the design file or the machine.
10. Hoop Misalignment – Design Not Centered in the Hoop
Description: Some users may face issues with the embroidery design not being centered correctly within the hoop, leading to misalignment.
Cause of the problem: Hoop misalignment can occur due to incorrect hoop placement or issues with the machine’s positioning system.
Troubleshooting: Follow these steps to address hoop misalignment issues:
- Double-check that the hoop is correctly placed and securely attached to the embroidery arm before starting the stitching process.
- Use the machine’s positioning features, if available, to align the design correctly within the hoop.
- Ensure that the fabric is properly taut and centered within the hoop to avoid any shifting during embroidery.
- Calibrate the machine’s positioning system, following the instructions in the user manual, to ensure accurate placement of the design.
11. Thread Looping on Top of Fabric – Loose or Puckered Stitches
Description: Some users may notice the thread looping on top of the fabric, resulting in loose or puckered stitches in the embroidery design.
Cause of the problem: This issue can be caused by incorrect tension settings, improper hooping, or using the wrong stabilizer for the fabric.
Troubleshooting: Follow these steps to address thread looping issues:
- Check the tension settings and adjust them as needed to ensure the thread flows smoothly without creating loops.
- Ensure the fabric is properly hooped and stabilized to prevent shifting during embroidery.
- Use the appropriate stabilizer for the type of fabric being used to support the stitches properly.
- Verify that the needle is not dull or damaged, as a damaged needle can cause thread looping.
12. Embroidery Design Stitching in the Wrong Color
Description: Some users may encounter issues with the embroidery machine stitching the design in the wrong thread color.
Cause of the problem: This problem can arise from incorrect color mapping in the design file or a software glitch.
Troubleshooting: Follow these steps to resolve color mapping issues:
- Check the color sequence in the design file to ensure it is correctly mapped to the machine’s thread colors.
- If the colors are still off, try converting the design to a different file format and re-importing it into the machine.
- Update the machine’s software to the latest version to fix any color-related bugs.
13. Uneven Embroidery – Design Not Stitching Smoothly
Description: Uneven stitching or gaps in the embroidery design can be a common issue faced by some users.
Cause of the problem: Uneven embroidery can result from fabric tension issues, incorrect hooping, or a damaged embroidery foot.
Troubleshooting: Follow these steps to address uneven embroidery:
- Check the fabric tension and make sure it is taut and secure within the hoop to prevent shifting during embroidery.
- Verify that the hoop is correctly placed and aligned with the machine’s embroidery arm.
- Inspect the embroidery foot for any signs of damage or wear, and replace it if necessary.
- Calibrate the machine to ensure accurate and smooth stitching across the entire design.
14. Thread Fraying or Breaking – Thread Not Holding During Embroidery
Description: Thread fraying or breaking during embroidery can cause interruptions and incomplete designs.
Cause of the problem: This issue can be caused by using low-quality thread, incorrect needle size, or excessive tension.
Troubleshooting: Follow these steps to address thread fraying or breaking:
- Use high-quality embroidery thread that is designed to withstand the stresses of embroidery.
- Ensure that the needle size is appropriate for the fabric and design being used.
- Adjust the tension settings to ensure the thread flows smoothly without excessive tension.
- Check for any obstructions or rough areas on the thread path and smooth them out to prevent thread fraying.
15. Incorrect Design Scaling – Design Size Not as Expected
Description: Some users may encounter issues with the embroidery design not scaling correctly as per their desired size.
Cause of the problem: Incorrect design scaling can be caused by incorrect settings or a software glitch.
Troubleshooting: Follow these steps to resolve design scaling issues:
- Double-check the design settings on the machine to ensure the scaling is set to the desired size.
- If the scaling is still off, try re-importing the design file and adjusting the settings again.
- Update the machine’s software to the latest version to resolve any scaling-related bugs.
16. Fabric Puckering – Wrinkling or Gathering of Fabric
Description: Fabric puckering occurs when the fabric wrinkles or gathers during embroidery, resulting in an undesirable finish.
Cause of the problem: Puckering can be caused by excessive tension, incorrect stabilizer choice, or using the wrong needle for the fabric.
Troubleshooting: Follow these steps to address fabric puckering:
- Adjust the tension settings to reduce the tightness of the stitches and prevent puckering.
- Use the appropriate stabilizer for the fabric to provide the necessary support and prevent distortion.
- Check the needle size and type to ensure it is suitable for the fabric being used.
- Consider hooping the fabric with additional care to maintain even tension during embroidery.
17. Thread Nesting on the Underside of Fabric – Bobbin Thread Showing on Top
Description: Thread nesting on the underside of the fabric is when the bobbin thread shows on the top side of the embroidery design, marring the final appearance.
Cause of the problem: This issue can occur due to improper bobbin winding, incorrect bobbin tension, or threading errors.
Troubleshooting: Follow these steps to resolve thread nesting issues:
- Ensure that the bobbin is correctly wound and inserted into the bobbin case without any loose threads.
- Check the bobbin tension and adjust it if necessary to avoid excessive bobbin thread showing on the top side.
- Re-thread the machine, ensuring the thread is correctly seated in the tension discs and the bobbin case.
- Try using a different bobbin to see if the problem persists, as some bobbins may not be compatible or wound properly.
18. Skipped Embroidery Stitches – Gaps in the Design
Description: Skipped stitches are when the embroidery machine skips certain stitches, leaving gaps in the design and affecting the overall appearance.
Cause of the problem: Skipped stitches can be caused by issues with the needle, incorrect threading, or problems with the design file.
Troubleshooting: Follow these steps to address skipped embroidery stitches:
- Check the needle for any damage or dullness, and replace it with a new needle if needed.
- Re-thread the machine, ensuring that the thread is properly threaded through all the guides and tension discs.
- Examine the design file for any issues, such as gaps or overlapping elements, that may be causing the machine to skip stitches.
- Make sure the fabric is hooped securely and there is no excessive fabric movement during embroidery.
19. Embroidery Machine Jamming – Unable to Move the Embroidery Arm
Description: Some users may experience the embroidery machine jamming, preventing the smooth movement of the embroidery arm.
Cause of the problem: Jamming can occur due to thread tangles, debris in the machine, or mechanical issues.
Troubleshooting: Follow these steps to address embroidery machine jamming:
- Turn off the machine and unplug it from the power source to avoid any potential damage.
- Carefully remove the hoop and check for any thread tangles or debris in the machine. Clear them out if present.
- Inspect the machine’s moving parts for any signs of obstruction or mechanical issues, and address them accordingly.
- Restart the machine and test its movement without the fabric or hoop to see if the jamming is resolved.
20. Embroidery Design Not Registering Correctly – Misaligned Layers
Description: Misaligned layers in the embroidery design can cause parts of the design to overlap incorrectly, resulting in an imperfect finish.
Cause of the problem: This issue can be caused by design misplacement, incorrect design merging, or issues with the software.
Troubleshooting: Follow these steps to resolve misaligned embroidery design issues:
- Ensure that the individual design elements are properly aligned and positioned before merging them into one design.
- Double-check the design placement on the machine’s touchscreen before starting the embroidery process.
- If using multiple design files, verify that they are compatible and properly aligned before merging them together.
- Update the machine’s software to the latest version to fix any design-related bugs.
21. Embroidery Machine Making Unusual Noises
Description: Some users may notice unusual noises coming from the embroidery machine during operation.
Cause of the problem: Unusual noises can be caused by loose parts, debris in the machine, or mechanical issues.
Troubleshooting: Follow these steps to address unusual noises:
- Turn off the machine and unplug it from the power source to avoid any potential safety hazards.
- Inspect the machine’s interior for any loose screws or parts and tighten them if needed.
- Clear any debris or lint that may be causing the noise.
- If the noise persists, seek professional assistance to diagnose and repair any mechanical issues.
22. Incorrect Color Matching – Embroidery Not Matching Design Preview
Description: Some users may find that the embroidery colors do not match the design preview shown on the machine’s screen.
Cause of the problem: Incorrect color matching can result from design file compatibility issues or machine settings.
Troubleshooting: Follow these steps to address color matching problems:
- Double-check the design file to ensure that it is compatible with the Brother PE535.
- If the colors are still off, try re-importing the design or converting it to a different file format.
- Adjust the machine’s color settings to see if there are any improvements.
- Test the design on a different machine or computer to verify if the issue is specific to the Brother PE535.
23. Embroidery Not Starting or Pausing Midway
Description: Some users may encounter issues with the embroidery not starting or pausing unexpectedly during stitching.
Cause of the problem: This issue can be caused by loose connections, insufficient memory, or software glitches.
Troubleshooting: Follow these steps to address embroidery startup and pausing issues:
- Check all the machine’s connections, including power and USB, to ensure they are secure and not causing any interruptions.
- Verify that there is enough available memory to complete the embroidery design. If not, consider using a smaller design or freeing up memory.
- Update the machine’s software to the latest version to resolve any pausing-related bugs.
- If the issue persists, try stitching the design in smaller sections or individual components to identify the problematic section.
24. Uneven Thread Tension – Unequal Stitch Appearance
Description: Uneven thread tension can lead to differences in stitch appearance, making the embroidery design look irregular.
Cause of the problem: Uneven thread tension can be caused by incorrect threading, dirty tension discs, or damaged thread guides.
Troubleshooting: Follow these steps to address uneven thread tension:
- Re-thread the machine, making sure the thread is properly seated in the tension discs and the needle eye.
- Clean the tension discs and thread guides to remove any lint or debris that may be affecting the tension.
- Adjust the tension settings, making incremental changes until you achieve a balanced stitch appearance.
- Test the tension on a piece of scrap fabric before starting on your actual embroidery project.
25. Limited Design Compatibility – Unable to Load Specific Designs
Description: Some users may face issues with certain design files not being compatible or loading on the Brother PE535.
Cause of the problem: Limited design compatibility can occur due to file format issues or outdated machine software.
Troubleshooting: Follow these steps to address design compatibility problems:
- Check the design file format to ensure it is compatible with the Brother PE535. Convert the design to a supported format if necessary.
- Update the machine’s software to the latest version to support newer design file formats.
- If the problem persists, try accessing the design files from a different source or computer to see if the issue is specific to a particular source.
Brother PE535 Sewing Machine User Reviews
In this section, we’ll explore user reviews of the Brother PE535 sewing machine available on the Walmart website. We’ll summarize both positive and negative feedback from users to provide an overview of the general customer experience with this embroidery machine.
Positive Reviews from Brother PE535 Sewing Machine Users
Many users were satisfied with the following parameters associated with their positive experience:
- Easy Setup and User-Friendly Interface: Numerous users appreciated the straightforward setup process, finding it easy to get started with the machine in no time. The user-friendly touchscreen interface was also praised for its ease of navigation and clear graphics.
- Impressive Embroidery Results: Several users were pleased with the embroidery quality, mentioning that the machine produced beautiful and intricate designs with smooth stitching.
- Great for Beginners: Some first-time embroidery machine users expressed their satisfaction with the Brother PE535, as it offered a relatively gentle learning curve, and they quickly grasped the basics of embroidery.
- Versatile Design Options: Users found the machine’s extensive built-in designs and fonts to be diverse and suitable for various embroidery projects, enabling them to personalize and customize their creations.
- Good Value for the Price: Many customers considered the Brother PE535 to be a valuable investment, offering impressive features and embroidery capabilities at an affordable price point.
Negative User Reviews of the Brother PE535 Sewing Machine
Some users were not satisfied with the following problems associated with their negative experience:
- Machine Malfunctions and Technical Issues: Several users reported issues with the machine, such as jamming, broken needles, and tangled threads, leading to disruptions in the embroidery process and frustrating experiences.
- Missing or Defective Parts: A few customers received the machine with missing or defective parts, such as power cords, spool caps, and embroidery bobbin screwdrivers, impacting their ability to use the machine effectively.
- Quality Control and Durability Concerns: Some users expressed disappointment with the overall quality and durability of the machine, encountering problems shortly after purchase, leading to doubts about its long-term performance.
- Limited Functionality for Sewing: A couple of customers mistakenly expected the machine to be capable of sewing in addition to embroidery, leading to disappointment when they realized it was solely an embroidery machine.
- Customer Support and Return Experience: A few users faced challenges in dealing with customer support or experienced difficulties during the return process, adding frustration to their overall experience.
It’s important to note that while some users encountered issues, the majority of customers were satisfied with their Brother PE535 sewing machine, appreciating its ease of use, embroidery quality, and value for money.
Note: All information about user reviews is taken from the Walmart website.
Brother PE535 Common Problems
Brother ST371HD Common Problems
Brother CP60X Common Problems
Brother PE535 Sewing Machine Manual
The operating instructions for the Brother PE535 sewing machine can be found on the manufacturer’s website. To access the manual, visit the official Brother website and navigate to the support or product page for the Brother PE535 model.
From there, you should be able to download the user manual in PDF format, which provides detailed guidance on setting up, using, and troubleshooting the sewing machine.
Brother PE535 Frequently Asked Questions
1. How do I import embroidery designs to the Brother PE535?
To import embroidery designs to the Brother PE535, you can use a USB memory stick. First, save the embroidery design files in the appropriate format (e.g., .PES) on the USB memory stick. Then, insert the memory stick into the USB port on the machine. Navigate to the embroidery design menu on the touchscreen, select “Import,” and choose the design you want to use from the memory stick.
2. Can I adjust the embroidery speed on the Brother PE535?
Yes, the Brother PE535 allows you to adjust the embroidery speed. While in the embroidery mode, press the “Settings” button on the touchscreen, and then choose the speed option. You can select the desired speed setting based on your preference or the complexity of the design.
3. Why is my embroidery design not aligning correctly on the fabric?
Incorrect design alignment can occur due to several reasons. First, ensure that you have hooped the fabric securely and evenly to maintain proper tension. Check the design placement on the touchscreen to ensure it is aligned correctly before starting the embroidery process. If the issue persists, refer to the user manual for guidance on adjusting design placement settings.
4. How do I troubleshoot thread breakage during embroidery?
If you experience thread breakage during embroidery, follow these steps to troubleshoot the issue: First, check that the thread is correctly threaded through all the guides and tension discs. Make sure the thread spool is not catching or getting stuck during the embroidery process. Additionally, ensure that the needle is sharp and the correct size for the fabric being used. If the problem persists, consider using high-quality embroidery thread and rethreading the machine.
5. Can I use third-party embroidery designs with the Brother PE535?
Yes, you can use third-party embroidery designs with the Brother PE535 as long as they are in a compatible format (e.g., .PES). Before using a third-party design, make sure it is suitable for your machine and fabric. Always test the design on a scrap fabric before stitching it on your project to ensure compatibility and avoid potential issues.
Conclusion
For any problems or issues with your Brother PE535 sewing machine, it’s essential to refer to the user manual provided by the manufacturer. The manual offers comprehensive guidance on setup, usage, and troubleshooting.
If you encounter any difficulties that you cannot resolve on your own, don’t hesitate to seek assistance from the Brother customer service or a certified service center.
They can provide personalized support and solutions to ensure you have a smooth and enjoyable embroidery experience with your Brother PE535.