Brother PQ1500SL Common Problems and Troubleshooting
In this comprehensive article, we will delve into the potential issues that may arise while using the Brother PQ1500SL quilting and sewing machine, and offer practical solutions to overcome them. Our primary objective is to assist you in troubleshooting any challenges that might occur during your sewing projects with this versatile machine, ensuring a smooth and enjoyable sewing experience.
As we explore the various aspects of the Brother PQ1500SL, we’ll address common concerns that users might encounter, such as bobbin-related problems, tension issues, needle threading difficulties, or any irregular stitches that might affect the quality of your work. By identifying these potential obstacles and providing step-by-step guidance, we aim to empower you with the knowledge and confidence to resolve these issues independently.
Brother PQ1500SL Overview
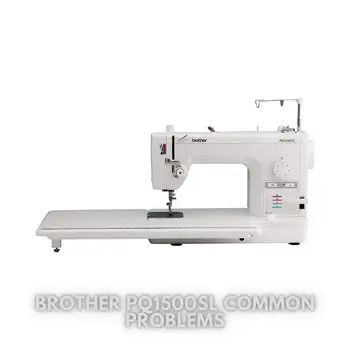
Product Description: The Brother PQ1500SL quilting and sewing machine is a high-speed straight stitching machine that allows for lightning-fast sewing at a maximum speed of 1,500 stitches per minute. It features a push-button automatic thread trimmer for time-saving convenience and a built-in needle threader for easy threading.
The machine comes equipped with an adjustable pin feed mechanism that allows you to switch between using feed dogs and a single pin for precise fabric handling. This is especially useful for quilting and sewing delicate fabrics without leaving feed dog marks.
The PQ1500SL also offers four additional feed dog settings for maximum fabric control, along with a knee lifter and bed extension table specifically designed for quilting needs. The foot pressure is adjustable for better sewing results, and the machine includes an automatic thread cutter with a fast needle threader.
Product Details and Features:
| Stitch Length (mm) | 5 |
| Stitch Width (mm) | 7 |
| UL/CSA Listed Voltage | 110v |
| Lighting Type | LED |
| Style | PQ1500SL w/ LCD Light |
| Brand | Brother |
| Color | Wide Table, 7 Included Sewing Feet |
| Material | Metal |
| Product Dimensions | 7.9″D x 12.6″W x 19.3″H |
| Item Weight | 29.76 Pounds |
| Power Source | Corded Electric |
| Is Electric | Yes |
The Brother PQ1500SL quilting and sewing machine also features an adjustable pin feed mechanism that allows you to exchange the use of the feed dogs for a single pin that cleanly extends from beneath the machine. This moves all layers of your quilt together or moves a delicate velvet without leaving feed dog marks in the nap. Four additional feed dog settings allow for maximum fabric control, while a knee lifter and bed extension table are added for quilting.
The Brother PQ1500SL also features a full range foot pressure adjustment and an automatic thread cutter with a fast. Needle threader – which is a huge time-saving convenience. This machine is additionally backed by a 25-year limited warranty with support for the life of the product.
Causes of Common Problems with the Brother PQ1500SL
This section will address possible problems and their solutions related to the Brother PQ1500SL sewing machine.
Common Problems and Troubleshooting with Brother PQ1500SL
1. Thread Breakage – Needle Misalignment
Description: One common issue with the Brother PQ1500SL is thread breakage during sewing, which can be frustrating and interrupt your work.
Cause of the Problem: Thread breakage often occurs when the needle is misaligned or bent, causing it to hit the bobbin case or other machine parts.
Troubleshooting:
- Turn off the machine and unplug it for safety.
- Remove the needle from the machine and inspect it for any bending or damage.
- If the needle is damaged, replace it with a new one, making sure to insert it correctly and tighten the screw securely.
- Check the bobbin case for any sharp edges or burrs that could be causing the thread to break. If necessary, replace the bobbin case.
- Thread the machine correctly, following the threading path as per the user manual.
- Test the machine with a scrap piece of fabric to ensure the thread no longer breaks. Adjust the needle alignment if needed.
2. Uneven Stitching – Feed Dog Issues
Description: Another common problem is uneven stitching, where the stitches may appear longer or shorter in some areas.
Cause of the Problem: Uneven stitching is often caused by issues with the feed dogs, which may not be moving the fabric smoothly or evenly.
Troubleshooting:
- Check the feed dogs for any dirt, lint, or debris that could be obstructing their movement. Clean the feed dogs thoroughly.
- Ensure that the fabric is positioned and guided properly while sewing to prevent any pulling or pushing that could affect stitch length.
- Try adjusting the foot pressure setting to see if it improves the fabric feeding. Experiment with different settings to find the most suitable one.
- If the issue persists, you may need to have the feed dogs checked and adjusted by a professional technician.
3. Skipped Stitches – Dull Needle
Description: Skipped stitches are when the machine fails to form stitches at regular intervals, leaving gaps in the seam.
Cause of the Problem: One common cause of skipped stitches is using a dull or damaged needle that cannot penetrate the fabric properly.
Troubleshooting:
- Replace the needle with a new, sharp needle that is appropriate for the fabric you are sewing.
- Ensure that the needle is inserted correctly and securely in the needle clamp.
- Check the thread tension to make sure it is not too tight, as excessive tension can also lead to skipped stitches.
- Re-thread the machine, following the correct threading path and ensuring the thread is properly seated in the tension discs.
- If the issue persists, try using a different thread that is suitable for your fabric and adjust the thread tension accordingly.
4. Bobbin Jamming – Incorrect Bobbin Placement
Description: Bobbin jamming occurs when the bobbin thread gets tangled or stuck, disrupting the smooth sewing process.
Cause of the Problem: One common cause of bobbin jamming is inserting the bobbin incorrectly or using the wrong type of bobbin.
Troubleshooting:
- Turn off the machine and unplug it for safety.
- Remove the bobbin and bobbin case from the machine.
- Check the bobbin to ensure it is the correct type for the Brother PQ1500SL and that it is wound evenly.
- Re-insert the bobbin into the bobbin case, following the correct threading direction as indicated in the user manual.
- Place the bobbin case back into the machine, making sure it clicks securely into place.
- Test the machine to see if the bobbin jamming issue is resolved.
5. Loud Noise – Mechanical Issue
Description: Experiencing loud and unusual noises during sewing can be indicative of a mechanical problem.
Cause of the Problem: Loud noises may be caused by loose parts, misaligned components, or internal mechanical issues.
Troubleshooting:
- Stop using the machine immediately if you hear any loud noises to prevent further damage.
- Turn off the machine and unplug it for safety.
- Inspect the exterior of the machine for any loose screws, bolts, or other visible issues.
- If you cannot identify any external problems, it is best to seek assistance from a qualified technician to diagnose and repair the internal mechanical issue.
6. Thread Bunching – Improper Thread Tension
Description: Thread bunching occurs when the upper and lower threads do not interlock properly, resulting in messy and tangled stitches.
Cause of the Problem: Incorrect thread tension, either too tight or too loose, is a common cause of thread bunching.
Troubleshooting:
- Check the thread tension settings and adjust them as needed. Refer to the user manual for guidance.
- Make sure the thread is correctly threaded through the tension discs and the machine’s thread guides.
- Try using a different thread, as some threads may be more prone to bunching than others.
- Ensure that the bobbin is wound evenly and inserted correctly into the bobbin case.
- Test the machine with scrap fabric to see if the thread bunching issue is resolved.
7. Needle Breakage – Wrong Needle Size
Description: Needles breaking frequently during sewing can be a frustrating and dangerous issue.
Cause of the Problem: Using the wrong needle size for the fabric thickness can cause excessive strain on the needle, leading to breakage.
Troubleshooting:
- Identify the correct needle size for the type of fabric you are sewing.
- Replace the current needle with the appropriate size and type.
- Make sure the needle is inserted correctly and securely.
- Check the fabric thickness and adjust the sewing speed accordingly to avoid putting excessive pressure on the needle.
- If the issue persists, inspect the needle plate and throat plate for any burrs or damage that could be causing needle breakage.
8. Fabric Puckering – Incorrect Presser Foot Pressure
Description: Fabric puckering happens when the fabric is gathered or wrinkled around the stitched area, affecting the overall appearance of the project.
Cause of the Problem: Incorrect presser foot pressure can lead to fabric puckering, as too much pressure can compress the fabric, while too little pressure may cause the fabric to move unevenly.
Troubleshooting:
- Adjust the presser foot pressure according to the fabric type and thickness. Refer to the user manual for instructions on adjusting the pressure.
- Use a suitable presser foot for the fabric, as some feet are designed to prevent puckering in specific materials.
- Ensure the feed dogs are clean and functioning properly, as they play a role in the fabric’s smooth movement during sewing.
- Test the sewing machine with scrap fabric to see if the fabric puckering issue is resolved.
9. Jammed Reverse Lever – Dust and Debris Buildup
Description: The reverse lever may become stuck or difficult to operate, hindering the backstitching function.
Cause of the Problem: Accumulation of dust, lint, or debris in and around the reverse lever can cause it to jam and become less responsive.
Troubleshooting:
- Turn off the machine and unplug it for safety.
- Inspect the reverse lever and surrounding area for any visible debris.
- Clean the reverse lever and its mechanism using a soft brush or compressed air to remove any accumulated dust or lint.
- Apply a small amount of sewing machine oil to the reverse lever mechanism to ensure smooth operation.
- Test the reverse lever to see if it moves freely without any sticking or jamming.
10. Uneven Thread Tension – Dirty Tension Discs
Description: Uneven thread tension can result in one thread being too loose or too tight compared to the other, affecting the overall stitch quality.
Cause of the Problem: Dust, lint, or debris buildup in the tension discs can interfere with the smooth functioning of the tension system.
Troubleshooting:
- Turn off the machine and unplug it for safety.
- Access the tension discs and carefully clean them using a soft brush or compressed air.
- Ensure that the thread is correctly seated between the tension discs and the thread guides.
- Check that the tension settings are appropriate for the type of fabric and thread being used.
- Test the machine with scrap fabric to see if the thread tension issue is resolved.
11. Bobbin Thread Not Catching – Bobbin Winding Issue
Description: The bobbin thread may not properly catch or loop with the upper thread during sewing, resulting in loose stitches or no stitches at all.
Cause of the Problem: One possible cause is incorrect bobbin winding, where the thread is not evenly wound on the bobbin.
Troubleshooting:
- Remove the bobbin and check if it is wound evenly and without any tangles.
- If necessary, rewind the bobbin, ensuring it is wound tightly and smoothly.
- Re-thread the bobbin into the bobbin case, following the correct threading direction as indicated in the user manual.
- Check the bobbin tension, making sure it is set correctly for smooth thread flow.
- Test the machine with scrap fabric to see if the bobbin thread catching issue is resolved.
12. Fabric Not Feeding – Feed Dog Issues
Description: The fabric may not move forward during sewing, causing uneven stitches or no stitches at all.
Cause of the Problem: Malfunctioning feed dogs or incorrect feed dog settings can prevent the fabric from advancing properly.
Troubleshooting:
- Turn off the machine and unplug it for safety.
- Inspect the feed dogs for any dirt, lint, or debris that could be obstructing their movement. Clean the feed dogs thoroughly.
- Ensure that the feed dog settings are appropriate for the type of fabric being used. Adjust the settings as needed.
- Check the presser foot pressure to make sure it is not too low, as this can also affect fabric feeding.
- If the issue persists, the feed dogs may need professional adjustment or repair.
13. Needle Hits the Bobbin Case – Incorrect Needle Size
Description: The needle may hit the bobbin case, causing damage to both the needle and the case.
Cause of the Problem: Using an incorrect needle size or type for the fabric thickness can lead to the needle hitting the bobbin case.
Troubleshooting:
- Stop using the machine immediately if you notice the needle hitting the bobbin case to prevent further damage.
- Turn off the machine and unplug it for safety.
- Identify the correct needle size and type for the fabric you are sewing.
- Replace the current needle with the appropriate size and type, ensuring it is inserted correctly and securely.
- Test the machine with scrap fabric to see if the needle hitting the bobbin case issue is resolved.
14. Thread Jam in Bobbin Area – Incorrect Bobbin Insertion
Description: The thread may get tangled or jammed in the bobbin area, affecting the smooth sewing process.
Cause of the Problem: Incorrect bobbin insertion or improperly wound bobbins can lead to thread jamming in the bobbin area.
Troubleshooting:
- Stop using the machine and unplug it if you notice a thread jam in the bobbin area.
- Remove the bobbin and bobbin case from the machine.
- Check the bobbin to ensure it is wound evenly and without any tangles or knots.
- Re-insert the bobbin into the bobbin case, following the correct threading direction as indicated in the user manual.
- Place the bobbin case back into the machine, making sure it clicks securely into place.
- Test the machine to see if the thread jamming issue is resolved.
15. Uneven Feed – Dirty Feed Dogs
Description: The fabric may feed unevenly, causing uneven stitching and difficulty in maintaining straight lines.
Cause of the Problem: Dirty or debris-filled feed dogs can interfere with the smooth movement of the fabric, leading to uneven feed.
Troubleshooting:
- Turn off the machine and unplug it for safety.
- Clean the feed dogs thoroughly, removing any dirt, lint, or debris that may be obstructing their movement.
- Check the presser foot pressure to ensure it is not too high, as excessive pressure can also affect fabric feeding.
- Make sure the fabric is guided evenly and smoothly while sewing to prevent any pulling or pushing that could affect feed consistency.
- Test the machine with scrap fabric to see if the uneven feed issue is resolved.
16. Thread Jam in Needle Plate – Fabric Snags
Description: The thread may get caught or jammed in the needle plate, resulting in fabric snags and potential damage to the fabric.
Cause of the Problem: Improper threading, using the wrong needle size, or sewing over pins can lead to thread jams in the needle plate.
Troubleshooting:
- Stop using the machine and unplug it if you notice thread jamming in the needle plate.
- Remove the needle plate and clean it thoroughly to remove any trapped threads or debris.
- Ensure that the machine is threaded correctly, following the proper threading path as per the user manual.
- Use the correct needle size and type for the fabric to prevent needle plate jams.
- Avoid sewing over pins, as they can cause thread jams and fabric snags.
- Test the machine with scrap fabric to see if the thread jam in the needle plate issue is resolved.
17. Uneven Bobbin Tension – Bobbin Case Adjustment
Description: Inconsistent bobbin tension can lead to stitches with loose or tight loops on the underside of the fabric.
Cause of the Problem: Improper bobbin case adjustment or debris in the bobbin case can result in uneven bobbin tension.
Troubleshooting:
- Remove the bobbin and bobbin case from the machine.
- Inspect the bobbin case for any dirt, lint, or debris that could be affecting the tension.
- Clean the bobbin case thoroughly, ensuring that it is free from any obstructions.
- Adjust the bobbin tension screw slightly, testing the tension with scrap fabric until it is even and balanced.
- Re-insert the bobbin into the bobbin case, making sure it is correctly threaded and seated securely.
- Test the machine with scrap fabric to see if the uneven bobbin tension issue is resolved.
18. Fabric Jam in Needle Plate – Incorrect Presser Foot
Description: The fabric may get stuck or jammed in the needle plate area, causing sewing difficulties and potential damage to the fabric.
Cause of the Problem: Using the wrong presser foot for the fabric type or thickness can lead to fabric jams in the needle plate.
Troubleshooting:
- Stop using the machine and unplug it if the fabric gets jammed in the needle plate.
- Remove the needle plate and carefully remove any trapped fabric.
- Inspect the presser foot to ensure it is suitable for the fabric you are using.
- Replace the current presser foot with the appropriate one for the fabric type and thickness.
- Test the machine with scrap fabric to see if the fabric jam in the needle plate issue is resolved.
19. Skipping Stitches – Incorrect Thread Type
Description: The machine may skip stitches, leaving gaps in the seam, compromising the strength and appearance of the sewing.
Cause of the Problem: Using the wrong type of thread, such as lightweight or poor-quality thread, can result in skipped stitches.
Troubleshooting:
- Ensure that you are using a high-quality thread suitable for the fabric you are sewing.
- Check that the thread is correctly threaded through the machine, passing through all thread guides and tension discs.
- Adjust the thread tension to ensure it is balanced and appropriate for the thread type and fabric.
- Test the machine with scrap fabric to see if the skipping stitches issue is resolved.
- If the problem persists, try using a different thread brand or type that is compatible with your sewing machine.
20. Needle Threader Malfunction – Cleaning and Adjustment
Description: The automatic needle threader may not function correctly, making it difficult to thread the needle efficiently.
Cause of the Problem: Dirt, lint, or misalignment of the needle threader mechanism can lead to its malfunction.
Troubleshooting:
- Turn off the machine and unplug it for safety.
- Inspect the needle threader for any dirt or lint buildup and clean it carefully using a soft brush or compressed air.
- Check the alignment of the needle threader and adjust it if necessary to ensure proper threading.
- Make sure the needle threader lever is in the correct position for threading.
- Test the machine with scrap fabric to see if the needle threader malfunction issue is resolved.
21. Machine Not Powering On – Power Source Issues
Description: The sewing machine may not power on, leaving it unresponsive to user commands.
Cause of the Problem: Power source problems, such as a disconnected power cord or a faulty electrical outlet, can prevent the machine from turning on.
Troubleshooting:
- Check that the power cord is securely plugged into both the machine and the electrical outlet.
- Try using a different electrical outlet to ensure the current outlet is functioning correctly.
- Inspect the power cord for any visible damage or fraying and replace it if necessary.
- Ensure that the sewing machine is compatible with the electrical voltage of your region.
- If the machine still does not power on, consult the user manual or contact customer support for further assistance.
22. Erratic Stitch Length – Feed Dog Issues
Description: The stitch length may vary or become erratic during sewing, affecting the overall quality of the stitches.
Cause of the Problem: Malfunctioning feed dogs or inconsistent feed dog settings can lead to irregular stitch length.
Troubleshooting:
- Turn off the machine and unplug it for safety.
- Check the feed dogs for any dirt, lint, or debris that could be obstructing their movement. Clean the feed dogs thoroughly.
- Ensure that the feed dog settings are consistent and appropriate for the fabric type and thickness.
- Verify that the fabric is guided smoothly and evenly during sewing to prevent any pulling or pushing that could affect stitch length.
- Test the machine with scrap fabric to see if the erratic stitch length issue is resolved.
23. Tangled Bobbin Thread – Incorrect Bobbin Winding
Description: The bobbin thread may tangle or form knots during sewing, causing interruptions and uneven stitches.
Cause of the Problem: Incorrect bobbin winding or improper bobbin insertion can lead to tangled bobbin thread.
Troubleshooting:
- Remove the bobbin and inspect it for any tangles or knots in the thread.
- If the bobbin thread is tangled, unwind it completely and rewind it evenly onto the bobbin.
- Re-insert the bobbin into the bobbin case, ensuring it is correctly threaded and seated securely.
- Check the bobbin tension, making sure it is set appropriately for smooth thread flow.
- Test the machine with scrap fabric to see if the tangled bobbin thread issue is resolved.
24. Jammed Handwheel – Obstructed Movement
Description: The handwheel may become stuck or difficult to turn, hindering the manual movement of the sewing machine.
Cause of the Problem: Dust, lint, or debris buildup inside the handwheel mechanism can cause it to jam.
Troubleshooting:
- Turn off the machine and unplug it for safety.
- Inspect the handwheel for any visible dirt, lint, or debris.
- Clean the handwheel thoroughly, removing any obstructions that may be causing the jam.
- Check for any loose parts or misalignment in the handwheel mechanism and adjust or tighten as needed.
- Test the machine to see if the handwheel movement is now smooth and unobstructed.
25. Uneven Needle Height – Bent Needle
Description: The needle height may be uneven during sewing, leading to inconsistent stitch quality and potential fabric damage.
Cause of the Problem: Using a bent or damaged needle can cause the needle height to be uneven, affecting the sewing process.
Troubleshooting:
- Turn off the machine and unplug it for safety.
- Remove the needle and inspect it for any bending or damage.
- If the needle is bent or damaged, replace it with a new one of the correct size and type.
- Make sure the new needle is inserted correctly and tightened securely.
- Test the machine with scrap fabric to see if the uneven needle height issue is resolved.
Brother PQ1500SL Sewing Machine User Reviews
Welcome to the user reviews section for the Brother PQ1500SL sewing machine! Here, we will explore the experiences of customers who have used this machine for their sewing and quilting projects.
The following subsections will summarize both the positive and negative reviews shared by users available on the website Walmart.com.
Positive Reviews from Brother PQ1500SL Sewing Machine Users
Many users expressed satisfaction with various aspects of the Brother PQ1500SL sewing machine. Some users were pleased with the following parameters associated with their positive experience:
- Speed Control and Smooth Stitching: Some users were impressed by the machine’s speed control, allowing them to sew at their desired pace. They also appreciated the smooth and clean stitches produced by the machine, even when working with various fabric types, such as twill, cotton, denim, organza, and crepe de chine.
- Versatility for Thin and Thick Fabrics: Several users found the machine versatile in handling both thin and thick fabrics. They reported successful sewing experiences with various materials, including vinyl and waterproof canvas, without encountering major issues.
- Durable and Reliable: Users mentioned that the Brother PQ1500SL sewing machine is durable and reliable, lasting them for years and consistently producing quality results.
Negative User Reviews of the Brother PQ1500SL Sewing Machine
While the Brother PQ1500SL received positive feedback from many users, some users expressed dissatisfaction with specific aspects of the machine. Some users were not satisfied with the following problems associated with their negative experience:
- Thread Breakage and Automatic Threader Issues: A few users faced challenges with thread breaking while using the automatic threader, leading to frustration during their sewing sessions.
- Limited Features and Needle Positioning: Some users felt that the machine lacked certain features they desired, such as a needle position button. Manually adjusting the needle position for fabric removal was reported as inconvenient.
- Difficulty in Bobbin Loading: A few users found loading the bobbin challenging, especially for those with arthritis or difficulty handling small components.
- Tension Adjustment Problems: Some users struggled with setting the tension correctly, leading to stitching issues and dissatisfaction.
Please keep in mind that user experiences can vary, and the feedback summarized here reflects the opinions of individuals who purchased and used the Brother PQ1500SL sewing machine.
For more comprehensive information, we recommend checking the reviews on Walmart.com to make an informed decision based on your specific needs and preferences.
Overall, the majority of users were satisfied with the Brother PQ1500SL sewing machine, highlighting its clean stitching, versatility, and reliability for various sewing and quilting projects.
Brother PQ1500SL Common Problems
Brother SM2700 Common Problems
Brother PE550D Common Problems
Brother PQ1500SL Sewing Machine Manual
The operating instructions for the Brother PQ1500SL sewing machine can be found on the manufacturer’s website. To access the manual, please visit the official Brother website and navigate to the support or product section.
Look for the specific model, PQ1500SL, and you should find a downloadable PDF version of the user manual. The manual will provide detailed information on how to set up and use the sewing machine, as well as essential maintenance and troubleshooting tips.
Brother PQ1500SL Frequently Asked Questions (FAQs)
1. How can I adjust the sewing speed on the Brother PQ1500SL?
The sewing speed on the Brother PQ1500SL can be adjusted using the foot pedal. The more pressure you apply to the foot pedal, the faster the machine will sew. For precise control over the sewing speed, practice using the foot pedal and gradually adjust the pressure to find the speed that suits your project.
2. What type of needle should I use for quilting with the Brother PQ1500SL?
For quilting projects with the Brother PQ1500SL, it is recommended to use quilting needles, which have a tapered point and are designed specifically for quilting fabrics. Quilting needles will help to minimize fabric distortion and ensure smooth stitching through multiple layers of fabric.
3. How do I clean the feed dogs and bobbin area of the machine?
To clean the feed dogs and bobbin area of the Brother PQ1500SL, first, turn off the machine and unplug it for safety. Use a soft brush or lint brush to remove any dust, lint, or debris that may have accumulated in these areas. Regular cleaning of these parts will help maintain smooth fabric feeding and prevent thread jams.
4. Why is the bobbin thread bunching up and causing uneven stitches?
Uneven stitches caused by the bobbin thread bunching up may be due to incorrect bobbin winding or improper insertion. Ensure that the bobbin is wound evenly and inserted correctly into the bobbin case. Additionally, check the bobbin tension to ensure it is properly adjusted for smooth thread flow.
5. How do I adjust the thread tension on the Brother PQ1500SL?
The thread tension on the Brother PQ1500SL can be adjusted using the tension dial located on the machine. Turning the dial clockwise will increase the tension, while turning it counterclockwise will decrease it. For balanced stitching, adjust the tension based on the type and thickness of the fabric you are using.
Conclusion
When encountering any issues or problems with the Brother PQ1500SL sewing machine, always refer to the user manual for troubleshooting guidance and maintenance instructions.
Additionally, feel free to reach out to Brother’s customer service or visit an authorized service center for professional assistance. Following the recommended guidelines and proper maintenance will help ensure optimal performance and longevity of your Brother PQ1500SL sewing machine.