Brother RLX3817 Common Problems and Troubleshooting
The Brother RLX3817 Sewing Machine is a popular model known for its versatility and ease of use. In this article, we will discuss common problems that users may encounter while using the Brother RLX3817 Sewing Machine and provide troubleshooting solutions. Brother is a well-known manufacturer of sewing machines and has a reputation for producing high-quality products.
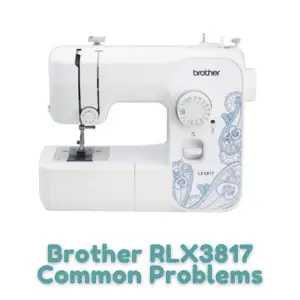
Brother RLX3817 Sewing Machine Overview
The Brother RLX3817 17-Stitch Full-Size Aqua Sewing Machine is a portable and lightweight sewing machine designed for everyday sewing tasks. It offers a range of features, including a blind hem stitch, four-step auto-size buttonhole, zigzag, and couching options. The machine comes with four quick-change sewing feet, including a zigzag foot, zipper foot, buttonhole foot, and button foot.
Product Details
| Product | Details |
|---|---|
| Assembled Product Weight | 12.8 lb |
| Assembled Product Dimensions (L x W x H) | 17.38 x 7.50 x 14.00 Inches |
Causes of Common Problems with the Brother RLX3817 Sewing Machine
Before we delve into the specific problems and troubleshooting steps, let’s discuss some common causes of issues that users may face with the Brother RLX3817 Sewing Machine. By understanding these causes, it will be easier to identify and resolve any problems that arise.
1. Thread Tension Issues
Description: The stitches are too loose or too tight.
Cause: Incorrect thread tension settings.
Troubleshooting:
- Refer to the instruction manual to understand how to adjust the thread tension correctly.
- Test different tension settings on a scrap fabric to find the optimal tension for your project.
- Make sure the thread is correctly threaded through the tension discs and take-up lever.
2. Needle Breakage
Description: The needle keeps breaking while sewing.
Cause: Incorrect needle installation or using the wrong needle type.
Troubleshooting:
- Ensure that the needle is inserted correctly with the flat side facing the back of the machine.
- Use the appropriate needle size and type for the fabric you are sewing.
- Replace the needle if it is damaged or dull.
3. Skipped Stitches
Description: The machine skips stitches while sewing.
Cause: Improper threading or a bent needle.
Troubleshooting:
- Rethread the machine, ensuring the thread is properly seated in the thread guides and tension discs.
- Replace the needle with a new one.
- Ensure the needle is inserted all the way up into the needle clamp.
4. Uneven Feed Dogs
Description: The fabric is not feeding evenly while sewing.
Cause: Misaligned or dirty feed dogs.
Troubleshooting:
- Check if the feed dogs are correctly aligned and not obstructed by any debris.
- Clean the feed dogs using a brush to remove any lint or thread buildup.
- Engage the feed dog lever to ensure they are in the raised position.
5. Bobbin Winding Problems
Description: Issues with winding the bobbin thread.
Cause: Improper bobbin placement or incorrect bobbin winding technique.
Troubleshooting:
- Ensure the bobbin is placed correctly on the winding spindle.
- Follow the instructions in the manual to wind the bobbin properly.
- Check for any obstructions or tangles that may hinder the bobbin winding process.
6. Thread Jamming in the Bobbin Area
Description: The thread gets jammed in the bobbin area.
Cause: Improper threading or lint accumulation.
Troubleshooting:
- Turn off the machine and unplug it.
- Carefully remove the bobbin case and clean any lint or thread from the area.
- Rethread the machine, ensuring the thread is properly guided through the bobbin case and tension mechanism.
7. Buttonhole Problems
Description: Difficulties in creating buttonholes.
Cause: Incorrect buttonhole settings or improper fabric positioning.
Troubleshooting:
- Refer to the manual for the correct buttonhole settings and instructions.
- Ensure the fabric is properly positioned and secured before starting the buttonhole stitching.
- Test the buttonhole on a scrap fabric to ensure proper sizing and stitching quality.
8. Machine Not Powering On
Description: The sewing machine does not turn on.
Cause: Power connection issues or a faulty power switch.
Troubleshooting:
- Check if the power cord is securely plugged into a working electrical outlet.
- Make sure the power switch is in the “On” position.
- If the machine still doesn’t power on, try using a different power cord or contact customer support for assistance.
9. Thread Keeps Breaking
Description: The thread frequently breaks during sewing.
Cause: Incorrect threading, incorrect tension, or using low-quality thread.
Troubleshooting:
- Rethread the machine, following the threading path as indicated in the manual.
- Adjust the tension to the appropriate setting for the fabric and thread being used.
- Use high-quality thread suitable for your sewing project.
10. Stuck or Jammed Fabric
Description: The fabric gets stuck or jammed while sewing.
Cause: Incorrect fabric feeding or improper presser foot pressure.
Troubleshooting:
- Ensure the presser foot pressure is adjusted according to the fabric thickness.
- Use the correct presser foot for the fabric type.
- Guide the fabric smoothly and evenly while sewing, avoiding sudden movements.
11. Inconsistent Stitch Length
Description: The stitch length varies while sewing.
Cause: Incorrect stitch length setting or a mechanical issue.
Troubleshooting:
- Verify that the stitch length dial is set to the desired length.
- Clean and lubricate the machine according to the maintenance instructions in the manual.
- If the problem persists, contact customer support for further assistance.
12. Machine Making Unusual Noises
Description: The sewing machine produces unexpected noises during operation.
Cause: Loose parts, debris, or mechanical issues.
Troubleshooting:
- Check for any loose screws, nuts, or bolts and tighten them if necessary.
- Remove the needle plate and clean any accumulated debris or lint.
- If the noise continues, it may indicate a mechanical issue. Contact customer support or a service center for repair.
13. Needle Threader Malfunction
Description: The automatic needle threader fails to work.
Cause: Misalignment or damage to the needle threader mechanism.
Troubleshooting:
- Check if the needle threader is properly aligned with the needle.
- Ensure the needle threader hook is not bent or damaged.
- If the issue persists, try threading the needle manually or seek professional assistance.
14. Uneven Stitches
Description: The stitches appear uneven or irregular.
Cause: Incorrect threading, tension, or needle choice.
Troubleshooting:
- Double-check the threading path and ensure the thread is properly seated in the tension discs.
- Adjust the thread tension according to the fabric and desired stitch appearance.
- Use the appropriate needle type and size for the fabric being sewn.
15. Motor Overheating
Description: The sewing machine’s motor becomes hot during use.
Cause: Prolonged use or insufficient ventilation.
Troubleshooting:
- Allow the machine to cool down by turning it off and unplugging it.
- Ensure the sewing machine is placed in a well-ventilated area during use.
- Avoid excessive continuous sewing and take breaks to prevent motor overheating.
16. Bobbin Thread Showing on the Top
Description: The bobbin thread is visible on the top side of the fabric.
Cause: Incorrect bobbin tension or incorrect threading.
Troubleshooting:
- Adjust the bobbin tension using the tension screw on the bobbin case.
- Ensure the bobbin is correctly threaded and properly inserted into the bobbin case.
- Check that the top thread is properly tensioned and threaded through the machine.
17. Foot Pedal Not Responsive
Description: The foot pedal does not respond when pressed.
Cause: Loose connection or faulty foot pedal.
Troubleshooting:
- Check the foot pedal connection to the machine and ensure it is securely plugged in.
- Verify that the foot pedal cable is not damaged or frayed.
- If the issue persists, try using a different foot pedal or contact customer support for assistance.
18. Thread Keeps Tangling
Description: The thread keeps tangling or forming knots during sewing.
Cause: Incorrect threading, improper bobbin placement, or using low-quality thread.
Troubleshooting:
- Rethread the machine, ensuring the thread follows the correct path and is properly tensioned.
- Check that the bobbin is correctly placed in the bobbin case and rotates smoothly.
- Use high-quality thread suitable for your sewing project.
19. Needle Hits the Presser Foot
Description: The needle hits the presser foot while sewing.
Cause: Incorrect needle positioning or incorrect presser foot installation.
Troubleshooting:
- Ensure the needle is inserted all the way up into the needle clamp.
- Check that the presser foot is correctly attached and aligned with the needle.
- Use the appropriate presser foot for the selected stitch and fabric thickness.
20. Jammed Reverse Lever
Description: The reverse lever gets stuck or does not engage.
Cause: Dirt or debris accumulation, or a mechanical issue.
Troubleshooting:
- Clean the area around the reverse lever using a small brush or compressed air to remove any debris.
- If the lever is still not engaging, contact customer support or a service center for further assistance.
21. Bobbin Thread Not Picking Up
Description: The machine fails to pick up the bobbin thread.
Cause: Improper bobbin placement, incorrect threading, or a bobbin case issue.
Troubleshooting:
- Ensure the bobbin is correctly placed in the bobbin case and rotates in the correct direction.
- Rethread the machine, making sure the top thread is properly guided through the tension discs and take-up lever.
- If the issue persists, check the bobbin case for any damage or seek professional assistance.
22. Stuck or Jammed Needle
Description: The needle gets stuck or jammed in the fabric.
Cause: Using the wrong needle size or sewing through multiple layers of thick fabric.
Troubleshooting:
- Use the appropriate needle size and type for the fabric you are sewing.
- When sewing through multiple layers of thick fabric, go slowly and ensure the needle can handle the thickness.
- If the needle gets stuck, gently rock the handwheel back and forth to release the fabric.
23. Uneven Bobbin Tension
Description: The bobbin thread tension is uneven.
Cause: Incorrect bobbin tension adjustment or lint buildup in the bobbin case.
Troubleshooting:
- Adjust the bobbin tension using the tension screw on the bobbin case, following the machine’s manual instructions.
- Clean the bobbin case to remove any lint or debris that may affect the tension.
- Test the bobbin thread tension on a scrap fabric to ensure it is balanced with the top thread tension.
24. Incorrect Stitch Selection
Description: The machine does not produce the selected stitch.
Cause: Incorrect stitch selection or a mechanical issue.
Troubleshooting:
- Double-check that you have chosen the correct stitch on the machine’s stitch selector.
- Ensure the machine is set to the desired stitch length and width.
- If the problem persists, consult the manual or contact customer support for further assistance.
25. Bobbin Thread Runs Out Quickly
Description: The bobbin thread depletes rapidly.
Cause: Incorrect bobbin winding or using a small bobbin.
Troubleshooting:
- Make sure the bobbin is wound evenly and with sufficient thread.
- Consider using a larger bobbin to increase the amount of thread available.
- Keep spare bobbins pre-wound to avoid interruptions in your sewing projects.
Brother RLX3817 Sewing Machine User Reviews
Positive Reviews from Brother RLX3817 Sewing Machine Users
- Some users were satisfied with the quality of the refurbished Brother RLX3817 Sewing Machine. They mentioned that it seemed brand new and worked flawlessly.
- Many users appreciated the ease of use and simplicity of the machine. They liked that it is a basic sewing machine without complicated features.
- Users praised the clear instructions and labeling on the machine, making it easy to load the thread and set up the stitches.
- Customers were happy with the lightweight design, making it convenient to carry and move around.
- Several users were thrilled with the affordable price they paid for the machine, considering the value and performance it offered.
- Beginner sewers found the Brother RLX3817 to be perfect for learning and practicing sewing skills.
- Users appreciated the variety of stitches available, which covered basic sewing needs.
- Customers were pleased with the complete package, including accessories, needles, bobbins, and a manual.
- Some users expressed their satisfaction with the sewing machine’s reliability, sturdiness, and lack of tension issues.
- Customers praised the machine’s performance in making various sewing projects like clothes and masks.
Negative User Reviews of the Brother RLX3817 Sewing Machine
- Some users experienced difficulties with tension settings, resulting in loose stitches and sewing issues.
- There were complaints about the thread cutter malfunctioning and causing problems during sewing.
- A few users found the machine to be less durable due to plastic internal parts, which impacted its performance over time.
- One user reported receiving a refurbished model that didn’t work properly, necessitating a return.
- Some users faced difficulties with the machine’s threading and stitching quality, leading to frustration.
- There were complaints about missing components, such as a power cord or foot pedal, which affected the machine’s operability.
- A few users faced issues with the bobbin holder getting jammed during high-speed sewing.
- One user expressed disappointment in the machine’s performance compared to older, more durable sewing machines.
- Some users were dissatisfied with the customer service response when they encountered issues with the machine.
Note: All information about user reviews is taken from the site Walmart.com.
The majority of users were satisfied with the Brother RLX3817 Sewing Machine, appreciating its value, ease of use, and performance. While there were some negative experiences reported, the positive feedback outweighs the negative feedback overall.
Brother RLX3817 Sewing Machine Manual
The instruction manual for the Brother RLX3817 Sewing Machine can be found here. It is always recommended to refer to the manual for detailed instructions on setting up and using the machine. The manual provides valuable information on troubleshooting common problems and offers guidance on proper maintenance and care.
Brother RLX3817 Sewing Machine Frequently Asked Questions
1. How do I thread the Brother RLX3817 Sewing Machine?
To thread the Brother RLX3817 Sewing Machine, follow these steps:
- Lift the presser foot and turn the handwheel towards you to raise the take-up lever to its highest position.
- Place the spool of thread on the spool pin and secure it with the spool cap.
- Guide the thread through the thread guides, tension discs, and take-up lever.
- Thread the needle from front to back.
- Pull the thread under the presser foot and towards the back of the machine.
- Lower the presser foot and you’re ready to start sewing.
2. Why is my Brother RLX3817 Sewing Machine not stitching properly?
If you’re experiencing stitching issues with your Brother RLX3817 Sewing Machine, try the following troubleshooting steps:
- Check the needle to ensure it is inserted correctly and not damaged.
- Verify that the thread is properly threaded through the machine, including the tension discs and take-up lever.
- Adjust the thread tension according to the fabric you’re sewing on.
- Clean the machine and remove any lint or debris that may be affecting the stitching.
3. How do I fix a jammed bobbin in my Brother RLX3817 Sewing Machine?
If your bobbin gets jammed, follow these steps to resolve the issue:
- Turn off the machine and unplug it.
- Remove the needle and presser foot.
- Open the bobbin case and carefully remove the jammed thread or debris.
- Inspect the bobbin case and surrounding area for any further obstructions.
- Reassemble the bobbin case and insert a new needle.
- Plug in the machine, turn it on, and test the sewing.
Conclusion
If you encounter any problems with your Brother RLX3817 Sewing Machine, it is always recommended to consult the instruction manual or contact the manufacturer’s customer service or service center for assistance. Proper maintenance, regular cleaning, and following the guidelines provided in the manual will help ensure optimal performance and longevity of your sewing machine.