Brother SE1950 Common Problems and Troubleshooting
Welcome to our troubleshooting guide for the Brother SE1950 sewing machine. In this article, we will address common problems that users may encounter while using this specific model. Whether you are a seasoned embroiderer or a sewing enthusiast, the Brother SE1950 is designed to bring your creative projects to life with its impressive features and capabilities.
However, like any complex machine, it can sometimes face issues that might hinder your sewing and embroidery experience. Don’t worry, though, as we’ve got you covered with solutions to these common problems.
Brother SE1950 Overview
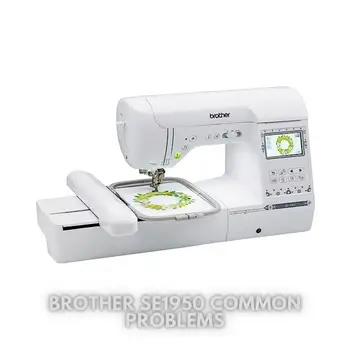
The Brother SE1950 is a versatile combination sewing and embroidery machine that empowers you to create stunning embroidery designs and execute various sewing projects. With a large 5″ x 7″ embroidery field and a user-friendly 3.2″ LCD color touch display screen, you can easily preview and edit your designs.
This machine boasts over 100 built-in embroidery designs, and you also have the option to import your own designs from iBroidery.com or other sources.
When it comes to sewing, the SE1950 doesn’t disappoint either. With a vast selection of 240 built-in sewing stitches, including 10 styles of auto-size buttonholes, you’ll have plenty of options for your sewing projects.
The advanced features, such as an automatic needle threader and a jam-resistant drop-in top bobbin, make sewing hassle-free and enjoyable.
The exceptional feed system ensures smooth fabric feeding, allowing you to focus on your creative process without interruptions. Plus, the My Custom Stitch™ feature enables you to design and save your custom sewing stitches directly on the machine, offering endless possibilities for your creations.
Product Details
| Brand | Brother |
|---|---|
| Color | White |
| Material | Plastic, Metal |
| Product Dimensions | 9.48″D x 17.56″W x 11.81″H |
| Item Weight | 22 Pounds |
| Power Source | AC |
| Is Electric | Yes |
| ASIN | B0B95BJ4Y6 |
| Item model number | SE1950 |
| Customer Reviews | 4.8 out of 5 stars (10 ratings) |
| Best Sellers Rank | #321,791 in Arts, Crafts & Sewing (See Top 100 in Arts, Crafts & Sewing) |
| Care Instructions | Hand Wash |
| Assembly Required | No |
| Number of Pieces | 1 |
| Warranty Description | 25 Year Limited Warranty |
| Batteries Required | No |
| Included Components | 5×7 hoop, embroidery foot, 8 sewing feet, 2 bobbins, 3 pre-wound bobbins, 3 bobbin clips, 6 pcs needle set, twin needle, darning plate, scissors, and more |
Causes of Common Problems with the Brother SE1950
In this section, we will delve into various common problems that users may encounter while using the Brother SE1950 sewing and embroidery machine. Each problem will be accompanied by its corresponding troubleshooting solution, helping you get back to your creative projects with ease.
1. Bobbin Thread Tangles during Embroidery
Description of the problem: When attempting embroidery, you notice that the bobbin thread frequently tangles or creates uneven stitches.
Cause of the problem: There are several reasons for bobbin thread tangles, including improper bobbin winding, incorrect bobbin insertion, or the upper threading not properly seated in the tension disks.
Troubleshooting:
- Ensure the bobbin is wound evenly and correctly. Avoid overfilling the bobbin or uneven winding.
- Insert the bobbin into the bobbin case with the thread unwinding in the correct direction.
- Check that the upper thread is threaded correctly and securely through the tension disks and take-up lever.
- Ensure the embroidery hoop is attached correctly and securely.
- If the problem persists, clean the bobbin area for any debris or tangled thread, and consider replacing the bobbin case if it’s damaged.
2. Needle Breakage during Sewing
Description of the problem: The needle frequently breaks while sewing with the Brother SE1950 machine.
Cause of the problem: Needle breakage can be caused by several factors, such as using the wrong needle size, sewing at a high speed with thick fabrics, or hitting a pin or other hard objects.
Troubleshooting:
- Ensure you are using the correct needle size and type suitable for the fabric you are sewing.
- When sewing thicker fabrics, reduce the sewing speed to avoid placing excessive stress on the needle.
- Always remove pins and other hard objects from the fabric before they reach the needle area.
- Check the needle for any visible damage or bending, and replace it with a new one if necessary.
- If the problem persists, inspect the needle plate and feed dogs for any damage, and replace them if needed.
3. Embroidery Design Misalignment
Description of the problem: The embroidery design appears misaligned or skewed on the fabric, even though you properly hooped the fabric.
Cause of the problem: Misalignment can be caused by inaccurate design placement, incorrect hooping, or the machine’s frame not moving smoothly during embroidery.
Troubleshooting:
- Double-check the design placement and align it correctly using the machine’s built-in grid lines or alignment marks.
- Ensure the fabric is hooped evenly and tightly, avoiding any wrinkles or looseness.
- Check for any obstructions or thread tangles in the embroidery frame, and clear them before re-embroidering.
- Consider using embroidery stabilizers to improve design stability and prevent misalignment.
- If the issue persists, update the machine’s firmware or consult a Brother service technician for further assistance.
4. Skipped Stitches during Sewing
Description of the problem: While sewing, you notice that the machine occasionally skips stitches, resulting in an uneven stitch pattern.
Cause of the problem: Skipped stitches can occur due to improper threading, a blunt or bent needle, incorrect thread tension, or using the wrong fabric for the chosen stitch.
Troubleshooting:
- Re-thread the machine, ensuring the thread passes through all the thread guides and tension disks correctly.
- Replace the needle with a new one, making sure it is compatible with the fabric and stitch type.
- Adjust the thread tension as needed. For lightweight fabrics, decrease the tension, while for heavier fabrics, increase it slightly.
- Use the appropriate needle size and type for the chosen fabric and stitch, as indicated in the machine’s manual.
- If the issue persists, clean the machine’s feed dogs and shuttle race, and ensure there are no obstructions or lint affecting the stitching.
5. Embroidery Thread Breaks Repeatedly
Description of the problem: During embroidery, the thread keeps breaking at regular intervals, interrupting the embroidery process.
Cause of the problem: Frequent thread breaks can be caused by an improperly threaded machine, tension issues, a damaged needle, or the design being too dense for the chosen fabric.
Troubleshooting:
- Re-thread the machine carefully, ensuring the thread is secured in all the necessary thread guides and the needle’s eye.
- Check and adjust the thread tension to ensure it is suitable for the chosen fabric and design.
- Replace the needle with a new one, making sure it is the correct size and type for the embroidery design and fabric.
- Consider using a higher-quality embroidery thread that is less prone to breaking.
- If the design is too dense for the fabric, try using a lighter design or stabilizing the fabric with additional embroidery stabilizers.
6. Uneven Stitch Length in Sewing Projects
Description of the problem: While sewing, you notice that the stitch length is inconsistent and varies throughout the project.
Cause of the problem: Uneven stitch length can be caused by incorrect tension settings, a worn-out feed dog, or an improperly adjusted stitch length dial.
Troubleshooting:
- Check and adjust the thread tension, making sure it is balanced for both the upper and lower threads.
- Inspect the feed dog for any signs of wear and replace it if necessary.
- Verify that the stitch length dial is properly set to the desired stitch length, and adjust it if needed.
- Clean the machine’s internal mechanisms, including the feed dog area, to remove any debris that may affect stitch consistency.
- If the issue persists, consult the machine’s manual for additional troubleshooting steps or seek assistance from a Brother service center.
7. Thread Jamming in the Bobbin Area
Description of the problem: The thread frequently gets jammed in the bobbin area, causing the machine to stop sewing.
Cause of the problem: Thread jamming can occur due to improperly wound bobbins, incorrect bobbin insertion, or lint accumulation in the bobbin case.
Troubleshooting:
- Ensure the bobbin is wound evenly and correctly, with the right amount of tension on the thread.
- Insert the bobbin into the bobbin case following the correct orientation as indicated in the machine’s manual.
- Regularly clean the bobbin area, removing any accumulated lint or debris that may hinder smooth thread flow.
- Check for any damaged or bent parts in the bobbin case or bobbin area, and replace them if necessary.
- If the issue persists, try using a different type of thread or consult a Brother technician for further evaluation.
8. Embroidery Hoop Slipping During Operation
Description of the problem: The embroidery hoop slips or moves while the machine is in operation, causing misalignment of the design.
Cause of the problem: Hoop slipping can happen due to improper hooping technique, a loose hoop screw, or worn-out hoop brackets.
Troubleshooting:
- Ensure the fabric is hooped securely, avoiding any wrinkles or uneven tension in the fabric.
- Tighten the hoop screw firmly to prevent the hoop from shifting during embroidery.
- Inspect the hoop brackets for any signs of wear or damage, and replace them if needed.
- Check that the embroidery frame is compatible with the hoop size and design you are using.
- If the hoop slipping continues, consider using adhesive stabilizers or hooping aids to enhance hoop grip on the fabric.
9. Unresponsive LCD Touch Display
Description of the problem: The LCD touch display becomes unresponsive or does not register touch inputs.
Cause of the problem: An unresponsive touch display can be caused by software glitches, dirt accumulation on the screen, or a faulty touch panel.
Troubleshooting:
- Restart the machine to see if the touch display becomes responsive after a fresh boot.
- Ensure the touch display is clean and free from any dirt or fingerprints that might hinder touch sensitivity.
- Perform a firmware update for the machine to address potential software-related issues.
- Check for any physical damage on the touch panel, such as cracks or scratches, and consider replacing it if necessary.
- If the problem persists, contact Brother support for further assistance or arrange a service visit if the machine is under warranty.
10. Limited Connectivity with iBroidery.com
Description of the problem: The machine faces difficulties connecting to iBroidery.com or fails to import designs from the website.
Cause of the problem: Connectivity issues can arise due to internet connectivity problems, incompatible design file formats, or outdated machine software.
Troubleshooting:
- Check your internet connection and ensure it is stable and functioning correctly.
- Verify that the design files you are trying to import are in a compatible format supported by the Brother SE1950.
- Update the machine’s software to the latest version to ensure compatibility with iBroidery.com services.
- Try accessing iBroidery.com from a different device or browser to check if the issue is specific to the machine or the website.
- If the problem persists, reach out to Brother customer support or iBroidery.com’s help center for further guidance.
11. Thread Looping on the Fabric’s Surface
Description of the problem: While sewing, you notice loops of thread forming on the top surface of the fabric.
Cause of the problem: Thread looping can be caused by incorrect threading, incorrect tension settings, or using the wrong needle for the fabric type.
Troubleshooting:
- Re-thread the machine, ensuring the thread is correctly seated in all the thread guides and the take-up lever.
- Check and adjust the thread tension to ensure it is balanced for the chosen fabric and stitch type.
- Use the appropriate needle size and type for the fabric to prevent excessive thread loops.
- Make sure the machine is correctly threaded for the chosen stitch pattern to avoid thread looping.
- If the issue persists, clean the machine’s bobbin area and tension disks from any debris that might affect thread flow.
12. Needle Breaking when Embroidering Dense Designs
Description of the problem: The needle breaks consistently while embroidering dense or intricate designs.
Cause of the problem: Embroidering dense designs can put excessive stress on the needle, especially if it’s not suitable for the design’s thickness or complexity.
Troubleshooting:
- Ensure you are using a needle specifically designed for embroidery and that is appropriate for the density of the design.
- Lower the sewing speed when embroidering dense designs to reduce stress on the needle.
- Check the design for any excessive stitch density or thread buildup, and modify it if necessary.
- Inspect the embroidery hoop and fabric for any uneven tension that might contribute to needle breakage.
- If the needle continues to break, consider using a stronger, more durable needle type or consult with a Brother technician.
13. Noisy Operation during Sewing
Description of the problem: The machine operates loudly or makes unusual noises while sewing.
Cause of the problem: Noisy operation can be caused by various factors, such as a loose or damaged part, lack of lubrication, or foreign objects inside the machine.
Troubleshooting:
- Identify the source of the noise by listening closely and examining the machine’s moving parts.
- Tighten any loose screws or parts that may contribute to the noise.
- Ensure the machine is properly lubricated according to the manufacturer’s recommendations.
- Remove any foreign objects or debris that may have entered the machine, causing the noise.
- If the noise persists, consult the machine’s manual for additional troubleshooting steps or seek assistance from a Brother service center.
14. Thread Skipping Stitches in Embroidery
Description of the problem: While embroidering, the machine skips stitches, leaving gaps in the design.
Cause of the problem: Thread skipping can occur due to an improperly threaded machine, incorrect tension settings, or a damaged embroidery needle.
Troubleshooting:
- Re-thread the machine, ensuring the thread is correctly seated in all the necessary thread guides and tension disks.
- Check and adjust the thread tension to ensure it is balanced for the chosen fabric and design.
- Use a new and appropriate embroidery needle suitable for the fabric and design thickness.
- Examine the embroidery design for any excessive density or intricate parts that might cause thread skipping, and adjust the design if needed.
- If the problem persists, clean the machine’s bobbin area and upper thread path from any lint or debris that might interfere with the embroidery process.
15. Limited or No Response to Touch Screen Inputs
Description of the problem: The LCD touch screen becomes partially or entirely unresponsive to touch inputs.
Cause of the problem: Touch screen issues can arise due to calibration errors, software glitches, or a faulty touch panel.
Troubleshooting:
- Recalibrate the touch screen using the machine’s built-in calibration tool.
- Restart the machine to see if the touch screen responsiveness improves.
- Perform a firmware update for the machine to address potential software-related issues.
- Ensure the touch screen is free from dirt, fingerprints, or any physical damage that may hinder touch sensitivity.
- If the problem persists, consider resetting the machine to its factory settings or seek assistance from a Brother technician.
16. Uneven Thread Tension in Sewing Stitches
Description of the problem: Sewing stitches exhibit inconsistent tension, resulting in loose or tight threads.
Cause of the problem: Uneven thread tension can be caused by incorrect threading, dirty tension disks, or a malfunctioning tension mechanism.
Troubleshooting:
- Re-thread the machine carefully, ensuring the thread passes through all the necessary thread guides and tension disks.
- Ensure the upper thread is properly seated in the tension disks and the take-up lever.
- Clean the tension disks and the surrounding area to remove any dirt or debris that may affect tension control.
- Adjust the thread tension settings as needed, making small changes and testing the stitches on a fabric scrap.
- If the tension issue persists, consult the machine’s manual for advanced tension adjustment options or contact a Brother service center.
17. Bobbin Thread Showing on the Top of the Fabric
Description of the problem: The bobbin thread is visible on the top surface of the fabric, spoiling the appearance of the sewing project.
Cause of the problem: This issue can occur due to incorrect bobbin winding, improper threading, or imbalanced tension settings.
Troubleshooting:
- Ensure the bobbin is wound evenly and correctly, avoiding overfilling or uneven winding.
- Re-thread the machine, ensuring the upper thread is correctly seated in all the necessary thread guides and tension disks.
- Adjust the upper thread tension to balance it with the bobbin thread tension.
- Verify that the bobbin is correctly inserted into the bobbin case and that it unwinds in the correct direction.
- If the problem persists, clean the bobbin case area and the tension mechanism to ensure smooth thread flow.
18. Limited Embroidery Design Size Options
Description of the problem: You find the available embroidery design size options to be limited or not meeting your project requirements.
Cause of the problem: The embroidery design size is limited by the maximum hoop size compatible with the Brother SE1950 machine.
Troubleshooting:
- Double-check the machine’s embroidery hoop size and confirm that you are selecting designs within its limitations.
- Consider resizing the embroidery design using compatible embroidery software before importing it into the machine.
- If you require larger embroidery designs, explore options for multi-hooping techniques to stitch larger designs in segments.
- Check for additional accessories or optional hoop sizes compatible with the machine that might offer larger design options.
- If the design size limitation remains an issue, explore other embroidery machine models that offer larger embroidery areas.
19. Frequent Thread Breakage in Embroidery
Description of the problem: The embroidery thread keeps breaking during embroidery, disrupting the design stitching.
Cause of the problem: Frequent thread breakage can be caused by an improperly threaded machine, high tension settings, or using low-quality embroidery thread.
Troubleshooting:
- Re-thread the machine, ensuring the thread is correctly seated in all the necessary thread guides and the take-up lever.
- Lower the thread tension slightly, as high tension can exert excessive stress on the thread.
- Use high-quality embroidery thread specifically designed for machine embroidery.
- Inspect the needle for any burrs or damage that might be causing the thread to break, and replace the needle if needed.
- Verify that the fabric is hooped correctly and smoothly to avoid undue tension on the embroidery thread.
20. Incorrect Design Alignment with Hoop
Description of the problem: The embroidered design is misaligned with the hoop, resulting in off-center or skewed placement.
Cause of the problem: Incorrect design alignment can be caused by improper hooping, inaccurate design centering, or software-related issues.
Troubleshooting:
- Hooping the fabric evenly and smoothly, avoiding wrinkles or uneven tension that can affect design placement.
- Double-check the embroidery design’s centering and alignment before starting the embroidery process.
- Use the machine’s grid lines or alignment marks to ensure accurate design positioning.
- Try re-hooping the fabric and re-importing the design to see if it aligns correctly.
- If the alignment issue persists, verify the machine’s software settings, update the firmware if available, or consult the machine’s manual for advanced alignment options.
21. Thread Fraying or Shredding during Sewing
Description of the problem: The thread frequently frays or shreds, leading to thread breakage or uneven stitches.
Cause of the problem: Thread fraying can occur due to using low-quality or old thread, an incorrect needle size, or a damaged thread guide.
Troubleshooting:
- Use high-quality, fresh thread that is appropriate for the fabric and stitch type.
- Verify that the needle size matches the fabric’s weight and the chosen stitch.
- Check the thread guide path for any burrs or rough edges that might be causing the thread to fray, and smooth any rough areas if needed.
- Adjust the thread tension as necessary to prevent excessive stress on the thread.
- If the thread continues to fray, inspect the needle for any damage, and replace it with a new one if necessary.
22. Inconsistent Thread Tension in Embroidery
Description of the problem: Embroidery stitches show uneven tension, with some areas too tight and others too loose.
Cause of the problem: Inconsistent thread tension during embroidery can be caused by incorrect bobbin tension, improperly wound bobbins, or thread path obstructions.
Troubleshooting:
- Check and adjust the bobbin tension to ensure it complements the upper thread tension.
- Make sure the bobbins are wound evenly and correctly, with consistent thread tension.
- Verify that the upper thread is threaded correctly and securely through all the necessary thread guides and tension disks.
- Clear the machine’s thread path of any obstructions, such as tangled thread or lint, that may interfere with smooth thread flow.
- If the tension issues persist, consider using embroidery stabilizers or seeking assistance from a Brother technician.
23. Error Messages or Codes Displayed
Description of the problem: The machine displays error messages or codes that you are unsure how to resolve.
Cause of the problem: Error messages can appear due to various issues, including software errors, mechanical malfunctions, or incorrect operations.
Troubleshooting:
- Consult the machine’s manual or online resources to identify the meaning of the specific error message or code displayed.
- Follow any troubleshooting steps or instructions provided in the manual for resolving the specific error.
- If the error persists, restart the machine and attempt to recreate the issue to verify if it’s a temporary glitch.
- If the error message is related to a specific function or feature, ensure you are operating the machine correctly and following all recommended steps.
- If you are unable to resolve the error, contact Brother customer support or a qualified technician for further assistance.
24. Skipping Stitches when Sewing Thick Fabrics
Description of the problem: The machine skips stitches while sewing through thick or multiple layers of fabric.
Cause of the problem: Skipping stitches on thick fabrics can happen due to inadequate needle penetration or insufficient needle strength.
Troubleshooting:
- Use a larger or heavier needle specifically designed for sewing through thick fabrics.
- Reduce the sewing speed when working with thick fabrics to allow the needle to penetrate smoothly.
- Ensure the fabric layers are properly aligned and evenly positioned under the presser foot.
- Use a walking foot or even-feed foot to improve fabric feeding and prevent skipped stitches on thick fabrics.
- If the problem persists, consider thinning the fabric layers or using a different sewing technique suitable for thicker materials.
25. Needle Positioning Errors in Embroidery
Description of the problem: The embroidery design’s needle positioning is off, resulting in misaligned or skewed stitches.
Cause of the problem: Needle positioning errors can occur due to incorrect design digitization, software glitches, or mechanical misalignments.
Troubleshooting:
- Double-check the embroidery design’s digitization and make sure it’s accurately centered and aligned in the software.
- Try re-importing the design to see if the positioning error is resolved.
- Inspect the embroidery hoop and fabric for any uneven tension or placement that might be causing the design to shift during embroidery.
- Check for any loose screws or parts in the machine’s embroidery mechanism, and tighten them if necessary.
- If the needle positioning error persists, consider updating the embroidery software or seeking assistance from a professional embroiderer or Brother technician.
Brother SE1950 Sewing Machine User Reviews
When considering purchasing a sewing machine, it’s essential to know what other users think about the product. The Brother SE1950 sewing machine has garnered attention from various customers who have shared their experiences online.
Below, we’ve compiled both positive and negative feedback from Brother SE1950 users, based on reviews available on Walmart.com.
Positive Reviews from Brother SE1950 Sewing Machine Users
- Some users were satisfied with the large embroidery field, measuring 7×5 inches, which allows for working on most patterns without the need for frequent repositioning.
- Several customers praised the machine’s ability to upload custom embroidery designs via USB, providing them with endless creative possibilities.
- Many users appreciated the convenience of the touch screen OLED display, which, despite being relatively small, proved to be intuitive and user-friendly.
- The sewing machine met expectations in terms of build quality, being described as fairly heavy and sturdy, ensuring stability during usage.
- Customers found the machine’s performance to be excellent, delivering precise stitching and reliable embroidery results.
- Users valued the machine’s wide selection of built-in designs and embroidery fonts, allowing for versatile and personalized projects.
Overall, the majority of customers were impressed with the Brother SE1950 sewing machine and found it to be a reliable and versatile tool for their embroidery and sewing needs.
Negative User Reviews of the Brother SE1950 Sewing Machine
- Some users were not satisfied with occasional thread tangling issues during embroidery, which led to interruptions and frustration.
- A few customers reported experiencing uneven stitch tension, particularly when sewing thicker fabrics, leading to less than satisfactory results.
- Several users found the embroidery hoop size limitation to be a downside, as it restricted their ability to work on larger designs.
- Some customers encountered occasional difficulties with the machine’s needle positioning during embroidery, resulting in misaligned stitches.
- A few users expressed concerns about the machine’s noise level during operation, finding it to be louder than expected.
While the negative feedback is worth noting, it’s essential to consider that these experiences may vary depending on individual usage and settings.
Brother SE1950 Common Problems
Brother SE1950 Sewing Machine Manual
The operating instructions and user manual for the Brother SE1950 sewing machine can be found on the manufacturer’s website. If you need guidance on how to use the machine, set up embroidery designs, or troubleshoot common issues, referring to the official manual is highly recommended.
The manual provides valuable information to ensure you get the most out of your Brother SE1950 sewing machine and enjoy a seamless sewing and embroidery experience.
Brother SE1950 Frequently Asked Questions
1. How do I import my own embroidery designs into the Brother SE1950 machine?
To import your custom embroidery designs into the Brother SE1950, use a USB flash drive to transfer the embroidery files (typically in .PES format) from your computer to the machine. Insert the USB drive into the designated port on the machine and access the built-in USB function in the embroidery menu. From there, you can browse and select the desired design files for embroidery.
2. What should I do if the machine displays an error message during embroidery?
If the Brother SE1950 displays an error message while embroidering, stop the machine immediately and refer to the user manual for a list of error codes and their meanings. Follow the troubleshooting steps provided in the manual to resolve the issue. If the problem persists, consider contacting Brother’s customer service or visiting an authorized service center for further assistance.
3. Can I adjust the sewing speed on the Brother SE1950 machine?
Yes, the Brother SE1950 offers adjustable sewing speed. You can control the sewing speed using the speed control slider or buttons located on the machine. Adjusting the sewing speed allows you to work at a comfortable pace and ensures precise stitching, especially when handling intricate sewing projects.
4. How do I clean the bobbin area of the Brother SE1950 sewing machine?
To clean the bobbin area, first, turn off the machine and unplug it for safety. Remove the bobbin case and bobbin from the machine. Use a soft brush or lint-free cloth to gently remove any dust, lint, or thread scraps from the bobbin area. Be careful not to touch or displace any mechanical parts. Once the area is clean, reassemble the bobbin case and bobbin, and you can resume sewing or embroidery.
5. How often should I change the sewing machine needle?
Regularly changing the sewing machine needle is crucial for achieving optimal stitching results and preventing potential issues. It is recommended to change the needle after every 8-10 hours of sewing or when you notice signs of wear, such as skipped stitches, frayed threads, or broken needles. Using a fresh needle ensures smooth fabric penetration and minimizes the risk of damaging the fabric or the machine.
Conclusion
When facing any problems with your Brother SE1950 sewing machine, always refer to the manual, customer service, or an authorized service center whenever possible. The user manual contains valuable information on machine operation, maintenance, and troubleshooting.
If you encounter difficulties beyond your expertise, seeking professional assistance will help you resolve the issues effectively, ensuring a seamless sewing and embroidery experience with your Brother SE1950.