Brother ST371HD Heavy-Duty Common Problems and Troubleshooting
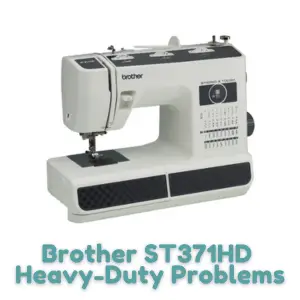
The Brother ST371HD Heavy-Duty Sewing Machine is a reliable and durable sewing machine designed to meet the needs of both beginners and advanced users. Manufactured by Brother, a renowned company in the sewing industry, this machine offers flexibility and robustness for a wide range of sewing projects.
In this article, we will address common problems that users may encounter with the Brother ST371HD Heavy-Duty Sewing Machine and provide troubleshooting solutions.
Brother ST371HD Heavy-Duty Sewing Machine Overview
The Brother Strong & Tough ST371HD Heavy-Duty Sewing Machine is perfectly designed for those requiring flexibility and durability. It is excellent for mending thick to lightweight fabrics and comes with a metal needle plate for smoother fabric feeding.
The machine features 37 utility and decorative stitches, including blind hems, stretch stitches, buttonholes, and zipper insertion, providing great value for users. With a maximum sewing speed of 800 stitches per minute, the Brother ST371HD ensures efficient completion of sewing projects without compromising quality.
Product Details
| Lighting Type | LED |
|---|---|
| Needle Threading System | Automatic |
| Number of Presser Feet | 6 |
| Stitch Selector Type | Dial |
| Thread Tension | Manual |
| UL/CSA Listed Voltage | 110v |
| Built-In Stitch Selections (Stitches) | 37 |
| Button Hole Styles | 1 |
| Maximum Sewing Speed (Stitches Per Minute) | 800 |
| Stitch Length (mm) | 5 |
| Stitch Width (mm) | 7 |
| Unit Dimensions (W” x D” x H”) | 12.21 x 16.10 x 7.87 |
| Unit Weight (lbs) | 14.3 |
| Condition | New |
| Machine Type | Heavy-Duty Sewing Machine |
| Assembled Product Weight | 14.33 lb
|
| Model | ST371HD |
| Assembled Product Dimensions (L x W x H) | 16.10 x 7.87 x 12.21 Inches |
Causes of Common Problems with the Brother ST371HD Heavy-Duty Sewing Machine
When using the Brother ST371HD Heavy-Duty Sewing Machine, you may encounter certain issues. In the following subsections, we will address these common problems and provide troubleshooting solutions to help you resolve them effectively.
1. Bobbin thread keeps tangling
Description: The bobbin thread gets tangled and creates knots or snarls.
Cause: Incorrect threading or improper bobbin placement.
Troubleshooting:
- Rethread the machine following the proper threading path.
- Ensure the bobbin is correctly inserted and rotates smoothly.
- Check the bobbin tension and adjust if necessary.
2. Machine is skipping stitches
Description: The machine is not stitching consistently, leaving gaps in the fabric.
Cause: Incorrect needle insertion, dull or damaged needle, or improper thread tension.
Troubleshooting:
- Check the needle for any damage or dullness and replace if needed.
- Ensure the needle is properly inserted and facing the correct direction.
- Adjust the thread tension according to the fabric being used.
3. Fabric puckers while sewing
Description: The fabric gathers or puckers along the seam line.
Cause: Incorrect thread tension, improper fabric handling, or using the wrong needle.
Troubleshooting:
- Adjust the thread tension, loosening or tightening as required.
- Ensure the fabric is properly aligned and guided through the machine.
- Use the appropriate needle size and type for the fabric being sewn.
4. Machine is making strange noises
Description: Unusual noises are produced during sewing, such as grinding or clunking sounds.
Cause: Incorrect machine setup, loose parts, or mechanical issues.
Troubleshooting:
- Check if all parts and accessories are properly attached and secured.
- Ensure the machine is placed on a stable and level surface.
- If the problem persists, consult the instruction manual or contact customer support.
5. Thread keeps breaking
Description: The thread repeatedly snaps while sewing.
Cause: Incorrect threading, improper needle usage, or tangled thread.
Troubleshooting:
- Rethread the machine, making sure the thread is properly guided through all thread guides and tension discs.
- Check the needle size and type, ensuring it matches the fabric being sewn.
- Remove any tangles or knots from the thread spool and bobbin.
6. Stitches are uneven in length
Description: The stitches vary in length, appearing uneven on the fabric.
Cause: Incorrect thread tension, uneven fabric feeding, or needle issues.
Troubleshooting:
- Adjust the thread tension, loosening or tightening as necessary.
- Ensure the fabric is evenly guided through the machine without pulling or pushing excessively.
- Check the needle for any damage or dullness and replace if needed.
7. Needle threader is not working
Description: The automatic needle threader fails to thread the needle.
Cause: Misalignment of the threader or incorrect usage.
Troubleshooting:
- Verify that the needle is in the highest position before attempting to use the threader.
- Ensure the threader is aligned properly with the needle’s eye.
- Refer to the instruction manual for detailed steps on using the needle threader.
8. Machine is not sewing in reverse
Description: The reverse stitching function is not working when the reverse button or lever is engaged.
Cause: Mechanical issues with the reverse mechanism or incorrect operation.
Troubleshooting:
- Check if the machine is set to the appropriate stitch type that allows for reverse sewing.
- Ensure the reverse button or lever is being pressed or engaged correctly.
- If the problem persists, consult the instruction manual or contact customer support.
9. Thread keeps jamming in the bobbin area
Description: The thread gets tangled or jammed in the bobbin area, causing sewing difficulties.
Cause: Incorrect bobbin placement, improper threading, or debris in the bobbin area.
Troubleshooting:
- Remove the bobbin case and clean any lint or debris from the bobbin area.
- Ensure the bobbin is correctly inserted and rotates smoothly.
- Rethread the machine, following the proper threading path.
10. Buttonhole stitching is uneven or incomplete
Description: The buttonhole stitches are not uniform or fail to complete the buttonhole shape.
Cause: Incorrect buttonhole settings, improper fabric positioning, or mechanical issues.
Troubleshooting:
- Ensure the fabric is properly positioned and stabilized for buttonhole sewing.
- Check the buttonhole settings and adjust as necessary.
- If the problem persists, consult the instruction manual or contact customer support.
11. Tension discs are not gripping the thread
Description: The tension discs fail to hold the thread properly, resulting in loose stitches.
Cause: Debris or lint buildup in the tension discs or incorrect thread threading.
Troubleshooting:
- Clean the tension discs using a small brush or compressed air to remove any debris or lint.
- Rethread the machine, ensuring the thread is properly seated between the tension discs.
- Adjust the thread tension accordingly after cleaning and rethreading.
12. Machine needle keeps breaking
Description: The sewing needle frequently breaks while in use.
Cause: Incorrect needle installation, using the wrong needle type, or sewing through thick layers without appropriate needle support.
Troubleshooting:
- Check the needle installation, ensuring it is inserted correctly and tightened securely.
- Use the appropriate needle type and size for the fabric and thread being used.
- Consider using a walking foot or reducing the number of fabric layers when sewing through thick materials.
13. Thread keeps shredding or fraying
Description: The thread unravels or frays while sewing, leading to weak stitches.
Cause: Using a poor-quality thread, incorrect thread tension, or rough edges on the needle or thread guides.
Troubleshooting:
- Switch to a higher-quality thread suitable for the fabric being sewn.
- Adjust the thread tension, ensuring it is not too tight or too loose.
- Check the needle and thread guides for any rough edges and smooth them if necessary.
14. Machine is not feeding the fabric properly
Description: The fabric is not advancing or feeding smoothly during sewing.
Cause: Incorrect presser foot pressure, improper fabric handling, or feed dog issues.
Troubleshooting:
- Adjust the presser foot pressure according to the fabric thickness and type.
- Ensure the fabric is properly guided and held taut while sewing.
- Check the feed dogs for any obstructions or damage and clean or repair if needed.
15. Stitches are too loose or loopy
Description: The stitches appear loose or loopy, lacking proper tension.
Cause: Incorrect thread tension, bobbin issues, or incorrect stitch settings.
Troubleshooting:
- Adjust the thread tension, increasing or decreasing as required.
- Check the bobbin, ensuring it is properly wound and inserted with the correct tension.
- Verify the stitch settings are appropriate for the desired stitch type.
16. Machine motor is overheating
Description: The machine’s motor becomes excessively hot during extended use.
Cause: Continuous sewing without breaks, inadequate ventilation, or motor issues.
Troubleshooting:
- Allow the machine to rest periodically during extended sewing sessions to prevent overheating.
- Ensure the machine is placed in a well-ventilated area to allow for proper heat dissipation.
- If the motor continues to overheat, consult the instruction manual or contact customer support.
17. Uneven fabric feeding
Description: The fabric is not fed evenly, causing misalignment or distortion in the stitches.
Cause: Uneven fabric tension, improper fabric handling, or feed dog issues.
Troubleshooting:
- Ensure the fabric is properly aligned and guided through the machine without stretching or pulling excessively.
- Check the presser foot pressure and adjust accordingly for even fabric feeding.
- Inspect the feed dogs for any obstructions or damage and clean or repair if necessary.
18. Machine is not powering on
Description: The sewing machine fails to turn on or respond to the power switch.
Cause: Power supply issues, loose power cord connection, or machine malfunction.
Troubleshooting:
- Check the power supply and ensure it is functioning correctly.
- Verify that the power cord is securely plugged into both the machine and the power outlet.
- If the machine still does not power on, consult the instruction manual or contact customer support.
19. Needle is hitting the presser foot or needle plate
Description: The sewing needle makes contact with the presser foot or needle plate, causing damage or incorrect stitching.
Cause: Incorrect needle insertion, bent needle, or improper presser foot attachment.
Troubleshooting:
- Ensure the needle is inserted correctly and facing the correct direction.
- Replace the needle if it appears bent or damaged.
- Verify that the presser foot is properly attached and aligned with the needle.
20. Bobbin thread is not catching
Description: The upper thread fails to catch the bobbin thread, resulting in no stitches being formed.
Cause: Incorrect bobbin placement, improper threading, or bobbin tension issues.
Troubleshooting:
- Check the bobbin placement, ensuring it is correctly inserted and rotates smoothly.
- Rethread the machine, following the proper threading path and ensuring the thread is properly seated in the tension discs.
- Adjust the bobbin tension if necessary.
21. Machine is not cutting the thread
Description: The automatic thread cutter fails to cut the thread after stitching.
Cause: Dull or damaged thread cutter blade, incorrect thread tension, or machine malfunction.
Troubleshooting:
- Check the thread cutter blade for any dullness or damage and replace if needed.
- Ensure the thread tension is properly adjusted, as excessive tension can prevent the thread cutter from working.
- If the problem persists, consult the instruction manual or contact customer support.
22. Stitch length or width cannot be adjusted
Description: The machine does not respond to the adjustment of stitch length or width settings.
Cause: Incorrect stitch selection, mechanical issues, or control panel malfunction.
Troubleshooting:
- Ensure the correct stitch type is selected, as some stitches may have fixed lengths or widths.
- Check if any mechanical components related to stitch length or width are stuck or obstructed and address the issue.
- If the problem persists, consult the instruction manual or contact customer support.
23. Built-in light is not working
Description: The sewing machine’s built-in light fails to illuminate the sewing area.
Cause: Burnt-out light bulb, loose connection, or electrical issues.
Troubleshooting:
- Check the light bulb and replace it if it is burnt out.
- Ensure the light bulb is securely connected to the machine.
- If the light still does not work, consult the instruction manual or contact customer support.
24. Machine is jammed and cannot sew
Description: The machine is stuck, and the needle cannot move or sew.
Cause: Thread tangles, fabric obstruction, or mechanical issues.
Troubleshooting:
- Turn off the machine and gently remove any tangled threads from the bobbin area.
- Remove the fabric from the machine, checking for any obstructions or tangled threads.
- If the machine remains jammed, consult the instruction manual or contact customer support.
25. Automatic thread tension is not working correctly
Description: The automatic thread tension feature does not adjust the tension appropriately for different fabrics or stitches.
Cause: Calibration issues, mechanical problems, or improper usage.
Troubleshooting:
- Check if the machine’s automatic tension feature can be calibrated or reset according to the instruction manual.
- Ensure the machine is set to the correct stitch type and adjust the tension manually if necessary.
- If the automatic tension feature still does not work correctly, consult the instruction manual or contact customer support.
User Reviews of the Brother ST371HD Heavy-Duty Sewing Machine
Positive Reviews from Brother ST371HD Heavy-Duty Sewing Machine Users
- Some users were satisfied with the durability of the Brother ST371HD sewing machine. They found it capable of handling heavy-duty fabrics such as denim without any issues.
- Many users appreciated the ease of use and simplicity of the machine. They found it suitable for both novice and intermediate sewers.
- Users praised the variety of stitches available on the machine, mentioning that they were able to accomplish different sewing projects with ease.
- Several users mentioned that the instructional DVD included with the machine was helpful in understanding its features and operation.
- Users liked the portability and lightweight design of the machine, making it convenient for them to carry and use in different locations.
Negative User Reviews of the Brother ST371HD Heavy-Duty Sewing Machine
- Some users experienced difficulties with the LED light on the machine, mentioning that they would have preferred a warmer-toned light or slightly brighter illumination.
- A few users found the location of the needle in the “R” position inconvenient, but they were able to adjust it to their preferred position using the Stitch Width dial.
The majority of users expressed satisfaction with the Brother ST371HD Heavy-Duty Sewing Machine. Positive feedback was given for its durability, ease of use, stitch variety, and portability. While a few users mentioned minor issues, overall, the machine was well-received by customers.
Brother ST371HD Heavy-Duty Sewing Machine Manual
The instruction manual for the Brother ST371HD Heavy-Duty Sewing Machine can be found here. It is important to consult the manual whenever you have questions or need guidance on operating the machine correctly.
Brother ST371HD Heavy-Duty Sewing Machine Frequently Asked Questions
1. How do I thread the Brother ST371HD Sewing Machine?
To thread the Brother ST371HD Sewing Machine, follow these steps:
- Turn off the machine and raise the needle to its highest position.
- Take the thread spool and place it on the spool pin.
- Pass the thread through the thread guide.
- Take the end of the thread and pass it through the needle eye from front to back.
- Pull the thread under the presser foot and towards the back of the machine.
- Use the thread tension dial to adjust the tension if needed.
2. Why is the needle breaking frequently?
The needle may break frequently due to the following reasons:
- Using the wrong needle size for the fabric.
- The needle is bent or damaged.
- The needle is not properly inserted.
- The machine is set to a high speed, causing excessive needle stress.
3. How can I fix uneven stitches on the Brother ST371HD Sewing Machine?
If you notice uneven stitches, you can try the following solutions:
- Check the thread tension and adjust it accordingly.
- Ensure the fabric is properly aligned and guided through the machine.
- Verify that the needle is not bent or damaged.
- Clean the machine and remove any lint or debris that may be affecting the stitch quality.
Conclusion
For any problems encountered with your Brother ST371HD Heavy-Duty Sewing Machine, it is always recommended to refer to the instruction manual provided by the manufacturer.
Additionally, you can seek assistance from Brother’s customer service or visit a service center for professional support. By following proper troubleshooting steps and seeking expert help when needed, you can ensure the optimal performance of your sewing machine.