How to Use the Zigzag Foot: A Guide to the Best Foot for General Stitching
The sewing world owes a great deal of its efficiency to the humble yet indispensable zigzag foot. This unassuming attachment transforms your sewing machine into a versatile tool capable of handling a myriad of stitching needs. In this comprehensive guide, we will unravel the intricacies of the zigzag foot, exploring its structure, applications, and providing valuable tips to maximize its potential for general stitching.
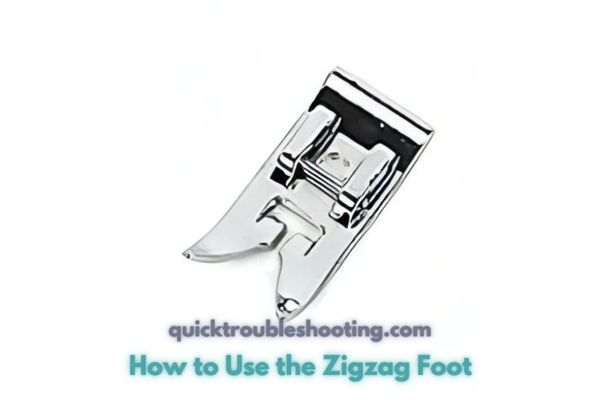
What is the Zigzag Foot: Zigzag Foot Tutorial
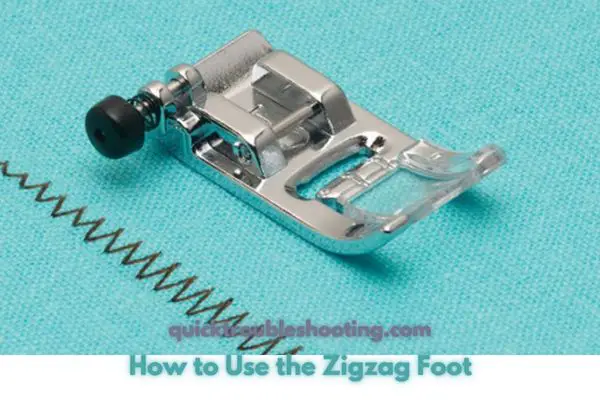
Understanding the Zigzag foot is the first step towards unlocking its potential. At its core, the zigzag foot is a presser foot designed to facilitate both straight sewing and zigzag stitching, making it an essential component in any sewing enthusiast’s toolkit. Its mechanics allow the needle to move from side to side, enabling a wide range of decorative stitches.
Mastering Zigzag Stitch Customization
Customizing your zigzag stitch is a key skill for any sewist. Adjusting the length and width of the stitch opens up a world of possibilities. Consider creating a stitch sampler, noting down the settings for various effects. Use the table below as a starting point for your own reference:
| Stitch Type | Length | Width | Use Case |
|---|---|---|---|
| Standard Zigzag | 2.5 | 2.5 | General stitching and seam finishing |
| Stretch Stitch | 2.0 | 1.5 | Sewing stretch fabrics and elastic attachment |
| Satin Stitch | 1.0 | 4.0 | Creating polished edges and monograms |
Uses of the Zig Zag Foot
Basic Applications of the Zigzag Foot
The zigzag foot, with its adaptability and functionality, proves to be an indispensable tool in various basic sewing applications. Here are some key techniques to explore, accompanied by tips on how to execute them effectively:
Neatening Seam Edges:
- Technique: Adjust the zigzag stitch for both length and width to prevent fraying along seam edges, offering a tidy finish to your projects.
- Tip: This technique is particularly useful when you don’t have access to a serger or overlocker, providing an efficient alternative for seam finishing.
Sewing Stretch Fabrics:
- Technique: Set the zigzag stitch to a narrow width, creating a stretch stitch that is perfect for sewing tricky knit fabrics.
- Tip: The narrow zigzag stitch allows the seam to maintain flexibility, accommodating the stretch in the fabric without compromising structural integrity.
Applique Shapes And Letters:
- Technique: Utilize a closely set zigzag stitch for secure appliqué work, especially effective on curved edges.
- Tip: When working with appliqué, leave the needle in the fabric, lift the presser foot, swivel, lower the presser foot, and continue for smooth transitions on curved edges.
These basic applications showcase the zigzag foot’s versatility and its ability to handle various sewing tasks with precision. Now, let’s take a closer look at these techniques in a structured table for quick reference:
| Application | Zigzag Stitch Settings | Tips |
|---|---|---|
| Neatening Seam Edges | Adjust length and width for zigzag | Ideal for seam finishing without a serger; provides a clean and tidy look. |
| Sewing Stretch Fabrics | Narrow width zigzag stitch | Maintains fabric flexibility while preventing seams from becoming rigid. |
| Applique Shapes And Letters | Closely set zigzag stitch | Effective for secure appliqué work, especially on curved edges. |
Experimenting with these techniques will enhance your understanding of the zigzag foot’s capabilities and empower you to tackle a wide range of sewing projects with confidence.
Exploring Creative Stitching Techniques with Zigzag
Take your sewing projects to new heights by delving into unique and creative stitching techniques with the versatile zigzag foot. Here are detailed instructions for each technique, accompanied by tips to help you achieve professional and polished results:
Sewing Satin Stitch:
- Technique: Narrow the zigzag stitch width to create a satin stitch, an excellent choice for finishing edges with a smooth and polished appearance.
- Tip: Experiment with different stitch lengths and thread colors to achieve various decorative effects. This technique is also perfect for monogramming projects.
Stitching Elastic Directly Onto The Garment:
- Technique: Utilize zigzag stitching to securely attach elastic onto waistbands, stretching the elastic as you sew to ensure a snug and comfortable fit.
- Tip: Maintain even tension on the elastic as you stitch to prevent uneven gathering. This technique is particularly useful for creating elasticized waistbands on skirts, pants, or shorts.
Mending A Tear In A Garment:
- Technique: Repeatedly use zigzag stitching over a tear in the fabric to cover and secure the damaged area, providing a quick and effective mend.
- Tip: Adjust the width of the zigzag stitch to cover the entire tear, reinforcing the fabric and preventing further fraying. This method works well for tears along seams and edges.
Now, let’s organize these creative stitching techniques into a structured table for easy reference:
| Technique | Zigzag Stitch Settings | Tips |
|---|---|---|
| Sewing Satin Stitch | Narrow the zigzag stitch width | Experiment with stitch lengths and thread colors for varied decorative effects. |
| Stitching Elastic Onto Garment | Adjust zigzag for secure attachment; stretch elastic | Maintain even tension on the elastic for a consistent fit; ideal for creating elasticized waistbands. |
| Mending A Tear In A Garment | Repeated zigzag stitching to cover and secure tear | Adjust zigzag width to cover the entire tear, reinforcing the fabric and preventing further fraying. |
These techniques not only showcase the creative potential of the zigzag foot but also provide practical solutions for common sewing challenges. Explore these methods and add a touch of uniqueness to your sewing projects.
Versatile Hem Edge Finishes
Unlock the potential of your sewing projects by experimenting with zigzag stitches to achieve unique and versatile hem edge finishes. Dive into the details of each technique, along with practical tips to enhance your sewing skills:
Creating Textured Hem Edges:
- Technique: Employ zigzag stitching on stretch fabric hems to create a crinkled and wavy edge, offering both neatening and decorative effects.
- Tip: Adjust the zigzag stitch width and length based on the fabric’s stretchiness. Experiment with different settings to achieve the desired texture and visual appeal.
Lettuce Hems and Decorative Effects:
- Technique: Explore lettuce hems and other decorative effects achievable with zigzag stitching.
- Tip: Lettuce hems are created by using a narrow and closely set zigzag stitch. Experiment with different fabrics to discover how zigzag stitching can add a playful and decorative touch to your hems.
Now, let’s organize these versatile hem edge finishes into a structured table for quick reference:
| Technique | Zigzag Stitch Settings | Tips |
|---|---|---|
| Creating Textured Hem Edges | Zigzag stitching on stretch fabric hems | Adjust zigzag width and length based on fabric stretchiness; experiment for varied texture effects. |
| Lettuce Hems and Decorative Effects | Closely set and narrow zigzag stitching | Achieve playful and decorative hems; experiment with different fabrics for unique visual appeal. |
These hem edge finishes not only add flair to your garments but also showcase the versatility of the zigzag foot in achieving both functional and aesthetic results. Explore these techniques and elevate the visual appeal of your sewing projects.
Taking Zigzag Beyond Basics
Delve into the advanced applications of the zigzag foot to unlock its full potential and elevate your sewing projects. Explore detailed techniques for each application, along with expert tips for optimal results:
Buttonhole Stitch:
- Technique: Utilize a closely set zigzag stitch as an alternative to dedicated buttonhole stitches.
- Tip: Experiment with different zigzag widths and lengths to achieve the desired buttonhole appearance. This technique is particularly useful if your sewing machine doesn’t have a dedicated buttonhole stitch.
Machine Embroidery:
- Technique: Expand possibilities with zigzag stitching in machine embroidery, creating borders or attaching trims.
- Tip: Adjust the zigzag stitch settings to create intricate patterns and designs. This technique provides versatility in embellishing fabrics and adding decorative elements to your projects.
Cord Gathering:
- Technique: Utilize zigzag stitches to gather fabric using a strong string, particularly effective for thick fabrics and soft furnishings.
- Tip: Ensure the zigzag stitches are wide enough to secure the cord effectively. This technique offers a unique way to create gathers, especially in projects like soft furnishings and garment embellishments.
Now, let’s organize these advanced applications into a structured table for quick reference:
| Technique | Zigzag Stitch Settings | Tips |
|---|---|---|
| Buttonhole Stitch | Closely set zigzag stitch | Experiment with different widths and lengths for a customized buttonhole appearance. |
| Machine Embroidery | Adjustable zigzag settings for intricate work | Explore various settings to create intricate patterns; ideal for embellishing fabrics and trims. |
| Cord Gathering | Wide zigzag stitches for effective gathering | Ensure stitches are wide enough to secure the cord; a unique method for gathering thick fabrics and trims. |
These advanced techniques showcase the versatility of the zigzag foot, allowing you to explore intricate details and add a personalized touch to your sewing projects. Experiment with these applications to enhance your skills and broaden your creative possibilities.
Enhancing Structural Integrity with Zigzag
Give your sewing projects added strength and durability by incorporating these advanced techniques with the versatile zigzag foot. Explore detailed instructions for each technique, along with valuable tips to ensure structural integrity:
Making Bar Tacks:
- Technique: Strengthen pockets and zipper openings with closely set zigzag stitches, creating secure bar tacks.
- Tip: Adjust the zigzag stitch width to match the thickness of the fabric. Multiple passes with the zigzag stitch in one spot create a robust and secure bar tack, preventing stress points from unraveling.
Decorative Finish For Blankets:
- Technique: Incorporate zigzag stitches for a polished edge on blankets, enhancing both aesthetics and durability.
- Tip: Experiment with different zigzag widths and lengths to achieve the desired decorative finish. Stitching a ribbon along the edge before applying the zigzag adds a soft and luxurious touch.
Now, let’s organize these techniques for enhancing structural integrity into a structured table for quick reference:
| Technique | Zigzag Stitch Settings | Tips |
|---|---|---|
| Making Bar Tacks | Closely set zigzag stitches | Adjust zigzag width for fabric thickness; multiple passes create a robust bar tack for reinforcing stress points. |
| Decorative Finish For Blankets | Variable zigzag widths and lengths | Experiment with settings for a decorative edge; consider stitching a ribbon before zigzagging for added elegance. |
These techniques not only fortify the structural integrity of your projects but also add a decorative element to functional elements like pockets and blanket edges. Incorporate these methods to create durable and visually appealing sewing projects.
Zigzag Troubleshooting and Tips
Ensure smooth and successful sewing projects by addressing common issues and implementing expert tips for optimal results with your zigzag foot. Let’s dive into detailed guidance on both troubleshooting and maximizing the functionality of the zigzag foot:
Addressing Common Issues:
Learn how to troubleshoot common zigzag stitching problems.
- Uneven Stitches:
- Check the needle for bending or dullness; replace if necessary.
- Ensure the fabric is properly fed and the presser foot is down.
- Verify the thread tension and adjust accordingly.
- Skipping Stitches:
- Use the appropriate needle size for the fabric thickness.
- Check for lint or thread buildup in the bobbin area.
- Confirm that the needle is securely inserted.
- Thread Bunching Under Fabric:
- Re-thread the machine, ensuring proper threading through the tension discs.
- Check the bobbin for proper installation and tension.
Expert Tips for Zigzag Foot
Maximize the functionality of the zigzag foot with expert tips for optimal results.
- Experiment with Stitch Settings:
- Play with zigzag stitch length and width to discover various decorative effects.
- Keep a stitch sampler for reference with different settings for future projects.
- Stabilize Stretch Fabrics:
- Use stabilizers or interfacing when sewing stretch fabrics to prevent distortion.
- Opt for a narrow zigzag stitch for a stretchy and secure seam.
- Choose the Right Needle:
- Select the appropriate needle type and size based on the fabric being used.
- Change needles regularly to prevent dullness and ensure clean stitches.
- Clean and Maintain Regularly:
- Clean the machine, especially around the bobbin area, to prevent lint buildup.
- Oil the machine following the manufacturer’s instructions for smooth operation.
Now, let’s organize these troubleshooting techniques and expert tips into a structured table for quick reference:
| Common Issue | Troubleshooting Steps |
|---|---|
| Uneven Stitches | – Check needle condition – Ensure proper fabric feeding – Adjust thread tension |
| Skipping Stitches | – Use appropriate needle size – Check for lint or thread buildup – Confirm secure needle insertion |
| Thread Bunching Under Fabric | – Re-thread machine, check tension discs – Verify bobbin installation and tension |
| Expert Tips for Zigzag Foot | Implementation Guidelines |
|---|---|
| Experiment with Stitch Settings | – Play with length and width for decorative effects – Maintain a stitch sampler for future reference |
| Stabilize Stretch Fabrics | – Use stabilizers or interfacing – Opt for a narrow zigzag for stretchy and secure seams |
| Choose the Right Needle | – Select appropriate type and size – Change needles regularly for clean stitches |
| Clean and Maintain Regularly | – Regularly clean machine, especially around bobbin area – Follow manufacturer’s instructions for oiling |
These troubleshooting and expert tips ensure that you can overcome common challenges and make the most of your zigzag foot for various sewing projects.
Maintenance and Care of the Zigzag Foot
Preserve the longevity and functionality of your zigzag foot by following proper maintenance practices. Here’s a comprehensive guide on cleaning, troubleshooting wear and tear, and ensuring your zigzag foot stays in top condition:
Cleaning and Maintenance:
Follow guidelines for cleaning and maintaining the zigzag foot for longevity.
- Regular Cleaning:
- Clean the zigzag foot after each use to remove lint, dust, and fabric debris.
- Use a small brush or compressed air to reach tight spaces and ensure thorough cleaning.
- Oil According to Guidelines:
- Refer to the sewing machine manual for specific instructions on oiling the zigzag foot.
- Apply a small amount of sewing machine oil to designated areas to keep the foot moving smoothly.
- Inspect for Loose Parts:
- Periodically check for any loose screws or parts; tighten or replace as needed.
- Ensure that the hinge and moving parts remain free from obstruction.
Troubleshooting Wear and Tear:
Troubleshoot common issues related to wear and tear, ensuring your foot remains in peak condition.
- Check for Friction or Drag:
- If the zigzag foot experiences friction or drag, investigate for any obstructions or misalignments.
- Ensure that the foot moves freely and smoothly along with the sewing machine’s motion.
- Inspect for Bent Components:
- Examine the zigzag foot for any bent components, such as the needle plate or presser foot.
- Replace any bent parts promptly to prevent further damage.
- Evaluate Spring Tension:
- Assess the tension of the zigzag foot’s spring; adjust if it feels loose or tight.
- A properly tensioned spring ensures optimal performance during sewing.
Now, let’s organize these maintenance and troubleshooting guidelines into a structured table for quick reference:
| Maintenance Task | Procedure for Zigzag Foot |
|---|---|
| Regular Cleaning | – Clean after each use – Use a small brush or compressed air – Thoroughly clean tight spaces |
| Oiling According to Guidelines | – Refer to the sewing machine manual – Apply small amount of oil to designated areas |
| Inspect for Loose Parts | – Periodically check for loose screws or parts – Tighten or replace as needed |
| Troubleshooting Wear and Tear | Common Issues |
| Check for Friction or Drag | – Investigate for obstructions or misalignments – Ensure smooth and free movement |
| Inspect for Bent Components | – Examine for bent parts, replace if necessary |
| Evaluate Spring Tension | – Assess tension; adjust if loose or tight |
Regular maintenance ensures that your zigzag foot operates smoothly and contributes to the overall longevity of your sewing machine. Incorporate these practices into your routine to enjoy seamless stitching and extended durability.
Advanced Techniques with Zigzag
Take your sewing skills to the next level by exploring advanced applications of the zigzag foot. These specialized techniques add texture, design, and intricate detailing to your projects. Dive into the world of quilting, patchwork, and complex decorative stitching with the versatile zigzag foot:
Quilting and Patchwork:
Incorporate zigzag in quilting and patchwork for added texture and design.
- Textured Quilting:
- Use zigzag stitches to create textured patterns within quilted layers.
- Experiment with different stitch lengths and widths to achieve unique quilting effects.
- Secure Patchwork Seams:
- Enhance the structural integrity of patchwork by reinforcing seams with zigzag stitching.
- Choose contrasting thread colors for decorative and visually appealing patchwork.
Complex Decorative Stitching Projects:
Enhance complex decorative stitching projects with the unique capabilities of the zigzag foot.
- Intricate Borders:
- Create intricate borders and outlines using zigzag stitches in varying widths.
- Combine zigzag with other decorative stitches for a customized and detailed look.
- Embellishments and Appliqué:
- Add embellishments to garments or home decor items using zigzag stitches.
- Use zigzag for appliqué work, securing fabric shapes with precision and style.
- Thread Painting:
- Explore thread painting techniques by layering zigzag stitches to mimic brush strokes.
- Achieve a painterly effect by selecting thread colors that complement your project.
Now, let’s organize these advanced techniques into a structured table for quick reference:
| Advanced Technique | Implementation Guidelines |
|---|---|
| Quilting and Patchwork | – Use zigzag for textured quilting patterns – Reinforce patchwork seams for structural integrity – Experiment with stitch lengths and widths |
| Complex Decorative Stitching Projects | – Create intricate borders with varying zigzag widths – Combine zigzag with other decorative stitches – Use zigzag for embellishments and appliqué – Explore thread painting techniques with layered zigzag stitches |
These advanced techniques open up new possibilities for your sewing projects, allowing you to add depth, creativity, and intricate detailing with the unique capabilities of the zigzag foot.
Choosing the Right Zigzag Foot for Your Machine
Selecting the appropriate zigzag foot is crucial for ensuring compatibility and optimal performance with your sewing machine. Consider the following factors and recommendations to make an informed choice:
Considerations When Selecting a Zigzag Foot:
Explore factors to consider, such as machine compatibility and specific features, when choosing a zigzag foot.
- Machine Compatibility:
- Check your sewing machine’s model and specifications to ensure compatibility with the zigzag foot.
- Some machines may have proprietary zigzag feet designed for optimal performance.
- Features and Adjustments:
- Evaluate the specific features and adjustments offered by different zigzag foot models.
- Consider additional functionalities, such as adjustable width or leveling buttons for thick fabrics.
Compatibility and Recommendations:
Find recommendations for various sewing machine models to guide your selection process.
- Consult the Manual:
- Refer to your sewing machine’s manual for guidance on compatible zigzag foot options.
- Manufacturers often provide recommendations and compatibility information.
- Brand-Specific Recommendations:
- Some sewing machine brands offer a range of zigzag feet designed for their models.
- Explore brand-specific recommendations for reliable compatibility.
Now, let’s organize these considerations into a structured table for quick reference:
| Consideration | Guidelines for Selection |
|---|---|
| Machine Compatibility | – Check your sewing machine’s model and specifications – Ensure compatibility with the zigzag foot – Consider proprietary zigzag feet for optimal performance |
| Features and Adjustments | – Evaluate specific features and adjustments offered by zigzag foot models – Consider functionalities like adjustable width or leveling buttons for thick fabrics |
| Compatibility and Recommendations | – Refer to your sewing machine’s manual for guidance – Explore brand-specific recommendations for compatible zigzag feet |
By considering these factors and recommendations, you can confidently choose the right zigzag foot for your machine, ensuring seamless stitching and enhanced versatility for your sewing projects.
Zig Zag Foot Brands
Here’s a list showcasing some popular zigzag foot brands and their notable characteristics:
| Brand | Features and Characteristics |
|---|---|
| 1. Singer | Widely compatible with various Singer sewing machine models. |
| Some models may feature a transparent design for enhanced visibility during stitching. | |
| Durable construction suitable for everyday sewing tasks. | |
| 2. Brother | Designed to work seamlessly with Brother sewing machines. |
| Adjustable settings for stitch width and length. | |
| Some models equipped with leveling buttons for thick fabrics. | |
| 3. Janome | Compatible with a range of Janome sewing machines. |
| Offers precision in stitching, suitable for decorative work. | |
| May include special adjustments for quilting and embroidery. | |
| 4. Pfaff | Known for compatibility with Pfaff sewing machine models. |
| Provides stability and precision in zigzag stitching. | |
| Adjustable features for customization based on project needs. | |
| 5. Bernina | Tailored for Bernina sewing machines, ensuring optimal performance. |
| Offers a variety of presser feet, including specialized zigzag options. | |
| Some models may feature a clear design for better visibility. | |
| 6. Juki | Designed for compatibility with Juki sewing machines. |
| Sturdy construction suitable for heavy-duty sewing projects. | |
| Adjustable settings for different zigzag stitch styles. | |
| 7. Husqvarna Viking | Compatible with Husqvarna Viking sewing machines. |
| Precision in zigzag stitching, ideal for intricate designs. | |
| Some models may include additional feet for diverse applications. |
Note: It's essential to check the specific model compatibility and features for each brand to ensure the zigzag foot meets your sewing machine's requirements.
Сonclusion
In conclusion, the zigzag foot emerges as a powerhouse in the sewing realm, offering unparalleled versatility and functionality for general stitching needs. As you embark on your sewing journey, experiment with the techniques and applications outlined in this guide. The zigzag foot is not just a tool; it’s your key to unlocking a world of creative possibilities in every stitch. Explore, experiment, and let your creativity soar with the remarkable zigzag foot. Happy sewing!