Husqvarna Viking 150E Common Problems and Troubleshooting
Retro Electric Sewing Machine: Husqvarna Viking 150E Review
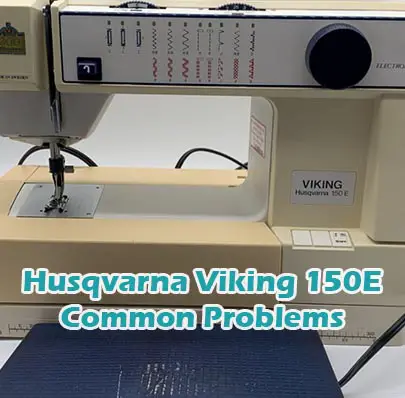
The Husqvarna Viking 150E is a versatile electronic sewing machine that caters to a variety of sewing needs, from denim to quilting to embroidery and wool projects. Despite being produced between 1989 and 1992, this machine still holds its own in terms of functionality and features.
One of the standout features of the Viking 150E is its electronic operation, which allows for precise stitching control and easy adjustment of settings. Whether you’re working on intricate embroidery designs or tackling heavy-duty denim seams, the electronic operation ensures smooth and consistent stitching.
The machine’s versatility is further enhanced by its range of features. The bobbin-winding mechanism simplifies the process of preparing bobbins, saving time and effort. Blind stitching capability adds a professional touch to hems and seams, while the buttonhole stitch feature offers convenience for garment construction.
The Viking 150E also boasts a free arm design, allowing for easy sewing of cylindrical items like sleeves and cuffs. This, coupled with its portable nature, makes it suitable for sewing on-the-go or in tight spaces.
Adjustability is a key strength of this machine. With adjustable stitch length and width, as well as adjustable presser foot pressure and needle position, users have the flexibility to customize their stitches according to the specific requirements of each project.
While the Viking 150E may not have the bells and whistles of more modern sewing machines, its reliability and solid performance make it a timeless choice for sewists of all skill levels. Whether you’re a beginner learning the ropes or an experienced crafter looking for a dependable workhorse, the Husqvarna Viking 150E delivers on quality and functionality.
Husqvarna Viking 150E Product Details
| Feature | Description |
|---|---|
| Operation | Electronic |
| Suitable For | Denim, Quilting, Embroidery, Wool |
| Features | Bobbin-Winding, Blind Stitching, Free Arm, Buttonhole-Stitch, Portable, Adjustable Stitch Length and Width, Adjustable Presser Foot Pressure, Adjustable Needle Position |
| Production Years | 1989 – 1992 |
Here you can find all the
parts and accessories for the Husqvarna Viking 150E
guaranteed to fit your sewing machine
Causes of Common Problems with the Husqvarna Viking 150E
Introduction text goes here, mentioning the specific model Husqvarna Viking 150E sewing machine and addressing the common problems users might encounter. This article will explore various issues and provide troubleshooting solutions tailored to this particular machine.
Common Problems with the Husqvarna Viking 150E
1. Thread Tension Issues
- Description of the Problem: Uneven stitches or thread bunching on fabric.
- Cause of the Problem: Incorrect tension settings or debris in the tension discs.
- Troubleshooting Steps:
- Check the tension settings according to the machine’s manual.
- Clean the tension discs using a small brush or compressed air.
- Thread the machine properly and retest on scrap fabric.
2. Needle Breakage
- Description of the Problem: Needles frequently breaking during sewing.
- Cause of the Problem: Dull or bent needles, incorrect needle size, or sewing through thick fabric.
- Troubleshooting Steps:
- Replace the needle with a new, appropriate size and type.
- Ensure the needle is properly inserted and tightened.
- Check the fabric thickness and adjust the needle size accordingly.
3. Bobbin Tension Issues
- Description of the Problem: Uneven or loopy stitches on the underside of the fabric.
- Cause of the Problem: Incorrect bobbin tension or improper bobbin threading.
- Troubleshooting Steps:
- Check the bobbin tension according to the machine’s manual.
- Ensure the bobbin is properly inserted and the thread is feeding correctly.
- Clean the bobbin case and area around it to remove any lint or debris.
4. Jammed Feed Dog
- Description of the Problem: Feed dogs not moving or getting stuck while sewing.
- Cause of the Problem: Accumulation of lint or debris, or mechanical issues.
- Troubleshooting Steps:
- Clean the feed dog area thoroughly with a brush and remove any obstructions.
- Check for any loose or damaged feed dog components and repair or replace as needed.
- Apply a drop of sewing machine oil to lubricate the feed dog mechanism.
5. Stitch Skipping
- Description of the Problem: Intermittent stitches missing from the sewing pattern.
- Cause of the Problem: Improper needle threading, dull needle, or sewing too fast.
- Troubleshooting Steps:
- Re-thread the needle according to the machine’s threading diagram.
- Replace the needle with a new, sharp one.
- Slow down the sewing speed to allow the machine to catch each stitch properly.
6. Bobbin Jamming
- Description of the Problem: Bobbin getting stuck or jammed in the bobbin case.
- Cause of the Problem: Incorrect bobbin insertion, lint buildup, or damaged bobbin case.
- Troubleshooting Steps:
- Remove the bobbin and clean the bobbin case thoroughly.
- Check for any burrs or damage on the bobbin case and replace if necessary.
- Re-insert the bobbin following the machine’s instructions carefully.
7. Thread Breakage
- Description of the Problem: Thread frequently snapping during sewing.
- Cause of the Problem: Tension issues, rough or sharp edges on the needle, or using low-quality thread.
- Troubleshooting Steps:
- Check and adjust the tension settings for both upper and lower threads.
- Inspect the needle for any burrs or damage and replace if necessary.
- Switch to a higher-quality thread suitable for the fabric being sewn.
8. Fabric Not Feeding Properly
- Description of the Problem: Fabric not moving smoothly under the presser foot.
- Cause of the Problem: Dirty feed dogs, incorrect presser foot pressure, or incorrect stitch length.
- Troubleshooting Steps:
- Clean the feed dogs and surrounding area to remove any debris.
- Adjust the presser foot pressure according to the fabric being used.
- Ensure the stitch length is appropriate for the fabric and adjust if necessary.
9. Uneven Stitch Length
- Description of the Problem: Inconsistent stitch length throughout the sewing project.
- Cause of the Problem: Improper tension settings, incorrect threading, or worn feed dogs.
- Troubleshooting Steps:
- Check and adjust the tension settings for both upper and lower threads.
- Ensure the machine is threaded correctly according to the manual.
- If feed dogs are worn, consider getting them replaced by a technician.
10. Noisy Operation
- Description of the Problem: Excessive noise coming from the sewing machine during operation.
- Cause of the Problem: Lack of lubrication, loose components, or internal mechanical issues.
- Troubleshooting Steps:
- Apply sewing machine oil to lubricate moving parts as per the manual.
- Tighten any loose screws or bolts on the machine.
- If the noise persists, consult a qualified technician for further inspection.
11. Uneven Feed Dog Movement
- Description of the Problem: Feed dogs moving erratically or not at all.
- Cause of the Problem: Debris obstructing feed dog movement, worn feed dog gears, or motor issues.
- Troubleshooting Steps:
- Clean the feed dog area thoroughly to remove any lint or debris.
- Inspect the feed dog gears for wear and replace if necessary.
- If the issue persists, consult a technician to check the motor and drive system.
12. Needle Threader Malfunction
- Description of the Problem: Automatic needle threader not working properly.
- Cause of the Problem: Misalignment of the needle threader mechanism, bent needle, or lack of proper calibration.
- Troubleshooting Steps:
- Inspect the needle threader for any misalignment or damage and adjust if possible.
- Ensure the needle is straight and not bent, as this can affect the threader’s function.
- Refer to the machine’s manual for instructions on calibrating the needle threader.
13. Stitching Machine Needle Hitting Plate
- Description of the Problem: Needle hitting the needle plate or bobbin case.
- Cause of the Problem: Improper needle insertion, bent needle, or incorrect presser foot attachment.
- Troubleshooting Steps:
- Ensure the needle is inserted correctly, with the flat side facing the back of the machine.
- Inspect the needle for any bends or damage and replace if necessary.
- Check that the presser foot is attached properly and not interfering with the needle’s path.
14. Bobbin Winding Malfunction
- Description of the Problem: Bobbin winding mechanism not functioning correctly.
- Cause of the Problem: Tension issues, incorrect bobbin placement, or faulty bobbin winding mechanism.
- Troubleshooting Steps:
- Check and adjust the bobbin winding tension according to the machine’s manual.
- Ensure the bobbin is placed on the winding spindle correctly.
- If the problem persists, consult a technician to inspect the bobbin winding mechanism.
Here you can find all the
parts and accessories for the Husqvarna Viking 150E
guaranteed to fit your sewing machine
15. Motor Overheating
- Description of the Problem: Sewing machine motor becoming excessively hot during use.
- Cause of the Problem: Overuse, lack of proper ventilation, or motor malfunction.
- Troubleshooting Steps:
- Allow the machine to cool down for a period of time if it becomes too hot.
- Ensure the machine is placed in a well-ventilated area to prevent overheating.
- If the motor continues to overheat, consult a technician to inspect for any underlying issues.
16. Buttonholing Malfunction
- Description of the Problem: Difficulty in creating consistent and properly sized buttonholes.
- Cause of the Problem: Incorrect settings, dull needle, or improper technique.
- Troubleshooting Steps:
- Ensure the machine is set to the appropriate buttonhole stitch and size.
- Replace the needle with a new, sharp one designed for buttonhole stitching.
- Practice buttonholing technique on scrap fabric to ensure proper alignment and tension.
17. Bobbin Thread Showing on Top
- Description of the Problem: Bobbin thread visible on the top side of the fabric.
- Cause of the Problem: Incorrect tension settings, improperly threaded bobbin, or lint buildup in the bobbin area.
- Troubleshooting Steps:
- Adjust the tension settings for the bobbin thread according to the machine’s manual.
- Ensure the bobbin is correctly threaded and seated in the bobbin case.
- Clean the bobbin area thoroughly to remove any lint or debris.
18. Thread Puckering
- Description of the Problem: Fabric puckering or gathering along the seam lines.
- Cause of the Problem: Incorrect tension settings, using the wrong needle or thread, or sewing too tightly.
- Troubleshooting Steps:
- Adjust the tension settings for both upper and lower threads to achieve balanced stitching.
- Use a needle appropriate for the fabric type and weight.
- Ensure the fabric is not stretched or pulled excessively during sewing.
19. Feed Dog Teeth Wear
- Description of the Problem: Wear and tear on the feed dog teeth resulting in uneven fabric feeding.
- Cause of the Problem: Regular use over time, sewing over pins, or sewing through thick layers of fabric.
- Troubleshooting Steps:
- Inspect the feed dog teeth for signs of wear and replace if necessary.
- Avoid sewing over pins to prevent damage to the feed dog teeth.
- Consider using a walking foot attachment when sewing thick or layered fabrics.
20. Bobbin Case Latch Issues
- Description of the Problem: Difficulty in properly securing the bobbin case in place.
- Cause of the Problem: Misalignment of the bobbin case, damaged latch mechanism, or debris obstruction.
- Troubleshooting Steps:
- Ensure the bobbin case is correctly inserted and aligned according to the machine’s manual.
- Inspect the latch mechanism for any damage and repair or replace if necessary.
- Clean the area around the bobbin case to remove any lint or debris that may be obstructing the latch.
16. Thread Cutter Not Working
- Description of the Problem: The automatic thread cutter feature does not cut the thread as expected.
- Cause of the Problem: Dull blade, thread jam, or mechanical malfunction in the thread cutter mechanism.
- Troubleshooting Steps:
- Inspect the thread cutter blade for any dullness or damage and replace if necessary.
- Clean the thread cutter area to remove any lint or debris that may be causing a jam.
- If the problem persists, consult a technician to diagnose and repair any mechanical issues.
17. Stitch Selection Malfunction
- Description of the Problem: Inability to select or change stitch patterns on the machine.
- Cause of the Problem: Button or selector switch malfunction, electrical issue, or software glitch.
- Troubleshooting Steps:
- Check for any physical damage or debris around the stitch selection buttons or switches.
- Ensure the machine is properly connected to a power source and there are no electrical issues.
- If possible, reset the machine to factory settings or update the firmware to address any software issues.
18. Foot Pedal Not Responsive
- Description of the Problem: The foot pedal does not respond when pressed, or responds intermittently.
- Cause of the Problem: Loose connection, faulty wiring, or internal circuitry issues in the foot pedal.
- Troubleshooting Steps:
- Check the connection between the foot pedal and the sewing machine for any loose or damaged wires.
- Test the foot pedal with another compatible machine to determine if the issue lies with the pedal or the machine.
- If necessary, replace the foot pedal or consult a technician for repair.
19. Fabric Puckering
- Description of the Problem: Excessive wrinkling or puckering of fabric during sewing.
- Cause of the Problem: Incorrect tension settings, improper presser foot pressure, or using the wrong needle size for the fabric.
- Troubleshooting Steps:
- Adjust the tension settings for both upper and lower threads to achieve balanced tension.
- Ensure the presser foot pressure is adjusted according to the fabric being sewn.
- Use the appropriate needle size and type for the fabric to prevent unnecessary puckering.
20. Thread Knots or Bird’s Nests
- Description of the Problem: Tangled thread underneath the fabric, forming knots or bird’s nests.
- Cause of the Problem: Improper threading, bobbin winding issues, or sewing at too high a speed.
- Troubleshooting Steps:
- Re-thread the machine, ensuring the thread follows the correct path and is properly seated in the tension discs.
- Check the bobbin winding for any irregularities or tension problems and re-wind if necessary.
- Slow down the sewing speed to allow the machine to properly form stitches without tangling the thread.
Here you can find all the
parts and accessories for the Husqvarna Viking 150E
guaranteed to fit your sewing machine
Husqvarna Viking 150E Sewing Machine Manual
The operating instructions for the Husqvarna Viking 150E can be found on the manufacturer’s website. Please visit www.husqvarnaviking.com to access the manual and learn more about how to use your sewing machine effectively and safely.
Frequently Asked Questions about the Husqvarna Viking 150E
1. How do I adjust the thread tension on my Husqvarna Viking 150E?
To adjust the thread tension on the Husqvarna Viking 150E, refer to the machine’s manual for detailed instructions. Typically, tension adjustments can be made using the tension dial or knobs located on the machine’s front panel.
2. What should I do if my needle keeps breaking?
If your needle keeps breaking, ensure that you are using the correct needle type and size for the fabric you are sewing. Additionally, check for any bent or damaged needles and replace them as needed. Adjusting the machine’s tension settings may also help alleviate needle breakage.
3. Why is my bobbin thread bunching up underneath the fabric?
Bobbin thread bunching up underneath the fabric can be caused by various factors such as incorrect threading, improper bobbin placement, or tension issues. Refer to the machine’s manual to properly thread the bobbin and adjust tension settings accordingly.
4. How do I clean and maintain my Husqvarna Viking 150E?
To clean and maintain your Husqvarna Viking 150E, regularly remove lint and debris from the bobbin area, feed dogs, and needle plate using a small brush or compressed air. Additionally, oil the machine as instructed in the manual to keep it running smoothly.
5. What should I do if my stitches are skipping or uneven?
If your stitches are skipping or uneven, first ensure that you are using the correct needle and thread for the fabric being sewn. Check the machine’s tension settings and adjust if necessary. Cleaning the machine and ensuring proper threading can also help improve stitch quality.
Conclusion
It is recommended that users always refer to the manual, customer service, or service center whenever possible if there is a problem with their Husqvarna Viking 150E sewing machine. Proper maintenance and troubleshooting techniques can help ensure smooth and efficient sewing experiences.
Husqvarna Viking Huskylock 170 Common Problems