Husqvarna Viking 6450 Common Problems and Troubleshooting
Are you experiencing issues with your Husqvarna Viking 6450 sewing machine? You’re not alone. Whether you’re a seasoned seamstress or just starting out, encountering common problems with your sewing machine can be frustrating. In this guide, we’ll explore some of the typical issues that users of the Husqvarna Viking 6450 may face and provide troubleshooting tips to help you get back to your sewing projects with ease.
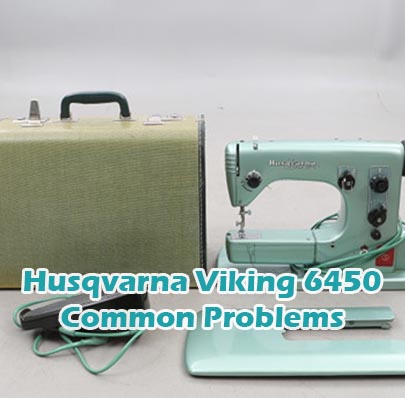
Here you can find all the
parts and accessories for the Husqvarna Viking 6450
guaranteed to fit your sewing machine
Causes of Common Problems with the Husqvarna Viking 6450 and Troubleshooting
1. Thread Breaking or Snapping
- Description: Thread breaks or snaps frequently during sewing.
- Cause: Incorrect threading or tension settings, dull or damaged needle, or using low-quality thread.
- Troubleshooting:
- Re-thread the machine following the threading diagram in the user manual.
- Check and adjust the tension settings according to the fabric and thread being used.
- Replace the needle with a new, appropriate one for the fabric being sewn.
- Use high-quality thread suitable for your project.
2. Uneven Stitching
- Description: Stitches appear uneven, with some being too tight or too loose.
- Cause: Incorrect tension settings, improper needle insertion, or bobbin issues.
- Troubleshooting:
- Check and adjust the tension settings to achieve balanced stitching.
- Ensure the needle is inserted correctly, with the flat side facing the back.
- Inspect the bobbin for any tangles or debris and re-thread if necessary.
3. Machine Jamming or Skipping Stitches
- Description: The machine jams or skips stitches intermittently during sewing.
- Cause: Dull or bent needle, incorrect bobbin insertion, or debris in the bobbin area.
- Troubleshooting:
- Replace the needle with a new one suitable for the fabric being sewn.
- Ensure the bobbin is inserted correctly and that the thread is feeding smoothly.
- Clean the bobbin area to remove any lint or debris that may be causing the issue.
4. Fabric Not Feeding Properly
- Description: The fabric does not move smoothly under the presser foot or fails to feed properly.
- Cause: Incorrect presser foot pressure, dirty feed dogs, or improper fabric handling.
- Troubleshooting:
- Adjust the presser foot pressure according to the thickness of the fabric.
- Clean the feed dogs and surrounding area to remove any lint or debris.
- Ensure the fabric is properly guided and not being pulled or pushed excessively.
5. Noisy Operation
- Description: The sewing machine operates loudly or makes unusual noises while in use.
- Cause: Loose or damaged parts, lack of lubrication, or improper machine setup.
- Troubleshooting:
- Tighten any loose screws or parts that may be causing the noise.
- Ensure all moving parts are properly lubricated according to the user manual.
- Check the machine setup to ensure it is on a stable surface and properly aligned.
6. Needle Breaking
- Description: Needles frequently break during sewing.
- Cause: Using the wrong needle size or type, sewing over thick seams, or a damaged needle plate.
- Troubleshooting:
- Ensure you are using the correct needle size and type for your fabric.
- Avoid sewing over thick seams by hand-cranking the machine over them or using a hump jumper.
- Inspect the needle plate for any damage and replace if necessary.
7. Bobbin Thread Tension Issues
- Description: Uneven tension between the top and bobbin threads.
- Cause: Improperly wound bobbin, incorrect threading, or debris in the bobbin case.
- Troubleshooting:
- Ensure the bobbin is wound evenly and inserted correctly into the bobbin case.
- Check the threading of the bobbin case and adjust as needed.
- Clean the bobbin case area to remove any lint or debris that may be affecting tension.
8. Stitches Skipping
- Description: The machine skips stitches, leaving gaps in the seam.
- Cause: Incorrect needle or thread tension, dull or bent needle, or bobbin issues.
- Troubleshooting:
- Adjust the tension settings for both the needle and bobbin threads.
- Replace the needle with a new one suitable for the fabric.
- Check the bobbin for any tangles or debris and re-thread if necessary.
9. Fabric Puckering
- Description: The fabric gathers or puckers unnaturally while sewing.
- Cause: Incorrect tension settings, improper presser foot pressure, or using the wrong needle size.
- Troubleshooting:
- Adjust the tension settings to achieve balanced stitching.
- Ensure the presser foot pressure is appropriate for the fabric being sewn.
- Use the correct needle size and type for the fabric to prevent puckering.
10. Thread Bunching on the Underside
- Description: Excess thread appears bunched up on the underside of the fabric.
- Cause: Incorrect threading, bobbin tension issues, or a dirty bobbin case.
- Troubleshooting:
- Re-thread the machine, ensuring the thread is correctly seated in the tension discs.
- Adjust the tension of the bobbin thread to match the top thread.
- Clean the bobbin case area thoroughly to remove any lint or debris.
11. Bobbin Not Winding Properly
- Description: The bobbin fails to wind evenly or completely.
- Cause: Incorrect bobbin threading, bobbin winding tension issues, or debris in the bobbin winding mechanism.
- Troubleshooting:
- Ensure the bobbin is inserted correctly on the winding spindle and threaded properly.
- Check the bobbin winding tension and adjust as necessary using the tension disc or knob.
- Clean the bobbin winding mechanism to remove any lint or debris that may be hindering proper winding.
12. Feed Dogs Not Moving
- Description: The feed dogs fail to engage or move the fabric during sewing.
- Cause: Feed dog adjustment issues, debris obstructing the feed dog movement, or mechanical malfunction.
- Troubleshooting:
- Check the feed dog adjustment to ensure they are not lowered or disengaged accidentally.
- Clean the feed dog area thoroughly to remove any lint, thread, or debris.
- If the issue persists, consult a professional for potential mechanical repairs.
13. Thread Cutter Not Functioning
- Description: The built-in thread cutter does not cut the thread cleanly or fails to operate.
- Cause: Dull or misaligned thread cutter blade, debris buildup, or mechanical issues.
- Troubleshooting:
- Inspect the thread cutter blade for dullness or misalignment and replace if necessary.
- Clean the thread cutter area to remove any lint, thread, or debris that may be obstructing its function.
- If the problem persists, seek professional assistance for potential mechanical repairs.
14. Machine Overheating
- Description: The sewing machine becomes excessively hot during extended use.
- Cause: Poor ventilation, overloaded motor, or mechanical malfunction.
- Troubleshooting:
- Ensure the machine is placed in a well-ventilated area to prevent overheating.
- Avoid running the machine at high speeds for prolonged periods to prevent motor overload.
- If the machine continues to overheat, discontinue use and consult a professional for inspection and repairs.
15. Electronic Malfunctions
- Description: The sewing machine experiences electronic glitches or failures.
- Cause: Power surges, faulty electronic components, or software errors.
- Troubleshooting:
- Ensure the machine is connected to a stable power source and surge protector to prevent damage from power fluctuations.
- If possible, reset the machine to its factory settings to troubleshoot software-related issues.
- If electronic malfunctions persist, contact the manufacturer or authorized service center for repair or replacement.
Here you can find all the
parts and accessories for the Husqvarna Viking 6450
guaranteed to fit your sewing machine
16. Bobbin Case Jamming
- Description: The bobbin case gets stuck or jams during sewing.
- Cause: Incorrect installation of the bobbin case, debris accumulation, or mechanical issues.
- Troubleshooting:
- Remove the bobbin case and re-insert it, ensuring it is properly seated and secured.
- Clean the bobbin case area to remove any lint, thread, or debris that may be causing the jam.
- If the problem persists, seek professional assistance for potential mechanical repairs.
17. Foot Pedal Malfunction
- Description: The foot pedal does not respond or operates intermittently.
- Cause: Loose connection, damaged cord, or internal wiring issues.
- Troubleshooting:
- Check the connection between the foot pedal and the machine to ensure it is secure.
- Inspect the power cord for any signs of damage or wear and replace if necessary.
- If the issue persists, contact the manufacturer or authorized service center for repair or replacement of the foot pedal.
18. Buttonhole Malformation
- Description: Buttonholes are uneven, too small, or fail to form properly.
- Cause: Incorrect buttonhole settings, dull or incorrect needle, or fabric thickness.
- Troubleshooting:
- Adjust the buttonhole settings according to the size and type of button being used.
- Ensure the needle is sharp and appropriate for the fabric being used.
- Stabilize the fabric and avoid excessive thickness when sewing buttonholes.
19. Bobbin Thread Keeps Tangling
- Description: The bobbin thread frequently tangles or nests underneath the fabric.
- Cause: Incorrect bobbin tension, bobbin winding issues, or debris in the bobbin area.
- Troubleshooting:
- Adjust the tension of the bobbin thread to match the top thread.
- Ensure the bobbin is wound evenly and inserted correctly into the bobbin case.
- Clean the bobbin case area thoroughly to remove any lint or debris that may be causing tangling.
20. Motor Overload
- Description: The sewing machine’s motor struggles or stalls during operation.
- Cause: Overloading the machine with thick fabrics, sewing at high speeds for extended periods, or mechanical issues.
- Troubleshooting:
- Avoid sewing excessively thick fabrics or multiple layers to prevent overloading the motor.
- Allow the machine to rest periodically, especially during long sewing sessions.
- If the motor continues to overload, consult a professional for inspection and potential repairs.
21. Thread Tension Discrepancies
- Description: Inconsistent tension between the top and bobbin threads.
- Cause: Incorrect tension settings, dirty tension discs, or threading errors.
- Troubleshooting:
- Adjust the tension settings for both the top and bobbin threads to achieve balanced tension.
- Clean the tension discs with a soft brush or compressed air to remove any debris.
- Double-check the threading of both the top thread and bobbin to ensure they are correctly threaded.
22. Thread Jamming in the Bobbin Case
- Description: The thread gets stuck or jams inside the bobbin case during sewing.
- Cause: Improper bobbin insertion, thread tension issues, or debris in the bobbin case.
- Troubleshooting:
- Ensure the bobbin is inserted correctly into the bobbin case with the thread feeding in the correct direction.
- Check and adjust the bobbin tension to prevent thread jams.
- Clean the bobbin case area thoroughly to remove any lint, thread, or debris that may be causing the jam.
23. Thread Looping on the Surface
- Description: Loops of thread appear on the surface of the fabric during sewing.
- Cause: Incorrect threading, bobbin tension issues, or dull needle.
- Troubleshooting:
- Re-thread the machine, ensuring the thread is correctly seated in the tension discs and threading guides.
- Check and adjust the tension of the bobbin thread to match the top thread.
- Replace the needle with a new, sharp one appropriate for the fabric being sewn.
24. Inconsistent Stitch Length
- Description: Stitch length varies unexpectedly during sewing.
- Cause: Incorrect stitch length setting, uneven fabric feeding, or mechanical issues.
- Troubleshooting:
- Adjust the stitch length setting on the machine to achieve the desired length.
- Ensure the fabric is feeding evenly under the presser foot without bunching or dragging.
- If the problem persists, consult a professional for inspection and potential repairs.
25. Needle Threader Malfunction
- Description: The automatic needle threader fails to function properly.
- Cause: Misalignment, damage to the needle threader mechanism, or threading errors.
- Troubleshooting:
- Ensure the needle is positioned correctly for threading and the threader mechanism is engaged.
- Inspect the needle threader for any signs of damage or misalignment and address as needed.
- Double-check the threading process to ensure the thread is properly guided through the threader.
Here you can find all the
parts and accessories for the Husqvarna Viking 6450
guaranteed to fit your sewing machine
Husqvarna Viking 6450 Sewing Machine Manual
The operating instructions for the Husqvarna Viking 6450 can be found on the manufacturer’s website. Please visit the official Husqvarna Viking website and navigate to the support or downloads section to access the manual for your specific model.
Frequently Asked Questions about the Husqvarna Viking 6450
1. How can I troubleshoot thread breaking or snapping issues with my Husqvarna Viking 6450?
To troubleshoot thread breaking or snapping, ensure proper threading, adjust tension settings, use a new needle suitable for your fabric, and use high-quality thread.
2. What should I do if my Husqvarna Viking 6450 is producing uneven stitching?
If you’re experiencing uneven stitching, check and adjust tension settings, ensure correct needle insertion, and inspect the bobbin for any issues.
3. How do I address machine jamming or skipping stitches with my Husqvarna Viking 6450?
To resolve machine jamming or skipping stitches, replace the needle, ensure proper bobbin insertion, and clean the bobbin area to remove any debris.
4. What could be causing my Husqvarna Viking 6450 to have fabric feeding issues?
If your fabric isn’t feeding properly, adjust presser foot pressure, clean feed dogs, and ensure proper fabric handling techniques.
5. Why is my Husqvarna Viking 6450 making unusual noises during operation?
If your machine is noisy, tighten loose parts, lubricate moving components, and ensure proper machine setup and alignment.
Conclusion
It’s important to remember that troubleshooting sewing machine issues can sometimes be complex. Always refer to the manual provided by the manufacturer for detailed instructions on operating and troubleshooting your Husqvarna Viking 6450. If you encounter persistent issues or are unsure how to proceed, don’t hesitate to reach out to customer service or a certified service center for assistance.
Husqvarna Viking 6370 Common Problems