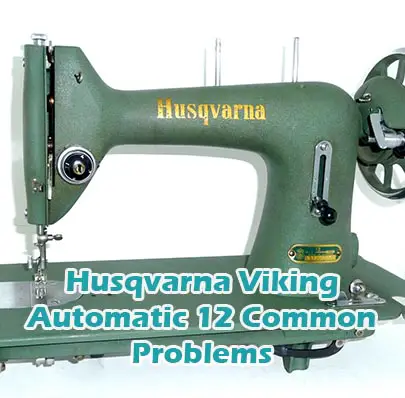
Husqvarna Viking Automatic 12 Common Problems and Troubleshooting
Welcome to our guide on troubleshooting common problems with the Husqvarna Viking Automatic 12 sewing machine. Whether you’re a seasoned seamstress or just starting out, encountering issues with your sewing machine can be frustrating. In this article, we’ll address some of the common problems users may face with the Husqvarna Viking Automatic 12 and provide solutions to help you get back to your sewing projects with ease.
Causes of Common Problems with the Husqvarna Viking Automatic 12
This section will address possible problems and solutions with this sewing machine:
1. Bobbin Thread Tension Issues
Description: Users may experience uneven stitching or thread bunching on the underside of the fabric.
Cause: Incorrect bobbin tension or improperly wound bobbin.
Troubleshooting:
- Check bobbin threading to ensure it’s correctly wound and inserted into the bobbin case.
- Adjust the bobbin tension screw using a small screwdriver, turning it clockwise to increase tension or counterclockwise to decrease tension.
- Test the machine with scrap fabric to ensure the tension is balanced.
2. Needle Breakage
Description: Needles may break during sewing, causing frustration and potential damage to the fabric.
Cause: Use of incorrect needle size or bent/damaged needle.
Troubleshooting:
- Ensure you’re using the correct needle size and type for the fabric being sewn.
- Inspect the needle for any signs of damage or bending, and replace it if necessary.
- Check for any obstructions in the needle plate or bobbin area that may be causing the needle to hit against them.
3. Jammed Bobbin Case
Description: The bobbin case may become jammed, preventing smooth sewing operation.
Cause: Accumulation of lint or debris in the bobbin area.
Troubleshooting:
- Remove the bobbin case and clean out any lint or debris using a brush or compressed air.
- Inspect the bobbin case for any signs of damage, such as scratches or burrs, and replace if necessary.
- Reinsert the bobbin case and test the machine with scrap fabric to ensure smooth operation.
4. Thread Tension Disk Issues
Description: Users may encounter issues with the upper thread tension, resulting in loose or tight stitches.
Cause: Dust or debris buildup in the thread tension disks.
Troubleshooting:
- Turn off the sewing machine and unplug it from the power source.
- Using a soft brush or compressed air, carefully clean the thread tension disks to remove any accumulated dust or debris.
- Plug in the machine and test the tension adjustment on scrap fabric to ensure proper stitching.
5. Fabric Feeding Issues
Description: Fabric may not feed smoothly through the machine, causing uneven stitching or skipped stitches.
Cause: Improper presser foot pressure or feed dog misalignment.
Troubleshooting:
- Check the presser foot pressure adjustment and adjust as needed according to the fabric thickness.
- Inspect the feed dogs for any signs of damage or misalignment, and make adjustments or repairs as necessary.
- Test the machine with scrap fabric to ensure smooth fabric feeding and stitching.
6. Thread Cutter Malfunction
Description: The built-in thread cutter may not function properly, leading to frustration during sewing projects.
Cause: Dull or misaligned blades in the thread cutter mechanism.
Troubleshooting:
- Inspect the thread cutter blades for any signs of dullness or damage, and replace them if necessary.
- Ensure the thread cutter mechanism is properly aligned and free of any obstructions.
- Test the thread cutter function with scrap thread to ensure smooth cutting.
7. Stitch Length Irregularities
Description: Users may notice inconsistencies in stitch length while sewing, affecting the overall appearance of the project.
Cause: Incorrect stitch length setting or mechanical issues with the stitch length regulator.
Troubleshooting:
- Check the stitch length setting on the machine and adjust it to the desired length.
- If the issue persists, inspect the stitch length regulator for any signs of damage or misalignment, and make necessary adjustments or repairs.
- Test the machine with scrap fabric to ensure consistent stitch length.
8. Thread Bunching in Bobbin Area
Description: Thread may become tangled or bunched up in the bobbin area, leading to sewing difficulties.
Cause: Improper threading of the bobbin or tension issues in the bobbin case.
Troubleshooting:
- Re-thread the bobbin following the machine’s instruction manual carefully.
- Check the tension of the bobbin case and adjust if necessary using the tension screw.
- Clean the bobbin area to remove any lint or debris that may be causing the thread to bunch.
9. Motor Overheating
Description: The sewing machine’s motor may become excessively hot during prolonged use, potentially causing damage.
Cause: Overuse or lack of proper ventilation around the machine.
Troubleshooting:
- Avoid prolonged continuous use of the machine and allow it to cool down periodically.
- Ensure there is adequate space around the machine for proper ventilation.
- Consider using a motor cooling fan or additional cooling mechanisms if overheating persists.
10. Bobbin Winding Problems
Description: Users may encounter difficulties when winding the bobbin, leading to unevenly wound bobbins or thread breakage.
Cause: Incorrect threading of the bobbin winding mechanism or issues with the bobbin winding tension.
Troubleshooting:
- Ensure the bobbin is placed correctly on the bobbin winding spindle and that the thread is properly threaded through the tension discs.
- Check the bobbin winding tension adjustment and adjust if necessary.
- If thread breakage occurs during bobbin winding, try reducing the winding speed or using a different thread spool holder.
11. Uneven Feed Dog Movement
Description: The feed dogs may not move smoothly or evenly, causing fabric to feed inconsistently during sewing.
Cause: Buildup of lint or debris underneath the feed dogs or mechanical issues with the feed dog mechanism.
Troubleshooting:
- Turn off the sewing machine and remove the needle plate to access the feed dogs.
- Clean out any accumulated lint or debris using a brush or compressed air.
- Check the feed dog mechanism for any signs of damage or misalignment, and make necessary repairs.
12. Thread Fraying or Breaking
Description: Thread may fray or break frequently during sewing, leading to interruptions and frustration.
Cause: Use of low-quality or old thread, incorrect threading of the machine, or rough edges on the needle plate or presser foot.
Troubleshooting:
- Use high-quality thread suitable for the fabric being sewn, and ensure it’s not old or damaged.
- Check the threading of the machine, including both the upper thread and bobbin, and rethread if necessary.
- Inspect the needle plate and presser foot for any rough edges or burrs, and smooth them out if present.
13. Stitch Skips or Loops
Description: The machine may skip stitches or form loops, resulting in an uneven or unsightly stitch pattern.
Cause: Incorrect needle type or size, tension issues, or timing problems with the sewing machine.
Troubleshooting:
- Ensure you’re using the correct needle type and size for the fabric being sewn.
- Check both upper and bobbin thread tension and adjust as needed.
- If the issue persists, consult a professional to inspect and possibly adjust the timing of the machine.
14. Noisy Operation
Description: The sewing machine may produce excessive noise during operation, causing disruption and discomfort.
Cause: Lack of lubrication, loose or worn parts, or mechanical issues within the machine.
Troubleshooting:
- Refer to the machine’s manual for instructions on proper lubrication and apply lubricant to the designated areas.
- Inspect the machine for any loose or worn parts, such as screws or gears, and tighten or replace them as needed.
- If the noise persists, consult a professional technician to diagnose and repair any mechanical issues.
15. Bobbin Thread Not Catching
Description: The upper thread may fail to catch the bobbin thread, preventing proper stitching.
Cause: Improper threading of the machine, incorrect bobbin insertion, or lint accumulation in the bobbin area.
Troubleshooting:
- Double-check the threading of both the upper thread and bobbin, ensuring they are correctly threaded according to the machine’s instructions.
- Verify that the bobbin is inserted into the bobbin case correctly and that the thread is pulled through the tension spring.
- Clean out any lint or debris from the bobbin area using a brush or compressed air.
16. Thread Jamming in the Needle Plate
Description: Thread may become jammed or caught in the needle plate, causing sewing to halt abruptly.
Cause: Improper threading of the machine, use of old or low-quality thread, or debris accumulation in the needle plate area.
Troubleshooting:
- Stop sewing immediately and cut the thread if jamming occurs.
- Inspect the threading of the machine, ensuring both the upper thread and bobbin are correctly threaded.
- Replace the needle with a new one to ensure it’s not dull or damaged.
- Clean out any lint or debris from the needle plate area using a brush or compressed air.
17. Uneven Stitch Formation
Description: Stitches may appear uneven or irregular, detracting from the quality of the sewing project.
Cause: Tension imbalances, incorrect needle size, or misalignment of machine components.
Troubleshooting:
- Check and adjust both upper and bobbin thread tension as needed.
- Ensure you’re using the correct needle size and type for the fabric being sewn.
- Inspect the machine for any signs of misalignment or damage, and make necessary adjustments or repairs.
18. Foot Pedal Responsiveness Issues
Description: The foot pedal may not respond consistently to pressure, affecting sewing speed and control.
Cause: Loose connection, electrical issues, or mechanical problems with the foot pedal.
Troubleshooting:
- Check the connection between the foot pedal and the sewing machine, ensuring it’s securely plugged in.
- Inspect the foot pedal for any signs of damage or wear, and replace it if necessary.
- If the issue persists, consult a professional technician to diagnose and repair any electrical or mechanical problems.
19. Fabric Puckering
Description: Fabric may pucker or gather excessively while sewing, resulting in an undesirable finish.
Cause: Incorrect tension settings, improper needle choice, or sewing machine speed.
Troubleshooting:
- Adjust the tension settings on the machine, ensuring both upper and bobbin tension are balanced.
- Use a needle appropriate for the fabric type and weight to prevent unnecessary fabric distortion.
- Control the sewing machine speed, slowing down when sewing over bulky or delicate fabric layers.
20. Inconsistent Thread Trimming
Description: The automatic thread trimmer may not consistently cut the thread after sewing, leaving excess thread tails.
Cause: Dull or misaligned blades in the thread trimming mechanism, or incorrect machine setup.
Troubleshooting:
- Inspect the thread trimming blades for any signs of dullness or damage, and replace them if necessary.
- Ensure the machine is properly set up for automatic thread trimming according to the user manual.
- If the issue persists, consult a professional technician to diagnose and repair any mechanical problems.
21. Thread Nesting on the Underside
Description: Excess thread may form nests on the underside of the fabric, causing messy stitching.
Cause: Incorrect threading, tension issues, or improper bobbin insertion.
Troubleshooting:
- Re-thread the machine, ensuring both the upper thread and bobbin are threaded correctly.
- Check and adjust the tension settings for both the upper thread and bobbin.
- Verify that the bobbin is inserted into the bobbin case correctly and that the thread is pulled through the tension spring.
22. Needle Threader Malfunction
Description: The automatic needle threader may fail to work consistently, making threading the needle difficult.
Cause: Misalignment or damage to the needle threader mechanism.
Troubleshooting:
- Inspect the needle threader mechanism for any signs of misalignment or damage, and make necessary adjustments or repairs.
- Ensure the needle is positioned correctly for threading and that the threader is engaged properly.
- If the issue persists, thread the needle manually or use a handheld needle threader as an alternative.
23. Needle Thread Breakage
Description: The needle thread may break frequently during sewing, disrupting the stitching process.
Cause: Tension imbalances, needle dullness, or rough edges on the needle plate.
Troubleshooting:
- Check and adjust both upper and bobbin thread tension as needed.
- Replace the needle with a new one to ensure it’s sharp and undamaged.
- Inspect the needle plate for any rough edges or burrs, and smooth them out if present.
24. Fabric Slippage
Description: Fabric may slip or shift during sewing, leading to uneven stitching or misalignment of seams.
Cause: Insufficient presser foot pressure, improper fabric handling, or inadequate stabilizing techniques.
Troubleshooting:
- Adjust the presser foot pressure according to the fabric type and thickness.
- Use sewing pins or fabric weights to secure the fabric layers and prevent shifting.
- Consider using stabilizers or interfacing to provide additional support to delicate or slippery fabrics.
25. Bobbin Running Out Quickly
Description: The bobbin thread may run out faster than expected, requiring frequent replacement.
Cause: Incorrect bobbin tension, bobbin winding issues, or excessive thread usage.
Troubleshooting:
- Check and adjust the tension settings for the bobbin thread to ensure it’s properly wound and tensioned.
- Inspect the bobbin winding mechanism for any issues, such as uneven winding or loose thread.
- Monitor thread usage during sewing and adjust stitching techniques if necessary to minimize bobbin thread consumption.
Husqvarna Viking Automatic 12 Sewing Machine Manual
The operating instructions for the Husqvarna Viking Automatic 12 sewing machine can be found on the manufacturer’s website. Please visit the official Husqvarna Viking website and navigate to the support or resources section to access the manual for your specific model.
Frequently Asked Questions about the Husqvarna Viking Automatic 12
1. Why is my sewing machine producing uneven stitches?
Answer: Uneven stitches can result from various issues such as incorrect tension settings, needle problems, or fabric handling. Try adjusting the tension, changing the needle, or ensuring proper fabric feeding.
2. How do I troubleshoot bobbin thread tension issues?
Answer: Bobbin thread tension problems can arise from improper winding, incorrect insertion, or tension settings. Check the bobbin threading, adjust the tension, and ensure the bobbin is correctly inserted.
3. What should I do if my needle keeps breaking?
Answer: Needle breakage can occur due to various reasons, including using the wrong needle size or type, sewing over pins, or a bent needle. Ensure you’re using the correct needle, avoid sewing over pins, and replace any bent or damaged needles.
4. How can I prevent fabric puckering while sewing?
Answer: Fabric puckering can be minimized by adjusting the tension, using the appropriate needle and thread for the fabric, and ensuring proper fabric handling techniques such as stabilizing.
5. What should I do if my sewing machine is making unusual noises?
Answer: Unusual noises can indicate mechanical issues or lack of lubrication. Try cleaning and oiling the machine according to the manual, and if the noise persists, consult a professional technician.
Conclusion
For any problems encountered with your Husqvarna Viking Automatic 12 sewing machine, it is advisable to always refer to the manual, contact customer service, or visit a certified service center for assistance. These resources can provide valuable guidance and support to help resolve issues effectively.
Husqvarna Viking 500 Computer Common Problems