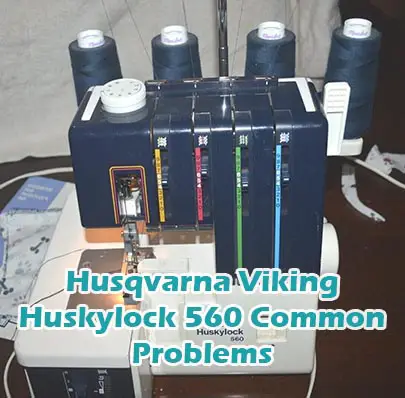
Husqvarna Viking Huskylock 560 Common Problems and Troubleshooting
Welcome to our guide on troubleshooting common issues with the Husqvarna Viking Huskylock 560 sewing machine. As proud owners of this advanced electric overlock machine, we understand the importance of seamless stitching and efficient operation. In this article, we’ll address some typical problems you may encounter with your Husqvarna Viking Huskylock 560 and provide effective solutions to ensure your sewing experience remains smooth and enjoyable.
Common Problems with the Husqvarna Viking Huskylock 560
-
Thread Breakage
Description of the problem: Threads keep breaking during sewing.
Cause of the problem: Incorrect threading or tension settings.
Troubleshooting step-by-step:
- Check the threading of all threads (upper and lower).
- Ensure proper tension settings according to the fabric being used.
- Clean the machine and remove any lint or debris that may be causing thread jams.
- If the problem persists, consult the user manual for specific troubleshooting steps or contact a certified technician.
-
Uneven Stitching
Description of the problem: Stitches appear uneven or irregular.
Cause of the problem: Incorrect needle or presser foot selection, or improper machine setup.
Troubleshooting step-by-step:
- Ensure the correct needle type and size are used for the fabric being sewn.
- Check that the presser foot is securely attached and appropriate for the selected stitch.
- Adjust the stitch length and width settings as needed for the desired outcome.
- If the issue persists, consider cleaning and oiling the machine, or consult the user manual for further troubleshooting guidance.
-
Looper Issues
Description of the problem: Loopers are not forming stitches properly.
Cause of the problem: Misaligned or damaged loopers, or incorrect threading.
Troubleshooting step-by-step:
- Inspect the loopers for any signs of misalignment or damage and adjust or replace as necessary.
- Ensure that the loopers are threaded correctly according to the machine’s threading diagram.
- Check the tension settings for the loopers and adjust if needed.
- If the problem persists, seek professional servicing to diagnose and repair any mechanical issues.
-
Fabric Jamming
Description of the problem: Fabric gets stuck or jams in the machine during sewing.
Cause of the problem: Incorrect threading, dull or damaged needles, or debris in the feed dogs.
Troubleshooting step-by-step:
- Check the threading of both upper and lower threads, ensuring they are correctly inserted and tensioned.
- Inspect the needle for any signs of damage or wear and replace if necessary.
- Clean the feed dogs and surrounding area to remove any lint or debris that may be causing the fabric to jam.
- If the issue persists, consider adjusting the presser foot pressure or seeking professional servicing.
-
Machine Not Powering On
Description of the problem: The sewing machine does not turn on when powered.
Cause of the problem: Faulty power connection, blown fuse, or internal electrical issues.
Troubleshooting step-by-step:
- Check that the power cord is securely plugged into the machine and the power outlet.
- Inspect the power cord for any damage or fraying, and replace if necessary.
- If applicable, check and replace any blown fuses in the machine.
- If the machine still does not power on, consult the user manual for further troubleshooting steps or contact customer support for assistance.
Stitch Skips
Description of the problem: The machine occasionally skips stitches while sewing.
Cause of the problem: Dull or damaged needle, incorrect needle size, or improper threading.
Troubleshooting step-by-step:
- Replace the needle with a new one of the correct size and type for the fabric being sewn.
- Re-thread the machine, ensuring the thread is properly seated in the tension discs and guides.
- Check the stitch length and tension settings to ensure they are appropriate for the fabric and thread being used.
- If the issue persists, try adjusting the presser foot pressure or consulting a technician for further assistance.
Needle Breakage
Description of the problem: Needles frequently break during sewing.
Cause of the problem: Using the wrong needle size or type, sewing over thick seams, or a mechanical issue.
Troubleshooting step-by-step:
- Ensure the correct needle size and type are being used for the fabric and thread combination.
- Avoid sewing over thick seams or multiple layers of fabric without proper support.
- Check for any obstructions or mechanical issues in the needle area and address them accordingly.
- If the problem persists, consult the user manual for specific troubleshooting steps or contact customer support.
Uneven Feed Dogs
Description of the problem: Fabric is not feeding evenly through the machine.
Cause of the problem: Misaligned or damaged feed dogs, improper presser foot pressure, or incorrect stitch settings.
Troubleshooting step-by-step:
- Inspect the feed dogs for any signs of misalignment or damage and adjust or replace as needed.
- Check the presser foot pressure and adjust it according to the thickness of the fabric being sewn.
- Ensure the stitch length and feed dog settings are appropriate for the desired sewing outcome.
- If the issue persists, consider cleaning and lubricating the feed dogs or seeking professional servicing.
Thread Tension Issues
Description of the problem: Inconsistent thread tension results in loose or tight stitches.
Cause of the problem: Incorrect tension settings, dirty tension discs, or worn tension components.
Troubleshooting step-by-step:
- Check the tension settings for both upper and lower threads, ensuring they are balanced and appropriate for the fabric being sewn.
- Clean the tension discs and surrounding area to remove any lint or debris that may be affecting tension control.
- If the issue persists, consider replacing any worn tension components or consulting a technician for further assistance.
- Experiment with different thread types and weights to find the optimal tension settings for your sewing projects.
Motor Overheating
Description of the problem: The sewing machine’s motor becomes excessively hot during use.
Cause of the problem: Extended periods of continuous operation, mechanical issues, or insufficient ventilation.
Troubleshooting step-by-step:
- Avoid sewing continuously for prolonged periods, allowing the motor to cool down periodically.
- Ensure the machine is placed in a well-ventilated area with sufficient airflow around the motor.
- If the motor continues to overheat, check for any mechanical issues or obstructions that may be causing excessive friction and address them accordingly.
- Consider using a motor cooling fan or consulting a technician for further assistance.
Blade Dullness
Description of the problem: The cutting blade of the machine becomes dull over time.
Cause of the problem: Continuous use, cutting thick or abrasive materials, or lack of maintenance.
Troubleshooting step-by-step:
- Inspect the cutting blade for signs of dullness or damage, such as nicks or burrs.
- Sharpen the blade using a sharpening stone or replace it with a new one if necessary.
- Avoid cutting excessively thick or abrasive materials that can accelerate blade dullness.
- Regularly clean and lubricate the blade to prolong its sharpness and effectiveness.
Bobbin Tension Problems
Description of the problem: Inconsistent bobbin tension affects stitch quality.
Cause of the problem: Improper bobbin threading, dirty bobbin case, or worn tension spring.
Troubleshooting step-by-step:
- Ensure the bobbin is correctly wound and inserted into the bobbin case according to the machine’s instructions.
- Clean the bobbin case and tension spring to remove any debris or buildup that may be affecting tension.
- Adjust the bobbin tension using the tension screw if necessary, testing the stitch quality after each adjustment.
- If the problem persists, consider replacing the bobbin case or seeking professional servicing.
Thread Jamming in the Bobbin Area
Description of the problem: Thread gets jammed or tangled in the bobbin area of the machine.
Cause of the problem: Improper bobbin insertion, incorrect threading, or debris accumulation.
Troubleshooting step-by-step:
- Remove the bobbin and bobbin case from the machine and clear any tangled thread or debris from the area.
- Re-thread the bobbin according to the machine’s instructions, ensuring proper tension and placement.
- Check for any obstructions or rough edges in the bobbin area that may be causing thread jams.
- If the issue persists, clean and lubricate the bobbin case and surrounding components, or consult a technician for further assistance.
Needle Jamming
Description of the problem: The needle frequently gets stuck or jams while sewing.
Cause of the problem: Bent or damaged needle, incorrect needle insertion, or mechanical issues.
Troubleshooting step-by-step:
- Inspect the needle for any signs of bending, dullness, or damage, and replace it if necessary.
- Ensure the needle is inserted correctly and securely into the needle clamp, with the flat side facing the back.
- Check for any obstructions or mechanical issues in the needle area, such as a bent needle bar or misaligned components.
- If the problem persists, consult the machine’s user manual for specific troubleshooting steps or contact customer support for assistance.
Bobbin Winding Issues
Description of the problem: The bobbin does not wind evenly or consistently.
Cause of the problem: Improper bobbin threading, tension issues, or mechanical faults.
Troubleshooting step-by-step:
- Ensure the bobbin is inserted correctly onto the winding spindle and the thread is properly threaded through the bobbin tension disc.
- Check the tension settings for the bobbin winding mechanism and adjust if necessary.
- Ensure the bobbin winding spindle is clean and free from debris that may affect winding.
- If the problem persists, inspect the bobbin winding mechanism for any signs of wear or damage and repair or replace as needed.
Thread Cutter Malfunction
Description of the problem: The built-in thread cutter fails to cut the thread properly.
Cause of the problem: Dull or misaligned thread cutter blade, debris accumulation, or mechanical issues.
Troubleshooting step-by-step:
- Inspect the thread cutter blade for any signs of dullness, damage, or misalignment.
- Clean the thread cutter area to remove any lint, dust, or debris that may be obstructing the blade.
- Manually trim the thread with scissors if the built-in cutter fails to function properly.
- If the issue persists, consult the machine’s manual for further instructions or contact customer support for assistance.
Stitch Length Variation
Description of the problem: Inconsistent stitch length occurs during sewing.
Cause of the problem: Incorrect stitch length setting, mechanical issues, or tension problems.
Troubleshooting step-by-step:
- Adjust the stitch length setting on the machine to the desired length for the fabric being sewn.
- Check for any mechanical issues or obstructions in the stitch length mechanism and address them accordingly.
- Ensure proper tension settings for both upper and lower threads, as tension imbalance can affect stitch length.
- If the problem persists, consult the user manual for specific troubleshooting steps or seek professional servicing.
Foot Pedal Unresponsiveness
Description of the problem: The foot pedal does not respond consistently or at all.
Cause of the problem: Loose connection, damaged pedal cord, or internal electrical issues.
Troubleshooting step-by-step:
- Check the connection between the foot pedal and the machine, ensuring it is securely plugged in.
- Inspect the pedal cord for any signs of damage, fraying, or wear and replace if necessary.
- Test the foot pedal on another machine (if available) to determine if the issue is with the pedal or the machine.
- If the problem persists, consult the user manual for troubleshooting guidance or contact customer support for assistance.
Thread Lint Accumulation
Description of the problem: Lint and debris build-up occurs in the thread path.
Cause of the problem: Use of low-quality thread, lack of regular maintenance, or improper storage.
Troubleshooting step-by-step:
- Use high-quality thread that is less likely to shed lint during sewing.
- Regularly clean the thread path, tension discs, and bobbin area to remove any accumulated lint or debris.
- Store the machine in a clean, dust-free environment when not in use to prevent lint accumulation.
- If the problem persists, consider using a lint brush or compressed air for more thorough cleaning, or consult a technician for assistance.
Looper Thread Snapping
Description of the problem: The looper thread frequently snaps or breaks.
Cause of the problem: Incorrect threading, looper tension issues, or sharp edges on the looper mechanism.
Troubleshooting step-by-step:
- Re-thread the looper according to the machine’s threading diagram, ensuring proper tension and alignment.
- Check the tension settings for the looper thread and adjust if necessary to prevent over-tensioning.
- Inspect the looper mechanism for any sharp edges or burrs that may be causing the thread to break and address them accordingly.
- If the issue persists, consult the user manual for specific troubleshooting steps or contact customer support for assistance.
Needle Threader Dysfunction
Description of the problem: The automatic needle threader fails to work properly.
Cause of the problem: Misalignment of the needle threader mechanism, dirt or debris obstructing the threader, or mechanical issues.
Troubleshooting step-by-step:
- Inspect the needle threader mechanism for any signs of misalignment or damage.
- Clean the needle threader area thoroughly to remove any dirt, lint, or debris that may be blocking the threader.
- Ensure the needle is properly positioned and fully inserted into the needle clamp.
- If the problem persists, refer to the machine’s user manual for specific troubleshooting steps or contact customer support for assistance.
Thread Knotting Underneath
Description of the problem: Thread knots or tangles form underneath the fabric during sewing.
Cause of the problem: Improper tension settings, incorrect threading, or mechanical issues.
Troubleshooting step-by-step:
- Check the tension settings for both the upper and lower threads, ensuring they are balanced and appropriate for the fabric being sewn.
- Re-thread the machine, following the threading diagram provided in the user manual.
- Clean the bobbin area and remove any lint, dust, or debris that may be causing the thread to tangle.
- If the issue persists, consult the user manual for specific troubleshooting steps or seek professional servicing.
Bobbin Case Misalignment
Description of the problem: The bobbin case is not aligned properly, causing stitching irregularities.
Cause of the problem: Loose or incorrectly positioned bobbin case, damaged bobbin case, or mechanical issues.
Troubleshooting step-by-step:
- Remove the bobbin case from the machine and reposition it according to the manufacturer’s instructions.
- Inspect the bobbin case for any signs of damage, such as cracks or warping, and replace if necessary.
- Check for any obstructions or mechanical issues in the bobbin case area and address them accordingly.
- If the problem persists, consult the user manual for specific troubleshooting steps or contact customer support for assistance.
Needle Bar Alignment Issues
Description of the problem: The needle bar is not aligned properly, causing stitching problems.
Cause of the problem: Loose or misaligned needle bar, worn or damaged needle bar components, or mechanical issues.
Troubleshooting step-by-step:
- Inspect the needle bar for any signs of misalignment or damage and adjust or replace components as necessary.
- Check the needle bar set screw to ensure it is securely tightened to prevent movement.
- Ensure proper lubrication of the needle bar mechanism to reduce friction and improve alignment.
- If the issue persists, consult the user manual for specific troubleshooting steps or seek professional servicing.
Noise During Operation
Description of the problem: Unusual noises occur while the machine is in use.
Cause of the problem: Loose or damaged components, lack of lubrication, or mechanical issues.
Troubleshooting step-by-step:
- Inspect the machine for any loose or damaged components, such as screws, belts, or gears, and tighten or replace as necessary.
- Ensure all moving parts are properly lubricated according to the manufacturer’s recommendations.
- Test the machine with different settings and operations to identify the source of the noise.
- If the noise persists, consult the user manual for specific troubleshooting steps or contact customer support for assistance.
Husqvarna Viking Huskylock 560 Sewing Machine Manual
The operating instructions for the Husqvarna Viking Huskylock 560 can be found on the manufacturer’s website. Please visit the official website of Husqvarna Viking to access the comprehensive manual, which includes detailed instructions on machine setup, operation, maintenance, and troubleshooting.
Frequently Asked Questions about the Husqvarna Viking Huskylock 560
Q: Why does my thread keep breaking?
A: Thread breakage can occur due to incorrect threading, improper tension settings, or using low-quality thread. Refer to the manual for proper threading instructions and adjust tension settings accordingly.
Q: How do I fix uneven stitching?
A: Uneven stitching may result from using the wrong needle or presser foot, improper tension settings, or machine misalignment. Ensure correct needle and presser foot selection, adjust tension settings, and check for any mechanical issues.
Q: What should I do if my fabric keeps jamming?
A: Fabric jamming can occur due to incorrect threading, dull or damaged needles, or debris in the feed dogs. Re-thread the machine, replace the needle if necessary, and clean the feed dogs and surrounding area to prevent jams.
Q: How can I troubleshoot thread tension issues?
A: Inconsistent thread tension may result from improper tension settings, dirty tension discs, or worn tension components. Check and adjust tension settings, clean tension discs, and consider replacing any worn components.
Q: What should I do if my machine doesn’t power on?
A: If the machine fails to power on, check the power cord connection, inspect for any damage to the cord, and verify that the fuse is not blown. If the issue persists, consult the manual for further troubleshooting steps or contact customer service.
Conclusion
Always refer to the manual, customer service, or service center whenever possible if there is a problem with your Husqvarna Viking Huskylock 560 sewing machine. These resources can provide valuable assistance and guidance to ensure optimal performance and longevity of your machine.
Husqvarna Viking 5540 Common Problems