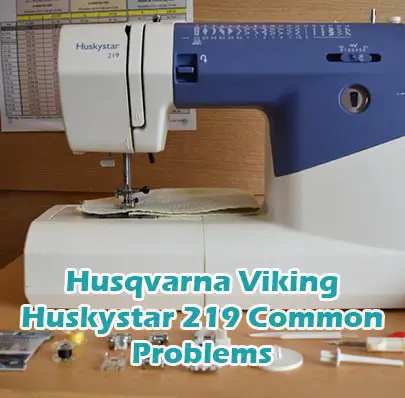
Husqvarna Viking Huskystar 219 Common Problems and Troubleshooting
Are you experiencing issues with your Husqvarna Viking Huskystar 219 sewing machine? Don’t worry; you’re not alone. In this guide, we’ll explore common problems that users encounter with this particular model and provide troubleshooting tips to help you get back to sewing smoothly.
Here you can find all the
parts and accessories for the Husqvarna Viking Huskystar 219
guaranteed to fit your sewing machine
Causes of Common Problems with the Husqvarna Viking Huskystar 219
1. Bobbin Jamming – Tangled Threads
- Description of the problem: The bobbin thread keeps jamming, resulting in tangled threads and disrupted sewing.
- Cause of the problem: Incorrect threading of the bobbin or bobbin case, or debris caught in the bobbin area.
- Troubleshooting step-by-step:
- Turn off the machine and remove the bobbin case.
- Clean out any lint, debris, or tangled thread from the bobbin area using a brush or compressed air.
- Check the bobbin and bobbin case for any damage or rough edges.
- Re-thread the bobbin according to the machine’s manual, ensuring proper tension.
- Replace the bobbin case and test the machine with scrap fabric.
2. Needle Breakage – Uneven Stitches
- Description of the problem: Needles frequently break during sewing, leading to uneven stitches or skipped stitches.
- Cause of the problem: Use of incorrect needle size or type, bent or damaged needle, or sewing through thick fabric without appropriate adjustments.
- Troubleshooting step-by-step:
- Ensure you are using the correct needle size and type for the fabric being sewn.
- Check the needle for any bends or damage, and replace if necessary.
- Adjust the needle position or presser foot pressure for thicker fabrics to prevent excessive strain on the needle.
- Slow down sewing speed and avoid abrupt changes in direction.
- If the problem persists, consult the machine’s manual for further troubleshooting or seek professional assistance.
3. Uneven Stitching – Thread Tension Issues
- Description of the problem: Stitches appear uneven or inconsistent in tension, with loops or puckering in the fabric.
- Cause of the problem: Incorrect thread tension settings, improper threading of the machine, or using low-quality or incompatible thread.
- Troubleshooting step-by-step:
- Check the threading path of the upper thread, ensuring it passes through all thread guides and the tension discs correctly.
- Adjust the upper thread tension dial gradually, testing on scrap fabric until the stitches appear balanced.
- Clean the tension discs with a lint-free cloth to remove any debris that may affect tension.
- Use high-quality thread appropriate for your fabric type and adjust tension settings accordingly.
- If the issue persists, consider consulting a professional technician for further adjustment or maintenance.
4. Machine Jamming – Mechanical Issues
- Description of the problem: The machine frequently jams or freezes during sewing, making it difficult to continue working smoothly.
- Cause of the problem: Mechanical issues such as worn-out or damaged gears, lack of lubrication, or misalignment of machine parts.
- Troubleshooting step-by-step:
- Turn off the machine and unplug it from the power source.
- Inspect the machine’s internal components for any visible damage, debris, or signs of wear.
- Apply sewing machine oil to lubricate moving parts, following the manufacturer’s recommendations.
- If the problem persists, contact a qualified technician for a thorough inspection and repair.
- Avoid forcing the machine if it jams, as this may cause further damage.
5. Thread Breaking – Incorrect Thread Path
- Description of the problem: The thread frequently breaks while sewing, causing frustration and interruptions to the sewing process.
- Cause of the problem: Incorrect threading of the machine, entangled thread, or using old, weak thread.
- Troubleshooting step-by-step:
- Turn off the machine and re-thread both the upper thread and bobbin, following the threading diagram in the machine’s manual.
- Check for any tangles or knots in the thread, and ensure it feeds smoothly through the machine.
- Replace the thread with a fresh, high-quality spool, as old or weak thread may break more easily.
- Adjust the tension settings if necessary, as incorrect tension can also contribute to thread breakage.
- If the problem persists, consult the troubleshooting section of the machine’s manual or seek professional assistance.
6. Feed Dogs Not Functioning – Fabric Feeding Issues
- Description of the problem: The feed dogs fail to move the fabric smoothly, resulting in uneven feeding or fabric puckering.
- Cause of the problem: Dirt or debris obstructing the feed dogs, incorrect stitch length settings, or mechanical malfunction.
- Troubleshooting step-by-step:
- Turn off the machine and remove the needle plate to access the feed dogs.
- Clean the feed dogs thoroughly with a brush or compressed air to remove any lint or debris.
- Check the stitch length setting and adjust it to a longer length if necessary for smoother fabric feeding.
- If cleaning doesn’t resolve the issue, consult the machine’s manual for instructions on adjusting or repairing the feed dog mechanism.
- Test the machine with scrap fabric to ensure the feed dogs are functioning properly before resuming regular sewing.
7. Thread Looping on the Underside – Bobbin Tension Problems
- Description of the problem: The thread forms loops or tangles on the underside of the fabric, indicating an issue with bobbin tension.
- Cause of the problem: Incorrect bobbin tension settings, damaged bobbin case, or improper bobbin insertion.
- Troubleshooting step-by-step:
- Remove the bobbin case and check for any visible damage or debris.
- Clean the bobbin case and surrounding area to ensure smooth operation.
- Adjust the bobbin tension screw slightly, testing on scrap fabric until the loops are eliminated.
- Ensure the bobbin is inserted correctly into the bobbin case, with the thread feeding in the proper direction.
- If the problem persists, consider replacing the bobbin case or seeking professional assistance for further adjustments.
8. Stitch Skips – Needle and Thread Compatibility Issues
- Description of the problem: The machine skips stitches intermittently, resulting in incomplete seams or weakened stitches.
- Cause of the problem: Incompatibility between the needle size and thread thickness, or using low-quality thread.
- Troubleshooting step-by-step:
- Ensure the needle size matches the thread thickness, using a larger needle for thicker threads and fabrics.
- Use high-quality thread appropriate for your sewing project to minimize breakage and skipping.
- Check the needle for any damage or dullness, and replace it if necessary.
- Experiment with different needle and thread combinations to find the optimal pairing for your sewing needs.
- If the problem persists, consult the machine’s manual for recommended needle and thread combinations or seek professional advice.
9. Thread Puckering – Fabric and Tension Adjustment
- Description of the problem: The fabric puckers or gathers unevenly along the seam line, resulting in an unattractive finish.
- Cause of the problem: Incorrect tension settings, using the wrong needle for the fabric type, or improper fabric handling.
- Troubleshooting step-by-step:
- Adjust the upper thread tension gradually, testing on scrap fabric until the puckering is minimized.
- Use a smaller needle size for lightweight fabrics and a larger needle size for heavier fabrics to prevent puckering.
- Handle the fabric gently and avoid pulling or stretching it while sewing to maintain even tension.
- Experiment with different stitch lengths and tension settings to achieve the desired result.
- If the issue persists, consider stabilizing the fabric with interfacing or consulting a professional for further advice.
10. Noisy Operation – Mechanical Malfunction
- Description of the problem: The sewing machine operates loudly or emits unusual noises during use, indicating potential mechanical issues.
- Cause of the problem: Worn-out or damaged machine parts, lack of lubrication, or misalignment of internal components.
- Troubleshooting step-by-step:
- Turn off the machine and unplug it from the power source.
- Inspect the machine’s internal components for signs of wear, damage, or loose parts.
- Apply sewing machine oil to lubricate moving parts, focusing on areas indicated in the machine’s manual.
- If the noise persists, consult the manual for instructions on adjusting or replacing worn-out parts.
- Avoid using the machine until the issue is resolved to prevent further damage.
11. Fabric Gathering – Incorrect Presser Foot Pressure
- Description of the problem: The fabric gathers or wrinkles excessively while sewing, affecting the quality of the stitches.
- Cause of the problem: Incorrect presser foot pressure settings, uneven fabric feeding, or using the wrong presser foot for the fabric type.
- Troubleshooting step-by-step:
- Adjust the presser foot pressure according to the fabric thickness and type, increasing it for thicker fabrics and decreasing it for lighter fabrics.
- Ensure the fabric is smooth and properly positioned under the presser foot before sewing.
- Use a presser foot suitable for the fabric type to ensure even fabric feeding and prevent gathering.
- If the problem persists, consider using a stabilizer or interfacing to support the fabric during sewing.
- Test the machine with scrap fabric to verify that the fabric gathers are minimized before continuing with your project.
12. Thread Spooling – Spool Holder Malfunction
- Description of the problem: The thread spool falls off or unwinds unevenly from the spool holder, causing disruptions in sewing.
- Cause of the problem: Loose or damaged spool holder, improper spool placement, or uneven tension on the thread.
- Troubleshooting step-by-step:
- Check the spool holder for any visible damage or looseness, and tighten or replace it if necessary.
- Ensure the thread spool is placed securely on the spool holder, with the thread feeding smoothly from the spool.
- Adjust the tension on the thread if necessary, ensuring it feeds evenly to prevent spooling issues.
- Consider using a thread net or cap to stabilize the thread spool and prevent it from unwinding too quickly.
- If the problem persists, consult the machine’s manual for instructions on adjusting or replacing the spool holder mechanism.
13. Buttonhole Malfunction – Stitch Irregularities
- Description of the problem: The buttonhole stitches appear irregular or inconsistent, affecting the functionality and appearance of the buttonhole.
- Cause of the problem: Incorrect buttonhole settings, improper positioning of the fabric, or dull needle.
- Troubleshooting step-by-step:
- Ensure the buttonhole foot is attached correctly and the fabric is positioned securely under the foot.
- Adjust the buttonhole settings on the machine according to the desired size and style of the buttonhole.
- Check the needle for any dullness or damage, and replace it if necessary before sewing buttonholes.
- Practice sewing buttonholes on scrap fabric to test different settings and ensure consistent stitch quality.
- If the issue persists, consult the machine’s manual for troubleshooting tips specific to buttonhole stitching.
14. Thread Nesting – Bobbin Case Misalignment
- Description of the problem: The thread forms nests or tangles underneath the fabric, causing frustration and disruptions in sewing.
- Cause of the problem: Misalignment of the bobbin case, improper threading of the bobbin, or incorrect tension settings.
- Troubleshooting step-by-step:
- Remove the bobbin case and reinsert it, ensuring it is properly aligned and seated securely in the machine.
- Check the threading of the bobbin, ensuring it follows the correct path and is properly tensioned.
- Adjust the bobbin tension screw slightly if necessary, testing on scrap fabric until the nesting is eliminated.
- Clean the bobbin area and remove any lint or debris that may be affecting the smooth operation of the bobbin case.
- If the problem persists, consider replacing the bobbin case or seeking professional assistance for further troubleshooting.
15. Thread Cutter Dysfunction – Blade Dullness
- Description of the problem: The thread cutter fails to cleanly cut the thread, leaving frayed edges or requiring multiple attempts to cut.
- Cause of the problem: Dull or damaged blade on the thread cutter, debris accumulation, or misalignment of the cutting mechanism.
- Troubleshooting step-by-step:
- Inspect the thread cutter blade for any signs of dullness or damage, and replace it if necessary.
- Clean the thread cutter area to remove any lint, dust, or debris that may be obstructing the blade.
- Ensure the cutting mechanism is properly aligned and functions smoothly when engaged.
- If the thread cutter is motorized, check the power source and connections to ensure proper operation.
- If the problem persists, consult the machine’s manual for instructions on adjusting or repairing the thread cutter mechanism.
Here you can find all the
parts and accessories for the Husqvarna Viking Huskystar 219
guaranteed to fit your sewing machine
16. Needle Threader Malfunction – Alignment Issues
- Description of the problem: The needle threader fails to properly align with the needle eye, making it difficult to thread the needle automatically.
- Cause of the problem: Misalignment of the needle threader mechanism, bent or damaged needle, or improper use of the threader.
- Troubleshooting step-by-step:
- Inspect the needle threader mechanism for any visible misalignment or damage, and adjust or repair it as needed.
- Ensure the needle is inserted correctly into the machine and is not bent or damaged, as this can affect the threader’s alignment.
- Follow the machine’s manual carefully when using the needle threader, ensuring proper positioning and engagement with the needle.
- If the problem persists, consider threading the needle manually or seeking professional assistance for further diagnosis and repair.
- Regular maintenance and cleaning of the needle threader mechanism can help prevent future malfunctions.
17. Fabric Snagging – Burrs or Rough Surfaces
- Description of the problem: The fabric gets caught or snagged on rough surfaces within the sewing machine, leading to tears or damage.
- Cause of the problem: Burrs or rough edges on machine parts, buildup of debris or thread residue, or improper fabric handling.
- Troubleshooting step-by-step:
- Inspect the machine’s internal components for any visible burrs, rough spots, or sharp edges, and smooth them out using a fine abrasive tool.
- Clean the machine regularly to remove any accumulated debris, lint, or thread residue that may contribute to fabric snagging.
- Handle the fabric gently and avoid pulling or forcing it through the machine to prevent unnecessary friction and snagging.
- If fabric snagging persists, consider using a different presser foot or needle type to minimize friction and improve fabric handling.
- Regular maintenance and lubrication of the machine can also help prevent wear and tear on machine parts, reducing the risk of fabric snagging.
18. Uneven Feed – Feed Dog Adjustment
- Description of the problem: The fabric feeds unevenly or sluggishly through the machine, resulting in inconsistent stitch lengths or skipped stitches.
- Cause of the problem: Misaligned or malfunctioning feed dogs, improper presser foot pressure, or debris accumulation in the feed dog area.
- Troubleshooting step-by-step:
- Inspect the feed dogs for any visible misalignment, damage, or obstruction, and adjust or clean them as needed.
- Check the presser foot pressure settings and adjust them according to the fabric type and thickness to ensure even fabric feeding.
- Clean the feed dog area thoroughly to remove any accumulated debris, lint, or thread residue that may affect the feeding mechanism.
- If the problem persists, consult the machine’s manual for instructions on adjusting or repairing the feed dog mechanism, or seek professional assistance.
- Regular maintenance and cleaning of the feed dog area can help prevent uneven feed and ensure smooth operation of the sewing machine.
19. Thread Fraying – Needle and Thread Compatibility
- Description of the problem: The thread frays or breaks easily during sewing, leading to weakened stitches and unsatisfactory results.
- Cause of the problem: Incompatibility between the needle size and thread thickness, using low-quality or worn-out thread, or improper tension settings.
- Troubleshooting step-by-step:
- Ensure the needle size matches the thread thickness, using a larger needle for thicker threads and fabrics to prevent thread fraying.
- Use high-quality thread appropriate for your sewing project to minimize breakage and fraying.
- Check the needle for any damage or dullness, and replace it if necessary before sewing to prevent excessive friction on the thread.
- Adjust the tension settings on the machine to ensure proper thread tension and prevent excessive strain on the thread.
- If the problem persists, consider using a thread conditioner or stabilizer to strengthen the thread and reduce fraying.
20. Thread Knotting – Bobbin Case Tension Adjustment
- Description of the problem: The thread knots or tangles underneath the fabric, causing disruptions in sewing and potentially damaging the project.
- Cause of the problem: Incorrect bobbin tension settings, improper threading of the bobbin, or debris accumulation in the bobbin area.
- Troubleshooting step-by-step:
- Remove the bobbin case and check the tension settings, adjusting them as needed to achieve proper tension for your sewing project.
- Thoroughly clean the bobbin area to remove any accumulated debris, lint, or thread residue that may affect the tension mechanism.
- Check the threading of the bobbin, ensuring it follows the correct path and is properly tensioned to prevent thread knotting.
- If the problem persists, consider replacing the bobbin case or seeking professional assistance for further adjustment or repair.
- Regular maintenance and cleaning of the bobbin area can help prevent thread knotting and ensure smooth operation of the sewing machine.
21. Bobbin Winding Malfunction – Tension Adjustment
- Description of the problem: The bobbin winding process is not functioning correctly, resulting in uneven winding or thread tangling.
- Cause of the problem: Improper tension settings on the bobbin winding mechanism, incorrect threading of the machine, or debris accumulation.
- Troubleshooting step-by-step:
- Check the tension settings on the bobbin winding mechanism and adjust them as needed to achieve even winding.
- Ensure the thread is properly threaded through the bobbin winding path and secured in place before initiating the winding process.
- Clean the bobbin winding area to remove any accumulated debris, lint, or thread residue that may affect the winding process.
- If the problem persists, consider using a different bobbin or thread type, as some materials may be more prone to tangling during winding.
- Regular maintenance and cleaning of the bobbin winding mechanism can help prevent malfunctions and ensure smooth operation of the sewing machine.
22. Thread Birdnesting – Incorrect Thread Tension
- Description of the problem: The thread forms tangled nests on the underside of the fabric, leading to sewing disruptions and poor stitch quality.
- Cause of the problem: Incorrect tension settings on the machine, improper threading of the upper thread, or bobbin tension issues.
- Troubleshooting step-by-step:
- Check the tension settings on the machine and adjust them as needed to achieve balanced tension between the upper and lower threads.
- Ensure the upper thread is properly threaded through all thread guides and tension discs, following the threading diagram in the machine’s manual.
- Check the tension settings on the bobbin case and adjust them as needed to match the tension of the upper thread.
- Test the machine on scrap fabric to verify that the thread tension is balanced and that birdnesting issues have been resolved.
- If the problem persists, consider replacing the needle or seeking professional assistance for further diagnosis and repair.
23. Fabric Slippage – Presser Foot Pressure Adjustment
- Description of the problem: The fabric slips or shifts during sewing, resulting in uneven seams or misaligned stitches.
- Cause of the problem: Incorrect presser foot pressure settings, smooth or slippery fabric surfaces, or improper fabric handling.
- Troubleshooting step-by-step:
- Adjust the presser foot pressure settings on the machine to increase or decrease pressure according to the fabric type and thickness.
- Use a presser foot suitable for the fabric type, such as a walking foot or non-slip foot, to improve fabric grip and prevent slippage.
- Handle the fabric carefully and avoid pulling or stretching it excessively while sewing to maintain even tension and prevent slippage.
- If the problem persists, consider using a fabric stabilizer or interfacing to provide additional support and prevent slippage during sewing.
- Regular maintenance and cleaning of the machine’s presser foot mechanism can help prevent slippage and ensure smooth operation of the sewing machine.
24. Thread Tension Release – Spring Adjustment
- Description of the problem: The thread tension releases unexpectedly during sewing, resulting in loose or uneven stitches.
- Cause of the problem: Improper tension release spring adjustment, worn-out or damaged tension release mechanism, or debris accumulation.
- Troubleshooting step-by-step:
- Inspect the tension release spring mechanism for any visible damage, wear, or misalignment, and adjust or repair it as needed.
- Check the tension release spring adjustment and ensure it is set to the appropriate tension level for your sewing project.
- Clean the tension release mechanism to remove any accumulated debris, lint, or thread residue that may affect its operation.
- If the problem persists, consider replacing the tension release spring or seeking professional assistance for further diagnosis and repair.
- Regular maintenance and lubrication of the tension release mechanism can help prevent malfunctions and ensure consistent thread tension during sewing.
25. Uneven Stitch Length – Feed Dog Adjustment
- Description of the problem: The stitches appear uneven or irregular in length, indicating an issue with the feed dog mechanism.
- Cause of the problem: Misaligned or malfunctioning feed dogs, improper presser foot pressure, or fabric slippage.
- Troubleshooting step-by-step:
- Inspect the feed dogs for any visible misalignment, damage, or obstruction, and adjust or repair them as needed.
- Check the presser foot pressure settings and adjust them according to the fabric type and thickness to ensure even fabric feeding.
- Ensure the fabric is properly positioned and secured under the presser foot to prevent slippage and maintain consistent stitch length.
- If the problem persists, consider using a fabric stabilizer or interfacing to provide additional support and improve feed dog traction.
- Regular maintenance and cleaning of the feed dog mechanism can help prevent uneven stitch length and ensure smooth operation of the sewing machine.
Here you can find all the
parts and accessories for the Husqvarna Viking Huskystar 219
guaranteed to fit your sewing machine
Husqvarna Viking Huskystar 219 Sewing Machine Manual
You can find the operating instructions for the Husqvarna Viking Huskystar 219 sewing machine on the manufacturer’s website.
Frequently Asked Questions (FAQ) about the Husqvarna Viking Huskystar 219
Q: How can I prevent my bobbin thread from jamming?
A: Ensure proper threading of the bobbin and bobbin case, regularly clean the bobbin area of lint or debris, and use high-quality thread.
Q: Why does my needle keep breaking?
A: Needle breakage can be caused by using incorrect needle size or type, sewing through thick fabric without adjustments, or using a bent or damaged needle.
Q: How do I fix uneven stitching?
A: Check and adjust the thread tension settings, ensure proper threading of the machine, and use high-quality thread appropriate for your fabric.
Q: What should I do if my sewing machine keeps jamming?
A: Turn off the machine, clean the bobbin area and feed dogs, check for damaged parts, and consult the manual for further troubleshooting or contact customer service.
Q: Why does my thread keep breaking?
A: Thread breakage can be caused by improper tension settings, using old or weak thread, or incorrect threading of the machine.
Conclusion
It’s essential for users to refer to the manual, customer service, or service center whenever they encounter a problem with their Husqvarna Viking Huskystar 219 sewing machine.
Husqvarna Viking Huskystar 215 Common Problems