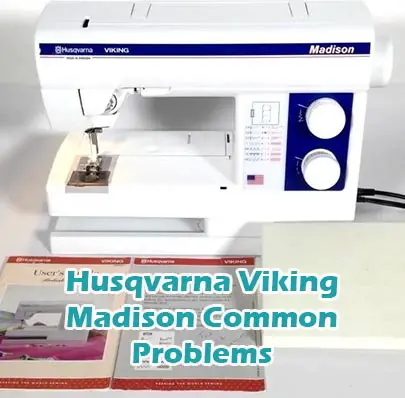
Husqvarna Viking Madison Common Problems and Troubleshooting
Welcome to our guide on common problems and troubleshooting tips for the Husqvarna Viking Madison sewing machine. Whether you’re a beginner or an experienced user, encountering issues with your sewing machine can be frustrating. In this article, we’ll address various common problems that Madison users may face and provide practical solutions to resolve them effectively.
Causes of Common Problems with the Husqvarna Viking Madison
This section serves as an introduction to the specific issues that Husqvarna Viking Madison sewing machine owners may encounter. Subsequent subsections will delve into detailed troubleshooting steps for each problem.
Common Problems with the Husqvarna Viking Madison
1. Thread Breakage
Description of the problem: Threads keep breaking while sewing.
Cause of the problem: Incorrect threading or tension settings, dull needle, or using low-quality thread.
Troubleshooting step-by-step:
- Re-thread the machine following the threading diagram provided in the user manual.
- Check and adjust the tension settings according to the fabric being used.
- Replace the needle with a new one, ensuring it’s compatible with the fabric.
- Use high-quality thread suitable for the fabric and the sewing project.
2. Uneven Stitching
Description of the problem: Stitches appear uneven or irregular.
Cause of the problem: Improper bobbin insertion, incorrect tension settings, or a damaged needle plate.
Troubleshooting step-by-step:
- Remove and re-insert the bobbin, ensuring it’s correctly placed and wound.
- Check and adjust the upper and lower tension settings as per the user manual.
- Inspect the needle plate for any nicks or scratches; replace if necessary.
3. Jammed Bobbin Case
Description of the problem: The bobbin case gets stuck or jammed during sewing.
Cause of the problem: Accumulation of lint or debris in the bobbin area, improperly inserted bobbin, or damaged bobbin case.
Troubleshooting step-by-step:
- Clean the bobbin area thoroughly, removing any lint or debris with a brush or compressed air.
- Ensure the bobbin is inserted correctly and unwinds in the proper direction.
- Inspect the bobbin case for any signs of damage or wear; replace if necessary.
4. Machine Skipping Stitches
Description of the problem: The sewing machine skips stitches while stitching.
Cause of the problem: Incorrect needle size, bent needle, or insufficient presser foot pressure.
Troubleshooting step-by-step:
- Ensure the needle is the correct size and type for the fabric being used.
- Replace the needle if it’s bent or damaged.
- Adjust the presser foot pressure according to the fabric thickness and type.
5. Loud or Strange Noise
Description of the problem: The sewing machine produces loud or unusual noises during operation.
Cause of the problem: Loose parts, lack of lubrication, or internal mechanical issues.
Troubleshooting step-by-step:
- Check all screws and bolts on the machine to ensure they are securely tightened.
- Apply sewing machine oil to the recommended lubrication points as per the user manual.
- If the issue persists, contact a certified technician for further inspection and repair.
6. Skipped Stitches in Free Motion Quilting
Description of the problem: When quilting in free motion, stitches occasionally skip or become irregular.
Cause of the problem: Incorrect presser foot tension, improper machine speed, or using the wrong needle for quilting.
Troubleshooting step-by-step:
- Adjust the presser foot tension to ensure it’s suitable for free motion quilting.
- Practice controlling the machine speed to maintain a consistent stitch length.
- Use a quilting needle appropriate for the fabric and batting being quilted.
7. Bobbin Thread Showing on Top of Fabric
Description of the problem: The bobbin thread is visible on the top side of the fabric, spoiling the stitching.
Cause of the problem: Incorrect tension settings, improper bobbin insertion, or using the wrong type of bobbin thread.
Troubleshooting step-by-step:
- Check and adjust the tension settings on the machine to balance the upper and lower threads.
- Ensure the bobbin is inserted correctly and wound evenly.
- Use high-quality bobbin thread suitable for the fabric being sewn.
8. Fabric Not Feeding Properly
Description of the problem: The fabric does not move smoothly under the presser foot while sewing.
Cause of the problem: Incorrect presser foot pressure, dirty feed dogs, or using the wrong foot for the fabric.
Troubleshooting step-by-step:
- Adjust the presser foot pressure to ensure it’s adequate for the fabric thickness.
- Clean the feed dogs and surrounding area to remove any lint or debris.
- Use the appropriate presser foot for the fabric type and sewing technique.
9. Needle Breaking Frequently
Description of the problem: Needles keep breaking while sewing, causing interruptions and frustration.
Cause of the problem: Incorrect needle size or type, sewing over thick seams, or a bent needle.
Troubleshooting step-by-step:
- Ensure the needle size and type are appropriate for the fabric and thread being used.
- Use a slower sewing speed when stitching over thick seams or multiple layers of fabric.
- Inspect the needle for any signs of bending or damage; replace if necessary.
10. Thread Bunching Underneath Fabric
Description of the problem: The thread forms loops or bunches underneath the fabric while sewing.
Cause of the problem: Improper bobbin tension, incorrectly threaded bobbin case, or a dull needle.
Troubleshooting step-by-step:
- Adjust the tension of the bobbin thread to achieve balanced stitches.
- Re-thread the bobbin case, ensuring the thread is properly seated in the tension spring.
- Replace the needle with a new one, as a dull needle can cause thread bunching.
6. Fabric Puckering
Description of the problem: Fabric puckers or gathers while sewing.
Cause of the problem: Incorrect tension settings, improper presser foot pressure, or using the wrong needle type.
Troubleshooting step-by-step:
- Adjust the upper and lower tension settings to achieve balanced stitching.
- Ensure the presser foot pressure is suitable for the fabric being used.
- Use a ballpoint or stretch needle for knit fabrics and a sharp needle for woven fabrics.
7. Bobbin Thread Tangling
Description of the problem: The bobbin thread gets tangled or forms loops on the underside of the fabric.
Cause of the problem: Improper threading, bobbin tension issues, or a dirty bobbin case.
Troubleshooting step-by-step:
- Re-thread the bobbin following the threading diagram provided in the user manual.
- Check and adjust the bobbin tension if necessary.
- Clean the bobbin case and surrounding area to remove any lint or debris.
8. Needle Breakage
Description of the problem: Needles frequently break during sewing.
Cause of the problem: Using the wrong needle size or type, sewing over thick seams, or a bent needle.
Troubleshooting step-by-step:
- Ensure the needle size and type are appropriate for the fabric and thread being used.
- Take care when sewing over thick seams to avoid bending or breaking the needle.
- Replace the needle if it becomes bent or damaged.
9. Thread Bunching
Description of the problem: Threads bunch up under the fabric instead of forming proper stitches.
Cause of the problem: Incorrect threading of the upper thread, bobbin threading issues, or tension imbalances.
Troubleshooting step-by-step:
- Double-check the upper thread path and ensure it’s correctly threaded through all guides and the needle.
- Verify that the bobbin is wound evenly and inserted correctly into the bobbin case.
- Adjust the tension settings to achieve balanced stitching.
10. Feed Dog Problems
Description of the problem: The feed dogs fail to move the fabric smoothly during sewing.
Cause of the problem: Dirty or damaged feed dogs, incorrect stitch length settings, or debris obstructing the feed dog mechanism.
Troubleshooting step-by-step:
- Clean the feed dogs and surrounding area to remove any accumulated lint or debris.
- Check the stitch length settings and adjust as needed for the desired fabric feed.
- If the issue persists, have a technician inspect and potentially replace the feed dog mechanism.
11. Bobbin Winding Difficulties
Description of the problem: Difficulty in winding thread onto the bobbin.
Cause of the problem: Improper placement of the bobbin, tension issues, or a malfunctioning bobbin winding mechanism.
Troubleshooting step-by-step:
- Ensure the bobbin is placed correctly on the winding spindle and secured in place.
- Check the bobbin winding tension and adjust if necessary.
- If the problem persists, inspect the bobbin winding mechanism for any obstructions or defects.
12. Fabric Not Feeding Properly
Description of the problem: The fabric does not advance smoothly under the presser foot.
Cause of the problem: Incorrect presser foot pressure, feed dog issues, or a misaligned presser foot.
Troubleshooting step-by-step:
- Adjust the presser foot pressure to ensure proper contact with the fabric.
- Clean and lubricate the feed dog mechanism to ensure smooth movement.
- Check the alignment of the presser foot to ensure it is parallel to the feed dogs.
13. Thread Tension Problems
Description of the problem: Inconsistent tension between the upper and lower threads.
Cause of the problem: Incorrect tension settings, dirty tension discs, or threading errors.
Troubleshooting step-by-step:
- Check and adjust the tension settings for both the upper and lower threads.
- Clean the tension discs with a lint-free cloth to remove any accumulated debris.
- Re-thread the machine, ensuring the thread passes through all necessary guides and tension discs.
14. Needle Threader Malfunction
Description of the problem: The automatic needle threader does not work properly.
Cause of the problem: Misalignment of the needle threader mechanism, damage to the threader hook, or threading errors.
Troubleshooting step-by-step:
- Ensure the needle is in the correct position and fully raised before attempting to use the threader.
- Inspect the needle threader mechanism for any misalignments or obstructions; adjust or clear as needed.
- If the problem persists, manually thread the needle using a handheld needle threader or by hand.
15. Stitches Skipping
Description of the problem: The sewing machine skips stitches intermittently while sewing.
Cause of the problem: Dull or damaged needle, improper threading, or mechanical issues.
Troubleshooting step-by-step:
- Replace the needle with a new, sharp one suitable for the fabric being used.
- Re-thread the machine, ensuring the thread is properly seated in all guides and tension discs.
- If the issue persists, inspect the sewing machine for any mechanical problems and consult a technician if necessary.
11. Bobbin Won’t Wind
Description of the problem: The bobbin fails to wind properly when using the machine’s winding mechanism.
Cause of the problem: Improper threading of the bobbin winding mechanism, worn-out bobbin winding parts, or motor issues.
Troubleshooting step-by-step:
- Ensure the bobbin is placed on the winding spindle correctly and the thread is threaded through the tension disc.
- Check for any worn-out parts in the bobbin winding mechanism and replace if necessary.
- If the problem persists, consult a technician to inspect the machine’s motor and internal components.
12. Fabric Slipping During Sewing
Description of the problem: The fabric moves unevenly or slips while being sewn.
Cause of the problem: Insufficient presser foot pressure, incorrect foot pressure adjustment, or using the wrong presser foot.
Troubleshooting step-by-step:
- Adjust the presser foot pressure to ensure it firmly holds the fabric in place while sewing.
- Check the presser foot pressure adjustment mechanism and ensure it’s functioning correctly.
- Use the appropriate presser foot for the specific fabric and sewing technique being employed.
13. Stitch Length Irregularities
Description of the problem: Stitch length varies inconsistently throughout the sewing process.
Cause of the problem: Incorrect stitch length settings, mechanical issues with the machine’s feed mechanism, or worn-out parts.
Troubleshooting step-by-step:
- Ensure the stitch length setting is properly adjusted according to the desired sewing outcome.
- Inspect the feed mechanism for any obstructions or signs of wear; clean or replace parts as needed.
- If the problem persists, seek professional assistance to diagnose and repair any mechanical issues.
14. Needle Threader Malfunction
Description of the problem: The automatic needle threader fails to work properly or consistently.
Cause of the problem: Misalignment of the needle threader mechanism, dirt or debris obstructing the threader, or worn-out parts.
Troubleshooting step-by-step:
- Check the alignment of the needle threader mechanism and adjust if necessary according to the user manual.
- Clean the needle threader area thoroughly to remove any accumulated dirt or debris.
- If cleaning and adjustment do not resolve the issue, consider replacing any worn-out components of the needle threader.
15. Thread Tension Release
Description of the problem: The tension release feature fails to function properly, causing tension issues during sewing.
Cause of the problem: Mechanical issues with the tension release mechanism, misalignment, or lack of lubrication.
Troubleshooting step-by-step:
- Inspect the tension release mechanism for any signs of damage or misalignment.
- Apply sewing machine oil to lubricate the tension release components as recommended in the user manual.
- If the problem persists, consult a technician for further inspection and repair.
Husqvarna Viking Madison Sewing Machine Manual
The operating instructions for the Husqvarna Viking Madison sewing machine can be found on the manufacturer’s website. Visit the official website of Husqvarna Viking and navigate to the support or manuals section to access the manual for your specific model of the Madison sewing machine. The manual provides comprehensive guidance on machine setup, operation, maintenance, and troubleshooting.
Frequently Asked Questions about the Husqvarna Viking Madison
1. How do I adjust the tension on my Husqvarna Viking Madison sewing machine?
To adjust the tension on your Husqvarna Viking Madison sewing machine, refer to the instruction manual. Typically, tension adjustments can be made using the tension dial or knobs located on the machine. Experiment with slight adjustments while testing on a scrap piece of fabric until you achieve the desired stitch quality.
2. What should I do if my Husqvarna Viking Madison sewing machine is skipping stitches?
If your Husqvarna Viking Madison sewing machine is skipping stitches, try the following troubleshooting steps:
- Check that the needle is inserted correctly and not bent.
- Ensure the thread is properly threaded and the tension is adjusted appropriately.
- Clean the machine, including the bobbin area, to remove any lint or debris that may be causing the issue.
- If the problem persists, consider replacing the needle or seeking professional maintenance.
3. Why is my Husqvarna Viking Madison sewing machine making unusual noises?
Unusual noises from your Husqvarna Viking Madison sewing machine may indicate several issues, such as loose parts, lack of lubrication, or internal mechanical problems. Try tightening any loose screws and applying sewing machine oil to lubrication points as recommended in the manual. If the noise persists, it’s advisable to consult a professional technician for further diagnosis and repair.
4. What type of needle should I use with my Husqvarna Viking Madison sewing machine?
For optimal performance, it’s essential to use the correct type and size of needle with your Husqvarna Viking Madison sewing machine. Consult the instruction manual for needle recommendations based on the type of fabric you’ll be sewing. Generally, universal needles are suitable for most woven fabrics, while ballpoint or stretch needles are better for knits and specialty needles are available for specific materials like leather or denim.
5. How do I clean and maintain my Husqvarna Viking Madison sewing machine?
To keep your Husqvarna Viking Madison sewing machine in top condition, regularly clean and maintain it according to the manufacturer’s guidelines. This may include:
- Removing lint and debris from the bobbin area and feed dogs after each use.
- Oiling the machine at recommended intervals to ensure smooth operation.
- Replacing needles regularly, especially if they become bent or dull.
- Having the machine professionally serviced annually to address any potential issues and keep it running smoothly.
Conclusion
It’s essential for users of the Husqvarna Viking Madison sewing machine to refer to the manual, customer service, or a service center whenever they encounter a problem. These resources provide valuable guidance and support to ensure the proper functioning of the machine and address any issues effectively.
Husqvarna Viking Huskylock 1001L SERGER Common Problems