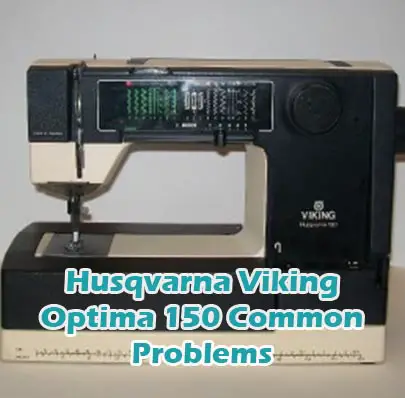
Husqvarna Viking Optima 150 Common Problems and Troubleshooting
If you own a Husqvarna Viking Optima 150 sewing machine, encountering issues while working on your projects can be frustrating. In this guide, we’ll explore common problems that users may face with the Husqvarna Viking Optima 150 and provide troubleshooting solutions to help you get back to sewing smoothly.
Causes of Common Problems with the Husqvarna Viking Optima 150
This section will address possible problems and solutions with this sewing machine:
Here you can find all the
parts and accessories for the Husqvarna Viking Optima 150
guaranteed to fit your sewing machine
1. Thread Breakage
Description: Thread breakage during sewing.
Cause: Incorrect threading or tension settings.
Troubleshooting:
- Check threading paths according to the machine manual.
- Ensure correct tension settings for the selected fabric.
- Clean the machine and bobbin area to remove any lint or debris.
- Replace the needle if it is dull or bent.
- Experiment with different thread brands or weights.
2. Uneven Stitching
Description: Stitches appearing uneven or irregular.
Cause: Improper needle or presser foot alignment.
Troubleshooting:
- Ensure the needle is inserted correctly and is not damaged.
- Check presser foot alignment and adjust if necessary.
- Re-thread the machine, ensuring proper tension.
- Test stitching on scrap fabric to evaluate the issue.
- Consult the machine manual for specific troubleshooting steps.
3. Bobbin Jamming
Description: Bobbin getting stuck or jammed while sewing.
Cause: Incorrectly wound or inserted bobbin.
Troubleshooting:
- Remove the bobbin case and clean out any debris.
- Ensure the bobbin is wound smoothly and inserted correctly.
- Check for any tangled threads in the bobbin area.
- Adjust bobbin tension if necessary.
- Try using a different type or brand of bobbin.
4. Needle Breakage
Description: Needles breaking during sewing.
Cause: Incorrect needle type or size for the fabric being used.
Troubleshooting:
- Ensure the needle is the correct size and type for the fabric.
- Replace the needle with a new one if it is dull or bent.
- Check for any obstructions in the needle path.
- Slow down the sewing speed to reduce stress on the needle.
- Consult the machine manual for needle recommendations.
5. Machine Jamming
Description: Machine getting stuck or jammed during operation.
Cause: Build-up of lint or debris in the machine mechanisms.
Troubleshooting:
- Clean the machine thoroughly, including the feed dogs and bobbin area.
- Check for any loose threads or tangled threads causing the jam.
- Oil the machine according to the manufacturer’s instructions.
- Ensure proper maintenance and servicing of the machine.
- Test the machine with different fabrics and stitching techniques.
In this subsection:Each problem is listed as an
subheading.For each problem, there’s a description of the issue, its potential cause, and step-by-step troubleshooting tips provided in
paragraphs.Troubleshooting steps are listed in
6. Fabric Not Feeding Properly
Description: Fabric not advancing smoothly while sewing.
Cause: Improper presser foot pressure or feed dog adjustment.
Troubleshooting:
- Adjust presser foot pressure according to the fabric thickness.
- Clean the feed dogs and remove any lint or debris obstructing them.
- Check for any bent or damaged feed dogs and replace if necessary.
- Ensure proper threading and bobbin winding.
- Experiment with different presser feet for better fabric handling.
7. Thread Tension Issues
Description: Uneven tension between upper and lower threads.
Cause: Incorrect tension settings or threading.
Troubleshooting:
- Re-thread the machine, ensuring correct paths and tension adjustments.
- Check bobbin tension and adjust if necessary.
- Test stitch tension on scrap fabric and make adjustments accordingly.
- Clean tension discs and remove any thread or debris stuck in them.
- Consult the machine manual for specific tension troubleshooting tips.
8. Skipping Stitches
Description: Machine skips stitches intermittently while sewing.
Cause: Dull or bent needle, incorrect needle size, or improper threading.
Troubleshooting:
- Replace the needle with a new one appropriate for the fabric.
- Ensure proper needle insertion and threading.
- Check for any obstructions in the needle path.
- Adjust stitch length and tension settings as needed.
- Test sewing on scrap fabric to confirm the issue has been resolved.
9. Bobbin Thread Showing on Top
Description: Bobbin thread visible on the top side of the fabric.
Cause: Incorrect bobbin threading or tension.
Troubleshooting:
- Re-thread the bobbin, ensuring it is properly wound and inserted.
- Check bobbin tension and adjust if necessary.
- Clean the bobbin case and remove any debris or lint.
- Ensure proper needle and thread for the fabric being used.
- Experiment with different bobbin types or brands for better results.
10. Jammed Handwheel
Description: Handwheel difficult to turn or completely jammed.
Cause: Accumulation of lint or debris in the handwheel mechanism.
Troubleshooting:
- Clean the handwheel area thoroughly, removing any lint or debris.
- Check for any loose threads or tangled threads causing the jam.
- Apply lubricant to the handwheel mechanism according to the manufacturer’s instructions.
- Inspect the handwheel for any damaged or worn parts and replace if necessary.
- Avoid forcing the handwheel and gently try to release the jammed mechanism.
11. Loud or Unusual Noise During Operation
Description: Machine emits loud or unusual noises while sewing.
Cause: Loose or damaged parts, incorrect threading, or lack of lubrication.
Troubleshooting:
- Inspect the machine for loose screws, bolts, or other parts and tighten as needed.
- Clean and oil the machine according to the manufacturer’s instructions.
- Check for any obstructions in the needle or bobbin area.
- Ensure proper threading and tension settings.
- If the issue persists, consult a professional technician for further inspection.
12. Fabric Puckering
Description: Fabric gathers or puckers unnaturally while sewing.
Cause: Incorrect tension settings, improper needle or thread choice, or feeding issues.
Troubleshooting:
- Adjust tension settings to achieve the desired stitch appearance.
- Use the appropriate needle size and type for the fabric being sewn.
- Ensure proper threading and bobbin winding.
- Check feed dog alignment and adjust if necessary.
- Test stitching on scrap fabric to fine-tune tension and settings.
13. Thread Nesting or Bird’s Nesting
Description: Tangled mess of thread on the underside of the fabric.
Cause: Improper threading, tension issues, or bobbin winding problems.
Troubleshooting:
- Re-thread the machine, ensuring correct paths and tension adjustments.
- Check bobbin tension and adjust if necessary.
- Ensure smooth and even bobbin winding.
- Clean the bobbin area and remove any lint or debris.
- Slow down sewing speed and use a lighter touch on the foot pedal.
14. Needle Threader Malfunction
Description: Automatic needle threader fails to work properly.
Cause: Bent or misaligned needle threader, or threading issues.
Troubleshooting:
- Check the needle threader for any visible damage or misalignment.
- Ensure the needle is fully inserted and positioned correctly.
- Try manually threading the needle to confirm the needle’s condition.
- Refer to the machine manual for specific needle threader troubleshooting steps.
- If the problem persists, contact customer support for assistance.
15. Limited Stitch Selection or Functionality
Description: Inability to select certain stitches or limited functionality.
Cause: Machine settings, mode selection, or mechanical issues.
Troubleshooting:
- Ensure the machine is in the correct mode for the desired stitches.
- Check for any mechanical obstructions preventing stitch selection.
- Reset the machine to its default settings and try again.
- Refer to the machine manual for troubleshooting specific to stitch selection.
- If the problem persists, consider seeking professional repair services.
Here you can find all the
parts and accessories for the Husqvarna Viking Optima 150
guaranteed to fit your sewing machine
16. Needle Plate Scratching Fabric
Description: The needle plate leaves scratches or marks on the fabric.
Cause: Uneven or damaged needle plate surface.
Troubleshooting:
- Inspect the needle plate for any visible damage or irregularities.
- Clean the needle plate and surrounding area to remove any debris.
- Check needle plate alignment and adjust if necessary.
- Use a needle plate specifically designed for the fabric being sewn.
- If the issue persists, consider replacing the needle plate.
17. Stitch Length Inconsistency
Description: Variation in stitch length throughout sewing.
Cause: Incorrect stitch length settings, tension issues, or mechanical problems.
Troubleshooting:
- Adjust stitch length settings to achieve the desired stitch appearance.
- Check tension settings for consistency.
- Ensure proper threading and bobbin winding.
- Inspect the machine for any mechanical issues affecting stitch length.
- If necessary, consult the machine manual for specific troubleshooting steps.
18. Foot Pedal Unresponsive
Description: The foot pedal does not control the machine’s speed or function.
Cause: Loose connection, damaged pedal, or electrical issues.
Troubleshooting:
- Check the connection between the foot pedal and the machine.
- Inspect the foot pedal for any visible damage or wear.
- Test the foot pedal with another compatible machine, if possible.
- Ensure the machine is properly plugged in and receiving power.
- If the issue persists, contact customer support for assistance.
19. Bobbin Case Popping Out
Description: The bobbin case becomes dislodged or pops out during sewing.
Cause: Incorrect installation or tension issues.
Troubleshooting:
- Re-insert the bobbin case, ensuring it is securely in place.
- Check bobbin tension and adjust if necessary.
- Inspect the bobbin case for any damage or irregularities.
- Ensure proper threading and bobbin winding.
- Test sewing on scrap fabric to verify the issue has been resolved.
20. Jammed Reverse Stitch Button
Description: Difficulty in engaging or disengaging the reverse stitch function.
Cause: Build-up of debris or mechanical issues with the reverse stitch mechanism.
Troubleshooting:
- Clean around the reverse stitch button to remove any debris.
- Gently press and release the button multiple times to try to dislodge any obstructions.
- If possible, remove the machine’s cover to access the reverse stitch mechanism for closer inspection.
- If the issue persists, consider seeking professional repair services.
- Refer to the machine manual for specific troubleshooting steps related to the reverse stitch function.
21. Thread Getting Caught in Bobbin Case
Description: Upper thread gets tangled or caught in the bobbin case during sewing.
Cause: Improper tension settings, incorrectly wound bobbin, or debris in the bobbin area.
Troubleshooting:
- Check and adjust tension settings for both the upper thread and bobbin thread.
- Ensure the bobbin is correctly wound and inserted into the bobbin case.
- Clean the bobbin case area to remove any lint or debris.
- Try using a different type or brand of thread.
- If the problem persists, consult a technician for further inspection.
22. Feed Dogs Not Moving Fabric
Description: The feed dogs fail to grip and move the fabric during sewing.
Cause: Dirty or malfunctioning feed dogs, incorrect machine settings, or mechanical issues.
Troubleshooting:
- Clean the feed dogs and surrounding area to remove any lint or debris.
- Check for proper engagement of the feed dog lever or switch.
- Ensure the stitch length setting is appropriate for the selected fabric.
- If the feed dogs still do not move the fabric, contact customer support for assistance.
- Consider professional servicing if the issue persists.
23. Thread Cutter Not Functioning
Description: The automatic thread cutter does not cut the thread after sewing.
Cause: Dull or misaligned thread cutter blade, debris obstructing the cutter, or mechanical issues.
Troubleshooting:
- Inspect the thread cutter blade for any visible damage or wear.
- Clean around the thread cutter to remove any lint or debris.
- Test the thread cutter function with different types of thread and fabric.
- Check for any mechanical obstructions preventing the cutter from operating properly.
- If necessary, consult the machine manual for specific troubleshooting steps.
24. Machine Freezing or Stalling
Description: The machine freezes or stalls intermittently during sewing.
Cause: Electrical issues, overheating, or mechanical malfunction.
Troubleshooting:
- Turn off the machine and unplug it from the power source.
- Allow the machine to cool down for a few minutes before restarting.
- Check the power cord and electrical connections for any signs of damage.
- Clean the machine and remove any dust or debris that may be causing overheating.
- If the problem persists, contact a qualified technician for further inspection.
25. Thread Spool Getting Stuck
Description: The thread spool gets stuck or does not rotate smoothly during sewing.
Cause: Tight threading path, misaligned spool pin, or debris around the spool holder.
Troubleshooting:
- Check the threading path and ensure the thread spool moves freely along it.
- Inspect the spool pin for proper alignment and adjust if necessary.
- Clean the spool holder area to remove any lint or debris.
- Use a spool cap or adapter to stabilize the thread spool if it continues to get stuck.
- Consider using a different type or size of thread spool.
Here you can find all the
parts and accessories for the Husqvarna Viking Optima 150
guaranteed to fit your sewing machine
Husqvarna Viking Optima 150 Sewing Machine Manual
The operating instructions for the Husqvarna Viking Optima 150 can be found on the manufacturer’s website. Please visit the official Husqvarna Viking website to access the manual for detailed operating instructions, troubleshooting tips, and maintenance guidelines.
Husqvarna Viking Optima 150 Frequently Asked Questions
1. How do I thread the Husqvarna Viking Optima 150?
Refer to the machine manual for detailed instructions on threading the Husqvarna Viking Optima 150. Ensure you follow the threading path indicated in the manual carefully to avoid any issues.
2. Why is my needle breaking frequently?
Needle breakage can occur due to various reasons such as using the wrong needle size or type, improper threading, or sewing over thick seams. Check the needle size and type recommended for the fabric you are sewing and ensure proper threading and tension settings.
3. What should I do if my stitches are skipping?
Stitch skipping can be caused by a dull or bent needle, incorrect needle size, or tension issues. Try replacing the needle with a new one, ensuring it is the correct size and type for your fabric. Also, check the tension settings and adjust as needed.
4. How do I clean and maintain my Husqvarna Viking Optima 150?
Regular cleaning and maintenance are essential to keep your sewing machine in optimal condition. Refer to the machine manual for specific cleaning instructions and maintenance schedules. Generally, you should clean the machine after each use, oil it regularly, and have it serviced annually by a qualified technician.
5. Why is my machine jamming frequently?
Frequent machine jamming can be caused by various factors such as improper threading, tension issues, or mechanical problems. Ensure you are threading the machine correctly, using the appropriate tension settings, and cleaning the machine regularly to prevent lint buildup.
Conclusion
It’s important to remember that while troubleshooting common problems with your Husqvarna Viking Optima 150 sewing machine, referring to the manual, contacting customer service, or visiting a service center can provide valuable assistance. These resources can offer tailored guidance and support to address any issues you may encounter effectively.
Husqvarna Viking Optima 120 Common Problems