Husqvarna Viking Prisma 940 Common Problems and Troubleshooting
Welcome to our guide on troubleshooting common problems with the Husqvarna Viking Prisma 940 sewing machine. As proud owners of this advanced model, we understand the frustration that can arise when encountering issues during your sewing projects. In this article, we will address various problems that users may encounter with the Prisma 940 and provide effective solutions to ensure smooth and uninterrupted sewing experiences.
Causes of Common Problems with the Husqvarna Viking Prisma 940
This section will address potential issues and solutions specific to the Husqvarna Viking Prisma 940 sewing machine.
Here you can find all the
parts and accessories for the Husqvarna Viking Prisma 940
guaranteed to fit your sewing machine
25 Common Problems and Troubleshooting for the Husqvarna Viking Prisma 940
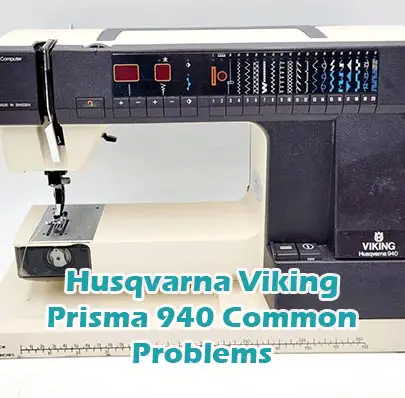
The Husqvarna Viking Prisma 940 is a versatile computerized sewing machine equipped with a plethora of features to enhance your sewing and embroidery projects. However, encountering issues while using this sophisticated machine is not uncommon.
In this comprehensive guide, we will explore 25 common problems that users may encounter with the Husqvarna Viking Prisma 940, along with detailed troubleshooting steps to help you resolve them effectively. From issues with embroidery stitches to problems with buttonholes and needle positioning, we’ll cover it all, ensuring that you can get the most out of your sewing experience with your Prisma 940.
- Problem: Machine is not turning on
Description: The sewing machine fails to power up when the power switch is turned on.
Cause: Faulty power connection, blown fuse, or malfunctioning power switch.
Troubleshooting:
- Check the power cord connection and ensure it is securely plugged into a working outlet.
- Replace the fuse if it is blown.
- If the power switch is faulty, contact a certified technician for repair or replacement.
- Problem: Needle is not moving up or down
Description: The needle remains stationary and does not respond to the needle up/down setting.
Cause: Incorrect setting, mechanical obstruction, or electronic malfunction.
Troubleshooting:
- Verify that the needle up/down setting is properly selected on the machine.
- Check for any obstructions such as tangled threads or debris in the bobbin area.
- If the issue persists, consult the user manual for resetting the machine or seek professional assistance.
- Problem: Embroidery stitches are skipping or uneven
Description: The embroidery stitches are not forming correctly, resulting in gaps or irregular patterns.
Cause: Improper tension, incorrect thread type or size, or machine calibration issues.
Troubleshooting:
- Adjust the tension settings according to the recommended guidelines for embroidery.
- Ensure that the correct embroidery thread and needle size are being used.
- Recalibrate the machine’s embroidery settings as per the user manual instructions.
- Problem: Buttonhole is not being stitched correctly
Description: The machine fails to create a proper one-step buttonhole as programmed.
Cause: Incorrect buttonhole foot attachment, incorrect settings, or mechanical issues.
Troubleshooting:
- Check that the buttonhole foot is securely attached and compatible with the machine.
- Verify that the correct buttonhole settings are selected, including size and style.
- Clean and lubricate the buttonhole mechanism if necessary, following the manufacturer’s guidelines.
- Problem: Free arm is jammed or difficult to access
Description: The free arm feature of the machine is stuck or hard to reach, hindering sewing operations.
Cause: Accumulation of lint or debris, mechanical obstruction, or lack of lubrication.
Troubleshooting:
- Clean the free arm area thoroughly, removing any lint or debris that may be causing obstruction.
- Apply lubricant to the free arm hinge or pivot points as recommended by the manufacturer.
- If the issue persists, consult the user manual for disassembly instructions or seek professional servicing.
- Problem: Stitch length or width is inconsistent
Description: The stitch length or width varies unexpectedly during sewing, resulting in irregular stitches.
Cause: Incorrect settings, mechanical issues, or worn-out machine parts.
Troubleshooting:
- Double-check the stitch length and width settings to ensure they are properly configured.
- Inspect the machine for any signs of wear or damage, particularly in the stitch length regulator.
- If necessary, adjust the machine’s internal mechanisms or replace worn-out parts to restore consistency.
- Problem: Presser foot pressure is too high or too low
Description: The pressure exerted by the presser foot on the fabric is either too strong or too weak, affecting stitch quality.
Cause: Incorrect presser foot pressure adjustment, mechanical issues, or improper fabric handling.
Troubleshooting:
- Adjust the presser foot pressure according to the thickness and type of fabric being used.
- Ensure that the presser foot is properly attached and aligned with the fabric.
- If the issue persists, check for any mechanical problems such as worn-out springs or loose components, and seek professional repair if necessary.
- Problem: Needle position is off-center or inconsistent
Description: The needle fails to maintain a consistent position, resulting in off-center stitches or misalignment.
Cause: Incorrect needle positioning settings, mechanical issues, or software glitches.
Troubleshooting:
- Verify that the needle position adjustment is correctly set according to the sewing requirements.
- Clean and lubricate the needle positioning mechanism to ensure smooth operation.
- If the problem persists, perform a factory reset of the machine’s software or contact technical support for further assistance.
- Problem: Machine is making unusual noises during operation
Description: The sewing machine emits unusual or loud noises while in use, indicating potential mechanical issues.
Cause: Loose components, lack of lubrication, or worn-out parts.
Troubleshooting:
- Turn off the machine and inspect it for any loose screws, bolts, or other components.
- Lubricate the moving parts of the machine according to the manufacturer’s recommendations.
- If the noise persists, seek professional assistance to identify and address the underlying mechanical problems.
Here you can find all the
parts and accessories for the Husqvarna Viking Prisma 940
guaranteed to fit your sewing machine
- Problem: Thread keeps breaking while sewing
Description: The thread frequently breaks during sewing, causing frustration and disrupting the stitching process.
Cause: Incorrect tension, dull or bent needle, or improper threading.
Troubleshooting:- Adjust the thread tension according to the recommended settings for the selected fabric.
- Replace the needle with a new one, ensuring it is the correct type and size for the fabric being used.
- Rethread the machine carefully, following the threading guide provided in the user manual.
- Problem: Machine is not recognizing embroidery designs or patterns
Description: The embroidery function of the machine fails to recognize or load embroidery designs from external sources.
Cause: Incompatible file formats, corrupted design files, or software compatibility issues.
Troubleshooting:- Ensure that the embroidery design files are in a compatible format supported by the machine (e.g., .vp3, .pes).
- Check the design files for any signs of corruption or damage, and try loading a different design to isolate the issue.
- Update the machine’s firmware or embroidery software to the latest version to address compatibility issues.
- Problem: Automatic thread cutter is not working
Description: The automatic thread cutter feature fails to cut the thread cleanly after sewing, leaving loose ends.
Cause: Dull or misaligned thread cutter blade, mechanical obstruction, or software glitch.
Troubleshooting:- Inspect the thread cutter blade for signs of dullness or misalignment, and replace it if necessary.
- Clear any debris or tangled threads that may be obstructing the thread cutter mechanism.
- Perform a factory reset of the machine’s software to troubleshoot potential software glitches.
- Problem: Machine is producing erratic or inconsistent stitches
Description: The sewing machine stitches erratically, producing uneven or irregular stitch patterns.
Cause: Improper tension, incorrect needle size or type, or mechanical issues.
Troubleshooting:- Adjust the thread tension to achieve balanced and consistent stitches for the selected fabric.
- Ensure that the needle is correctly inserted and tightened, using the appropriate needle size and type.
- Inspect the machine for any signs of mechanical problems such as loose belts or gears, and address them accordingly.
- Problem: LCD screen is not displaying properly
Description: The LCD screen of the machine is blank, flickering, or displaying distorted images.
Cause: Loose connection, damaged screen, or software malfunction.
Troubleshooting:- Check the connections between the LCD screen and the machine’s internal components to ensure they are secure.
- Inspect the screen for any signs of physical damage, such as cracks or scratches, and replace it if necessary.
- Perform a factory reset of the machine’s software to troubleshoot potential software glitches affecting the display.
- Problem: Machine is jamming frequently
Description: The sewing machine jams frequently, causing the fabric to become stuck or tangled.
Cause: Improper threading, accumulation of lint or debris, or mechanical issues.
Troubleshooting:- Rethread the machine carefully, following the threading guide provided in the user manual.
- Clean the bobbin area and feed dogs thoroughly to remove any accumulated lint or debris.
- Inspect the machine for any signs of mechanical problems such as bent or misaligned parts, and address them accordingly.
- Problem: Machine is not responding to button inputs
Description: The sewing machine fails to respond to button inputs, such as selecting stitch patterns or adjusting settings.
Cause: Software malfunction, damaged buttons, or electronic issues.
Troubleshooting:- Perform a soft reset of the machine by turning it off and unplugging it for a few minutes before restarting.
- Check the buttons for any signs of physical damage or wear, and clean them gently with a soft cloth if necessary.
- If the problem persists, contact technical support or a certified technician for further assistance.
- Problem: Bobbin thread is looping or tangling
Description: The bobbin thread forms loops or tangles underneath the fabric, affecting stitch quality.
Cause: Improper bobbin tension, incorrectly wound bobbin, or bobbin case issues.
Troubleshooting:- Adjust the bobbin tension according to the recommended settings for the selected fabric and thread.
- Ensure that the bobbin is wound evenly and inserted correctly into the bobbin case.
- Clean the bobbin case and surrounding area to remove any lint or debris that may be causing interference.
- Problem: Machine is running slowly or sluggishly
Description: The sewing machine operates at a slower speed than usual, impeding productivity.
Cause: Lack of lubrication, mechanical obstruction, or software issues.
Troubleshooting:- Apply lubricant to the moving parts of the machine, such as the motor and gears, to ensure smooth operation.
- Check the machine for any signs of mechanical obstruction or jamming, and clear them as necessary.
- Perform a factory reset of the machine’s software to troubleshoot potential software glitches affecting performance.
- Problem: Thread tension is difficult to adjust
Description: The thread tension adjustment dial or control is stiff or unresponsive when attempting to make adjustments.
Cause: Accumulation of dirt or debris, lack of lubrication, or mechanical issues.
Troubleshooting:- Clean the thread tension adjustment mechanism thoroughly to remove any dirt or debris that may be causing stiffness.
- Apply lubricant to the tension adjustment dial or control to improve its responsiveness.
- If the problem persists, inspect the machine for any signs of mechanical problems such as worn-out parts, and address them accordingly.
- Problem: Fabric is puckering or gathering while sewing
Description: The fabric gathers or puckers unnaturally along the seam lines, affecting the overall finish of the project.
Cause: Incorrect tension, incorrect needle size or type, or improper sewing technique.
Troubleshooting:- Adjust the thread tension to achieve a balanced stitch for the selected fabric.
- Ensure that the needle size and type are appropriate for the fabric being used, and replace the needle if necessary.
- Practice proper sewing techniques, such as guiding the fabric evenly and maintaining consistent stitching speed, to minimize puckering.
- Problem: Machine is overheating during prolonged use
Description: The sewing machine becomes hot to the touch after prolonged use, potentially leading to performance issues or damage.
Cause: Insufficient ventilation, blocked air vents, or mechanical overload.
Troubleshooting:- Allow the machine to cool down by turning it off and unplugging it for a period of time before resuming use.
- Ensure that the machine is placed in a well-ventilated area with sufficient airflow around the motor and internal components.
- Avoid overloading the machine with heavy or dense fabrics, and take regular breaks during prolonged sewing sessions to prevent overheating.
- Problem: Automatic needle threader is not functioning properly
Description: The automatic needle threader feature fails to thread the needle correctly, resulting in frustration and wasted time.
Cause: Misaligned or damaged needle threader mechanism, incorrect threading technique, or software issues.
Troubleshooting:- Inspect the needle threader mechanism for any signs of misalignment or damage, and adjust or replace it as necessary.
- Review the threading instructions in the user manual and ensure that the needle is threaded correctly before using the automatic threader.
- Perform a factory reset of the machine’s software to troubleshoot potential software glitches affecting the needle threader.
- Problem: Bobbin thread is not being picked up
Description: The sewing machine fails to pick up the bobbin thread during the stitching process, resulting in incomplete stitches.
Cause: Incorrect bobbin insertion, bobbin tension issues, or timing problems.
Troubleshooting:- Verify that the bobbin is inserted correctly into the bobbin case, with the thread wound evenly and in the correct direction.
- Adjust the bobbin tension according to the recommended settings for the selected fabric and thread.
- If the problem persists, consult the user manual for instructions on adjusting the machine’s timing or seek professional assistance.
- Problem: Machine is emitting a burning smell
Description: The sewing machine emits a burning or overheated odor during use, indicating potential mechanical or electrical issues.
Cause: Overheating motor, friction between moving parts, or electrical short circuit.
Troubleshooting:- Immediately turn off the machine and unplug it from the power source if you detect a burning smell.
- Allow the machine to cool down completely before inspecting it for any signs of mechanical or electrical damage.
- If the smell persists or if you observe any smoke or sparks, do not attempt to use the machine further and seek professional repair immediately.
- Problem: Thread is fraying or breaking at the needle
Description: The thread frays or breaks consistently at the needle, leading to sewing disruptions and compromised stitch quality.
Cause: Dull or bent needle, incorrect threading technique, or tension issues.
Troubleshooting:- Replace the needle with a new one, ensuring it is the correct type and size for the fabric being used.
- Review the threading instructions in the user manual and ensure that the thread is threaded correctly through the needle’s eye.
- Adjust the thread tension according to the recommended settings for the selected fabric to prevent excessive strain on the thread.
By following these detailed troubleshooting steps, users of the Husqvarna Viking Prisma 940 can effectively address a wide range of common problems encountered during sewing and embroidery projects, ensuring optimal performance and stitch quality.
Here you can find all the
parts and accessories for the Husqvarna Viking Prisma 940
guaranteed to fit your sewing machine
Husqvarna Viking Prisma 940 Sewing Machine Manual
The operating instructions for the Husqvarna Viking Prisma 940 can be found on the manufacturer’s website. Please visit the official Husqvarna Viking website and navigate to the support or downloads section to access the manual for your specific model.
Frequently Asked Questions about the Husqvarna Viking Prisma 940
1. How can I adjust the thread tension on the Husqvarna Viking Prisma 940?
To adjust the thread tension on the Husqvarna Viking Prisma 940, refer to the tension adjustment dial located on the machine. Turn the dial clockwise to increase tension and counterclockwise to decrease tension. Test your stitches on a scrap piece of fabric to ensure the desired tension is achieved.
2. What should I do if the needle keeps breaking?
If the needle on your Husqvarna Viking Prisma 940 sewing machine keeps breaking, first check that you are using the correct needle type and size for your fabric. Ensure the needle is inserted correctly and not bent or damaged. Additionally, adjust the machine settings to accommodate the fabric thickness and avoid sewing over thick seams.
3. Why is my bobbin thread tangling?
If the bobbin thread on your Husqvarna Viking Prisma 940 is tangling, check that the bobbin is inserted correctly and the bobbin tension is properly adjusted. Clean the bobbin area to remove any debris or lint that may be causing the tangling. Ensure you are using high-quality thread and correctly threading the bobbin case.
4. How do I clean and maintain my Husqvarna Viking Prisma 940?
To clean and maintain your Husqvarna Viking Prisma 940, regularly remove lint and debris from the bobbin area, feed dogs, and needle plate using a brush or vacuum attachment. Oil the machine according to the manufacturer’s instructions to keep it running smoothly. Avoid using compressed air, as it can push debris further into the machine.
5. What should I do if my stitches are skipping?
If your stitches are skipping on the Husqvarna Viking Prisma 940, first check that the machine is threaded correctly and the needle is inserted properly. Ensure the bobbin is wound evenly and inserted correctly into the bobbin case. If the problem persists, try using a new needle and adjusting the tension settings.
Conclusion
For any issues encountered with your Husqvarna Viking Prisma 940 sewing machine, it is recommended to always refer to the manual, contact customer service, or visit an authorized service center for assistance. Proper maintenance and following the manufacturer’s guidelines can help ensure optimal performance and longevity of your machine.
Husqvarna Viking Prisma 950S Common Problems
Husqvarna Viking Prelude 370 Common Problems
Husqvarna Viking Prelude 360 Common Problems