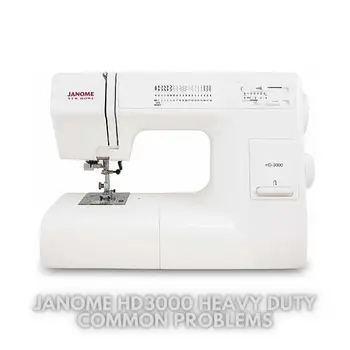
Janome HD3000 Heavy Duty Common Problems and Troubleshooting
Welcome to the Janome HD3000 Heavy Duty sewing machine troubleshooting guide. If you own the Janome HD3000, you’ve got yourself a heavy-duty machine perfect for both beginners and experienced sewists.
This article aims to address common issues you may encounter while using the Janome HD3000 and provide solutions to help you get back to your sewing projects without any hassle.
Janome HD3000 Heavy Duty Overview
The HD-3000 is a Heavy-Duty Machine designed for sewists looking to handle a wide range of sewing tasks. It comes with 18 stitches, including a one-step buttonhole, providing you with the necessary tools to tackle any sewing project.
The machine’s Heavy-Duty Aluminum Body ensures durability, while the Free Arm Capability allows you to work on pants legs and shirt sleeves with ease. The maximum sewing speed of 860 SPM ensures efficient and quick sewing.
| Brand | Janome |
|---|---|
| Color | White |
| Material | Leather |
| Product Dimensions | 10″D x 19″W x 14.7″H |
| Item Weight | 21 Pounds |
| Power Source | Treadle Powered |
| Is Electric | Yes |
Product Features
- Automatic Needle Threader – No more straining your eyes with threading, thanks to the built-in automatic needle threader.
- Jam Proof Top-Loading Bobbin System – Worry less about bobbin jams as the top-loading system is designed to be jam-proof.
- Easy Stitch Selection – Simply turn the stitch selection dial to choose your desired stitch, which will appear in red.
- Flip-Up Stitch Panel – Conveniently view all 18 built-in stitches at a glance using the flip-up stitch panel.
- Adjustable Presser Foot Pressure – Easily adjust the presser foot pressure to accommodate various fabric thicknesses.
- Free Arm Capability – Sew pants legs and shirt sleeves effortlessly with the free-arm feature.
Causes of Common Problems with the Janome HD3000 Heavy Duty
In the following subsections, we’ll address possible problems that you may encounter with the Janome HD3000 Heavy Duty sewing machine and provide troubleshooting solutions to resolve them.
Common Problems with Janome HD3000 Heavy Duty and Troubleshooting
1. Bobbin Jamming – Fabric Threaded Incorrectly
Description: One of the common issues users may encounter with the Janome HD3000 Heavy Duty is bobbin jamming. This occurs when the bobbin is not threaded correctly or if there are tangled threads in the bobbin area.
Cause of the Problem: Incorrect threading of the bobbin or using low-quality thread can lead to jamming in the bobbin case.
Troubleshooting:
- Turn off the sewing machine and unplug it for safety.
- Remove the bobbin case and clean any tangled threads or lint in the area.
- Rethread the bobbin according to the machine’s manual, ensuring it is inserted correctly.
- Check the bobbin tension and adjust it if necessary.
- Use high-quality thread and avoid using old or damaged thread.
2. Uneven Stitching – Incorrect Tension Settings
Description: Uneven or irregular stitching is a common problem that can occur while using the Janome HD3000 Heavy Duty sewing machine.
Cause of the Problem: Incorrect tension settings, either too tight or too loose, can result in uneven stitching.
Troubleshooting:
- Check the tension settings on the machine and make sure they are set to the recommended values for the fabric you are using.
- Test the stitching on a scrap piece of fabric to find the right tension setting before starting your project.
- If the tension is too tight, decrease the tension by adjusting the tension dial. If it’s too loose, increase the tension.
- Make sure the thread is properly threaded through all the guides and tension discs.
3. Needle Breakage – Incorrect Needle or Fabric
Description: Needles may break while sewing, causing frustration and interrupting your sewing process.
Cause of the Problem: Using the wrong type or size of needle for the fabric being sewn can lead to needle breakage.
Troubleshooting:
- Ensure you are using the correct needle type and size for the fabric you are sewing. Use universal needles for general sewing and specialized needles for specific fabrics like leather or denim.
- Replace the needle regularly, especially if it becomes dull or bent.
- Check for any burrs or damage in the needle plate that might be causing the needle to break and replace it if necessary.
- Slow down your sewing speed when working with thick or dense fabrics to reduce the strain on the needle.
4. Skipped Stitches – Dull or Bent Needle
Description: Skipped stitches are when the sewing machine fails to form a complete stitch, leaving gaps in the fabric.
Cause of the Problem: A dull or bent needle can cause skipped stitches as it may not properly penetrate the fabric.
Troubleshooting:
- Replace the needle with a new, sharp needle that is suitable for the fabric you are using.
- Make sure the needle is inserted correctly, with the flat side facing the back of the machine.
- Check that the needle is not damaged or bent. If it is, replace it immediately.
- Ensure the thread tension is correctly adjusted and that the thread is properly threaded through all the guides and the needle’s eye.
5. Thread Bunching Underneath – Incorrect Bobbin Placement
Description: Thread bunching or looping underneath the fabric is a common issue that can affect the quality of your sewing.
Cause of the Problem: Incorrect placement of the bobbin or improperly wound bobbin thread can lead to thread bunching underneath.
Troubleshooting:
- Remove the bobbin case and check if the bobbin is inserted correctly with the thread unwinding in the correct direction.
- Make sure the bobbin is wound evenly and there are no loose threads or tangles.
- Check that the bobbin tension is adjusted properly. Adjust the tension screw if necessary.
- Clean the bobbin area from any lint or debris that may be causing thread bunching.
6. Thread Breaking – Incorrect Thread Tension
Description: Thread breakage during sewing can be frustrating and disrupt your workflow.
Cause of the Problem: Incorrect thread tension, either too tight or too loose, can cause the thread to break.
Troubleshooting:
- Check the thread tension settings on the machine and adjust them to the recommended values for the fabric you are using.
- Ensure the thread is properly threaded through all the guides and tension discs.
- Try using a higher-quality thread, as low-quality threads are more prone to breaking.
- If the thread is too tight, decrease the tension by adjusting the tension dial. If it’s too loose, increase the tension.
7. Machine Jamming – Foreign Objects in the Feed Dog
Description: The sewing machine may jam if there are foreign objects lodged in the feed dog area.
Cause of the Problem: Accidentally dropping pins, needles, or other small objects into the feed dog can cause jamming.
Troubleshooting:
- Turn off the sewing machine and unplug it for safety.
- Carefully remove the needle plate and check for any foreign objects in the feed dog area.
- If you find any objects, gently remove them using tweezers or a small tool.
- Reassemble the needle plate and ensure it is securely in place before resuming sewing.
8. Uneven Feed – Dirty or Damaged Feed Dogs
Description: Uneven fabric feeding can result in uneven stitching and sewing difficulties.
Cause of the Problem: Dirty or damaged feed dogs can cause the fabric not to move smoothly during sewing.
Troubleshooting:
- Remove the needle plate and clean the feed dogs from any lint, dust, or debris that may have accumulated.
- Inspect the feed dogs for any signs of damage or wear. If damaged, replace them following the machine’s manual instructions.
- Apply a drop of sewing machine oil to the feed dogs to lubricate them, enhancing their performance.
- Use the appropriate presser foot for the fabric you are sewing to ensure proper feeding.
9. Thread Tangling in the Bobbin Area – Improper Bobbin Winding
Description: Thread tangling in the bobbin area can cause frustrating knots and interruptions in your sewing.
Cause of the Problem: Improper bobbin winding or not threading the bobbin correctly can lead to thread tangling.
Troubleshooting:
- Remove the bobbin and re-wind it following the correct winding technique as per the machine’s manual.
- Ensure the thread is wound evenly and tightly on the bobbin to prevent tangling.
- Check that the bobbin is inserted correctly with the thread unwinding in the designated direction.
- If the problem persists, try using a different type or brand of thread, as some threads may be more prone to tangling.
10. Skipped Buttonholes – Dull Buttonhole Blade
Description: Skipped buttonholes can occur when the buttonhole blade is not cutting through the fabric properly.
Cause of the Problem: A dull or damaged buttonhole blade can lead to incomplete or skipped buttonholes.
Troubleshooting:
- Inspect the buttonhole blade for any signs of damage or dullness. If damaged, replace it following the machine’s manual instructions.
- Ensure the fabric is properly positioned and stabilized when creating buttonholes.
- Use a stabilizer or interfacing on the fabric to prevent shifting and improve buttonhole quality.
- Adjust the buttonhole size and density settings according to the fabric and button you are using.
11. Thread Fraying – Incorrect Needle Size
Description: Thread fraying can lead to messy stitches and fabric damage.
Cause of the Problem: Using the wrong needle size for the thread can cause it to fray during sewing.
Troubleshooting:
- Check the recommended needle size for the thread you are using and ensure it matches the needle you have installed.
- If the needle size is incorrect, replace it with the appropriate size to match the thread weight.
- Use a needle with a sharp point, especially when working with delicate fabrics to prevent fraying.
- Make sure the needle is properly inserted and tightened to prevent any unnecessary movement.
12. Fabric Not Feeding – Worn Feed Dogs
Description: If the fabric doesn’t feed through the machine smoothly, it can lead to sewing difficulties.
Cause of the Problem: Worn-out feed dogs can lose their grip on the fabric, causing feeding issues.
Troubleshooting:
- Inspect the feed dogs for signs of wear or damage, such as smooth or rounded edges.
- If the feed dogs are worn, consider replacing them with new ones following the machine’s manual instructions.
- Ensure the presser foot pressure is appropriately adjusted for the fabric thickness to aid in smooth feeding.
- Keep the feed dogs clean and free from any debris that may hinder their performance.
13. Machine Overheating – Continuous Heavy Use
Description: If the sewing machine overheats, it may shut down or affect its overall performance.
Cause of the Problem: Continuous heavy use of the machine without breaks can cause it to overheat.
Troubleshooting:
- If the machine feels hot to the touch, turn it off and unplug it immediately to allow it to cool down.
- Avoid using the machine for extended periods without giving it time to rest and cool down.
- Keep the machine’s air vents and ventilation areas free from obstructions to aid in heat dissipation.
- Consider using a sewing machine cooling fan or placing the machine in a well-ventilated area to prevent overheating.
14. Uneven Buttonholes – Incorrect Fabric Positioning
Description: Uneven buttonholes can cause difficulty in attaching buttons and affect the overall appearance of the garment.
Cause of the Problem: Incorrect fabric positioning and stabilization during buttonhole creation can lead to uneven results.
Troubleshooting:
- Ensure the fabric is positioned flat and straight under the buttonhole foot before starting the buttonhole.
- Use a stabilizer or interfacing to support the fabric during buttonhole creation, especially on stretchy or lightweight fabrics.
- Test the buttonhole on a fabric scrap before creating it on the final garment to ensure proper positioning and sizing.
- Adjust the buttonhole density and stitch width according to the button’s size and the fabric thickness.
15. Needle Threader Malfunction – Misalignment
Description: If the needle threader fails to work correctly, threading the needle can become a tedious task.
Cause of the Problem: The needle threader may malfunction due to misalignment or improper setup.
Troubleshooting:
- Check the needle threader’s alignment and make sure it is properly calibrated.
- Refer to the machine’s manual for the correct procedure to use the needle threader and follow the steps carefully.
- Ensure the needle threader hook is not bent or damaged and clean it regularly to avoid obstructions.
- Practice using the needle threader with the machine turned off until you are familiar with the correct technique.
16. Thread Loops on the Underside – Bobbin Tension Issues
Description: Thread loops appearing on the underside of the fabric can result in messy stitching.
Cause of the Problem: Incorrect bobbin tension or improper threading can cause thread loops on the underside.
Troubleshooting:
- Check the bobbin tension and adjust it according to the machine’s manual for the fabric you are using.
- Ensure the bobbin is correctly threaded and inserted into the bobbin case.
- Confirm that the bobbin case is clean and free from lint or debris that might affect the tension.
- Verify that the top thread is properly threaded through all the guides and the tension discs.
17. Inconsistent Buttonhole Sizes – Buttonhole Sensor Issues
Description: Inconsistent buttonhole sizes can lead to difficulties in button attachment and garment fit.
Cause of the Problem: Malfunctioning buttonhole sensor or improper sensor calibration can cause variations in buttonhole sizes.
Troubleshooting:
- Refer to the machine’s manual for the correct procedure to calibrate or reset the buttonhole sensor.
- Make sure the buttonhole foot is properly attached and secure during the buttonhole creation process.
- Test the buttonhole sensor on scrap fabric before using it on the final garment.
- Check the buttonhole foot for any signs of damage or wear that might affect the sensor’s performance.
18. Motor Noise – Lack of Lubrication
Description: Unusual motor noise can be indicative of a lack of lubrication or potential mechanical issues.
Cause of the Problem: Lack of regular maintenance and lubrication can lead to increased friction and motor noise.
Troubleshooting:
- Refer to the machine’s manual for proper lubrication points and use high-quality sewing machine oil.
- Apply a drop of oil to the recommended areas, such as the motor shaft and other moving parts.
- Avoid over-lubrication as excessive oil can attract lint and debris, causing more issues.
- If the motor noise persists, consider taking the machine to a professional technician for inspection.
19. Stitches Skipping – Bent or Blunt Needle
Description: Skipping stitches can result in uneven seams and compromised sewing quality.
Cause of the Problem: A bent or blunt needle can skip stitches as it fails to penetrate the fabric properly.
Troubleshooting:
- Replace the needle with a new, sharp needle that is appropriate for the fabric type.
- Make sure the needle is inserted correctly with the flat side facing the back of the machine.
- Check that the needle is compatible with the thread weight you are using.
- Inspect the needle for any signs of damage or bending and replace it if necessary.
20. Machine not Powering On – Electrical Issues
Description: If the sewing machine does not power on, it can be frustrating and halt your sewing projects.
Cause of the Problem: Electrical issues, such as a faulty power cord or switch, can prevent the machine from powering on.
Troubleshooting:
- Ensure the power cord is securely plugged into a working electrical outlet.
- Check for any damage or wear on the power cord and replace it if necessary.
- Verify that the power switch is in the “ON” position and functioning correctly.
- Try using the machine with a different power cord to rule out any issues with the original cord.
21. Skipped Stitches – Incorrect Thread Type
Description: Skipped stitches can be frustrating and result in incomplete seams.
Cause of the Problem: Using the wrong type of thread for the fabric can cause the needle to skip stitches.
Troubleshooting:
- Ensure you are using the appropriate thread type for the fabric you are sewing.
- Choose a thread that matches the weight and fiber content of the fabric to prevent skipping.
- Check that the thread is properly threaded through the machine’s guides and tension discs.
- If the problem persists, try adjusting the thread tension slightly to see if it improves stitching.
22. Uneven Tension – Tension Assembly Issues
Description: Uneven tension can cause an inconsistent appearance of stitches on both sides of the fabric.
Cause of the Problem: Problems with the tension assembly can lead to uneven thread tension.
Troubleshooting:
- Inspect the tension assembly for any loose parts or signs of damage.
- Refer to the machine’s manual for proper tension assembly adjustment procedures.
- Test the tension on a fabric scrap before starting your project to ensure it is properly balanced.
- Clean the tension discs and guides from any lint or debris that might be affecting the tension.
23. Needle Hitting the Presser Foot – Incorrect Presser Foot
Description: The needle hitting the presser foot can result in broken needles and damage to the foot.
Cause of the Problem: Using the wrong presser foot or attaching it incorrectly can cause the needle to hit the foot.
Troubleshooting:
- Check that you are using the correct presser foot for the sewing task at hand.
- Ensure the presser foot is properly attached and secure before sewing.
- Verify that the needle position is appropriate for the chosen presser foot.
- If the problem continues, consult the machine’s manual for compatible presser feet and needle combinations.
24. Thread Slippage – Incorrect Thread Path
Description: Thread slippage can lead to loose and uneven stitches.
Cause of the Problem: Incorrect threading of the machine or not following the correct thread path can cause thread slippage.
Troubleshooting:
- Refer to the machine’s manual for the correct threading path and follow it step-by-step.
- Check that the thread is properly seated in the tension discs and take-up lever.
- Inspect the bobbin winding to ensure it is done correctly and the bobbin thread is wound tightly.
- Practice threading the machine slowly until you are confident in the correct path.
25. Fabric Puckering – Incorrect Stitch Length
Description: Fabric puckering can ruin the appearance of the finished sewing project.
Cause of the Problem: Using an incorrect stitch length for the fabric type can cause puckering.
Troubleshooting:
- Choose the appropriate stitch length for the fabric you are sewing to prevent puckering.
- Test the stitch length on a fabric scrap to find the optimal setting before sewing your project.
- If the fabric still puckers, try stabilizing the fabric with a stabilizer or interfacing.
- Ensure the presser foot pressure is adjusted correctly for the fabric thickness to avoid puckering.
Janome HD3000 Heavy Duty Sewing Machine User Reviews
Positive Reviews from Janome HD3000 Heavy Duty Sewing Machine Users
- Some users were satisfied with the excellent stitch quality delivered by the Janome HD3000, praising its ability to handle a wide range of fabrics, including thick materials like leather.
- Many users appreciated the machine’s heavy-duty build, which provided stability and reduced vibrations during sewing, resulting in smooth and precise stitches.
- Several users found the automatic needle threader to be a helpful feature, making threading the needle an easy and time-saving task.
- Users admired the machine’s straightforward stitch selection dial, allowing them to choose from the 18 built-in stitches effortlessly.
- Several users found the included accessory kit valuable, providing them with various presser feet and other tools to enhance their sewing experience.
Overall, positive feedback from users highlighted the Janome HD3000 Heavy Duty sewing machine’s durability, stitch quality, and ease of use, making it a reliable choice for both beginners and experienced sewists.
Negative User Reviews of the Janome HD3000 Heavy Duty Sewing Machine
- Some users expressed frustration with the machine’s reverse stitch function, reporting that it didn’t work right out of the box and required troubleshooting.
- Several users mentioned issues with the thread bobbin and automatic threader malfunctioning after minimal use, resulting in a disappointing sewing experience.
- Some users found threading the machine to be cumbersome, and the automatic threader was challenging to use, leading to frustration during setup.
- A few users experienced difficulties with the tension assembly, leading to uneven stitching and fabric puckering.
- Some users encountered problems with the motor overheating during extended sewing sessions, causing interruptions in their projects.
While the majority of users praised the Janome HD3000 Heavy Duty sewing machine for its performance and durability, a subset of negative reviews highlighted issues related to the machine’s functionality, particularly with the automatic threader, tension assembly, and motor overheating.
Note: All information about user reviews is taken from the site Walmart.com.
Janome HD3000 Heavy Duty Common Problems
Janome C30 Common Problems
Janome 3160QDC-T Common Problems
Janome HD3000 Heavy Duty Sewing Machine Manual
The operating instructions for the Janome HD3000 Heavy Duty sewing machine can be found on the manufacturer’s website. Please visit the official Janome website to access and download the comprehensive user manual that provides detailed information on setup, operation, maintenance, and troubleshooting tips for the HD3000 model.
Janome HD3000 Heavy Duty Frequently Asked Questions (FAQs)
1. How do I thread the Janome HD3000 Heavy Duty sewing machine?
To thread the Janome HD3000, follow the step-by-step instructions provided in the user manual. Typically, it involves guiding the thread through specific guides and tension discs, threading the needle, and using the automatic needle threader if available. Refer to the manual for the correct thread path and ensure the machine is properly threaded before starting to sew.
2. What types of fabrics can I sew with the Janome HD3000?
The Janome HD3000 is designed to handle a wide range of fabrics, including cotton, denim, wool, leather, and other medium to heavyweight materials. It is suitable for various sewing projects, from garment making to quilting and home decor. However, always refer to the user manual to adjust the settings and needle type according to the specific fabric you are working with.
3. Why is my Janome HD3000 sewing machine not powering on?
If your machine is not powering on, check the power cord for any damages or loose connections. Ensure that the power switch is in the “ON” position and plugged into a functional electrical outlet. If the issue persists, refer to the troubleshooting section in the user manual or contact customer service for assistance.
4. How can I fix skipped stitches on the Janome HD3000?
Skipped stitches can occur due to various reasons, such as using the wrong needle type, incorrect thread tension, or a bent needle. Start by replacing the needle with a new, appropriate one for your fabric. Check the thread tension and adjust it as needed. If the problem continues, refer to the user manual for further troubleshooting steps.
5. Can the Janome HD3000 sew buttonholes automatically?
Yes, the Janome HD3000 comes with an automatic one-step buttonhole feature. Refer to the user manual for instructions on setting up the buttonhole foot and using the automatic buttonhole function. Practice on scrap fabric before sewing buttonholes on your project to achieve consistent results.
Conclusion
For any problems encountered with the Janome HD3000 Heavy Duty sewing machine, always refer to the user manual for proper setup, troubleshooting, and maintenance guidance. Additionally, if you face difficulties that cannot be resolved, do not hesitate to reach out to Janome’s customer service or visit an authorized service center for professional assistance. Proper care and adherence to the manual’s instructions will ensure a smooth sewing experience with your Janome HD3000 Heavy Duty.