JUKI America HZL-353Z Common Problems and Troubleshooting
Welcome to our guide on common problems and troubleshooting for the JUKI America HZL-353Z sewing machine. In this article, we’ll address potential issues you might encounter with this specific model and provide solutions to overcome them.
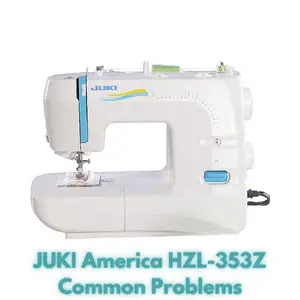
JUKI America HZL-353Z Overview
Juki industrial sewing machine technology in every stitch! The JUKI America HZL-353Z is a high-quality, lightweight sewing machine featuring 21 built-in sewing patterns and an automatic 1-Step Buttonhole function. This versatile machine is equipped with LED lights for a brighter sewing area and an automatic needle threader for added convenience. Its free arm and stitch variety offer great flexibility, making it an excellent choice for beginners. The machine boasts a large and user-friendly stitch selection dial, along with a conveniently placed reverse lever. It features easy drop-in bobbin functionality.
| Product Details | Specifications and Features |
|---|---|
| Brand: JUKI | Lightweight portable design |
| Color: White | 21 built-in sewing patterns and Buttonhole |
| Power Source: Corded Electric | Automatic needle threader |
| Is Electric: Yes | Presser foot pressure adjustment |
| LED light for a bright work area | |
| Easy drop-in bobbin | |
| Free Arm | |
| Product Dimensions: 19 x 11 x 15 inches | Item model number: HZL-353ZR-C/UL |
| ASIN: B018KAEGP6 | Customer Reviews: 4.6 out of 5 stars |
Causes of Common Problems with the JUKI America HZL-353Z
As we delve into the various subsections of this article, we will explore potential issues that users might encounter with the JUKI America HZL-353Z sewing machine. Furthermore, we will provide helpful solutions to address these challenges effectively.
Common Problems with the JUKI America HZL-353Z and Troubleshooting
Problem 1: Stitch Skipping
Description: One of the common issues with the JUKI America HZL-353Z is stitch skipping, where the machine fails to create consistent stitches.
Cause: Stitch skipping can be caused by improper threading, incorrect tension settings, or a dull needle.
Troubleshooting:
- Re-thread the machine following the correct threading path as specified in the user manual.
- Check the tension settings and adjust them as needed. Start with the default setting and make small adjustments if necessary.
- Replace the needle with a new, appropriate-sized needle. A dull or bent needle can cause stitching problems.
Problem 2: Bobbin Thread Tension Issues
Description: Uneven or loose bobbin thread tension can lead to looping and uneven stitches.
Cause: Incorrect bobbin threading, debris in the bobbin case, or incorrect bobbin tension settings can cause this issue.
Troubleshooting:
- Ensure that the bobbin is correctly threaded and placed in the bobbin case.
- Clean the bobbin case area from any lint, thread pieces, or debris that might affect the thread’s movement.
- Check and adjust the bobbin tension using the tension screw on the bobbin case. Make small adjustments and test with scrap fabric.
Problem 3: Uneven Stitch Length
Description: Uneven stitch length can result in a visually unappealing and functionally problematic seam.
Cause: Improper tension settings, incorrect presser foot pressure, or inconsistent sewing speed can lead to uneven stitch length.
Troubleshooting:
- Check and adjust the tension settings, both upper and lower, to achieve balanced stitches.
- Ensure the presser foot pressure is appropriate for the fabric you’re using. Adjust it if necessary.
- Sew at a consistent speed, avoiding sudden changes that could affect stitch length.
Problem 4: Thread Jamming in Bobbin Area
Description: Thread jamming around the bobbin area can halt your sewing progress and cause frustration.
Cause: Improper threading, incorrect bobbin installation, or lint buildup in the bobbin area can lead to thread jamming.
Troubleshooting:
- Remove the bobbin and re-thread it following the correct path.
- Check that the bobbin is correctly placed in the bobbin case and rotates smoothly.
- Clean the bobbin area thoroughly, removing any lint or thread fragments.
Problem 5: Uneven Feed Dogs Movement
Description: Uneven movement of the feed dogs can result in fabric not feeding properly, causing stitching irregularities.
Cause: Debris accumulation, improper pressure foot attachment, or mechanical issues can lead to uneven feed dog movement.
Troubleshooting:
- Clean the feed dog area to ensure there’s no lint, debris, or thread obstructing their movement.
- Check that the pressure foot is properly attached and not hindering the feed dogs’ motion.
- If the issue persists, consult the user manual for troubleshooting steps related to the feed dogs.
Problem 6: Thread Breakage
Description: Frequent thread breakage during sewing can be frustrating and disrupt your sewing project.
Cause: Thread breakage may occur due to incorrect threading, using low-quality thread, or the needle being too small for the chosen fabric.
Troubleshooting:
- Double-check the threading of both the upper and lower threads, ensuring they are correctly tensioned.
- Use high-quality sewing thread that is appropriate for the fabric you are working with.
- Consider using a larger needle size if you are sewing thick or heavy fabrics.
Problem 7: Uneven Buttonhole Stitches
Description: Inconsistent buttonhole stitches can affect the functionality and aesthetics of your sewing projects.
Cause: Uneven buttonholes may result from incorrect buttonhole foot placement, improper sizing, or debris in the buttonhole mechanism.
Troubleshooting:
- Ensure the buttonhole foot is correctly attached and aligned with the button size you intend to use.
- Check the machine’s buttonhole settings and make adjustments as necessary for your specific project requirements.
- Clean the buttonhole mechanism area to remove any lint or debris that could impact stitching quality.
Problem 8: Noisy Operation
Description: Unusual or excessive noise during sewing can be a sign of mechanical issues.
Cause: Noisy operation can be caused by loose parts, lack of lubrication, or foreign objects trapped in the machine.
Troubleshooting:
- Inspect the machine for loose screws, bolts, or components, and tighten them if necessary.
- Regularly lubricate the moving parts of the machine according to the manufacturer’s recommendations.
- Check the sewing area for any foreign objects that might be causing the noise and remove them.
Problem 9: Fabric Puckering
Description: Fabric puckering, where the fabric wrinkles or gathers unnaturally, can affect the final appearance of your sewing projects.
Cause: Puckering often occurs due to incorrect tension settings, using the wrong type of needle, or sewing too quickly.
Troubleshooting:
- Adjust the upper and lower thread tensions to find the right balance for your fabric type and project.
- Ensure you are using an appropriate needle for the fabric; choose a ballpoint needle for knits and a universal needle for woven fabrics.
- Slow down your sewing speed, especially when working with delicate or lightweight materials.
Problem 10: Needle Breakage
Description: Frequent needle breakage can be a frustrating issue that disrupts your sewing process.
Cause: Needle breakage may occur if the needle is bent, damaged, or if you are using the wrong type or size of needle.
Troubleshooting:
- Inspect the needle for any signs of damage, and replace it with a new needle if needed.
- Ensure you are using the correct needle type and size for the fabric you are working with.
- Check for any obstructions in the needle’s path, and clear them to prevent further breakage.
Problem 11: Uneven Tension
Description: Uneven tension can lead to stitches that are too tight on one side and too loose on the other.
Cause: Incorrect tension settings, improper threading, or lint buildup can cause uneven tension issues.
Troubleshooting:
- Re-thread both the upper and lower threads following the correct threading paths.
- Adjust the tension settings gradually and test on scrap fabric to achieve balanced stitches.
- Clean the tension discs and remove any lint or thread that might be affecting tension.
Problem 12: Fabric Jamming in the Feed Dogs
Description: Fabric getting stuck in the feed dogs can lead to sewing interruptions and fabric damage.
Cause: Uneven fabric feeding, incorrect presser foot pressure, or using the wrong needle can cause fabric jamming.
Troubleshooting:
- Ensure that the presser foot pressure is appropriate for the fabric type you’re using.
- Use the correct needle size and type for the fabric; a ballpoint needle for knits and a sharp needle for woven fabrics.
- Guide the fabric evenly through the machine, avoiding pulling or pushing too forcefully.
Problem 13: Inconsistent Thread Tension on Buttonholes
Description: Buttonholes with varying thread tension can result in unsightly and weak buttonholes.
Cause: Incorrect buttonhole foot attachment, inadequate thread tension adjustments, or fabric shifting can lead to this issue.
Troubleshooting:
- Ensure the buttonhole foot is securely attached and properly aligned.
- Adjust the thread tension settings specifically for buttonholes and test on a scrap fabric to achieve consistency.
- Stabilize the fabric properly to prevent shifting during the buttonhole stitching.
Problem 14: Skipped Stitches on Thick Fabrics
Description: Skipped stitches when sewing thick fabrics can compromise seam strength and quality.
Cause: Inadequate needle penetration, incorrect needle size, or improper machine settings can cause skipped stitches on thicker materials.
Troubleshooting:
- Choose a needle size appropriate for the thickness of the fabric, ensuring it can penetrate the layers effectively.
- Adjust the machine settings to a slower sewing speed and a slightly longer stitch length when working with thick fabrics.
- Guide the fabric carefully to prevent the needle from deflecting or skipping stitches.
Problem 15: Thread Bunching on the Underside
Description: Thread bunching on the underside of the fabric can create unsightly knots and compromise seam strength.
Cause: Improper threading, incorrect bobbin placement, or upper thread tension issues can cause thread bunching.
Troubleshooting:
- Re-thread both the upper thread and the bobbin, ensuring they are properly tensioned and correctly placed.
- Check for any thread snags or obstructions in the thread path that might be causing the issue.
- Gradually adjust the upper thread tension until the stitch quality improves.
Problem 16: Fabric Slippage During Sewing
Description: Fabric slipping or shifting while sewing can result in uneven seams and misaligned patterns.
Cause: Insufficient presser foot pressure, inappropriate fabric handling, or inadequate stabilizing can lead to fabric slippage.
Troubleshooting:
- Adjust the presser foot pressure to firmly hold the fabric without stretching it.
- Use proper fabric handling techniques, such as gently guiding the fabric without pulling or pushing excessively.
- Consider using stabilizers or pins to prevent fabric slippage, especially on slippery or delicate materials.
Problem 17: Bobbin Winding Difficulties
Description: Difficulty in winding the bobbin can hinder the sewing process and delay your project.
Cause: Incorrect bobbin placement, tangled thread, or issues with the bobbin winding mechanism can cause bobbin winding difficulties.
Troubleshooting:
- Ensure the bobbin is correctly placed on the winding spindle and secured in place.
- Check for any tangles or knots in the thread, as they can interfere with smooth bobbin winding.
- If the bobbin winding mechanism is not working properly, consult the user manual for guidance or seek professional assistance.
Problem 18: Needle Threader Malfunction
Description: A malfunctioning needle threader can make threading the needle a challenging and time-consuming task.
Cause: Dirt accumulation, misalignment, or damage to the needle threader mechanism can cause it to malfunction.
Troubleshooting:
- Carefully clean the needle threader mechanism to remove any lint, dust, or debris.
- Ensure the needle threader is properly aligned with the needle eye and the threading path.
- If the needle threader continues to malfunction, thread the needle manually or consider seeking professional repair.
Problem 19: Uneven Fabric Feeding
Description: Uneven fabric feeding can result in uneven seam allowances and misaligned stitching.
Cause: Improper presser foot pressure, uneven fabric layers, or feed dog issues can lead to uneven fabric feeding.
Troubleshooting:
- Adjust the presser foot pressure to ensure even fabric feeding without stretching or gathering.
- Ensure that fabric layers are smooth and even before sewing to prevent variations in feeding.
- Clean and inspect the feed dogs for any obstructions or damage that might be affecting fabric feeding.
Problem 20: Limited Stitch Variety
Description: Limited stitch variety can restrict your creative options and project possibilities.
Cause: Incorrect stitch selection, lack of familiarity with the machine’s features, or software glitches can limit stitch variety.
Troubleshooting:
- Refer to the user manual to understand the full range of stitches available and how to select them.
- Explore the machine’s settings and controls to ensure you are accessing all available stitch options.
- If you experience software glitches, consider updating the machine’s firmware or seeking technical support.
Problem 21: Thread Tangling in the Bobbin Area
Description: Thread tangling or nesting in the bobbin area can lead to messy stitches and fabric damage.
Cause: Incorrect threading, incorrect bobbin placement, or improper tension settings can cause thread tangling in the bobbin area.
Troubleshooting:
- Re-thread both the upper thread and the bobbin, ensuring proper threading paths.
- Check that the bobbin is inserted into the bobbin case correctly and rotates freely.
- Adjust the thread tensions and test on scrap fabric to prevent thread tangling.
Problem 22: Irregular Buttonhole Length
Description: Buttonholes with uneven lengths can affect the functionality and appearance of your sewing projects.
Cause: Incorrect buttonhole foot setup, inconsistent fabric feeding, or mechanical issues can lead to irregular buttonhole lengths.
Troubleshooting:
- Ensure the buttonhole foot is securely attached and properly calibrated for consistent buttonhole length.
- Feed the fabric evenly through the machine to prevent variations in buttonhole length.
- If the problem persists, consult the user manual for troubleshooting guidance or seek professional assistance.
Problem 23: Limited Lighting in the Workspace
Description: Insufficient lighting in the sewing workspace can strain your eyes and affect the quality of your work.
Cause: Dim or inadequate lighting in the sewing area can lead to visibility issues and sewing inaccuracies.
Troubleshooting:
- Position your sewing machine near a natural light source or use additional task lighting to brighten the workspace.
- Consider using a daylight LED lamp to provide optimal lighting conditions for sewing.
- Adjust the light angle and intensity to minimize shadows and enhance visibility of your sewing area.
Problem 24: Fabric Fraying at Edges
Description: Fabric fraying at the edges of seams can result in weakened stitching and a messy appearance.
Cause: Inadequate seam allowances, improper stitch selection, or fabric type can contribute to fabric fraying.
Troubleshooting:
- Ensure you are using an appropriate seam allowance for the fabric type to prevent excessive fraying.
- Select a suitable stitch type that reinforces the fabric edges, such as an overlock or zigzag stitch.
- Consider finishing raw edges with pinking shears or applying seam sealants to minimize fraying.
Problem 25: Inconsistent Thread Tension on Zigzag Stitches
Description: Zigzag stitches with inconsistent tension can lead to uneven stitching and compromised seam strength.
Cause: Incorrect tension settings, improper threading, or fabric variations can cause zigzag stitches with uneven tension.
Troubleshooting:
- Double-check the threading of both the upper and lower threads, ensuring proper tensioning.
- Adjust the tension settings to achieve balanced zigzag stitches on both sides of the fabric.
- Test on scrap fabric before sewing your project to ensure the tension is consistent and appropriate for the fabric type.
JUKI America HZL-353Z Sewing Machine User Reviews
In this section, we provide an overview of user reviews for the JUKI America HZL-353Z sewing machine based on feedback and highlight both positive and negative experiences shared by customers.
Positive Reviews from JUKI America HZL-353Z Sewing Machine Users
- Some users were satisfied with the ease of use and user-friendly controls of the JUKI America HZL-353Z sewing machine.
- Several customers appreciated the variety of built-in stitches and the convenience of the automatic needle threader.
- Many users found the lightweight and portable design of the machine to be highly convenient for home sewing projects.
- Some customers praised the LED lighting, which provided a well-lit work area, improving visibility while sewing.
- Several users were pleased with the machine’s consistent stitch quality and performance on various fabrics.
Overall, positive feedback suggests that the JUKI America HZL-353Z sewing machine offers ease of use, versatility, and reliable stitching capabilities for home sewing enthusiasts.
Negative User Reviews of the JUKI America HZL-353Z Sewing Machine
- Some users expressed concerns about the machine’s ability to handle thicker fabrics or heavy-duty projects, citing instances where the motor lacked sufficient power.
- Several customers were disappointed by the lack of information regarding the motor power and recommended sewing durations in the machine’s documentation.
- Some users mentioned that the machine’s performance declined when sewing thick seams, leading to motor strain and potential locking.
- A few customers wished for more detailed instructions, particularly for using the machine with different fabric types and thicknesses.
- Some users noted that the included DVD guide was basic and not up-to-date, impacting their ability to fully utilize the machine’s features.
These negative reviews highlight concerns related to the machine’s power when handling thicker fabrics and the need for more comprehensive instructions.
The majority of users were satisfied with the JUKI America HZL-353Z sewing machine, with many praising its ease of use, versatility, and stitch quality. While some negative feedback centered around the machine’s performance with thicker fabrics and the need for more detailed instructions, the overall impression remains positive.
JUKI America HZL-353Z Sewing Machine Manual
The operating instructions and user manual for the JUKI America HZL-353Z sewing machine can be found on the manufacturer’s official website. It is recommended to refer to the manual for detailed guidance on setting up, using, and maintaining your sewing machine. The manual provides valuable information on machine features, threading, stitch selection, troubleshooting, and more. Accessing the manual ensures that you can make the most out of your sewing machine’s capabilities.
JUKI America HZL-353Z Frequently Asked Questions
Q1: How do I thread the JUKI America HZL-353Z sewing machine?
A1: Threading the JUKI America HZL-353Z sewing machine involves passing the thread through specific guides, tension discs, and the needle. Consult the user manual for detailed threading instructions, including the correct path and tension adjustments.
Q2: Why does my thread keep breaking during sewing?
A2: Thread breakage can result from issues such as incorrect threading, tension problems, or using low-quality thread. Review the threading process, adjust thread tensions, and consider using high-quality thread suitable for your fabric.
Q3: Can I sew thick fabrics with the JUKI America HZL-353Z?
A3: The JUKI America HZL-353Z is designed for lightweight and medium-weight fabrics. Sewing thicker fabrics might pose challenges and strain the motor. Consider using an appropriate needle, adjusting settings, and testing on scrap fabric before sewing thicker materials.
Q4: How do I troubleshoot uneven stitches?
A4: Uneven stitches can stem from tension issues, improper threading, or fabric handling. Check both upper and lower thread tensions, ensure proper threading, and practice even fabric feeding techniques to achieve balanced stitches.
Q5: Why does my fabric keep bunching up or puckering?
A5: Fabric puckering can result from incorrect tension settings, using the wrong needle, or sewing too quickly. Adjust thread tensions, choose an appropriate needle, and sew at a steady pace to avoid puckering issues.
Conclusion
For any problems or concerns related to your JUKI America HZL-353Z sewing machine, it’s advisable to consult the user manual, contact customer service, or visit an authorized service center whenever possible. The manual provides comprehensive guidance, while seeking professional assistance can help resolve issues effectively and ensure your sewing experience remains enjoyable and productive.