JUKI MO-2000QVP Common Problems and Troubleshooting
Welcome to our guide on common problems and troubleshooting for the JUKI MO-2000QVP sewing machine. As a proud owner of the JUKI MO-2000QVP, it’s essential to know how to tackle any issues that might arise during your sewing journey. In this article, we’ll explore various common problems and their solutions to ensure that your sewing experience remains smooth and enjoyable.
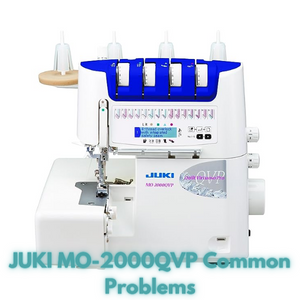
JUKI MO-2000QVP Overview
The JUKI MO-2000QVP is a versatile sewing machine designed to make your sewing projects a breeze. With its fully automatic threading system powered by an electric air pump and advanced needle technology, it offers efficiency and precision like never before. The LCD display provides clear voltage configuration instructions, and its reduced gap between knives and needles ensures impeccable curved seams while minimizing noise and vibration. Here are some key features:
| Product Details | Specification |
|---|---|
| Product Dimensions | 12.99 x 11.02 x 12.2 inches |
| Item Weight | 18.7 pounds |
| Power Source | Electricity, Male Plug |
| Is Electric | Yes |
Product Description
The JUKI MO-2000QVP is a 4-thread serger with fully automatic threading and needles, thanks to its electric air pump mechanism. The liquid crystal display simplifies voltage setup, and its ability to work with 2, 3, and 4 threads offers flexibility. With features like foot pressure adjustment, precise curved seams, reduced noise and vibration, and an integrated switch for automatic thread routing, this sewing machine is a must-have. Additional features include adjustable stitch length, LED lighting, and a large waste collection tray. It even comes with a cover for protection.
Product Information
- Product Dimensions: 12.99 x 11.02 x 12.2 inches
- Item Weight: 18.7 pounds
- Manufacturer: JUKI
- ASIN: B0748JMYTT
- Item Model Number: MO-2000QVP
Causes of Common Problems with the JUKI MO-2000QVP
In the following sections, we will address various potential problems that you might encounter while using the JUKI MO-2000QVP sewing machine. We’ll provide detailed troubleshooting steps to help you resolve these issues effectively and get back to sewing with ease.
Common Problems and Troubleshooting for JUKI MO-2000QVP
1. Thread Breakage During Sewing
Description: One of the common issues you might encounter with your JUKI MO-2000QVP is thread breakage while sewing.
Cause: Thread breakage can occur due to incorrect threading, tangled thread, or improper tension settings.
Troubleshooting:
- Ensure that the machine is threaded correctly following the threading guide in the user manual.
- Check for any knots or tangles in the thread path and remove them.
- Adjust the thread tension settings based on the fabric you’re using and the stitch type you’ve selected.
2. Uneven Stitches
Description: Uneven stitches can lead to an unattractive finish on your sewing projects.
Cause: Uneven stitches may be caused by incorrect tension settings, uneven fabric feeding, or dull needles.
Troubleshooting:
- Check and adjust the thread tension for both upper and lower threads.
- Ensure that the fabric is feeding smoothly by holding it gently and guiding it evenly.
- Replace the needles if they are dull or damaged, as they can cause skipped stitches and uneven tension.
3. Fabric Jamming in the Feed Dogs
Description: Fabric getting stuck in the feed dogs can halt your sewing progress.
Cause: Fabric jamming can occur if the machine is not properly threaded, the presser foot is not down, or the fabric is too thick for the selected settings.
Troubleshooting:
- Double-check that the machine is threaded correctly, following the threading guide in the user manual.
- Ensure that the presser foot is lowered before starting to sew.
- If sewing thick fabric, consider using a walking foot attachment or adjusting the presser foot pressure.
4. Overlapping Stitches in Overlock Mode
Description: Overlapping stitches can lead to messy seams, especially in overlock mode.
Cause: Overlapping stitches often occur when the stitch width or length settings are not appropriate for the selected fabric.
Troubleshooting:
- Ensure that the stitch width and length are set correctly for the fabric type you’re using.
- Practice on scrap fabric to find the right settings before starting your main project.
5. Poor Cutting in Fabric Edges
Description: If the fabric edges are not being cleanly cut, it can lead to fraying and uneven seams.
Cause: Poor cutting can result from dull knives or incorrect knife adjustments.
Troubleshooting:
- Check the condition of the knives and replace them if they are dull or damaged.
- Adjust the knife position and pressure according to the fabric thickness and desired cutting width.
6. Skipped Stitches on Thin Fabrics
Description: Skipped stitches can be frustrating, especially when sewing thin fabrics.
Cause: Skipped stitches can occur due to incorrect needle choice for the fabric, improper threading, or a damaged needle.
Troubleshooting:
- Use a finer needle appropriate for thin fabrics to prevent skipped stitches.
- Re-thread the machine, making sure the thread is properly seated in the tension disks and guides.
- Inspect the needle for any damage, and replace it if necessary.
7. Gathering or Puckering in Seams
Description: Unintended gathering or puckering can affect the appearance of your seams.
Cause: Gathering or puckering can result from incorrect tension settings, improper fabric handling, or using the wrong stitch type.
Troubleshooting:
- Adjust the tension settings for both upper and lower threads to achieve balanced stitches.
- Ensure that you are guiding the fabric evenly while sewing to prevent unnecessary tension on the fabric.
- Select the appropriate stitch type for the fabric and seam you are working on.
8. Noisy Operation
Description: Excessive noise during sewing can indicate an issue with the machine’s operation.
Cause: Noisy operation can be caused by misaligned parts, loose components, or inadequate lubrication.
Troubleshooting:
- Check for any loose screws, bolts, or parts and tighten them as needed.
- Inspect the machine for any visible misalignments, and consult the user manual for guidance on adjustments.
- Ensure that the machine is properly lubricated according to the manufacturer’s recommendations.
9. Thread Looping on the Underside
Description: Thread looping on the underside of the fabric can result in messy stitches.
Cause: Thread looping can be caused by incorrect threading, improper tension settings, or a damaged needle.
Troubleshooting:
- Re-thread the machine, following the threading guide carefully.
- Adjust the tension settings for both upper and lower threads to achieve balanced tension.
- Inspect the needle for any bending or damage, and replace it if necessary.
10. Error Messages on the LCD Display
Description: Error messages appearing on the LCD display can disrupt your sewing process.
Cause: Error messages can be triggered by issues such as incorrect threading, jammed threads, or sensors detecting abnormalities.
Troubleshooting:
- Refer to the user manual for the specific error message and follow the recommended steps to resolve it.
- Check the threading of the machine and ensure there are no tangled threads causing the error.
- If the issue persists, contact JUKI customer support for further assistance.
11. Uneven Fabric Feeding
Description: Uneven fabric feeding can lead to uneven stitching and an overall poor finish.
Cause: Uneven fabric feeding can be caused by an improperly adjusted presser foot, uneven fabric layers, or incorrect differential feed settings.
Troubleshooting:
- Ensure that the presser foot pressure is adjusted correctly for the fabric you’re using.
- Even out the fabric layers before sewing to prevent one layer from feeding faster than the other.
- Adjust the differential feed settings as needed to match the fabric type and desired effect.
12. Stitch Density Variation
Description: Inconsistent stitch density can result in uneven and unattractive seams.
Cause: Stitch density variation can occur due to incorrect tension settings, use of different thread types, or worn-out needles.
Troubleshooting:
- Check and adjust the tension settings for both upper and lower threads to achieve consistent stitch density.
- Use the same type and weight of thread in both the upper and lower loopers to ensure uniform stitching.
- Replace worn-out needles with new ones to maintain consistent stitching quality.
13. Needle Breakage
Description: Needles breaking during sewing can be frustrating and disrupt your workflow.
Cause: Needle breakage can occur if the needle is dull, bent, or if the machine is not properly threaded.
Troubleshooting:
- Inspect the needle for any signs of damage, and replace it if it’s dull or bent.
- Ensure that the machine is threaded correctly according to the user manual.
- Use the appropriate needle type and size for the fabric you’re working with.
14. Stitches Skipping on Heavy Fabrics
Description: Skipping stitches on heavy fabrics can lead to weak seams and compromised durability.
Cause: Stitches can skip on heavy fabrics due to improper needle choice, incorrect tension settings, or inadequate presser foot pressure.
Troubleshooting:
- Use a heavy-duty or ballpoint needle specifically designed for heavy fabrics.
- Adjust the tension settings to accommodate the thickness of the fabric.
- Increase the presser foot pressure to ensure proper fabric feeding.
15. Elastic Thread Breakage in Shirring
Description: Breakage of elastic thread during shirring can affect the elasticity and appearance of gathered fabric.
Cause: Elastic thread breakage can result from improper tension settings, incorrect threading of the elastic thread, or using old elastic thread.
Troubleshooting:
- Adjust the tension settings for both upper and lower threads, ensuring that the elastic thread is not too tight.
- Threading the elastic thread properly according to the user manual.
- Use fresh and good-quality elastic thread to ensure better stretch and durability.
16. Broken Serger Knife
Description: A broken serger knife can disrupt the cutting mechanism and affect the quality of your seams.
Cause: A serger knife can break due to hitting a pin, using excessive force, or wear and tear.
Troubleshooting:
- Inspect the serger knife for any visible damage, and replace it if broken.
- Avoid sewing over pins and other hard objects that can damage the knife.
- Handle the machine with care to prevent unnecessary stress on the knife.
17. Looped Threads on the Fabric Surface
Description: Threads appearing as loops on the fabric surface can mar the appearance of your stitches.
Cause: Looped threads can result from incorrect threading, improper tension settings, or using worn-out needles.
Troubleshooting:
- Re-thread the machine, following the threading guide carefully.
- Check and adjust the tension settings for both upper and lower threads to eliminate loops.
- Replace worn-out needles to ensure proper thread tension and stitch formation.
18. Fabric Not Feeding Properly
Description: If the fabric isn’t feeding through the machine smoothly, it can lead to uneven stitches and frustration.
Cause: Poor fabric feeding can occur due to a dirty feed dog, incorrect presser foot pressure, or tension issues.
Troubleshooting:
- Clean the feed dog and the throat plate to remove any lint or debris that might hinder fabric feeding.
- Adjust the presser foot pressure to match the fabric thickness and prevent slipping.
- Check the thread tension and adjust it for balanced stitches and proper fabric feeding.
19. Limited Stitch Options
Description: Limited stitch options can restrict your creativity and sewing versatility.
Cause: Limited stitch options may be due to incorrect machine settings, issues with the stitch selector, or mechanical problems.
Troubleshooting:
- Ensure that you have selected the correct stitch type and settings for your desired stitch.
- If the stitch selector is not working properly, consult the user manual for guidance on troubleshooting or adjustment.
- If the issue persists, consider seeking professional repair assistance to address any mechanical problems.
20. Uneven Edge Trimming
Description: Uneven edge trimming can result in fabric fraying and affect the overall neatness of your projects.
Cause: Uneven edge trimming can be caused by incorrect knife position, blunt knives, or fabric alignment issues.
Troubleshooting:
- Adjust the knife position to ensure even trimming along the fabric edges.
- Replace dull or damaged knives to achieve clean and precise edge trimming.
- Pay attention to the fabric alignment as you feed it through the machine for consistent trimming.
21. Excessive Fabric Stretching
Description: Excessive fabric stretching can lead to distorted stitches and misshapen seams.
Cause: Fabric stretching can occur due to incorrect tension settings, improper handling, or using the wrong presser foot.
Troubleshooting:
- Check and adjust the tension settings for both upper and lower threads to prevent excessive stretching.
- Support the fabric evenly as you sew to minimize stretching, especially with lightweight or stretchy fabrics.
- Use a walking foot or even-feed foot for fabrics that tend to stretch during sewing.
22. Wavy or Puckered Seams
Description: Wavy or puckered seams can diminish the overall appearance of your sewing projects.
Cause: Wavy or puckered seams can result from inconsistent fabric feeding, improper tension, or incorrect stitch settings.
Troubleshooting:
- Ensure that the fabric is feeding smoothly and evenly to prevent waves or puckers.
- Check and adjust the tension settings for both upper and lower threads for balanced stitching.
- Select the appropriate stitch type and settings for the fabric type and sewing task.
23. Needle Hits Presser Foot
Description: The needle hitting the presser foot can cause damage to both the needle and the foot.
Cause: Needle hitting the presser foot can happen if the needle is bent, improperly inserted, or the presser foot is not aligned.
Troubleshooting:
- Ensure that the needle is inserted correctly and fully tightened in the needle clamp.
- Replace the needle if it’s bent or damaged.
- Check the alignment of the presser foot to ensure it’s properly positioned.
24. Loose or Tight Loops
Description: Loops formed by the lower looper can be either too loose or too tight, affecting stitch quality.
Cause: Incorrect tension settings, incorrect threading, or worn-out lower looper can lead to loose or tight loops.
Troubleshooting:
- Adjust the tension settings for the lower looper to achieve balanced loops.
- Re-thread the lower looper following the threading guide in the user manual.
- If the lower looper is worn or damaged, replace it with a new one.
25. Difficulty in Differential Feed Adjustment
Description: Difficulty in adjusting the differential feed can hinder your ability to achieve desired fabric effects.
Cause: Difficulty in adjusting the differential feed can result from lack of familiarity with the settings or mechanical issues.
Troubleshooting:
- Refer to the user manual for clear instructions on how to adjust the differential feed for different fabric types.
- Practice adjusting the settings on scrap fabric to become more comfortable with the process.
- If the adjustment is still challenging, consider seeking assistance from sewing experts or tutorials.
JUKI MO-2000QVP Sewing Machine User Reviews
When considering a sewing machine, hearing from other users about their experiences can provide valuable insights. We’ve gathered a range of user reviews from online sources to help you get a better understanding of what customers have to say about the JUKI MO-2000QVP sewing machine.
Positive Reviews from JUKI MO-2000QVP Sewing Machine Users
- Some users were satisfied with the quiet and dream-like sewing experience offered by the JUKI MO-2000QVP. The auto thread of loopers and needles was a standout feature for many, making threading less maddening.
- Several users appreciated the LED screen with stitch style directions, eliminating the need to refer to manuals or cheat sheets for stitch setup.
- The machine’s affordability was highlighted, with customers finding exceptional value for its features and capabilities.
- The automatic features, such as thread looping and needle threading, were praised for making the sewing process more efficient and user-friendly.
- Users mentioned that the JUKI MO-2000QVP’s performance and stitch quality lived up to their expectations, and it worked well on various fabric types.
Overall, positive feedback suggests that many users found the JUKI MO-2000QVP sewing machine to be a reliable and feature-rich option that enhances their sewing experience.
Negative User Reviews of the JUKI MO-2000QVP Sewing Machine
- Some users expressed dissatisfaction with the machine’s tendency to skip stitches and shake violently during use, raising concerns about its build quality and performance.
- A few customers reported issues with thread looping on the fabric surface, which affected the overall stitch appearance and required adjustments during sewing.
- Several users mentioned difficulty in adjusting the differential feed, possibly indicating challenges in achieving desired fabric effects with this feature.
- While the automatic features received praise, a couple of users mentioned that they encountered occasional problems with the automatic threading mechanisms.
- One user mentioned receiving a machine with non-English instructions and an incompatible plug, causing inconvenience and additional hassle.
While the majority of customers had positive experiences with the JUKI MO-2000QVP sewing machine, there were also some concerns and drawbacks raised by users. These experiences highlight the importance of considering different perspectives when evaluating a sewing machine’s suitability for your needs.
JUKI MO-2000QVP Sewing Machine Manual
If you’re looking for the operating instructions for the JUKI MO-2000QVP sewing machine, you can find them on the manufacturer’s official website. The manual provides detailed information on how to set up and use your sewing machine effectively, along with essential maintenance and troubleshooting tips.
Frequently Asked Questions
1. Why does my machine keep skipping stitches?
Answer: Skipping stitches can occur due to various factors such as incorrect threading, worn-out needles, or improper tension settings. Make sure to re-thread the machine according to the manual, replace needles regularly, and adjust the tension for both upper and lower threads.
2. How can I prevent fabric from stretching excessively while sewing?
Answer: Excessive fabric stretching can be reduced by adjusting the tension settings, providing even support to the fabric during sewing, and using appropriate presser feet for different fabric types. Experiment with the differential feed settings to control fabric stretching as well.
3. Why are my seams coming out wavy or puckered?
Answer: Wavy or puckered seams can result from uneven fabric feeding, incorrect tension, or improper stitch settings. Ensure that the fabric is feeding smoothly, adjust the tension for balanced stitches, and choose the appropriate stitch type for the fabric and project.
4. How do I address the issue of uneven edge trimming?
Answer: To achieve even edge trimming, make sure the knife position is adjusted correctly, and replace any dull or damaged knives. Pay attention to fabric alignment as it passes through the machine and practice smooth feeding techniques.
5. What should I do if my serger’s needles keep hitting the presser foot?
Answer: If the needles are hitting the presser foot, ensure that they are properly inserted and tightened. Replace any bent or damaged needles. Additionally, check the alignment of the presser foot and make sure it’s properly positioned.
Conclusion
Always refer to the manual, customer service, or a certified service center whenever possible if you encounter any problems with your JUKI MO-2000QVP sewing machine. Proper troubleshooting and maintenance will help ensure optimal performance and longevity for your machine.