JUKI TL-2010Q Common Problems and Troubleshooting
Welcome to our guide on common problems and troubleshooting for the JUKI TL-2010Q sewing machine. In this article, we’ll address possible issues you might encounter while using this specific model of sewing machine. Whether you’re into quilting, tailoring, or home decor projects, the JUKI TL-2010Q has a lot to offer. Let’s dive into some potential problems and their solutions.
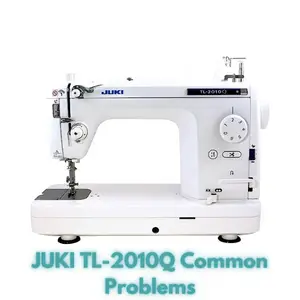
JUKI TL-2010Q Overview
Product Description: The JUKI TL-2010Q is a versatile 1-needle, lockstitch sewing machine designed for various applications including quilting, tailoring, apparel, and home decor. It features an automatic thread trimmer, making your sewing process more efficient. This portable machine can be used on a table top or mounted into cabinets, and it’s even compatible with machine quilting frames.
| Brand | JUKI |
|---|---|
| Color | White |
| Material | Metal |
| Product Dimensions | 14″D x 25″W x 18″H |
| Power Source | AC |
| Is Electric | Yes |
Features
- High Performance Machine: The JUKI TL-2010Q offers high-performance sewing and quilting capabilities.
- Automatic Thread Trimmer: Equipped with an automatic thread trimming device, making thread management easier.
- Knee Lifter Lever: Lift/lower the presser foot without using your hands, accommodating various materials.
- Automatic Needle Threader: The push lever automatic needle threader speeds up your sewing setup.
- Light-Weight and Portable: Easily transport this lightweight machine wherever you need.
Additional Details
- Product Dimensions: 25 x 14 x 18 inches
- Item Weight: 37.4 pounds
- Manufacturer: Juki
- ASIN: B075V5PZSK
- Item model number: TL-2010Q
Causes of Common Problems with the JUKI TL-2010Q
In the following sections, we’ll explore potential problems that users might face with the JUKI TL-2010Q sewing machine and provide solutions to address these issues.
Common Problems and Troubleshooting for JUKI TL-2010Q
1. Thread Bunching Under Fabric
Description: You notice that the thread is bunching up underneath the fabric, creating uneven and messy stitches.
Cause: This issue is often caused by incorrect threading or improper tension settings.
Troubleshooting:
- Check Thread Path: Ensure that the thread is correctly threaded through all the guides and tension discs, following the machine’s threading diagram.
- Adjust Tension: Experiment with adjusting the upper thread tension dial slightly higher or lower to achieve balanced stitches. Refer to your machine’s manual for recommended tension settings.
- Bobbin Inspection: Ensure the bobbin is wound properly and inserted correctly into the bobbin case. Make sure the bobbin case is clean and free from lint.
2. Skipped Stitches
Description: The machine occasionally skips stitches, resulting in incomplete seams or uneven stitching.
Cause: Skipped stitches can occur due to dull or bent needles, improper threading, or incorrect needle and thread combinations.
Troubleshooting:
- Needle Check: Check the needle for any signs of dullness or bending. Replace the needle with a new one, ensuring it’s the correct type and size for the fabric you’re using.
- Threading Review: Double-check the threading of both the upper thread and the bobbin thread. Proper threading is crucial for consistent stitching.
- Thread and Needle Match: Ensure the needle and thread are compatible. Use the right thread weight for the needle size and fabric type.
3. Uneven Tension
Description: You notice that the stitches have varying tension, with some being too tight and others too loose.
Cause: Uneven tension can result from incorrect threading, improper bobbin placement, or incorrect tension settings.
Troubleshooting:
- Re-Thread Machine: Completely re-thread the machine, making sure to follow the correct thread path and tension disc placements.
- Bobbin Check: Ensure the bobbin is wound evenly and inserted correctly into the bobbin case. Make sure there’s no lint buildup affecting tension.
- Balance Tension: Adjust the upper thread tension dial and bobbin tension screw as needed to achieve balanced tension. Test on scrap fabric.
4. Thread Breakage
Description: The thread frequently breaks while sewing, causing frustration and interruptions.
Cause: Thread breakage can occur due to various reasons, including incorrect threading, tension issues, or a damaged needle.
Troubleshooting:
- Re-Thread Machine: Carefully re-thread the machine, ensuring the thread is properly seated in all guides and tension discs.
- Tension Adjustment: Experiment with adjusting the tension settings slightly to find the optimal balance between the upper and bobbin thread tensions.
- Needle Replacement: Check the needle for any burrs or damage. Replace with a new, high-quality needle appropriate for your fabric.
5. Jammed Bobbin Case
Description: The bobbin case gets jammed or stuck, preventing smooth stitching.
Cause: A jammed bobbin case can occur due to incorrect bobbin placement, thread tangles, or debris in the bobbin area.
Troubleshooting:
- Bobbin Inspection: Remove the bobbin case and check for any tangled thread or debris. Clean the area thoroughly.
- Bobbin Placement: Ensure the bobbin is correctly inserted into the bobbin case with the thread unwinding in the correct direction.
- Thread Tangles: Check for any thread tangles or loops around the bobbin case or underneath the needle plate. Clear any obstructions.
6. Fabric Not Feeding Properly
Description: The fabric doesn’t move smoothly while sewing, causing uneven stitches and frustration.
Cause: Improper presser foot pressure, incorrect feed dog settings, or using the wrong type of presser foot can lead to this issue.
Troubleshooting:
- Presser Foot Pressure: Adjust the presser foot pressure dial according to the thickness of your fabric. Lighter fabrics require less pressure, while heavier fabrics need more.
- Feed Dog Check: Make sure the feed dogs are engaged and properly positioned to grip and move the fabric as you sew.
- Proper Presser Foot: Ensure you’re using the correct presser foot for the type of sewing you’re doing. Different presser feet are designed for various tasks.
7. Uneven Stitch Length
Description: The stitch length varies unexpectedly, resulting in inconsistent seam lengths.
Cause: Incorrect stitch length settings, inconsistent speed control, or mechanical issues can lead to uneven stitches.
Troubleshooting:
- Stitch Length Setting: Double-check the stitch length setting on your machine. Adjust it as needed for your desired stitch length.
- Consistent Speed: Maintain a steady and consistent speed while sewing to achieve even stitch lengths. Avoid abrupt changes in speed.
- Mechanical Inspection: If the problem persists, consult your machine’s manual for instructions on inspecting the mechanical components that control stitch length.
8. Motor Running but Needle Not Moving
Description: You hear the motor running, but the needle isn’t moving to sew the fabric.
Cause: A disengaged clutch, broken drive belt, or mechanical obstruction can prevent the needle from moving despite the motor running.
Troubleshooting:
- Clutch Engagement: Ensure that the handwheel clutch is properly engaged for sewing. If it’s disengaged, the needle won’t move.
- Drive Belt Check: Examine the drive belt for any signs of damage or breakage. Replace the drive belt if necessary.
- Mechanical Obstructions: Inspect the machine for any jammed or obstructed parts that might be preventing the needle mechanism from moving. Clear any obstructions.
9. Thread Keeps Breaking
Description: The thread repeatedly breaks during sewing, causing frustration and interruptions.
Cause: Using low-quality thread, incorrect threading, or sharp edges on the sewing table can lead to thread breakage.
Troubleshooting:
- Quality Thread: Use high-quality thread that’s suitable for your fabric. Low-quality threads are more likely to break under tension.
- Proper Threading: Double-check the threading of both the upper thread and the bobbin thread, ensuring they follow the correct paths.
- Smooth Sewing Surface: Make sure your sewing table doesn’t have any sharp edges that could cause friction and thread breakage.
10. Excessive Noise During Sewing
Description: Your sewing machine produces loud and unusual noises while in operation.
Cause: Loose parts, lack of lubrication, or debris in the machine’s internal components can result in excessive noise.
Troubleshooting:
- Tighten Parts: Check all screws, bolts, and parts to ensure they’re properly tightened and secured in their places.
- Lubrication: Follow your machine’s manual to lubricate the appropriate components, as lack of lubrication can lead to friction and noise.
- Debris Removal: Open the machine’s casing and remove any accumulated lint, dust, or debris that might be causing interference and noise.
11. Needle Threader Not Working
Description: The automatic needle threader feature isn’t functioning properly, making it difficult to thread the needle.
Cause: The needle threader may be misaligned, damaged, or not being used correctly.
Troubleshooting:
- Proper Alignment: Ensure the needle threader is properly aligned with the needle eye. Consult your manual for precise alignment instructions.
- Gentle Use: Be gentle when using the needle threader to avoid bending or damaging it. Follow the correct steps as outlined in the manual.
- Clean and Clear: Remove any thread or debris that might be obstructing the needle threader mechanism. A clean needle threader functions better.
12. Uneven Feed Dogs
Description: The feed dogs (the metal teeth under the presser foot) are not moving the fabric smoothly, causing uneven feeding.
Cause: Dust, lint buildup, or misalignment of the feed dogs can result in uneven fabric movement.
Troubleshooting:
- Clean Feed Dogs: Remove the presser foot and needle plate to access the feed dogs. Clean any accumulated lint or debris using a soft brush or lint roller.
- Oil and Lubricate: Apply a small amount of sewing machine oil to the feed dogs and move them manually to ensure smooth movement.
- Alignment Check: Verify that the feed dogs are properly aligned and engaged with the fabric. They should move up and down consistently.
13. Tangled Bobbin Thread
Description: The bobbin thread gets tangled underneath the fabric, leading to messy stitches and frustration.
Cause: Incorrect bobbin insertion, improper threading, or using the wrong bobbin size can cause the thread to tangle.
Troubleshooting:
- Bobbin Insertion: Ensure the bobbin is inserted correctly into the bobbin case with the thread unwinding in the correct direction.
- Threading Review: Double-check the bobbin threading process, ensuring the thread is properly wound around the bobbin and through the tension spring.
- Bobbin Compatibility: Use the appropriate bobbin size and type recommended for your JUKI TL-2010Q model.
14. Fabric Puckering
Description: The fabric bunches up and puckers along the seam lines, giving an undesirable appearance.
Cause: Incorrect tension settings, using the wrong needle size, or sewing at high speeds can cause fabric puckering.
Troubleshooting:
- Tension Adjustment: Experiment with adjusting the tension settings for both upper and bobbin threads to find the right balance for your fabric.
- Needle Selection: Choose the appropriate needle size and type for your fabric. A too-small needle can cause fabric puckering.
- Controlled Sewing Speed: Sew at a moderate and consistent speed to prevent excessive fabric bunching caused by stitching too quickly.
15. Stuck Reverse Lever
Description: The reverse lever, which is used for backstitching, becomes stuck or difficult to operate.
Cause: Dirt, debris, or mechanical issues in the reverse lever mechanism can cause it to become stuck.
Troubleshooting:
- Clean Lever Area: Carefully clean the area around the reverse lever, removing any lint or dirt that might be affecting its movement.
- Lubrication: Apply a small amount of sewing machine oil to the reverse lever mechanism to ensure smooth operation.
- Mechanical Inspection: If the lever remains stuck, consult your machine’s manual for guidance on inspecting and resolving mechanical issues.
16. Uneven Stitch Width
Description: The width of your stitches varies, causing irregular seams and an inconsistent overall appearance.
Cause: Incorrect stitch width settings, mechanical issues, or using the wrong presser foot can result in uneven stitch width.
Troubleshooting:
- Stitch Width Adjustment: Double-check the stitch width setting on your machine and adjust it as needed for your desired stitch width.
- Presser Foot Compatibility: Make sure you’re using the appropriate presser foot for the stitch you’re using. Some stitches require specific feet for accurate width.
- Mechanical Inspection: If the problem persists, consult your machine’s manual for guidance on inspecting and resolving mechanical issues related to stitch width.
17. Bobbin Tension Issues
Description: The tension of the bobbin thread is inconsistent, leading to visible looping on the fabric’s underside.
Cause: Improper bobbin tension settings, incorrect threading, or debris in the bobbin case can cause tension problems.
Troubleshooting:
- Bobbin Tension Adjustment: Refer to your machine’s manual to adjust the tension screw on the bobbin case for balanced bobbin tension.
- Bobbin Threading: Make sure the bobbin is threaded correctly and placed in the bobbin case with the thread unwinding in the proper direction.
- Bobbin Case Cleaning: Clean the bobbin case and surrounding area to ensure there’s no debris affecting tension. A clean bobbin case works better.
18. Needle Hits Presser Foot
Description: The needle occasionally hits or clashes with the presser foot, causing needle breakage or damage.
Cause: Incorrect presser foot installation, improper needle positioning, or using the wrong presser foot can lead to this issue.
Troubleshooting:
- Presser Foot Check: Verify that the presser foot is properly installed and aligned with the needle. Avoid using a presser foot that’s too thick for your fabric.
- Needle Position: Make sure the needle is correctly inserted with the flat side facing the back of the machine and fully tightened.
- Appropriate Presser Foot: Use the appropriate presser foot for your sewing task. Some tasks require a specific foot to prevent needle-presser foot clashes.
19. Inconsistent Thread Tension Changes
Description: The tension settings seem to change unexpectedly during sewing, causing irregular stitch quality.
Cause: Loose tension discs, incorrect threading, or mechanical issues can lead to inconsistent tension changes.
Troubleshooting:
- Tighten Tension Discs: Ensure that the tension discs are properly tightened to secure the thread in place during sewing.
- Threading Accuracy: Double-check the threading of both the upper and bobbin threads, following the machine’s threading diagram carefully.
- Mechanical Inspection: If tension changes persist, consult your machine’s manual for guidance on inspecting and resolving mechanical issues related to tension.
20. Difficulty Lowering Presser Foot
Description: You experience difficulty in lowering the presser foot, preventing you from beginning sewing.
Cause: Mechanical obstruction, incorrect presser foot lever positioning, or debris buildup can lead to this issue.
Troubleshooting:
- Obstruction Check: Examine the area around the presser foot lever for any obstructions or debris that might be hindering its movement.
- Proper Lever Use: Ensure you’re using the presser foot lever correctly. It should be in the raised position when inserting fabric and lowered to engage the presser foot.
- Cleaning: Clean the presser foot lever mechanism and surrounding area to eliminate any debris that could be affecting its movement.
21. Needle Breaks Frequently
Description: The needle frequently breaks while sewing, causing interruptions and frustration.
Cause: Incorrect needle installation, using the wrong needle type, or sewing through thick layers can lead to needle breakage.
Troubleshooting:
- Needle Inspection: Check the needle for any signs of damage or bending. Replace the needle if it’s dull or damaged.
- Needle Compatibility: Use the appropriate needle type and size for your fabric and sewing task. Heavy fabrics may require stronger needles.
- Layer Management: For thick fabrics or multiple layers, go slow and ensure the machine can handle the thickness without straining the needle.
22. Bobbin Runs Out Quickly
Description: The bobbin thread runs out more frequently than expected, causing interruptions during sewing.
Cause: Incorrect bobbin tension, bobbin winding issues, or using too thin thread can lead to quicker bobbin depletion.
Troubleshooting:
- Bobbin Tension Check: Verify that the bobbin tension is properly adjusted. Too tight tension can lead to quicker bobbin thread consumption.
- Bobbin Winding: Wind the bobbin with consistent tension and avoid overfilling it, as that can lead to quicker thread depletion.
- Thread Selection: Choose a slightly thicker thread for the bobbin, especially when sewing with thicker fabrics, to reduce rapid bobbin depletion.
23. Uneven Fabric Feeding
Description: The fabric doesn’t move evenly, causing variations in stitch length and appearance.
Cause: Inconsistent presser foot pressure, uneven feed dog movement, or fabric slipping can result in uneven feeding.
Troubleshooting:
- Presser Foot Pressure: Adjust the presser foot pressure according to the fabric type to ensure even feeding.
- Feed Dog Inspection: Check the feed dogs for any damage or unevenness that might affect their movement. Clean and lubricate them as needed.
- Fabric Handling: Hold the fabric gently and guide it evenly to prevent slipping or bunching as you sew.
24. Inconsistent Bobbin Tension
Description: The tension of the bobbin thread varies unpredictably, causing irregular stitches on the underside.
Cause: Loose bobbin tension, improper bobbin winding, or incorrect bobbin placement can lead to inconsistent tension.
Troubleshooting:
- Bobbin Tension Adjustment: Make sure the bobbin tension is set appropriately by following your machine’s manual. Adjust if needed.
- Bobbin Winding Technique: Wind the bobbin with consistent tension and avoid overfilling it, as that can lead to tension irregularities.
- Bobbin Insertion: Ensure the bobbin is correctly inserted into the bobbin case with the thread unwinding in the right direction.
25. Thread Keeps Knotting
Description: The thread frequently knots or tangles during sewing, causing messy stitches and frustration.
Cause: Incorrect threading, using low-quality thread, or sewing at too high a speed can cause thread knotting.
Troubleshooting:
- Threading Review: Double-check the threading of both the upper and bobbin threads, ensuring they follow the correct paths.
- Quality Thread: Use high-quality thread that’s suitable for your fabric. Low-quality threads are more prone to knotting.
- Controlled Sewing Speed: Sew at a moderate speed, avoiding rapid changes, to reduce the chances of thread knotting.
JUKI TL-2010Q Sewing Machine User Reviews
When considering a sewing machine, it’s helpful to hear from those who have used it. Reviews from actual users provide valuable insights into both positive and negative experiences with the JUKI TL-2010Q sewing machine. The following sections highlight some of the feedback shared by users.
Positive Reviews from JUKI TL-2010Q Users
- Excellent Machine: Some users were satisfied with the high stitch quality and ease of setup. The machine’s stitch quality was praised, with users noting its reliability for various sewing tasks, including quilting, tailoring, and apparel construction.
- Powerful and Quiet: Users appreciated the machine’s power and steady performance. It was reported as being quiet and capable of handling various fabrics with ease.
- Great for Quilting: Quilters found the machine to be a fantastic choice for quilting projects. The machine’s speed and stitch precision were highlighted as particularly beneficial for quilting tasks.
- Heavy-Duty Performance: Some users valued the machine’s semi-industrial design, mentioning its ability to sew through thick materials without hesitation.
- Simplicity and Quality: Users admired the machine’s straightforward design and found it easy to use. The metal construction and overall build quality were also appreciated.
Negative User Reviews of the JUKI TL-2010Q
- Needle Threader Challenges: Several users expressed frustration with the automatic needle threader, noting that it could be tricky to use. However, some users reported being able to thread the needle manually without significant difficulty.
- Bobbin Visibility: Some users found it challenging to see the bobbin through the machine, which made it harder to monitor bobbin thread levels during sewing.
- Complex Threading: A few users mentioned that threading the machine could take longer compared to other machines, particularly due to the additional threading paths and components.
- Foot Attachment Difficulties: Users experienced difficulties when changing presser feet, noting that the process required unscrewing the feet, which could be time-consuming and cumbersome.
- Needle Breakage: A couple of users reported instances of needle breakage, even while sewing at slower speeds or over zippers, indicating potential issues with needle strength or usage technique.
It’s important to note that the user reviews mentioned above are based on feedback. Overall, the majority of users seemed to be satisfied with the JUKI TL-2010Q sewing machine, appreciating its performance, versatility, and overall quality.
JUKI TL-2010Q Sewing Machine Manual
If you’re looking for the JUKI TL-2010Q operating instructions, you can find them on the official manufacturer’s website. The manual provides detailed information on setting up, operating, and maintaining your JUKI TL-2010Q sewing machine. Refer to the manual for specific guidelines, troubleshooting tips, and maintenance recommendations to ensure optimal performance.
JUKI TL-2010Q Frequently Asked Questions
1. How do I adjust the thread tension on the JUKI TL-2010Q?
To adjust thread tension, refer to your machine’s manual for specific instructions. Generally, you can adjust the upper thread tension using the tension dial. Ensure the presser foot is down when making adjustments for accurate results.
2. Why does the thread keep breaking while sewing?
Thread breakage can result from various factors, including incorrect threading, using the wrong thread type, or a dull needle. Double-check your threading, use quality thread suitable for your fabric, and replace the needle if it’s damaged or dull.
3. How often should I oil my JUKI TL-2010Q?
It’s recommended to oil your JUKI TL-2010Q sewing machine regularly, especially if you’re sewing frequently. Refer to your machine’s manual for the specific oiling points and intervals. Proper lubrication helps maintain smooth operation.
4. What can I do if my stitches are skipping or uneven?
Uneven or skipped stitches can result from various issues, such as improper threading, incorrect needle type, or incorrect bobbin winding. Check your threading, ensure you’re using the correct needle, and wind the bobbin evenly to address this problem.
5. How can I prevent the fabric from bunching up while sewing?
Fabric bunching can occur due to incorrect threading, uneven fabric feeding, or incorrect presser foot pressure. Ensure proper threading, adjust presser foot pressure as needed, and guide the fabric evenly to prevent bunching.
Conclusion
When encountering issues with your JUKI TL-2010Q sewing machine, it’s always advisable to refer to the manual for specific troubleshooting steps. Additionally, reaching out to customer service or a certified service center can provide expert assistance in resolving problems and ensuring the continued performance of your machine.