NANANARDOSO Mini Portable for Beginner Common Problems and Troubleshooting
Welcome to our guide for troubleshooting common issues with the NANANARDOSO Mini Portable for Beginner sewing machine. In this article, we will address various problems that users might encounter while using this specific sewing machine model. Whether you’re a beginner or an experienced user, we’ve got solutions for you.
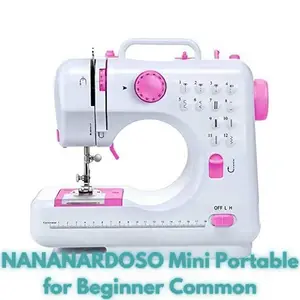
NANANARDOSO Mini Portable for Beginner Overview
Here’s an overview of the NANANARDOSO Mini Portable for Beginner sewing machine:
| Product Details | |
|---|---|
| Brand | NANANARDOSO |
| Color | Pink |
| Material | Plastic, Metal |
| Product Dimensions | 4.8″D x 10.8″W x 10.2″H |
| Power Source | AC/DC |
| Is Electric | Yes |
Product Features
- The mini sewing machine set includes bobbins, spools, a spare needle, and needle threader.
- 12 stitching modes, including straight stitches and zigzag stitches, to cater to different sewing needs.
- Built-in thread cutter and light for convenient sewing.
- Dual power modes: AC adapter and 4 AA batteries.
- Suitable for beginners, kids, children, girls, women, and sewing enthusiasts.
Causes of Common Problems with the NANANARDOSO Mini Portable for Beginner
In the following subsections, we will address some common issues that users might face with the NANANARDOSO Mini Portable for Beginner sewing machine and provide solutions to resolve these problems.
Common Problems with NANANARDOSO Mini Portable for Beginner
1. Thread Breakage – Frequent Snapping of Thread
Description of the Problem: One common issue users face with the NANANARDOSO Mini Portable for Beginner is frequent thread breakage during sewing, which can be frustrating.
Cause of the Problem: Thread breakage can occur due to several reasons, such as using the wrong needle size, improper threading, or tension issues.
Troubleshooting Step-by-Step:
- Check the needle: Ensure you’re using the correct needle size and type for the fabric you’re sewing.
- Re-thread the machine: Carefully re-thread both the upper and lower threads following the machine’s manual.
- Adjust tension: Experiment with the tension settings to find the right balance for your fabric.
2. Uneven Stitches – Inconsistent Stitch Quality
Description of the Problem: Some users may notice that their stitches are uneven or of inconsistent quality when using the NANANARDOSO Mini Portable for Beginner sewing machine.
Cause of the Problem: Uneven stitches can result from incorrect threading, bobbin issues, or problems with the presser foot.
Troubleshooting Step-by-Step:
- Check the threading: Re-thread both the upper and lower threads carefully.
- Examine the bobbin: Ensure the bobbin is properly inserted and wound with the thread.
- Inspect the presser foot: Make sure the presser foot is correctly attached and not causing fabric jams.
3. Needle Jamming – Needle Gets Stuck
Description of the Problem: Needle jamming, where the needle gets stuck or refuses to move, is a frustrating issue that can occur with this sewing machine.
Cause of the Problem: Needle jams can be caused by bent needles, foreign objects in the bobbin area, or incorrect threading.
Troubleshooting Step-by-Step:
- Check the needle: Replace the needle if it’s bent or damaged.
- Inspect the bobbin area: Remove any debris or foreign objects that might be causing the jam.
- Re-thread the machine: Ensure proper threading of both the upper and lower threads.
4. Bobbin Winding Problems – Uneven Bobbin Thread
Description of the Problem: Users may encounter issues while winding the bobbin, resulting in uneven bobbin thread distribution.
Cause of the Problem: Uneven bobbin winding can be caused by improper placement of the bobbin or incorrect bobbin tension.
Troubleshooting Step-by-Step:
- Check bobbin placement: Ensure the bobbin is correctly placed and engaged with the winding mechanism.
- Adjust bobbin tension: Experiment with the bobbin tension to achieve even winding.
5. Machine Jams with Thick Fabrics – Difficulty Sewing Thick Materials
Description of the Problem: Some users may experience difficulties when trying to sew thick materials, as the machine can jam or struggle.
Cause of the Problem: The sewing machine’s limitations may cause it to struggle with very thick fabrics or multiple layers.
Troubleshooting Step-by-Step:
- Use appropriate needles: Ensure you’re using heavy-duty needles designed for thick fabrics.
- Reduce the number of layers: If possible, reduce the number of fabric layers to prevent jamming.
6. Bobbin Tension Issues – Loose or Tight Bobbin Thread
Description of the Problem: Users might notice that the tension of the bobbin thread is either too loose or too tight, affecting stitch quality.
Cause of the Problem: Incorrect bobbin tension settings or improper threading can lead to uneven stitches.
Troubleshooting Step-by-Step:
- Adjust bobbin tension: Experiment with the bobbin tension settings to achieve balanced stitches.
- Re-thread the machine: Carefully re-thread the bobbin following the machine’s manual.
7. Fabric Doesn’t Feed Properly – Uneven Fabric Movement
Description of the Problem: Some users may face issues with the fabric not feeding smoothly through the machine, causing uneven sewing.
Cause of the Problem: Problems with the feed dogs, incorrect presser foot pressure, or incorrect stitch settings can lead to this issue.
Troubleshooting Step-by-Step:
- Check the feed dogs: Ensure the feed dogs are engaged and moving the fabric properly.
- Adjust presser foot pressure: Modify the presser foot pressure settings to match the fabric thickness.
- Choose appropriate stitch settings: Select the appropriate stitch length and type for the fabric you’re using.
8. Thread Bunching Underneath – Bobbin Thread Tangling
Description of the Problem: Thread bunching underneath the fabric, leading to tangled bobbin thread and messy stitches.
Cause of the Problem: Incorrect threading of the upper thread, bobbin issues, or mismatched needle and thread can cause this problem.
Troubleshooting Step-by-Step:
- Re-thread the machine: Carefully re-thread both the upper and lower threads according to the machine’s manual.
- Check bobbin winding: Ensure the bobbin is wound evenly and inserted correctly.
- Use appropriate needle and thread: Ensure the needle and thread are suitable for the fabric you’re using.
9. Skipped Stitches – Intermittent Stitching Gaps
Description of the Problem: Users might observe skipped stitches, where intermittent gaps appear in the stitching.
Cause of the Problem: Dull or damaged needles, incorrect threading, or improper needle insertion can lead to skipped stitches.
Troubleshooting Step-by-Step:
- Replace the needle: Use a new and sharp needle appropriate for the fabric.
- Re-thread the machine: Double-check both upper and lower threading, ensuring they are correct.
- Insert the needle properly: Make sure the needle is correctly inserted and facing the right direction.
10. Limited Stitch Control – Inability to Adjust Stitches
Description of the Problem: Users might find it difficult to adjust stitches or switch between different stitch patterns.
Cause of the Problem: Technical glitches, user error, or lack of familiarity with the machine’s controls can lead to this issue.
Troubleshooting Step-by-Step:
- Refer to the manual: Consult the machine’s manual to understand the stitch selection and adjustment process.
- Restart the machine: Turn the machine off and on again to see if the issue resolves.
- Check for updates: If applicable, check for any firmware or software updates that might address the issue.
11. Noisy Operation – Loud or Unusual Machine Sounds
Description of the Problem: Users may encounter excessive noise or unusual sounds while operating the sewing machine.
Cause of the Problem: Misaligned components, loose parts, or lack of proper lubrication can lead to noisy operation.
Troubleshooting Step-by-Step:
- Tighten loose parts: Inspect the machine for any loose screws or components and tighten them if needed.
- Apply lubrication: Check the machine’s manual for lubrication points and apply appropriate lubricant.
- Refer to the manual: Consult the manual for guidance on diagnosing and addressing specific noises.
12. Uneven Feed – Fabric Not Moving Evenly
Description of the Problem: Users might notice that the fabric isn’t feeding evenly, resulting in uneven stitching.
Cause of the Problem: Uneven fabric feed can be caused by incorrect presser foot pressure, feed dog issues, or mismatched fabric layers.
Troubleshooting Step-by-Step:
- Adjust presser foot pressure: Modify the presser foot pressure settings to match the fabric’s thickness.
- Check feed dogs: Ensure the feed dogs are moving smoothly and are properly engaged.
- Reduce fabric layers: If sewing multiple layers, reduce the number of layers to allow smoother feeding.
13. Lights Not Working – Sewing Machine Light Issue
Description of the Problem: Some users may find that the built-in light of the sewing machine isn’t functioning as expected.
Cause of the Problem: Wiring issues, a faulty light bulb, or incorrect light settings could cause the light to not work.
Troubleshooting Step-by-Step:
- Check the light bulb: Ensure the light bulb is properly screwed in and functioning. Replace it if needed.
- Inspect wiring: Check for any loose or damaged wiring that could be affecting the light’s operation.
- Adjust light settings: Consult the manual to confirm that you’re using the correct settings to turn on the light.
14. Stitch Length Inconsistency – Varying Stitch Sizes
Description of the Problem: Users might experience inconsistency in stitch length, where the stitches vary in size during sewing.
Cause of the Problem: Inconsistent stitch length can result from accidental adjustment of the stitch length dial or mechanical issues.
Troubleshooting Step-by-Step:
- Check stitch length dial: Make sure the stitch length dial is set to your desired stitch length.
- Inspect mechanical components: Look for any mechanical issues that might be causing the inconsistency.
15. Fabric Puckering – Wrinkling or Bunching of Fabric
Description of the Problem: Some users may notice fabric puckering, where the fabric wrinkles or bunches up while sewing.
Cause of the Problem: Incorrect tension settings, improper handling of the fabric, or use of incorrect needles can lead to fabric puckering.
Troubleshooting Step-by-Step:
- Adjust tension: Experiment with the tension settings to find the right balance for your fabric.
- Handle fabric gently: Guide the fabric smoothly to prevent pulling or bunching during sewing.
- Use appropriate needles: Ensure you’re using the correct needle type and size for the fabric.
16. Thread Keeps Tangling – Continuous Thread Snarls
Description of the Problem: Users may face persistent tangling of the thread, leading to thread snarls and difficulties in sewing.
Cause of the Problem: Incorrect threading, improper bobbin placement, or tension issues can cause the thread to tangle.
Troubleshooting Step-by-Step:
- Re-thread the machine: Carefully re-thread both the upper thread and the bobbin thread following the machine’s manual.
- Check bobbin placement: Ensure the bobbin is correctly placed and wound evenly.
- Adjust tension: Experiment with the tension settings to prevent excessive thread tension.
17. Needle Threader Malfunction – Inoperable Needle Threader
Description of the Problem: Some users might encounter issues with the needle threader not functioning as intended.
Cause of the Problem: A misaligned or damaged needle threader mechanism can lead to its malfunction.
Troubleshooting Step-by-Step:
- Inspect the needle threader: Examine the needle threader mechanism for any visible misalignment or damage.
- Gently realign if needed: If the threader seems misaligned, gently attempt to realign it according to the machine’s manual.
- Contact customer support: If the issue persists, consider reaching out to customer support for further assistance.
18. Motor Overheating – Sewing Machine Gets Hot
Description of the Problem: Users may notice that the sewing machine’s motor becomes unusually hot during use.
Cause of the Problem: Continuous use without breaks, high-speed sewing, or inadequate ventilation can cause the motor to overheat.
Troubleshooting Step-by-Step:
- Take breaks: Avoid prolonged sewing sessions and give the machine time to cool down.
- Reduce sewing speed: Sew at a moderate speed to prevent excessive heat buildup.
- Ensure proper ventilation: Place the machine in an area with adequate air circulation.
19. Bobbin Case Jam – Difficulty Removing Bobbin Case
Description of the Problem: Users might encounter difficulties while removing the bobbin case for maintenance or troubleshooting.
Cause of the Problem: Dust accumulation, incorrect placement, or foreign objects can cause the bobbin case to jam.
Troubleshooting Step-by-Step:
- Clean the area: Gently clean around the bobbin case area to remove dust or debris that might be causing the jam.
- Check placement: Ensure the bobbin case is correctly positioned and seated in its designated area.
- Inspect for foreign objects: Look for any foreign objects that might be obstructing the bobbin case’s movement.
20. Uneven Presser Foot Pressure – Fabric Feeding Issues
Description of the Problem: Users might experience uneven pressure from the presser foot, leading to uneven fabric feeding.
Cause of the Problem: Presser foot misalignment, incorrect settings, or dirt buildup can cause uneven pressure.
Troubleshooting Step-by-Step:
- Check presser foot alignment: Ensure the presser foot is properly aligned and parallel to the fabric.
- Adjust pressure settings: Modify the presser foot pressure settings to achieve even fabric feeding.
- Clean presser foot area: Remove any dirt or debris around the presser foot that might affect its movement.
21. Stuck Reverse Stitch Lever – Difficulty Switching to Reverse
Description of the Problem: Users might have trouble using the reverse stitch lever, which is stuck or unresponsive.
Cause of the Problem: Dust accumulation, mechanical issues, or misalignment can cause the reverse stitch lever to get stuck.
Troubleshooting Step-by-Step:
- Clean the area: Gently clean around the reverse stitch lever to remove dust or debris that might be affecting its movement.
- Gently move the lever: Carefully attempt to move the lever back and forth to see if it becomes unstuck.
- Consult the manual: If the lever remains stuck, refer to the manual for guidance on resolving this issue.
22. Uneven Bobbin Tension – Bobbin Thread Too Loose or Tight
Description of the Problem: Users may notice that the tension of the bobbin thread is consistently too loose or too tight, affecting stitch quality.
Cause of the Problem: Incorrect bobbin tension settings or improper bobbin threading can lead to uneven stitches.
Troubleshooting Step-by-Step:
- Adjust bobbin tension: Experiment with the bobbin tension settings to achieve balanced stitches.
- Re-thread the bobbin: Carefully re-thread the bobbin following the machine’s manual.
23. Fabric Jams at Needle Plate – Material Gets Stuck
Description of the Problem: Users may experience fabric getting stuck or jammed at the needle plate area, disrupting sewing.
Cause of the Problem: Incorrect needle and fabric combination, improper threading, or debris in the needle plate area can lead to fabric jams.
Troubleshooting Step-by-Step:
- Check needle size: Ensure the needle size is appropriate for the fabric you’re using.
- Re-thread the machine: Double-check upper threading and make sure it’s done correctly.
- Clean the needle plate area: Gently remove any debris that might be causing the fabric to jam.
24. Uneven Bobbin Winding – Unequal Bobbin Thread Distribution
Description of the Problem: Users might notice that the bobbin thread is winding unevenly onto the bobbin, causing thread distribution issues.
Cause of the Problem: Incorrect bobbin winding technique or tension can result in uneven bobbin thread distribution.
Troubleshooting Step-by-Step:
- Adjust bobbin tension: Experiment with the bobbin tension settings to achieve even winding.
- Re-wind the bobbin: Carefully wind the bobbin again, ensuring consistent tension throughout.
25. Limited Stitch Options – Inability to Access Certain Stitches
Description of the Problem: Users might find that they cannot access or select certain stitch options on the sewing machine.
Cause of the Problem: Technical glitches, user error, or limitations of the machine’s design can lead to the inability to access certain stitches.
Troubleshooting Step-by-Step:
- Refer to the manual: Consult the manual to understand the stitch selection process and ensure you’re following the correct steps.
- Restart the machine: Turn the machine off and on again to see if the issue is resolved.
- Check for updates: If applicable, check for any firmware or software updates that might address the issue.
NANANARDOSO Mini Portable for Beginner Sewing Machine User Reviews
Positive Reviews from NANANARDOSO Mini Portable for Beginner Users
- Some users were satisfied with the smooth and consistent stitches produced by the machine.
- Several customers appreciated the user-friendly design of the sewing machine, making it suitable for beginners.
- Many users found the LED lamp that lights up the needle area to be a helpful feature.
- Customers praised the machine’s ability to sew through multiple layers of fabric, including denim.
- Several users were pleased with the small and portable size of the machine, making it easy to carry.
- Customers noted that the machine comes with a variety of stitch options, enhancing its versatility.
Overall, the majority of users had positive experiences with the NANANARDOSO Mini Portable for Beginner sewing machine. They found it to be user-friendly, versatile, and capable of producing quality stitches.
Negative User Reviews of the NANANARDOSO Mini Portable for Beginner
- Some users were not satisfied with the machine’s bobbin mechanism, which caused frequent jams and threading issues.
- Several customers reported that the machine stopped working after a short period of use, raising concerns about its durability.
- Some users mentioned that the machine struggled to sew straight stitches, leading to uneven and messy stitching.
- A few customers experienced issues with the reverse stitch function, noting that it was unresponsive or malfunctioned.
- Several users were disappointed with the overall quality of the machine, describing it as flimsy and toy-like.
- Customers mentioned difficulties in getting the machine to work properly, even after following the manual’s instructions.
Despite the positive feedback, there were some negative experiences reported by users of the NANANARDOSO Mini Portable for Beginner sewing machine. Issues such as jamming, stitching problems, and overall quality concerns were among the reported drawbacks.
NANANARDOSO Mini Portable for Beginner Sewing Machine Manual
The operating instructions for the NANANARDOSO Mini Portable for Beginner sewing machine can be found on the manufacturer’s official website. To ensure proper usage and troubleshooting, it’s recommended to refer to the manual provided by the manufacturer.
NANANARDOSO Mini Portable for Beginner Sewing Machine Frequently Asked Questions
Q: How do I thread the NANANARDOSO Mini Portable for Beginner sewing machine?
A: Threading instructions can be found in the sewing machine’s manual. Follow the step-by-step guide provided in the manual for correct threading. If you encounter difficulties, ensure that you’re following the instructions accurately and consult the manual’s troubleshooting section.
Q: Why is the stitching uneven and inconsistent?
A: Uneven stitching can be caused by incorrect tension settings, improper threading, or using the wrong needle and thread combination. Refer to the manual for guidance on adjusting tension and threading. Ensure that the needle and thread are appropriate for the fabric you’re using.
Q: My sewing machine keeps jamming. How can I resolve this?
A: Frequent jams can occur due to several reasons, including improper threading, incorrect bobbin placement, or using low-quality thread. Review the manual’s troubleshooting section to identify the specific cause of jamming and follow the recommended steps to resolve it.
Q: How can I prevent the sewing machine from overheating during prolonged use?
A: Sewing machines can overheat if used continuously for extended periods. To prevent overheating, take short breaks during extended sewing sessions to allow the machine’s motor to cool down. Refer to the manual for recommended usage guidelines to avoid overheating and potential damage.
Q: Can I sew heavy fabrics like denim with the NANANARDOSO Mini Portable for Beginner?
A: The NANANARDOSO Mini Portable for Beginner is designed for light to medium sewing tasks. While it can handle some layers of denim, sewing through thick or heavy fabrics might strain the machine. It’s recommended to use the appropriate needle and thread for the fabric and avoid excessive strain on the machine.
Conclusion
For any issues or concerns with your NANANARDOSO Mini Portable for Beginner sewing machine, it’s advisable to always refer to the manual provided by the manufacturer. If you encounter persistent problems or require technical assistance, consider reaching out to customer service or a certified service center for expert guidance and support.
NANANARDOSO for Beginners Common Problems