SINGER C7290Q Common Problems and Troubleshooting
This article, “SINGER C7290Q Common Problems and Troubleshooting,” is your comprehensive guide to overcoming these challenges. Whether you are a seasoned seamstress or just beginning your sewing journey, understanding and resolving these issues is crucial to maintaining a smooth and enjoyable sewing experience.
We will explore a range of typical problems that C7290Q users may encounter, from thread tension woes and bobbin jams to needle-related mishaps and operational hiccups. Armed with this knowledge, you’ll be better equipped to troubleshoot and resolve these issues on your own, saving both time and frustration.
In addition to identifying these common problems, we will provide step-by-step troubleshooting instructions, tips, and preventive measures to keep your SINGER C7290Q sewing smoothly. With our guidance, you’ll be back to stitching beautiful creations in no time, ensuring that your SINGER C7290Q remains a steadfast partner in your creative endeavors. Let’s delve into the world of SINGER C7290Q troubleshooting and ensure your sewing projects always run seamlessly.
Here you can find all the
parts and accessories for the SINGER C7290Q
guaranteed to fit your sewing machine
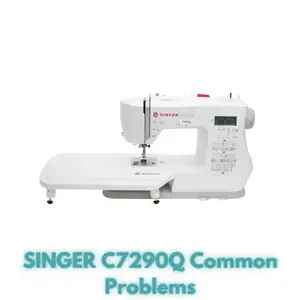
SINGER C7290Q Overview
The SINGER® C7290Q Computerized Sewing Machine is a sewing and quilting powerhouse! Designed for sewists of any level, enjoy easy-to-use, touch-button features that bring professional sewing results in less time.
With over 400 Stitch Applications, you’ll always have the right stitch for any fabric. Love personalizing projects? The SINGER® C7290Q includes a lettering font to personalize projects with custom words, phrases or monograms.
A package of specially chosen accessories will deliver a sewing and quilting experience like no other! Along with the removable extension table for larger projects like quilts, 12 hand-picked sewing and quilting presser feet are included with your machine.
Now it’s easier than ever to apply the most-loved sewing and quilting techniques to your projects. The SINGER® C7290Q will make your creative dreams come to life with ease.
The SINGER® C7290Q Computerized Sewing Machine is a sewing and quilting powerhouse. It comes with a wide range of features to enhance your sewing experience:
| Feature | Description |
|---|---|
| Stitch Applications | Over 400 stitch applications for various sewing techniques. |
| Built-In Lettering | Personalize projects with custom words, phrases, or monograms. |
| One-Step Buttonhole | Automatically sew buttonholes in one easy step. |
| Top Drop-In Bobbin | Transparent bobbin and cover for easy thread monitoring. |
Causes of Common Problems with the SINGER C7290Q
This section will address possible problems and solutions with the SINGER C7290Q sewing machine.
Common Problem: Thread Tension Issues
If you’re experiencing uneven stitches or thread breakage, it might be due to thread tension issues.
Cause:
Incorrect thread tension settings can lead to poor stitching quality.
Troubleshooting:
- Make sure the machine is threaded correctly following the threading guide in the manual.
- Check if the tension dial is set to the appropriate level for the fabric you’re using.
- Test stitching on a fabric scrap to adjust the tension dial incrementally until the stitches appear balanced.
Common Problem: Bobbin Jamming
If the bobbin thread gets tangled or jams frequently, it can hinder your sewing process.
Cause:
Incorrect bobbin insertion or tangled thread can cause bobbin jamming.
Troubleshooting:
- Remove the bobbin and clean the bobbin area of any lint or debris.
- Reinsert the bobbin, ensuring it’s placed correctly and the thread unwinds in the correct direction.
- Check that the bobbin tension is properly adjusted; it should be snug but not too tight.
Common Problem: Needle Breakage
Needle breakage can disrupt your sewing and may result from various factors.
Cause:
Using the wrong needle size or hitting pins can cause the needle to break.
Troubleshooting:
- Ensure you’re using the correct needle size and type for the fabric you’re sewing.
- Avoid sewing over pins, as they can cause the needle to break.
- Check the needle regularly for any signs of damage or dullness and replace it as needed.
Common Problem: Uneven Feed or Skipped Stitches
If your stitches are uneven or the fabric isn’t feeding properly, it can impact your sewing results.
Cause:
Dirty feed dogs, incorrect presser foot pressure, or dull needle can lead to these issues.
Troubleshooting:
- Clean the feed dogs and the machine’s interior regularly to prevent lint buildup.
- Adjust the presser foot pressure according to the fabric thickness.
- Ensure the needle is sharp and properly inserted, and the machine is threaded correctly.
Common Problem: Thread Bunching Under Fabric
Thread bunching under the fabric is a frustrating issue that can affect your sewing quality.
Cause:
Improper threading of the top thread, incorrect bobbin insertion, or tangled thread can cause this problem.
Troubleshooting:
- Rethread the machine, making sure to follow the correct threading path.
- Check the bobbin to ensure it’s inserted correctly and the thread unwinds smoothly.
- Clean the bobbin area and remove any tangled thread that might be causing the issue.
Bobbin Thread Not Catching
If the bobbin thread isn’t being picked up by the needle, your stitches won’t form properly.
Cause:
Improper bobbin insertion, incorrect threading, or a bent needle can prevent the bobbin thread from catching.
Troubleshooting:
- Reinsert the bobbin, ensuring it’s correctly threaded in the bobbin case.
- Check that the top thread is threaded properly and the needle is not bent or damaged.
- Make sure the needle is inserted correctly and fully tightened in its holder.
Machine Jamming During Free Motion
If the machine jams while doing free-motion quilting or embroidery, it can disrupt your creative process.
Cause:
Incorrect tension settings, improper technique, or a dull needle can lead to jamming during free-motion sewing.
Troubleshooting:
- Adjust the tension settings for free-motion sewing according to the machine’s manual.
- Practice proper technique by moving the fabric smoothly and steadily while sewing.
- Use a new and sharp needle suitable for the fabric and technique you’re using.
Thread Keeps Breaking
Frequent thread breakage can be frustrating and disrupt your sewing flow.
Cause:
Incorrect threading, sharp edges on the sewing path, or a damaged needle can cause thread breakage.
Troubleshooting:
- Rethread the machine, ensuring the thread follows the correct path and is properly tensioned.
- Smooth out any sharp edges on the fabric or sewing area that might be causing the thread to break.
- Replace the needle with a new one, making sure it’s the right type and size for your fabric.
Machine Running Slowly
If your machine is sewing at a slower pace than usual, it can impact your efficiency.
Cause:
Lack of proper maintenance, lint buildup, or incorrect stitch settings can lead to slow sewing speed.
Troubleshooting:
- Clean the machine’s interior, bobbin area, and feed dogs regularly to prevent lint accumulation.
- Check the stitch settings to ensure you haven’t accidentally set the machine to a slower speed.
- If the problem persists, consult the machine’s manual for additional troubleshooting steps.
Noise and Vibration
Excessive noise and vibration during sewing can indicate an issue that needs attention.
Cause:
Loose parts, improper machine placement, or a worn-out belt can cause noise and vibration.
Troubleshooting:
- Check all screws and parts to ensure they are tightened securely.
- Place the machine on a stable and level surface to minimize vibrations.
- If noise continues, inspect the machine’s internal components and consult a professional if needed.
Needle Threader Malfunction
If the automatic needle threader isn’t working properly, it can be frustrating to thread the needle.
Cause:
Dirt or misalignment of the needle threader mechanism can lead to its malfunction.
Troubleshooting:
- Clean the needle threader mechanism using a soft brush to remove any lint or debris.
- Ensure the needle threader is aligned properly with the needle eye.
- If the problem persists, consult the machine’s manual for specific troubleshooting steps.
Uneven Stitch Length
Variations in stitch length can affect the overall appearance and quality of your sewing projects.
Cause:
Improper tension settings, incorrect presser foot pressure, or a worn-out feed dog can lead to uneven stitches.
Troubleshooting:
- Check the tension settings for both the upper and lower threads, and adjust as needed.
- Ensure the presser foot pressure is set correctly for the fabric you’re using.
- If the feed dog is worn, consider replacing it as it might be causing uneven fabric feeding.
Here you can find all the
parts and accessories for the SINGER C7290Q
guaranteed to fit your sewing machine
Thread Fraying
If your thread is fraying or breaking at the needle, it can interrupt your sewing process.
Cause:
Using a needle that’s too small, improper threading, or using low-quality thread can cause thread fraying.
Troubleshooting:
- Use the correct needle size for the fabric you’re working with to prevent excessive friction on the thread.
- Rethread the machine carefully, ensuring the thread follows the correct path and is properly tensioned.
- Opt for high-quality thread to minimize thread fraying issues.
Buttonhole Problems
Difficulty in creating buttonholes can be frustrating, especially if they don’t turn out as expected.
Cause:
Incorrect buttonhole settings, improper technique, or a dull buttonhole cutter can lead to buttonhole issues.
Troubleshooting:
- Refer to the machine’s manual to set the correct buttonhole settings for your desired button size.
- Practice creating buttonholes on scrap fabric before attempting them on your project.
- Ensure the buttonhole cutter is sharp and functioning properly to achieve clean cuts.
Stitch Selector Error
If the stitch selector isn’t working as intended, you might not be able to access all stitch options.
Cause:
Dirt, debris, or misalignment of the stitch selector mechanism can lead to this error.
Troubleshooting:
- Clean the stitch selector area using a soft brush to remove any accumulated dirt or lint.
- Ensure the stitch selector knob or button is aligned properly with the selected stitch.
- If the problem persists, consult the machine’s manual or consider professional servicing.
Thread Jamming in the Bobbin Area
If the thread gets jammed or tangled in the bobbin area, it can disrupt your sewing progress.
Cause:
Incorrect bobbin insertion, improper threading, or a buildup of lint can lead to thread jamming.
Troubleshooting:
- Remove the bobbin case and clean the area thoroughly to remove any lint or debris.
- Reinsert the bobbin properly, making sure the thread unwinds in the correct direction.
- Check that the upper thread is threaded correctly and the needle is not bent.
Inconsistent Bobbin Tension
If you’re noticing uneven stitches on the underside of your fabric, the bobbin tension might be the culprit.
Cause:
Incorrect bobbin tension settings can result in inconsistent stitching on the bottom side.
Troubleshooting:
- Check the bobbin tension and adjust it as needed using the adjustment screw on the bobbin case.
- Ensure the bobbin is wound evenly and inserted correctly into the bobbin case.
- Test sew on scrap fabric to fine-tune the bobbin tension until the stitches are balanced.
Needle Hits Presser Foot
If the needle hits the presser foot during sewing, it can cause damage to both the needle and the foot.
Cause:
Using the wrong presser foot or incorrect needle position can lead to this issue.
Troubleshooting:
- Ensure you’re using the correct presser foot for the selected stitch and sewing technique.
- Double-check that the needle is properly inserted and tightened in its holder.
- If the problem persists, consult the machine’s manual for further guidance.
Uneven Fabric Feeding
Uneven feeding of the fabric can result in skewed seams and misaligned stitches.
Cause:
Dirty feed dogs, incorrect presser foot pressure, or using the wrong foot for the fabric can cause uneven feeding.
Troubleshooting:
- Clean the feed dogs and the machine’s interior regularly to prevent lint buildup.
- Adjust the presser foot pressure according to the fabric thickness.
- Use the appropriate presser foot for the fabric type and sewing technique.
Automatic Features Malfunction
If the automatic features such as thread cutter or needle down function aren’t working, it can impact your sewing convenience.
Cause:
Dirt, mechanical issues, or incorrect settings can lead to malfunctioning automatic features.
Troubleshooting:
- Clean the machine’s internal mechanisms and sensors to ensure smooth operation.
- Check the settings for the specific automatic feature and ensure they are properly configured.
- If the problem persists, consult the machine’s manual or consider professional servicing.
Bobbin Thread Not Pulling Up
If the bobbin thread isn’t pulling up to the top when you start sewing, your stitches won’t form properly.
Cause:
Improper bobbin insertion, incorrect threading, or a malfunctioning bobbin winder can cause this issue.
Troubleshooting:
- Reinsert the bobbin, ensuring it’s correctly threaded in the bobbin case.
- Rethread the machine carefully, following the threading guide in the manual.
- Check that the bobbin winder is disengaged and not affecting the sewing process.
Thread Keeps Looping on the Bottom
Excessive loops or knots on the underside of the fabric can affect the appearance and strength of your stitches.
Cause:
Incorrect threading, incorrect bobbin insertion, or a combination of incorrect settings can cause looping.
Troubleshooting:
- Rethread both the top thread and the bobbin, following the correct threading paths.
- Ensure the bobbin is properly inserted and unwinds in the correct direction.
- Check that the thread tension settings are balanced for both upper and lower threads.
Machine Not Powering On
If your sewing machine isn’t turning on, you won’t be able to use its features.
Cause:
Power cord issues, faulty power outlet, or a malfunctioning power switch can prevent the machine from powering on.
Troubleshooting:
- Check that the power cord is securely plugged into both the machine and the power outlet.
- Test the power outlet with another device to ensure it’s functioning properly.
- If applicable, check if the power switch is in the “on” position and functioning as intended.
Stitch Selection Display Error
If the selected stitch isn’t displaying correctly on the LCD screen, it can be confusing to navigate your sewing options.
Cause:
Display malfunction, incorrect stitch selector positioning, or technical issues can cause this error.
Troubleshooting:
- Power cycle the machine by turning it off and on again to see if the display issue resolves.
- Check that the stitch selector is set to the correct position for the desired stitch.
- If the problem persists, consult the machine’s manual or seek professional assistance.
Thread Keeps Skipping Stitches
If your machine is skipping stitches, the result can be an uneven and unreliable seam.
Cause:
Dull needle, incorrect needle size, or improper threading can lead to skipped stitches.
Troubleshooting:
- Replace the needle with a new one, ensuring it’s the correct size and type for your fabric.
- Thread the machine carefully, following the correct threading path and ensuring proper tension.
- Check the fabric type and thickness to ensure you’re using the appropriate needle.
SINGER C7290Q Sewing Machine User Reviews
Customer feedback plays a crucial role in understanding the real-world performance and user experiences of the SINGER C7290Q sewing machine.
Positive Reviews from SINGER C7290Q Sewing Machine Users
- Users praised the extensive selection of 417 stitch applications, catering to a variety of sewing techniques and projects.
- Many were satisfied with the built-in lettering font that allowed for personalized projects with custom words, phrases, or monograms.
- Reviewers found the LED screen highly convenient for selecting stitches and adjusting settings for their projects.
- Users appreciated the machine’s ease of setup and threading, making it suitable for beginners and experienced sewists alike.
- Several users noted the machine’s efficiency in handling tasks like hemming, quilting, and basic embroidery.
These positive aspects contributed to a favorable overall impression of the SINGER C7290Q sewing machine.
Negative User Reviews of the SINGER C7290Q Sewing Machine
- Some users reported tension issues, including difficulties in achieving consistent and balanced stitches.
- Several reviewers expressed frustration with the machine’s performance in executing certain fancy or intricate stitches.
- A number of users had concerns about the quality of the machine, with issues ranging from tension problems to overall machine performance.
- One reviewer highlighted disappointment with the machine manual, noting inaccuracies and omissions.
- Some users found challenges in choosing the correct type of bobbin to use, leading to confusion and frustration.
Despite these negative experiences, it’s important to note that not all users encountered the same issues, and individual experiences may vary.
Based on the reviews, the majority of users expressed satisfaction with the SINGER C7290Q sewing machine, particularly its stitch variety, personalization features, and user-friendly design. However, a subset of users faced challenges related to tension, stitching intricacies, and product quality. As with any product, it’s recommended to carefully consider both positive and negative reviews when evaluating the SINGER C7290Q sewing machine for your own sewing needs.
Here you can find all the
parts and accessories for the SINGER C7290Q
guaranteed to fit your sewing machine
SINGER C7290Q Sewing Machine Manual
The operating instructions and user manual for the SINGER C7290Q sewing machine can be accessed on the manufacturer’s website. This manual provides comprehensive guidance on setting up, using, and maintaining your sewing machine, along with troubleshooting tips and important safety information.
Frequently Asked Questions about the SINGER C7290Q Sewing Machine
- Q: Why is the thread breaking frequently?
A: Thread breakage can result from incorrect threading, a damaged needle, or improper tension settings. Recheck threading, use a new needle, and adjust tension if necessary. - Q: How do I fix uneven stitches?
A: Uneven stitches can be due to incorrect tension settings or presser foot pressure. Adjust both according to the fabric and thread you’re using. - Q: Why is the machine running slowly?
A: Slow sewing can result from lint buildup or incorrect stitch settings. Regularly clean the machine’s interior and check for correct settings. - Q: How do I resolve bobbin thread not catching?
A: Ensure the bobbin is correctly inserted and threaded. Check the top thread and needle, making sure they’re properly set. - Q: What should I do if the machine makes excessive noise?
A: Excessive noise can be caused by loose parts or improper placement. Tighten all parts and place the machine on a stable surface.
Conclusion
For any issues with your SINGER C7290Q sewing machine, it’s recommended to consult the user manual for troubleshooting guidance. Additionally, if problems persist, you can reach out to customer service or a certified service center for assistance. Always refer to official resources for accurate solutions to ensure the optimal performance of your sewing machine.