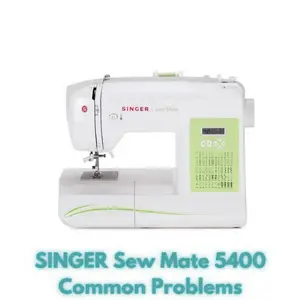
SINGER Sew Mate 5400 Common Problems and Troubleshooting
In this comprehensive guide, we will delve into the world of the SINGER Sew Mate 5400, exploring the common problems that users may encounter during their sewing journeys. Whether you’re dealing with frustrating thread jams, tension problems, or issues with your machine’s performance, we’ve got you covered. Our troubleshooting tips and expert advice will empower you to tackle these challenges with confidence, ensuring that your sewing machine operates at its best.
No matter if you’re a seasoned pro or just getting started with your SINGER Sew Mate 5400, understanding how to diagnose and resolve these common issues is essential. So, let’s dive in and unravel the mysteries of troubleshooting this fantastic sewing machine. Discover the solutions to these problems and get back to stitching your dreams with precision and ease.
SINGER Sew Mate 5400 Overview
The SINGER Sew Mate 5400 sewing machine offers a range of user-friendly features that streamline the sewing process. With automatic stitch selection and adjustable settings, this machine is designed to make sewing easier and more efficient.
The SINGER Sew Mate 5400 sewing machine provides a variety of features that cater to both beginners and experienced sewists:
- 154 stitch applications for versatile sewing projects
- One-step buttonhole stitching with consistent results
- Adjustable stitch length and width for personalized projects
- Easy access to the Free Arm for sewing cuffs and smaller items
- Online Owner’s Class video for assistance
Product Details
| Specification | Value |
|---|---|
| Built-In Stitches | 60 |
| One-Step Buttonhole | 4 styles |
| Needle Threader | Built-in |
Features
- Front Loading Bobbin
- Darning Plate for free-motion sewing
- Touch Button Stitch Selection
Causes of Common Problems with the SINGER Sew Mate 5400
This section will address various problems that users might encounter while using the SINGER Sew Mate 5400 sewing machine. Each problem will be accompanied by troubleshooting solutions to assist users in resolving issues effectively.
Common Problems with the SINGER Sew Mate 5400 and Troubleshooting
1. Thread Breakage During Stitching
Description: Threads frequently break while stitching, causing disruptions in the sewing process.
Cause: Incorrect threading or tension settings can lead to thread breakage.
Troubleshooting:
- Check the threading of the top thread and ensure it follows the correct path as shown in the user manual.
- Ensure proper tension settings for the chosen fabric. Adjust the tension dial accordingly.
- Inspect the needle for any burrs or damage. Replace with a new needle if necessary.
- Re-thread the bobbin, making sure it’s inserted correctly and the bobbin case is clean.
2. Uneven Stitching or Skipped Stitches
Description: Stitches appear uneven or certain stitches are skipped while sewing.
Cause: Incorrect needle installation or tension imbalance can result in uneven stitching.
Troubleshooting:
- Ensure the needle is properly installed, with the flat side facing the back of the machine.
- Check the threading of both the top thread and bobbin thread for any tangles or snags.
- Adjust the tension settings gradually while testing on a scrap fabric until even stitching is achieved.
- Use the appropriate needle size and type for the fabric you’re working with.
3. Bobbin Thread Jamming
Description: The bobbin thread gets jammed or tangled underneath the fabric.
Cause: Improper bobbin placement or incorrect threading of the bobbin case can lead to thread jams.
Troubleshooting:
- Remove the bobbin and reinsert it, ensuring it rotates counterclockwise when pulled by the thread.
- Clean the bobbin case area of any lint or debris that may be causing obstruction.
- Check the bobbin tension and adjust it if necessary. It should offer slight resistance when pulling the thread.
- Re-thread the machine, both top and bobbin threads, following the correct paths.
4. Needle Breaking During Sewing
Description: Needles frequently break while sewing, causing interruptions.
Cause: Using the wrong needle size for the fabric or sewing at high speeds can cause needle breakage.
Troubleshooting:
- Ensure you’re using the appropriate needle size and type for the fabric being sewn.
- Lower the sewing speed if you’re working with thick or dense fabrics.
- Check the needle for any visible damage or bending. Replace it with a new needle if needed.
- Examine the presser foot to ensure it’s properly attached and not causing undue pressure on the needle.
5. Irregular Feed Dog Movement
Description: The feed dogs fail to move the fabric smoothly, causing fabric to bunch or not advance.
Cause: Dust or debris accumulation in the feed dog area or a disengaged feed dog mechanism.
Troubleshooting:
- Turn off the machine and unplug it before cleaning the feed dog area using a brush or compressed air.
- Check if the feed dog mechanism is engaged. Refer to the user manual for instructions on engaging/disengaging.
- If the problem persists, there might be an issue with the feed dog mechanism. Consult a technician.
6. Thread Bunching on the Underside of Fabric
Description: Excess thread accumulates on the underside of the fabric, creating messy loops.
Cause: Incorrect threading of the bobbin case or improper tension settings can lead to thread bunching.
Troubleshooting:
- Check that the bobbin is wound correctly and placed in the bobbin case with the thread unwinding in the correct direction.
- Re-thread the bobbin following the correct path and ensure the tension is properly adjusted.
- Verify the top thread tension settings to ensure they are appropriate for the chosen fabric.
- Test on scrap fabric, adjusting tensions slightly until the issue is resolved.
7. Needle Threader Malfunction
Description: The automatic needle threader fails to work consistently or properly.
Cause: Misalignment of the needle threader mechanism or dirt obstructing its movement can cause issues.
Troubleshooting:
- Carefully inspect the needle threader mechanism for any visible misalignment or damage. Readjust if necessary.
- Clean the needle threader area using a small brush to remove any dust or debris that might hinder its movement.
- Ensure the needle is at the highest position when attempting to use the threader.
- Refer to the user manual for proper usage instructions and troubleshooting steps for the needle threader.
8. Inconsistent Buttonhole Results
Description: Buttonholes appear uneven or do not match the intended size or style.
Cause: Incorrect buttonhole foot attachment, incorrect fabric positioning, or improper settings can lead to inconsistencies.
Troubleshooting:
- Ensure the correct buttonhole foot is attached securely and properly aligned.
- Position the fabric accurately under the foot and mark the starting and ending points for the buttonhole.
- Review the buttonhole settings on the machine and adjust them according to the fabric and button size.
- Test on a scrap fabric first to confirm the buttonhole settings before sewing on the actual project.
9. Skipped Stitches in Thick Fabrics
Description: The machine skips stitches or struggles to sew through thicker fabrics.
Cause: Inadequate presser foot pressure or using the wrong needle can lead to skipped stitches in heavy fabrics.
Troubleshooting:
- Adjust the presser foot pressure to increase the grip on thicker fabrics, ensuring proper feeding.
- Use a larger and stronger needle appropriate for heavy fabrics, such as denim or canvas.
- Slow down the sewing speed when working with thick layers to allow the machine to stitch accurately.
- Hold the fabric taut behind the presser foot while sewing to help guide it through the machine.
10. Bobbin Winding Issues
Description: The bobbin winding process is not functioning correctly or the bobbin thread is uneven.
Cause: Incorrect placement of the bobbin on the winder spindle or improper threading can result in bobbin winding problems.
Troubleshooting:
- Ensure the bobbin is placed securely on the winder spindle and locked in place.
- Thread the bobbin thread through the correct path as indicated in the user manual.
- Engage the bobbin winding mechanism and begin winding, making sure the thread winds evenly onto the bobbin.
- If the problem persists, inspect the bobbin winding mechanism for any obstructions or damage.
11. Uneven Tension Across Stitches
Description: Stitches show uneven tension, with some being too tight and others too loose.
Cause: Incorrect threading, dirty tension discs, or worn-out tension mechanisms can lead to uneven tension.
Troubleshooting:
- Re-thread the machine both on top and in the bobbin, ensuring threads are properly seated in tension discs.
- Clean the tension discs and surrounding area using a soft brush to remove any lint or debris.
- Test stitch on a scrap fabric, adjusting the tension settings incrementally until balanced tension is achieved.
- If tension issues persist, there might be a mechanical problem. Consult a professional technician.
12. Fabric Not Feeding Properly
Description: Fabric does not advance smoothly while sewing, causing uneven stitching or bunching.
Cause: Improper presser foot pressure, worn-out feed dogs, or incorrect stitch settings can lead to feeding problems.
Troubleshooting:
- Adjust the presser foot pressure to ensure it holds the fabric securely without distorting it.
- Inspect the feed dogs for signs of wear or damage. Replace them if necessary.
- Choose the appropriate stitch setting, and ensure that the stitch length is suitable for the fabric type.
- Hold the fabric gently at the beginning of sewing to help guide it through the initial stitches.
13. Erratic Machine Behavior
Description: The machine behaves unexpectedly, such as suddenly stopping or producing irregular stitches.
Cause: Loose or damaged internal components, electronic glitches, or power supply issues can cause erratic behavior.
Troubleshooting:
- Turn off the machine, unplug it, and then restart after a few minutes to reset any electronic glitches.
- Check all connections, including power and foot pedal, to ensure they are securely attached.
- If the problem persists, there might be an internal issue. Contact the manufacturer’s support or a professional technician.
14. Bobbin Thread Not Picking Up
Description: The needle fails to catch the bobbin thread, preventing stitches from forming.
Cause: Incorrect bobbin insertion, improper threading, or a bent needle can result in bobbin thread issues.
Troubleshooting:
- Reinsert the bobbin, ensuring it rotates counterclockwise and the thread follows the correct path.
- Double-check the top thread threading, making sure it passes through all guides and the needle eye.
- Replace the needle if it’s bent or damaged, as a straight needle is crucial for proper bobbin thread pickup.
- Gently hold the top thread as you manually lower and raise the needle to help catch the bobbin thread.
15. Limited Stitch Functionality
Description: The machine fails to perform certain stitches, or the stitch selection buttons do not respond.
Cause: Electronic malfunctions, disconnected wiring, or a control panel issue can lead to limited stitch functionality.
Troubleshooting:
- Turn off the machine, unplug it, and wait for a few minutes before plugging it back in and restarting.
- Check the stitch selection buttons for any obstructions or debris. Clean the control panel gently if needed.
- Inspect the wiring and connections, ensuring all components are securely attached.
- If stitch functionality remains limited, contact the manufacturer’s support or a professional technician for assistance.
16. Thread Getting Tangled Around Bobbin Case
Description: Thread becomes entangled around the bobbin case, causing jams and disruptions.
Cause: Incorrect bobbin insertion or improper threading can lead to thread tangling around the bobbin case.
Troubleshooting:
- Remove the bobbin case and untangle any thread caught around it. Clean the bobbin area from lint or debris.
- Reinsert the bobbin, making sure it’s properly seated and rotates in the correct direction.
- Thread the machine following the correct path, ensuring the thread is properly inserted into the bobbin case’s tension spring.
- Test sew on scrap fabric to ensure the issue is resolved before continuing with your project.
17. Motor Runs but Needle Doesn’t Move
Description: The machine’s motor operates, but the needle remains stationary and doesn’t sew.
Cause: Disconnected or broken drive belt, a malfunctioning motor, or internal issues can lead to this problem.
Troubleshooting:
- Check the drive belt to ensure it’s properly attached and not broken. Replace it if necessary.
- Inspect the motor for any visible damage or signs of malfunction. Consult a technician if the motor needs replacement.
- Turn the handwheel manually to see if the needle moves. If not, there might be internal issues. Seek professional help.
- Ensure the machine is threaded correctly and no thread is jammed, which can prevent the needle from moving.
18. Stitch Length or Width Not Changing
Description: The machine doesn’t adjust stitch length or width despite changing settings.
Cause: Electronic glitches, control panel issues, or a malfunctioning adjustment mechanism can lead to this problem.
Troubleshooting:
- Restart the machine after unplugging it for a few minutes to reset any electronic glitches.
- Check if the control panel buttons are responsive. Clean the panel gently if needed.
- Manually select different stitches to see if the problem persists. If so, there might be a mechanical issue. Consult a technician.
- Refer to the user manual for instructions on adjusting stitch length and width settings properly.
19. Excessive Noise While Sewing
Description: The machine produces loud or unusual noises during sewing.
Cause: Loose parts, debris in the machine, or internal issues can result in excessive noise.
Troubleshooting:
- Turn off the machine and unplug it. Carefully inspect the machine’s interior for any loose parts or objects.
- Clean the machine, especially around moving parts, to remove any debris that might be causing noise.
- If the noise persists, there might be an internal issue. Consult a technician for proper diagnosis and repair.
- Regular maintenance and oiling as per the user manual can prevent excessive noise in the long run.
20. LCD Screen Display Issues
Description: The LCD screen displays gibberish, flickers, or remains blank.
Cause: Electronic glitches, loose connections, or LCD screen malfunctions can lead to display issues.
Troubleshooting:
- Restart the machine after unplugging it for a few minutes to reset electronic glitches that might affect the display.
- Check the connections between the LCD screen and the internal components to ensure they are secure.
- If the display issue persists, consult a technician for LCD screen diagnosis and replacement if necessary.
- Regularly clean the LCD screen using a soft, dry cloth to prevent dust buildup that might affect visibility.
21. Needle Hits the Presser Foot
Description: The needle hits the presser foot while sewing, causing damage to both.
Cause: Incorrect needle size, bent needle, or incorrect presser foot attachment can lead to this problem.
Troubleshooting:
- Ensure you’re using the correct needle size for the fabric you’re working with.
- Inspect the needle for any bending or damage. Replace it with a new needle if necessary.
- Verify that the presser foot is properly attached and aligned according to the user manual.
- Test on scrap fabric to ensure the needle doesn’t hit the presser foot before continuing with your project.
22. Automatic Thread Cutter Not Working
Description: The automatic thread cutter function fails to trim the thread after sewing.
Cause: Electronic glitches, thread tangles, or improper function settings can lead to thread cutter issues.
Troubleshooting:
- Restart the machine after unplugging it for a few minutes to reset any electronic glitches affecting the thread cutter.
- Clean the thread cutter area from any tangled threads that might obstruct its movement.
- Check the machine settings to ensure the automatic thread cutter function is enabled.
- If the problem persists, consult the user manual or contact the manufacturer’s support for further assistance.
23. Skipped Stitches in Zigzag Stitches
Description: Zigzag stitches exhibit skipped stitches or irregular pattern.
Cause: Incorrect needle choice, improper threading, or tension imbalances can lead to issues with zigzag stitches.
Troubleshooting:
- Use a zigzag needle appropriate for the fabric to ensure the needle pierces the fabric accurately.
- Double-check the threading of both the top thread and bobbin thread, ensuring they follow the correct paths.
- Balance the tension settings for the top thread and bobbin thread to achieve even stitches in zigzag patterns.
- Test the zigzag stitch on scrap fabric, adjusting tensions gradually until the desired stitch quality is achieved.
24. Limited Stitch Width Adjustment
Description: The stitch width adjustment doesn’t change the width of the stitch as expected.
Cause: Mechanical issues with the stitch width mechanism or electronic malfunctions can lead to limited adjustments.
Troubleshooting:
- Restart the machine after unplugging it for a few minutes to reset any electronic glitches affecting stitch width adjustment.
- Check if the stitch width mechanism is functioning properly and isn’t obstructed by debris or thread.
- Manually adjust the stitch width settings while turning the handwheel to see if the mechanism responds correctly.
- If the issue persists, there might be a mechanical problem. Consult a technician for further assistance.
25. Uneven Thread Tension in Decorative Stitches
Description: Decorative stitches show uneven tension, affecting the appearance of the final design.
Cause: Incorrect thread tension settings, improper thread choice, or threading issues can lead to uneven tension in decorative stitches.
Troubleshooting:
- Refer to the user manual for recommended tension settings for specific decorative stitches.
- Choose a thread suitable for decorative stitching and ensure it’s threaded correctly in both the top thread and bobbin.
- Test the decorative stitch on scrap fabric, adjusting the tension settings incrementally until balanced tension is achieved.
- If the issue persists, consult the user manual or contact the manufacturer’s support for further guidance.
SINGER Sew Mate 5400 Sewing Machine User Reviews
Positive Reviews from SINGER Sew Mate 5400 Users
- Users were satisfied with the ease of use and quick start instructions, especially for beginners.
- Positive feedback on the automatic needle threader, making threading effortless.
- Appreciation for the variety of stitches available for different projects, from mending to decorative stitching.
- Praise for the LED display that shows stitch information clearly and helps with stitch selection.
- Users liked the machine’s lightweight and easy movability, allowing them to sew in various spaces.
Overall, these positive reviews indicate that the SINGER Sew Mate 5400 sewing machine is user-friendly, particularly for those new to sewing, and offers a range of features that contribute to enjoyable sewing experiences.
Negative User Reviews of the SINGER Sew Mate 5400
- Users reported issues with jamming and stitch inconsistency, leading to wasted time, thread, and fabric.
- Complaints about the machine’s inability to handle multiple layers of lightweight fabric or elastic effectively.
- Negative feedback on the build quality, specifically the plastic casing being thin and prone to breakage.
- Concerns about the machine’s motor not being powerful enough for certain sewing tasks.
- Disappointment with the tension settings, leading to thread gathering and uneven stitching.
These negative reviews highlight challenges users faced with the SINGER Sew Mate 5400 sewing machine, such as its performance limitations and issues related to build quality and functionality.
The majority of users, however, expressed satisfaction with the SINGER Sew Mate 5400 sewing machine, praising its user-friendly features, stitch variety, and ease of use. While there were concerns raised about certain aspects of the machine’s performance and build quality, positive feedback outweighed the negative experiences, indicating that the machine generally meets the needs of a wide range of sewing enthusiasts.
SINGER Sew Mate 5400 Sewing Machine Manual
The operating instructions and user manual for the SINGER Sew Mate 5400 sewing machine can be found on the manufacturer’s official website. These resources provide detailed guidance on setting up and using the machine effectively. Refer to the manual for information on threading, stitch selection, troubleshooting, maintenance, and more.
Frequently Asked Questions about the SINGER Sew Mate 5400
Q: How do I troubleshoot stitch irregularities and skipped stitches?
A: Stitch irregularities can be caused by improper threading, incorrect needle choice, or tension issues. Ensure proper threading, use appropriate needles, and adjust tension settings according to the user manual’s guidelines.
Q: What should I do if the machine jams frequently?
A: Frequent jamming might be due to incorrect threading, improper bobbin insertion, or debris in the bobbin area. Check the threading, reinsert the bobbin correctly, and clear any lint or debris to prevent jams.
Q: How do I address tension problems while sewing?
A: Uneven thread tension can result from incorrect threading, incorrect tension settings, or using low-quality thread. Double-check the threading path, adjust tension settings gradually, and consider using high-quality thread for optimal results.
Q: Why is my sewing machine making loud noises?
A: Loud or unusual noises may indicate loose parts, debris, or mechanical issues. Turn off the machine, inspect the interior for loose parts or debris, and perform regular maintenance as per the user manual to prevent excessive noise.
Q: How can I avoid thread tangling around the bobbin case?
A: Thread tangling can occur due to incorrect bobbin insertion or improper threading. Ensure the bobbin is inserted correctly, follow the threading path precisely, and keep the bobbin area clean to prevent thread tangling.
Conclusion
For any issues with your SINGER Sew Mate 5400 sewing machine, it’s recommended to consult the user manual, reach out to customer service, or visit a certified service center. The manual provides comprehensive guidance on troubleshooting and maintenance, while professional assistance can ensure effective solutions to any problems you might encounter.