Singer Sewing Machine Tension Problems
The Singer Sewing Machine can sometimes have issues with tension, which is often what people blame when they encounter sewing problems. To ensure successful sewing, it’s important to pay attention to many factors, such as threading the machine properly, using the right needle type for your fabric, inserting the bobbin correctly and cleaning your machine regularly.
Tension should always be adjusted as a last resort if any stitching imbalances occur due to differences between top and bobbin thread weights. The result should be a stitch that looks identical on both sides of the material.
What are Singer sewing machine tension issues?
Thread tension is the amount of thread pulled through a sewing machine to form stitches. The more thread, the looser the stitch; the less thread, the tighter it is. When stitching together fabrics, there needs to be a balanced relationship between the top and bobbin threads in order to create properly formed stitches.
If looping thread, bird nesting or snapped threads are encountered while sewing, try following a checklist to get back on track and produce perfect stitches with your sewing machine.
How to Fix Singer Sewing Machine Tension Issues
To fix tension issues on a Singer Sewing Machine, try out this troubleshooting checklist. Here are 6 steps you can take to resolve any thread tension problems:
How to Improve Your Sewing Results with the Singer Machine: Changing Your Needle
If you’re experiencing Singer sewing machine tension issues, we recommend checking you sewing needle. One of the easiest ways to improve your sewing results is to change the needle on your machine. It is important to use the right type of needle for your project – for example, if you are sewing with denim, a denim needle will give you the best results.
To ensure that your stitching looks sharp and crisp, it is recommended that you switch out the needle every 6-8 hours of sewing. This simple step can make a big difference in how well your finished product looks!
Ensuring the Accuracy of Your Singer Sewing Machine Threading
Verify the threading of your Singer sewing machine. Even if you just completed the process, check it once again for accuracy. A minor tug in the wrong direction can cause the thread to become disconnected from its paths, leading to tension issues. To prevent this issue and achieve optimal results, use high-quality threads that don’t break easily. Double-checking will save you time and hassle in the long run!
Ensuring Consistent Tension with Matching Threads
Verify that you are using the same thread in both the top and bottom of your Singer sewing machine for optimal tension. If there is a discrepancy in weight or fiber content, it could potentially disrupt the desired tension. It’s important to use matching threads for best results.
Maintaining Your Singer Sewing Machine: Cleaning and Servicing
It’s important to keep your Singer sewing machine in top condition by cleaning out the bobbin area and getting it serviced regularly. Refer to your sewing machine manual, and consider booking a service with your local SINGER® technician every 12 months. This will help ensure that you get perfect stitching results free from tension issues caused by lint and dust build-up.
Adjusting Singer Sewing Machine Thread Tension when Issue upper thread too loose or bobbin too tight
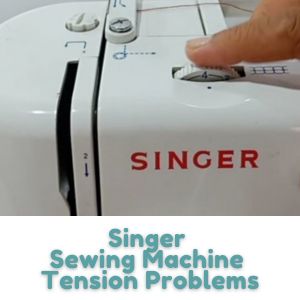
If you find that your upper thread is too loose or the bobbin thread appears excessively tight, then all it takes to correct this is a simple adjustment of the tension dial. Increase the number until both threads are evenly balanced in terms of tension for optimal performance and results.
Adjusting Singer Sewing Machine Upper Thread and Bobbin Tension when Issue upper thread too tight or bobbin too loose
If you’re having difficulty getting the balance of upper and bobbin thread tension just right, lower your tension dial until both threads are even.
By adhering to this checklist, you’ll be able to achieve perfectly stitched fabric with ideal tension in no time.
Singer sewing machine bobbin tension problems
What is the bobbin tension? Bobbin tension is the amount of pressure on the thread within the bobbin case, created by two pieces held together by a small screw. Tightening this screw increases the pressure while loosening it reduces it. This metal plate/spring assembly is set to a specific tension in production and applies pressure to the thread as it moves between the plate and bobbin case. This keeps the thread tension consistent while sewing.
How Do You Adjust The Bobbin Tension On A Singer Sewing Machine?
- If you wish to adjust the bobbin tension on your Singer Sewing Machine, please make sure to look through the manual of your particular model. This is vital in order for you to familiarize yourself with any applicable instructions and guidelines before carrying out this adjustment;
- Test the strength of your stitching by sewing a seam on folded fabric, then tugging gently to see if it will break;
- If your machine is only displaying one broken thread, attempt to correct the bobbin tension first;
- To gain access to the bobbin area of your sewing machine, detach its faceplate;
- Remove the bobbin and its case via the hinged latch but keep the bobbin in the case;
- Use a screwdriver that fits the size of the screw on the side of your bobbin case, and turn it to adjust accordingly;
- Resist the temptation to exert too much force; instead, make small adjustments to tighten the screw;
- To increase the bobbin tension, turn the knob clockwise; to decrease it, rotate counterclockwise;
- Tension can be gauged by pulling lightly on the bobbin thread to feel its resistance;
- When the thread easy to pull out, it’s a clear indication that the tension is too loose;
- When the thread won’t come out, it usually means that the tension is too tight on your sewing machine;
- Reinstall the bobbin in the Singer sewing machine;
- Reattach the faceplate for added security;
- To ensure that your seam is properly sewn, stitch diagonally on the fabric as instructed in step 2;
- The top and bottom of your stitches should be even, with the center securely locked in place;
- Ensure that each thread remains intact when tugged on to guarantee fabric longevity.
When to adjust the bobbin tension on a Singer Sewing Machine?
To ensure your sewing machine is working correctly, it’s best to adjust the top thread tension first before making any changes to the bobbin tension. However, if you’re using a very fine or thick thread, you may need to adjust the bobbin tension accordingly.
Make sure to only turn the screw in minor increments and test after each movement so that you can achieve optimal results. Also be aware that manufacturers have already set the bobbin tension for most projects, so use this as your starting point.
Table: Troubleshooting Singer Sewing Machine Tension Issues
| Issue | Troubleshooting Steps for Singer Sewing Machine |
|---|---|
| General Thread Tension Issues | 1. Change Needle: Use the right needle type for your project and change it every 6-8 hours of sewing. This enhances stitching quality. 2. Verify Threading: Double-check the accuracy of the machine threading. Ensure high-quality threads to avoid breakage. 3. Consistent Thread Matching: Use matching threads in both top and bottom for optimal tension. 4. Cleaning and Servicing: Regularly clean the bobbin area and service the machine to prevent tension issues caused by lint and dust buildup. 5. Adjusting Tension Dial: Adjust the tension dial to balance upper and bobbin thread tension. |
| Bobbin Tension Problems | 1. Understanding Bobbin Tension: It’s the pressure on the thread within the bobbin case, controlled by a screw. Tighten to increase, loosen to reduce pressure. 2. Adjustment Steps: Refer to the machine manual for specific instructions. 3. Testing Stitch Strength: Sew a seam on folded fabric and gently tug to check strength. 4. Bobbin Area Access: Detach the faceplate, remove the bobbin, and access the bobbin case. 5. Screw Adjustment: Use a suitable screwdriver to make small adjustments. Clockwise to increase tension, counterclockwise to decrease. 6. Checking Tension: Pull lightly on the bobbin thread to gauge tension. Too easy to pull indicates looseness; resistance indicates tightness. 7. Reinstall and Test: Reinstall the bobbin, secure the faceplate, stitch diagonally, and ensure even top and bottom stitches. |
| When to Adjust Bobbin Tension | – Prefer Top Thread Adjustment: Adjust top thread tension before making changes to bobbin tension. – Consider Thread Type: Fine or thick threads may require bobbin tension adjustments. – Minor Increments: Make small adjustments and test after each movement. – Manufacturer’s Setting: Manufacturers often set bobbin tension for most projects; use it as a starting point. |
Singer Sewing Machine Manual

FAQ
Why Singer Sewing Machine Bobbin thread showing on top?
If you are seeing loops of the bobbin thread on the right side of your fabric, this indicates that the tension for the bobbin thread is too loose. To fix this, reduce the tension of your needle thread by adjusting the dial to a lower number. This should help correct any issues with visibility of your bobbin thread.
Why Singer Sewing Machine Needle thread showing on the underside
The Singer needle thread can sometimes appear on the underside of the fabric if the bobbin thread tension is too tight. To fix this, you need to increase the tension dial to a higher number so that the needle thread won’t be pulled too much. This will help create even stitches and prevent needle thread from appearing on the wrong side. In other words, make sure your Singer tension settings are correct for smooth sewing results.
When to adjust the bobbin tension?
When sewing, the bobbin thread tension should be adjusted depending on the fabric thickness, stiffness, number of layers being sewn, and type of stitches/techniques being used. Bobbin tension also needs to be adjusted when using different thread weights, a twin needle, elastic thread (e.g. for shirring), and when doing stippling or free motion quilting. If problems with skipped stitches occur due to breaking threads in the bobbin despite adjusting only the upper thread tension, bobbin tension should also be changed accordingly.
Conclusion: Singer Sewing Machine Tension Problems
To conclude, adjusting the bobbin tension on your Singer Sewing Machine is essential for ensuring successful sewing projects. It’s important to adjust both the upper thread and the bobbin tension so that you get even stitches and avoid skipped stitches, loops of thread showing through fabric, or other sewing issues. With patience and practice, you can achieve perfect results every single time! Happy sewing!
