Brother 2340CV Common Problems and Troubleshooting
Welcome to our guide on troubleshooting common problems with the Brother 2340CV sewing machine. In this article, we’ll address potential issues you might encounter while using this specific model of sewing machine and provide solutions to help you get back to stitching smoothly.
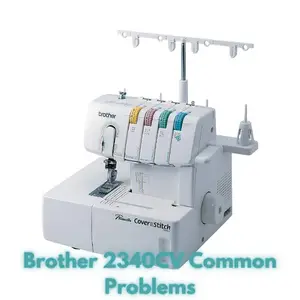
Brother 2340CV Overview
Product Description: The Brother 2340CV Cover Stitch is an advanced serger that allows users to create a wide range of cover stitches on various fabric weights and types. It offers features like wide and narrow cover stitches, tricover stitch capability, and an easy looper threading system. With color-coded threading and adjustment dials, it ensures high-quality stitching. The machine’s three needles and one looper thread allow for professional hems, chain stitching, and decorative stitching.
Product Details and Features:
| Product Dimensions: | 13″D x 15″W x 13.4″H |
| Item Weight: | 13 Pounds |
| Power Source: | Corded Electric |
| Is Electric: | No |
About this item:
- Metal frame for durability
- Tri-cover stitch, wide and narrow cover stitches
- 1,100 stitches per minute sewing speed
- Easy-to-use thread looper system
- Comes with standard and hem sewing presser feet
- Intended for sale in the US at 120 volts
Causes of Common Problems with the Brother 2340CV
As you use the Brother 2340CV sewing machine, you might encounter certain issues that can affect your stitching experience. In the following sections, we’ll delve into some common problems that users face with this machine and provide step-by-step solutions to address these challenges.
Common Problems and Troubleshooting for Brother 2340CV
Problem 1: Stitch Skipping
Description: You notice that the machine is skipping stitches in the fabric, resulting in an uneven and incomplete stitch pattern.
Cause: Stitch skipping can occur due to incorrect threading or tension settings.
Troubleshooting:
- Check the threading of all needles and the looper according to the color-coded guides.
- Ensure that the needles are properly inserted and securely tightened.
- Adjust the tension settings by referring to the user manual. Gradually increase or decrease tension to find the optimal settings.
Problem 2: Uneven Stitching
Description: Your stitches are uneven in length or tension, resulting in an unsightly finished look.
Cause: Uneven stitching can be caused by inconsistent fabric feeding or incorrect thread tension.
Troubleshooting:
- Check the differential feed setting. Increase or decrease the feed ratio to match the fabric you’re working with.
- Inspect the fabric as it feeds through the machine. Make sure it’s not getting stuck or pulled unevenly.
- Re-thread the machine, ensuring the threads are properly seated in the tension discs and guides.
Problem 3: Thread Breakage
Description: The threads are breaking frequently while you’re sewing.
Cause: Thread breakage can occur due to various reasons, including incorrect threading, tension issues, or using poor-quality thread.
Troubleshooting:
- Check the threading path and ensure the threads are correctly inserted through all guides and tension discs.
- Use high-quality threads suitable for the Brother 2340CV.
- Adjust the tension settings for both needles and loopers to prevent excessive tension that might lead to breakage.
Problem 4: Fabric Puckering
Description: The fabric puckers or gathers while you’re stitching, giving an undesirable wrinkled appearance.
Cause: Fabric puckering can be caused by incorrect tension settings or inappropriate differential feed settings.
Troubleshooting:
- Re-adjust the tension settings to achieve a balance between upper and lower threads.
- Ensure the fabric is smoothly fed through the machine and isn’t overly stretched or bunched up.
- Experiment with the differential feed settings to find the right combination that prevents puckering.
Problem 5: Skipped Stitches on Thick Fabrics
Description: When sewing on thicker fabrics, the machine occasionally skips stitches or struggles to create clean stitches.
Cause: Sewing on thick fabrics can put additional strain on the machine’s mechanisms, leading to skipped stitches.
Troubleshooting:
- Use the appropriate needle size and type for thicker fabrics to ensure proper penetration.
- Reduce the sewing speed to allow the machine to handle thicker layers more effectively.
- Consider using a fabric stabilizer or walking foot to aid in smooth fabric feeding.
Problem 6: Uneven Fabric Feed
Description: The fabric is not feeding evenly through the machine, causing irregular stitching.
Cause: Uneven fabric feed can result from an incorrect differential feed setting or a lack of proper pressure on the presser foot.
Troubleshooting:
- Check the differential feed settings and adjust them to match the fabric type and thickness.
- Ensure that the presser foot pressure is appropriately set for the fabric. Adjust if necessary.
- Inspect the fabric as it feeds and guide it gently to prevent misalignment.
Problem 7: Excessive Noise and Vibration
Description: The sewing machine produces excessive noise and vibration during operation.
Cause: Excessive noise and vibration can occur due to an imbalanced machine, loose parts, or lack of proper maintenance.
Troubleshooting:
- Ensure that the machine is placed on a stable surface and that all feet are properly adjusted.
- Tighten any loose screws, bolts, or components that might contribute to vibration.
- Clean and lubricate the moving parts of the machine as per the manufacturer’s recommendations.
Problem 8: Thread Jamming in the Bobbin Area
Description: Threads are getting jammed or tangled in the bobbin area, causing sewing disruptions.
Cause: Thread jamming can be caused by improper threading, incorrect bobbin placement, or lint buildup in the bobbin area.
Troubleshooting:
- Turn off the machine and remove the needle plate to access the bobbin area.
- Carefully remove any tangled threads or debris from the bobbin case and surrounding areas.
- Re-thread the upper thread and ensure the bobbin is correctly inserted and rotating in the correct direction.
Problem 9: Fabric Slippage
Description: The fabric slips or shifts during stitching, causing misalignment and uneven stitches.
Cause: Fabric slippage can result from an inadequate presser foot grip, incorrect tension, or improper handling of the fabric.
Troubleshooting:
- Ensure that the presser foot pressure is adjusted properly to hold the fabric securely.
- Check and adjust the thread tension to prevent excessive pulling or loosening of the fabric.
- Guide the fabric gently with both hands as it feeds through the machine to maintain control.
Problem 10: Needle Breakage
Description: Needles are breaking frequently while sewing, disrupting the stitching process.
Cause: Needle breakage can occur due to using the wrong needle size, hitting pins, or sewing over thick seams.
Troubleshooting:
- Ensure you’re using the correct needle type and size for the fabric you’re working with.
- Remove any pins or obstructions from the fabric before sewing over them.
- When sewing over thick areas, gently hand-crank the machine to ensure the needle goes through smoothly.
Problem 11: Uneven Thread Tension
Description: The tension between upper and lower threads is inconsistent, leading to uneven stitching.
Cause: Uneven thread tension can result from incorrect threading, damaged threads, or misadjusted tension settings.
Troubleshooting:
- Re-thread the machine, ensuring that threads are correctly seated in their respective tension discs.
- Inspect the threads for any signs of damage or knots that might affect tension.
- Adjust the tension settings gradually and test on a scrap fabric until you achieve balanced stitching.
Problem 12: Looping or Tangling Threads
Description: Threads are looping, tangling, or forming knots on the fabric’s underside during stitching.
Cause: Looping threads can be caused by improper threading, incorrect tension settings, or a damaged needle.
Troubleshooting:
- Check the threading path to ensure the threads are passing through all guides correctly.
- Re-adjust the tension settings to achieve a balanced tension between upper and lower threads.
- Inspect the needle for damage or bending. Replace the needle if needed.
Problem 13: Fabric Fraying at Edges
Description: The fabric edges are fraying excessively while using the Brother 2340CV.
Cause: Excessive fabric fraying can result from using the wrong stitch settings or not finishing edges properly.
Troubleshooting:
- Ensure you’re using appropriate stitch settings for finishing edges, such as using an overlock stitch.
- Consider using fabric stabilizers or interfacing to prevent fraying, especially on lightweight fabrics.
- If possible, sew slightly inside the fabric’s edge to encase the raw edges within the stitching.
Problem 14: Inconsistent Stitch Length
Description: The stitch length varies inconsistently, resulting in a visually unappealing finish.
Cause: Inconsistent stitch length can occur due to inconsistent fabric feeding or incorrect stitch length settings.
Troubleshooting:
- Check the differential feed settings and ensure the fabric is feeding evenly through the machine.
- Adjust the stitch length settings according to your desired outcome and fabric type.
- Practice on scrap fabric to find the right combination of settings for consistent stitching.
Problem 15: Elastic Threads Breaking
Description: Elastic threads used for decorative stitching or gathering keep breaking.
Cause: Elastic thread breakage can result from incorrect threading, excessive tension, or overstretching of the elastic.
Troubleshooting:
- Threading elastic thread requires special care. Consult the machine’s manual for the proper threading process.
- Lower the tension settings for both upper and lower threads to reduce strain on the elastic thread.
- Avoid stretching the elastic thread excessively while threading or sewing, as this can weaken it.
Problem 16: Fabric Not Feeding
Description: The fabric isn’t feeding through the machine as you sew, resulting in uneven stitches or halted sewing.
Cause: Poor fabric feeding can be due to issues with the presser foot, incorrect feed settings, or a lack of proper guiding.
Troubleshooting:
- Check that the presser foot is properly lowered and engaging with the fabric.
- Adjust the differential feed settings to match the fabric type and prevent feeding issues.
- Guide the fabric with your hands, helping it feed smoothly and evenly.
Problem 17: Unwanted Fabric Stretch
Description: The fabric gets stretched out or distorted while sewing, leading to misshapen projects.
Cause: Unwanted fabric stretching can result from incorrect differential feed settings or using too much tension.
Troubleshooting:
- Adjust the differential feed settings to a higher value for lightweight fabrics and a lower value for heavier fabrics.
- Reduce the thread tension slightly to avoid pulling on the fabric excessively.
- Support the fabric gently with both hands as it feeds through the machine to prevent stretching.
Problem 18: Jammed Upper Looper
Description: The upper looper of the serger keeps jamming, causing stitching disruptions.
Cause: A jammed upper looper can occur due to thread entanglement, incorrect threading, or issues with the looper mechanism.
Troubleshooting:
- Turn off the machine and carefully remove any tangled threads from the upper looper area.
- Re-thread the upper looper according to the machine’s threading guides.
- Inspect the looper mechanism for any obstructions or signs of damage that might cause jamming.
Problem 19: Limited Stitch Variation
Description: You’re unable to achieve a wide range of stitch variations despite adjusting settings.
Cause: Limited stitch variation can occur due to incorrect settings, improper threading, or using the wrong stitch type.
Troubleshooting:
- Review the user manual to understand the full capabilities of the machine’s stitch settings.
- Ensure that you’re threading the machine correctly, as improper threading can affect stitch results.
- Experiment with different stitch types and settings to explore the machine’s capabilities fully.
Problem 20: Needle Threader Malfunction
Description: The automatic needle threader isn’t working properly, making it difficult to thread the needles.
Cause: Needle threader malfunction can be due to misalignment, dirt, or a mechanical issue with the threader mechanism.
Troubleshooting:
- Gently clean the needle threader mechanism and surrounding area to remove any dirt or debris.
- Check for any misalignment of the threader and adjust it if necessary.
- If the threader still doesn’t work, consider threading the needles manually or seeking professional assistance.
Problem 21: Excessive Thread Lint
Description: The sewing machine accumulates excessive lint, affecting its performance and stitch quality.
Cause: Excessive thread lint can accumulate due to poor thread quality, lint buildup, or lack of regular machine maintenance.
Troubleshooting:
- Use high-quality threads that produce less lint during sewing.
- Regularly clean the machine’s tension discs, thread paths, and bobbin area to remove lint and debris.
- Follow the manufacturer’s guidelines for lubrication and maintenance to keep the machine running smoothly.
Problem 22: Limited Stitch Length Control
Description: You’re unable to adjust the stitch length as desired, even after changing settings.
Cause: Limited stitch length control can occur due to mechanical issues with the machine’s stitch length adjustment mechanism.
Troubleshooting:
- Check if there are any obstructions or debris preventing the stitch length adjustment from functioning correctly.
- Attempt to gently adjust the stitch length settings while the machine is turned off to see if any changes occur.
- If the issue persists, consider seeking professional repair or servicing to address the mechanical problem.
Problem 23: Difficulty Threading Loopers
Description: Threading the loopers of the serger is challenging and time-consuming.
Cause: Difficulty threading loopers can result from improper threading technique or lack of familiarity with the machine’s threading process.
Troubleshooting:
- Carefully review the machine’s threading guides and instructions to ensure you’re following the correct threading path.
- Use a good light source and magnifying tools if necessary to aid in threading the small and intricate loopers.
- Practice threading the loopers multiple times until you become more comfortable with the process.
Problem 24: Limited Material Compatibility
Description: The machine struggles to sew on certain fabrics or materials, resulting in stitching issues.
Cause: Limited material compatibility can be due to the machine’s limitations, incorrect settings, or using inappropriate needles.
Troubleshooting:
- Refer to the machine’s manual to understand its recommended material compatibility and limitations.
- Use appropriate needles for specific fabric types and ensure they’re suitable for the Brother 2340CV.
- Adjust tension, stitch settings, and feed mechanisms to accommodate the specific fabric you’re working with.
Problem 25: Limited Workspace and Lighting
Description: The workspace and lighting provided by the machine are insufficient for your sewing needs.
Cause: Limited workspace and lighting can be due to the machine’s design or placement, making it challenging to work comfortably.
Troubleshooting:
- Consider using additional lighting, such as task lamps, to brighten your workspace and improve visibility.
- Use extension tables or sewing machine platforms to provide more space for larger projects.
- Position the machine in an area with ample natural light or use adjustable lighting solutions to enhance visibility.
Brother 2340CV Sewing Machine User Reviews
Positive Reviews from Brother 2340CV Sewing Machine Users
Based on user feedback, the Brother 2340CV sewing machine has garnered positive responses from users. Some users were satisfied with the following aspects of their experience:
- Effortless and clear threading process, making it easy to set up the machine for stitching.
- Ability to create professional-looking cover stitches, even on stretchy and delicate fabrics.
- Consistent and reliable stitch quality, especially for cover hems and chain stitches.
- Ease of use and compatibility with various types of knits and woven fabrics.
- Positive sewing outcomes on a range of projects, including swimsuits, knit dresses, t-shirts, and more.
These positive reviews suggest that many users have found the Brother 2340CV sewing machine to be a valuable addition to their sewing tools, enabling them to achieve high-quality stitching results on a variety of garments and projects.
Negative User Reviews of the Brother 2340CV Sewing Machine
While the Brother 2340CV sewing machine has received praise, some users have expressed dissatisfaction with certain aspects of its performance. Here are some common issues that users have reported:
- Difficulty with thread release buttons, leading to challenges in removing fabric from the machine after stitching.
- Stitch skipping, broken needles, or bunched threads, which affected the overall sewing experience.
- Problems with the machine’s ability to handle variations in fabric thickness, causing stitch irregularities and frustration.
- Issues with the motor, such as buzzing sounds and inconsistent engagement, resulting in sewing difficulties.
- Some users found that the machine arrived damaged or appeared to have been previously opened and returned.
These negative experiences highlight areas where users encountered challenges with the Brother 2340CV sewing machine, affecting the quality of their sewing projects and overall satisfaction.
The majority of users were satisfied with the Brother 2340CV sewing machine’s performance. Many praised its ease of threading, ability to create professional stitches, and compatibility with various fabrics. However, some users faced challenges related to thread release, stitch quality, and motor issues. Overall, the positive feedback suggests that the machine has enabled users to achieve desirable stitching results and improve their sewing projects.
Brother 2340CV Sewing Machine Manual
The comprehensive operating instructions for the Brother 2340CV sewing machine can be accessed on the manufacturer’s website. The manual provides detailed guidance on machine setup, threading, stitching techniques, maintenance, troubleshooting, and more. It’s recommended to consult the manual for in-depth information on operating your Brother 2340CV sewing machine.
Brother 2340CV Frequently Asked Questions
- Q: Why does threading the Brother 2340CV seem challenging?
A: Threading a serger can be complex due to the multiple threads involved. Refer to the manual for step-by-step instructions, and consider using tweezers for assistance.
- Q: How do I prevent thread breakage during stitching?
A: Ensure proper tension adjustments and use high-quality threads. Check for any obstructions in the threading path and ensure smooth thread flow.
- Q: Why are my stitches skipping or uneven?
A: Stitch skipping can be caused by improper threading, incorrect tension settings, or using dull needles. Re-thread the machine, adjust tensions, and replace needles regularly.
- Q: How can I achieve consistent stitch length and width?
A: Calibrate the machine’s settings according to the fabric type and thickness. Test stitches on scrap fabric to achieve desired results.
- Q: Why does the fabric get stuck or jammed while sewing?
A: Ensure that the fabric is properly aligned and not caught in the presser foot or feed dogs. Avoid abrupt starts and stops to prevent fabric jams.
- Q: How can I sew different fabric types without compromising stitch quality?
A: Experiment with differential feed adjustments to prevent puckering on lightweight fabrics and stretching on heavier fabrics.
- Q: Why is my Brother 2340CV sewing machine making unusual noises?
A: Unusual noises can result from various factors, including incorrect threading, debris in the machine, or a need for oiling. Refer to the manual for maintenance guidelines.
- Q: How can I reduce vibration during operation?
A: Ensure the machine is placed on a stable surface and that all components are properly secured. Vibrations may also be reduced with proper maintenance.
- Q: Why do my needles keep breaking?
A: Needle breakage can result from using the wrong needle size for the fabric, hitting pins, or threading issues. Use appropriate needles and avoid sewing over pins.
- Q: What type of threads work best with the Brother 2340CV?
A: High-quality threads, suitable for the fabric type, are recommended. Using good-quality threads can help prevent thread breakage and improve stitch quality.
Conclusion
For any issues with your Brother 2340CV sewing machine, it’s advisable to refer to the machine’s manual for troubleshooting guidance. If problems persist, you can reach out to customer service or visit an authorized service center for professional assistance. Remember that proper maintenance and adherence to operating instructions will contribute to optimal performance and stitching results.