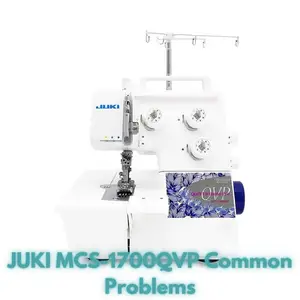
JUKI MCS-1700QVP Common Problems and Troubleshooting
If you own a JUKI MCS-1700QVP sewing machine, you know the joy of creating beautiful stitches effortlessly. However, like any intricate device, it might face certain issues over time. In this guide, we’ll explore common problems that can arise with the JUKI MCS-1700QVP and provide troubleshooting solutions to keep your sewing experience smooth.
JUKI MCS-1700QVP Overview
The JUKI MCS-1700QVP is a high-performance cover stitch machine designed to provide impeccable stitching results. This versatile machine is packed with features that ensure precision and ease of use for both beginners and experienced sewists.
Product Description
The JUKI MCS-1700QVP offers a range of features to enhance your sewing projects:
- Super Easy Looper Threading
- Differential Feed Adjustment
- Adjustable Presser Foot Pressure
- Selectable Stitch Width
- Front Foot Lift
Specification and Features
| Package Dimensions | 16.7 x 15.3 x 13.6 inches |
|---|---|
| Item Weight | 19.26 pounds |
| Manufacturer | Juki |
| ASIN | B07BNQFJ5T |
| Item model number | MCS 17700QVP |
| Customer Reviews | 3.3 out of 5 stars |
Causes of Common Problems with the JUKI MCS-1700QVP
This article will delve into various issues that you might encounter while using the JUKI MCS-1700QVP sewing machine. We’ll address each problem and provide troubleshooting steps to help you resolve them effectively.
Problem: Thread Breakage During Stitching
Cause: Thread breakage can occur due to incorrect threading or tension settings.
Troubleshooting:
- Re-thread both the upper and lower loopers, ensuring they follow the correct threading path as specified in the user manual.
- Check the thread tension settings and adjust them according to the fabric and stitch type you’re using.
- Inspect the needles for any damage or bending. Replace if necessary.
Problem: Uneven Stitches
Cause: Uneven stitches may result from incorrect tension settings or fabric feeding issues.
Troubleshooting:
- Adjust the tension dials for both loopers to achieve balanced stitches.
- Ensure the fabric is feeding evenly through the machine. Make sure the presser foot pressure is appropriately set for the fabric thickness.
- Inspect the differential feed adjustment and set it to the appropriate level for the fabric type.
Problem: Skipped Stitches
Cause: Skipped stitches can occur if the needles are dull or not inserted correctly.
Troubleshooting:
- Replace the needles with new ones that are compatible with the JUKI MCS-1700QVP.
- Ensure the needles are inserted all the way up and tightened securely.
- Check the stitch width settings and adjust if necessary.
Problem: Fabric Jamming in the Machine
Cause: Fabric jamming can occur due to improper threading, incorrect settings, or debris in the machine.
Troubleshooting:
- Turn off the machine and unplug it before attempting to clear any fabric jams.
- Carefully remove the fabric and any loose threads from the machine.
- Check the stitch width and length settings, as well as the differential feed adjustment, to ensure they are appropriate for the fabric.
Problem: Uneven Gathering or Stretching of Fabric
Cause: Uneven gathering or stretching may result from incorrect differential feed settings.
Troubleshooting:
- Adjust the differential feed settings to match the type of fabric you’re working with. Higher settings gather the fabric, while lower settings prevent stretching.
- Test on a scrap piece of fabric before working on your actual project to ensure the desired results.
Problem: Excessive Noise During Operation
Cause: Excessive noise can be caused by loose parts or improper maintenance.
Troubleshooting:
- Check all screws and components to ensure they are properly tightened.
- Oil the machine as specified in the user manual to reduce friction and noise.
Problem: Fabric Not Feeding Smoothly
Cause: Uneven fabric feeding may result from a damaged or improperly adjusted feed dog.
Troubleshooting:
- Inspect the feed dog for any damage or wear. Replace if necessary.
- Adjust the presser foot pressure to ensure proper contact with the fabric.
Problem: Tangled Threads on the Underside of the Fabric
Cause: Tangled threads underneath can be caused by incorrect threading or bobbin issues.
Troubleshooting:
- Re-thread the machine, making sure the thread follows the correct path.
- Check the bobbin tension and adjust it if needed.
Problem: Stitches Skipping or Skipping Stitches
Cause: This issue can occur due to improper needle and thread combination.
Troubleshooting:
- Ensure you are using the correct type and size of needles for the fabric.
- Use high-quality threads that match the needle and fabric type.
Problem: Error Messages on the Display
Cause: Error messages may appear due to various reasons, including incorrect settings or issues with the machine’s sensors.
Troubleshooting:
- Refer to the user manual to interpret the specific error message.
- Check for any obstructions or tangled threads around the sensors or moving parts.
- Reset the machine and recheck your settings.
Problem: Uneven Stitch Length
Cause: Uneven stitch length can result from incorrect settings or mechanical issues.
Troubleshooting:
- Check the stitch length settings and adjust if needed.
- Ensure there are no obstructions or debris in the machine’s feed system.
Problem: Broken Needles
Cause: Broken needles may occur due to using the wrong needle type, sewing over thick seams, or improper needle insertion.
Troubleshooting:
- Use appropriate needles for the fabric you’re working with.
- Be cautious while sewing over thick layers or seams, and use a slow and steady pace.
- Make sure needles are inserted correctly and securely.
Problem: Machine Jamming During Reverse Stitching
Cause: Jamming when using reverse stitches can be caused by thread tension issues or obstructions in the machine’s mechanism.
Troubleshooting:
- Check the thread tension and adjust it to a slightly lower setting for reverse stitching.
- Inspect the machine’s interior for any debris or tangled threads that could be causing the jamming.
Problem: Fabric Puckering
Cause: Fabric puckering can occur due to excessive tension or incorrect pressure on the presser foot.
Troubleshooting:
- Lower the tension settings on both loopers slightly.
- Adjust the presser foot pressure to a lighter setting for delicate fabrics.
Problem: Needle Threader Not Working
Cause: The needle threader may not work properly due to misalignment or damage.
Troubleshooting:
- Check if the needle threader is properly aligned and calibrated.
- Inspect the threader mechanism for any visible damage. Replace if needed.
- Thread the needle manually if the threader continues to malfunction.
Problem: Thread Tension Inconsistencies
Cause: Uneven thread tension can result from incorrect settings, worn-out tension discs, or threading errors.
Troubleshooting:
- Re-thread the machine, ensuring the thread is correctly seated in all tension discs.
- Clean the tension discs from lint or debris that might be affecting the tension control.
- Adjust the thread tension settings for both loopers as needed.
Problem: Frayed or Shredded Thread
Cause: Frayed or shredded thread can be caused by using poor-quality thread, incorrect threading, or damaged needles.
Troubleshooting:
- Use high-quality thread that is suitable for the fabric you’re working with.
- Re-thread the machine following the correct threading path.
- Check the needles for any burrs or damage, and replace if necessary.
Problem: Stitches Skipping When Starting to Sew
Cause: Stitches skipping at the beginning can occur due to the fabric not catching properly or incorrect needle insertion.
Troubleshooting:
- Hold the threads at the back of the machine when you start sewing to prevent the fabric from being pulled down into the feed dogs.
- Ensure the needle is inserted correctly, with the flat side facing the back of the machine.
Problem: Looper Threads Breaking
Cause: Looper threads breaking can result from incorrect threading, tangled threads, or dull needles.
Troubleshooting:
- Check the threading path for both upper and lower loopers, and make sure they’re correctly threaded.
- Clear any tangles or knots in the thread path that could be causing tension issues.
- Inspect the needles for dullness and replace if needed.
Problem: Machine Jamming During Heavy Fabrics
Cause: Jamming when sewing heavy fabrics can be caused by improper pressure settings or using incorrect needles.
Troubleshooting:
- Adjust the presser foot pressure to accommodate the thickness of the fabric.
- Use appropriate needles for heavy fabrics to prevent breakage and jams.
- Sew at a slower pace to ensure the machine can handle the dense material.
Problem: Stitch Irregularities in Free Arm Sewing
Cause: Stitch irregularities on the free arm can be due to improper fabric handling or incorrect settings.
Troubleshooting:
- Support the fabric as it feeds into the free arm to prevent uneven stitching.
- Ensure the differential feed is set appropriately for the fabric type.
- Check that the presser foot pressure is suitable for the fabric thickness.
Problem: Gathering Threads Getting Tangled
Cause: Threads used for gathering can become tangled due to incorrect tension settings or thread paths.
Troubleshooting:
- Adjust the tension settings for both loopers to achieve the desired gathering effect.
- Ensure that the threads are correctly threaded and not overlapping or crossing in the thread path.
Problem: Uneven Feed on Stretch Fabrics
Cause: Uneven feeding on stretch fabrics can result from improper settings or improper handling.
Troubleshooting:
- Set the differential feed to a higher setting when working with stretchy fabrics to prevent uneven feeding.
- Guide the fabric gently as it goes under the presser foot to ensure even feeding.
Problem: Limited Stitch Options
Cause: Limited stitch options may occur due to incorrect settings or a lack of familiarity with the machine’s features.
Troubleshooting:
- Explore the machine’s manual to learn about the full range of stitch options and settings available.
- Experiment with different stitch lengths, widths, and combinations to achieve desired effects.
Problem: Machine Running Roughly
Cause: A rough-running machine can be due to issues with the motor, internal components, or lack of maintenance.
Troubleshooting:
- Turn off the machine, unplug it, and remove the throat plate to check for any debris or tangles in the feed system.
- Oil the machine’s moving parts as per the user manual’s instructions to ensure smooth operation.
- If the problem persists, consider consulting a professional technician for further assessment.
JUKI MCS-1700QVP Sewing Machine User Reviews
Positive Reviews from JUKI MCS-1700QVP Users
- Some users were satisfied with the ease of setup and threading, finding it straightforward and user-friendly.
- Positive feedback highlighted the machine’s strong build quality, with users praising its durability and performance.
- Customers appreciated the machine’s ability to produce high-quality stitches and cover stitch results.
- Several users mentioned that the JUKI MCS-1700QVP exceeded their expectations, delivering excellent value for its price.
- Reviewers also commended the machine’s versatility in handling various fabrics and stitching tasks.
Overall, JUKI MCS-1700QVP users expressed satisfaction with the machine’s performance, build quality, and ease of use.
Negative User Reviews of the JUKI MCS-1700QVP
- Some users reported initial issues with the machine producing a metal-on-metal grinding noise at low RPM, though this improved with use.
- Negative feedback mentioned a steeper learning curve for the cover stitch function compared to other serger models.
- Several users expressed concerns about the machine being sensitive to thread quality and sometimes being picky with certain threads.
- One user received a machine that appeared used, with oil, scratches, and dirty threads, leading to disappointment with the purchase.
- A user from the UK received a machine packed with issues, including drenching in machine oil, scratches, and unsuitable threads.
While the majority of users were satisfied with the JUKI MCS-1700QVP, a few experienced issues related to noise, thread sensitivity, and product condition.
JUKI MCS-1700QVP Sewing Machine Manual
The operating instructions for the JUKI MCS-1700QVP sewing machine can be found on the manufacturer’s official website. You can access the manual there to learn more about the machine’s features, settings, and troubleshooting tips.
JUKI MCS-1700QVP Frequently Asked Questions
Q: How can I prevent thread breakage during stitching on the JUKI MCS-1700QVP?
A: To prevent thread breakage, make sure you have correctly threaded both the upper and lower loopers following the machine’s manual. Check and adjust the tension settings based on the fabric you’re using, and ensure the needles are not bent or damaged.
Q: Why are my stitches uneven on the JUKI MCS-1700QVP?
A: Uneven stitches might result from improper tension settings or fabric feeding. Adjust the tension dials for both loopers to achieve balanced stitches. Make sure the fabric is feeding evenly, and check the presser foot pressure and differential feed adjustment settings.
Q: How can I troubleshoot skipped stitches on the JUKI MCS-1700QVP?
A: Skipped stitches can occur due to dull or incorrectly inserted needles. Replace the needles with new ones, ensure proper insertion, and check the stitch width settings. Also, check if the selected stitch type is appropriate for the fabric.
Conclusion
When encountering issues with your JUKI MCS-1700QVP sewing machine, it’s recommended to consult the manual provided by the manufacturer. If problems persist or if you have specific concerns, reach out to the customer service or visit an authorized service center for assistance. Proper troubleshooting and maintenance can help ensure smooth and satisfactory sewing experiences with your machine.