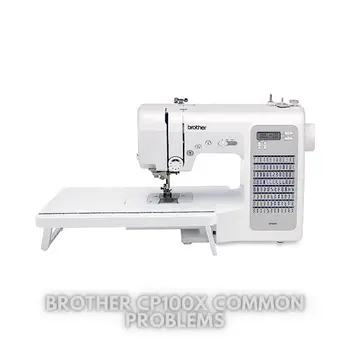
Brother CP100X Common Problems and Troubleshooting
Welcome to the article on Brother CP100X Common Problems and Troubleshooting. In this guide, we will address possible issues you may encounter with the CP100X sewing and quilting machine by Brother. We understand the importance of maintaining the optimal performance of your craft room companion, and we’re here to help you resolve any problems you may face.
Whether you are a seasoned sewing enthusiast or just starting your journey with the CP100X, this guide will provide you with valuable solutions to keep your sewing machine running
smoothly.
Brother CP100X Overview
The CP100X is a feature-rich sewing and quilting machine designed to bring high-quality sewing to your craft room. It offers convenience, durability, and advanced features to enhance your sewing experience. Key features include:
- Sharp LCD display for easy navigation and stitch selection.
- One-step automatic needle threader with easy-to-follow threading diagrams.
- Quick-Set bobbin system for hassle-free bobbin setup.
- Adjustable sewing speed control to suit your sewing needs.
- Large wide table for sewing quilts and garments.
- Protective hard case for safe storage when the machine is not in use.
- Comes with 10 sewing and quilting feet for versatile projects.
- Offers 100 unique built-in stitches, including utility, decorative, and heirloom stitch functions.
- Features 8 styles of auto-size one-step buttonholes.
- Durable metal frame construction for tackling various projects, from thick denim to heavy quilts.
- Fixed needle bar for cleaner stitching and even lines.
Brother CP100X Specifications
| Brand | Brother |
|---|---|
| Color | White |
| Material | Metal |
| Product Dimensions | 11.9″D x 19.9″W x 17.2″H |
| Item Weight | 1 Pound |
| Power Source | Corded Electric |
| Is Electric | Yes |
| ASIN | B0924X8MZ3 |
| Item Model Number | CP100X |
| Customer Reviews | 4.7 out of 5 stars (511 ratings) |
| Best Sellers Rank | #27,822 in Arts, Crafts & Sewing (See Top 100 in Arts, Crafts & Sewing) |
| Number of Pieces | 1 |
Product Details
- Manufacturer: Brother International Corp
- Country of Origin: Vietnam
- Manufacturer’s Model Number: CP100X
- Care Instructions: Hand Wash
- Assembly Required: No
- Batteries Required: No
- Included Components:
- Eyelet Punch
- L Driver
- Screwdriver
- Ball Point Needle
- Quilting Guide
- 3-Piece Needle Set
- 10 Sewing Feet: Zigzag foot, Buttonhole foot, Zipper foot, Button sewing foot, Overcasting foot, Blind
stitch foot, Monogramming foot, 1/4 Piecing foot, Walking foot, Quilting foot - 3 Bobbins
- Operation Manual
- Spool Pin
- Cleaning Brush
- Twin Needle
- Accessory Pouch
- Seam Ripper
Causes of Common Problems with the Brother CP100X
In the following subsections, we will address common problems that you may encounter with the Brother CP100X sewing and quilting machine. We understand that with extended use, certain issues may arise, but fear not, we’ve got you covered! The following sections will provide solutions and troubleshooting tips to ensure smooth sewing experiences with your CP100X.
Common Problems and Troubleshooting for Brother CP100X
1. Bobbin Jamming – Thread Tension Issue
Description of the problem: One common issue you might face with your Brother CP100X sewing machine is the bobbin jamming. This occurs when the thread tension is not properly adjusted, causing the thread to get tangled and jammed in the bobbin area.
Cause of the problem: The bobbin thread tension might be too tight or too loose, leading to imbalanced stitching and bobbin jams.
Troubleshooting step-by-step:
- Turn off the sewing machine and unplug it from the power source for safety.
- Remove the bobbin and check the tension setting. If it’s too tight, loosen it slightly; if it’s too loose, tighten it accordingly.
- Ensure that the bobbin thread is correctly threaded through the tension spring.
- Reinsert the bobbin and run a test stitch on scrap fabric to check for any improvements.
- If the problem persists, refer to your Brother CP100X user manual for further guidance on adjusting the bobbin tension or consider seeking assistance from a certified technician.
2. Skipped Stitches – Dull or Incorrect Needle
Description of the problem: Another issue you might encounter is skipped stitches, where the sewing machine fails to create stitches consistently, resulting in gaps in the fabric.
Cause of the problem: Skipped stitches can be caused by using a dull or incorrect needle for the fabric type you are sewing on.
Troubleshooting step-by-step:
- Turn off the machine and remove the current needle.
- Inspect the needle for any signs of damage or dullness. If the needle is damaged or bent, replace it with a new, appropriate needle for your fabric type.
- Make sure the needle is inserted correctly, with the flat side facing the back of the machine.
- Thread the machine and run a test stitch on scrap fabric to check for any improvement in stitch quality.
- If the issue persists, check if the selected stitch type is suitable for the fabric you are using. Adjust the stitch length or type as needed.
3. Uneven Stitching – Feed Dog Adjustment
Description of the problem: Uneven stitching is a problem where the stitches appear uneven or irregular in length, causing an unprofessional finish.
Cause of the problem: This issue is often caused by incorrect feed dog height or improper fabric feeding.
Troubleshooting step-by-step:
- Turn off the machine and remove the fabric.
- Locate the feed dog adjustment on your Brother CP100X and check its height. It should be aligned with the needle plate surface.
- Adjust the feed dog height using the machine’s manual or control settings. Make sure it’s set correctly for the type of fabric you are sewing on.
- Re-thread the machine and reinsert the fabric, making sure it’s aligned properly.
- Run a test stitch on scrap fabric to see if the stitching is now even. If not, consider cleaning the feed dogs for any debris that might affect their performance or consult a technician for further inspection.
4. Thread Breakage – Incorrect Thread Tension
Description of the problem: Frequent thread breakage can be frustrating and disrupt your sewing flow.
Cause of the problem: Incorrect thread tension, either too tight or too loose, can lead to thread breakage.
Troubleshooting step-by-step:
- Turn off the machine and rethread both the upper thread and the bobbin thread.
- Ensure that the thread is correctly threaded through all the thread guides and the tension discs.
- Check the upper thread tension settings on your Brother CP100X and adjust it to the recommended setting for your fabric.
- Run a test stitch on scrap fabric to see if the thread breakage issue has been resolved.
- If the problem persists, consider using a different thread brand or type that is better suited for your sewing project.
5. Machine Not Powering On – Power Source and Plug
Description of the problem: If your Brother CP100X sewing machine is not turning on, it can be concerning.
Cause of the problem: The most common reason for this issue is a problem with the power source or the machine’s plug.
Troubleshooting step-by-step:
- Check that the power cord is securely plugged into the machine’s power input and a working power outlet.
- Test the power outlet with another device to ensure it’s functioning correctly.
- Inspect the power cord for any visible damage. If there is damage, replace the cord with a compatible one.
- Ensure that the Brother CP100X’s power switch is turned on.
- If the machine still doesn’t power on, try plugging it into a different outlet to rule out any issues with the initial power source.
- If the problem persists, consider seeking assistance from a certified technician to diagnose and resolve the power-related issue.
6. Thread Looping on the Underside – Incorrect Thread Tension
Description of the problem: If you notice thread loops forming on the underside of your fabric, it can affect the overall appearance and strength of your stitches.
Cause of the problem: The most common cause of this issue is incorrect tension settings on the upper thread.
Troubleshooting step-by-step:
- Turn off the machine and rethread the upper thread, ensuring it passes through all the thread guides and tension discs properly.
- Check the tension settings on your Brother CP100X and adjust them to the recommended setting for the fabric you are using.
- Run a test stitch on scrap fabric to see if the thread looping issue has been resolved.
- If the problem persists, consider cleaning the tension discs and the bobbin case area for any lint or debris that may be affecting the thread tension.
- Alternatively, try using a different thread type or brand that is compatible with your sewing project.
7. Noisy Operation – Need for Lubrication
Description of the problem: Unusual or excessive noise during operation can be a sign of lack of lubrication.
Cause of the problem: The moving parts of the sewing machine might require lubrication to reduce friction and noise.
Troubleshooting step-by-step:
- Turn off the machine and unplug it from the power source for safety.
- Consult your Brother CP100X user manual to identify the parts that require lubrication.
- Apply a small amount of sewing machine oil or lubricant to the specified areas as per the manual’s instructions.
- After lubrication, manually move the machine’s handwheel back and forth to distribute the oil evenly.
- Plug the machine back in, turn it on, and run a test stitch to check if the noise has reduced.
8. Needle Breakage – Incorrect Needle Size
Description of the problem: Frequent needle breakage can disrupt your sewing process and may indicate a mismatch between the needle size and the fabric thickness.
Cause of the problem: Using an incorrect needle size for the fabric being sewn can lead to needle breakage.
Troubleshooting step-by-step:
- Turn off the machine and replace the broken needle with a new one.
- Ensure that the needle type and size are appropriate for the fabric you are working with.
- Double-check that the needle is inserted correctly, with the flat side facing the back of the machine.
- If you are sewing through thick or multiple layers of fabric, consider using a stronger or thicker needle designed for heavy-duty sewing.
- Run a test stitch on scrap fabric to see if the needle breakage issue has been resolved.
9. Skipped Buttonholes – Incorrect Buttonhole Setting
Description of the problem: If your machine is not creating complete buttonholes, it can affect the functionality and appearance of your garments.
Cause of the problem: The issue may arise due to incorrect buttonhole settings or an incorrect buttonhole foot.
Troubleshooting step-by-step:
- Turn off the machine and remove the fabric.
- Ensure that the buttonhole foot is correctly attached to the machine and that it matches the button size.
- Consult your Brother CP100X user manual to understand the correct settings for creating buttonholes.
- Adjust the buttonhole settings as per the manual’s instructions and run a test buttonhole on scrap fabric.
- If the issue persists, consider cleaning the buttonhole sensor or seeking assistance from a certified technician to inspect and calibrate the buttonhole function.
10. Uneven Feed – Dirty Feed Dogs or Presser Foot
Description of the problem: Uneven feeding of fabric can lead to stitching inconsistencies and fabric misalignment.
Cause of the problem: The feed dogs or presser foot may be dirty, affecting the smooth feeding of fabric.
Troubleshooting step-by-step:
- Turn off the machine and unplug it from the power source for safety.
- Remove the fabric and presser foot.
- Check the feed dogs and presser foot for any lint, dust, or debris. Clean them thoroughly using a brush or lint roller.
- Reassemble the presser foot and fabric, ensuring proper alignment and positioning.
- Run a test stitch on scrap fabric to check if the feeding is now even and smooth.
- If the problem persists, consider adjusting the presser foot pressure or consult a technician to inspect and service the feed mechanism.
11. Thread Fraying – Incorrect Thread Type
Description of the problem: Thread fraying occurs when the thread starts to unravel, leading to unstable stitches and potential fabric damage.
Cause of the problem: Using the wrong type of thread for your sewing project can cause the thread to fray easily.
Troubleshooting step-by-step:
- Turn off the machine and rethread it with a new, high-quality thread suitable for your fabric type.
- Ensure that the thread is correctly threaded through all the thread guides and tension discs.
- Check that the needle size is appropriate for the thread weight to prevent excessive friction.
- Run a test stitch on scrap fabric to see if the thread is no longer fraying.
- If the problem persists, consider using a thread conditioner or switching to a more suitable thread type for your sewing project.
12. Bobbin Winding Issues – Improper Winding
Description of the problem: If your bobbin is not winding correctly, it can disrupt your sewing process and affect the quality of your stitches.
Cause of the problem: Improper winding of the bobbin can occur due to incorrect setup or threading.
Troubleshooting step-by-step:
- Turn off the machine and unplug it from the power source for safety.
- Remove the bobbin and check for any tangles or loose threads that might hinder the winding process.
- Reinsert the bobbin correctly into the winding mechanism, ensuring it’s secured in place.
- Check the threading path and tension for the bobbin winding process as per your Brother CP100X manual.
- Plug the machine back in and run a test bobbin winding process to see if the issue has been resolved.
- If the problem persists, consider cleaning the bobbin winding area for any debris that might be affecting the winding process or consult a technician for further inspection.
13. Needle Misalignment – Bent Needle or Incorrect Insertion
Description of the problem: If your needle is misaligned, it can lead to uneven stitches and potential damage to the fabric.
Cause of the problem: Needle misalignment can occur due to a bent needle or incorrect insertion.
Troubleshooting step-by-step:
- Turn off the machine and replace the needle with a new one.
- Make sure the needle is inserted correctly, with the flat side facing the back of the machine.
- Run a test stitch on scrap fabric to see if the needle alignment has improved.
- If the issue persists, check the needle plate and throat plate for any burrs or damage that might be affecting the needle’s movement. Smooth out any imperfections if necessary.
- Consider adjusting the needle position as per your machine’s manual or consult a technician for further assistance.
14. Uneven Thread Tension – Mechanical Issue
Description of the problem: Uneven thread tension results in inconsistent stitch quality, with some stitches tighter than others.
Cause of the problem: This issue can be caused by a mechanical problem within the tension system of the sewing machine.
Troubleshooting step-by-step:
- Turn off the machine and rethread both the upper thread and the bobbin thread.
- Check for any visible signs of damage or wear in the tension discs or tension assembly.
- If you are confident in your technical skills, you can attempt to adjust the tension system following the guidelines in your Brother CP100X manual.
- Run a test stitch on scrap fabric to see if the thread tension has evened out.
- If the problem persists or if you are unsure about adjusting the tension yourself, seek assistance from a certified technician to inspect and resolve the mechanical issue.
15. Inconsistent Stitch Length – Feed Dog Issues
Description of the problem: If your sewing machine is producing stitches with varying lengths, it can affect the overall look of your project.
Cause of the problem: Inconsistent stitch length is often caused by feed dog problems or improper fabric feeding.
Troubleshooting step-by-step:
- Turn off the machine and remove the fabric and presser foot.
- Inspect the feed dogs for any debris, lint, or damage. Clean the feed dogs thoroughly.
- Check that the feed dogs are moving smoothly and that they are properly aligned with the presser foot.
- Reassemble the presser foot and fabric, ensuring proper alignment and positioning.
- Run a test stitch on scrap fabric to check if the stitch length is now consistent.
- If the issue persists, consider adjusting the presser foot pressure or consult a technician to inspect and service the feed dog mechanism.
16. Fabric Puckering – Incorrect Stitch Length
Description of the problem: Fabric puckering occurs when the fabric gathers or wrinkles along the stitching line, resulting in an unsightly finish.
Cause of the problem: Using an incorrect stitch length for the fabric type can cause the fabric to be pulled too tightly, leading to puckering.
Troubleshooting step-by-step:
- Turn off the machine and remove the fabric.
- Adjust the stitch length setting on your Brother CP100X to a longer or shorter length, depending on the fabric type and desired result.
- Reinsert the fabric and rethread the machine.
- Run a test stitch on scrap fabric to see if the fabric puckering has improved.
- If the issue persists, consider using a stabilizer or interfacing on the fabric to prevent puckering or experiment with different stitch types to find the best fit for your project.
17. Thread Nesting – Incorrect Upper Thread Tension
Description of the problem: Thread nesting, also known as bird’s nesting, happens when tangled thread builds up on the underside of the fabric.
Cause of the problem: Incorrect tension on the upper thread can lead to excessive thread buildup and nesting.
Troubleshooting step-by-step:
- Turn off the machine and rethread the upper thread, making sure it is correctly guided through all the thread guides and tension discs.
- Check the upper thread tension settings on your Brother CP100X and adjust them to a balanced setting.
- Run a test stitch on scrap fabric to see if the thread nesting issue has been resolved.
- If the problem persists, consider using a thread net or spool cap to prevent the thread from unwinding too quickly and nesting.
- Inspect the needle for any burrs or damage that may be affecting the thread flow. Replace the needle if necessary.
18. Needle Threader Malfunction – Mechanism Alignment
Description of the problem: If the automatic needle threader on your Brother CP100X is not working properly, it can be frustrating to thread the needle manually.
Cause of the problem: The needle threader’s mechanism may be misaligned or out of position.
Troubleshooting step-by-step:
- Turn off the machine and refer to your Brother CP100X manual to understand the correct usage and alignment of the needle threader.
- Ensure that the needle is in the correct position for the needle threader to work effectively.
- If there is any visible misalignment, gently adjust the needle threader’s components to their proper positions.
- Run a test with a spare needle to see if the needle threader is now functioning correctly.
- If the issue persists, consider cleaning the needle threader area for any lint or debris that may be obstructing the mechanism or seek assistance from a certified technician.
19. Erratic Stitching – Feed Dog Irregularities
Description of the problem: Erratic stitching produces inconsistent and unpredictable stitches, affecting the overall quality of your sewing.
Cause of the problem: Feed dog irregularities, such as uneven movement or blockages, can lead to erratic stitching.
Troubleshooting step-by-step:
- Turn off the machine and unplug it from the power source for safety.
- Remove the fabric and presser foot.
- Inspect the feed dogs for any visible damage, wear, or blockages. Clean them thoroughly to remove any debris.
- Manually move the feed dogs back and forth to ensure smooth and even movement.
- Reassemble the presser foot and fabric, ensuring proper alignment.
- Run a test stitch on scrap fabric to see if the erratic stitching issue has been resolved.
- If the problem persists, consider adjusting the presser foot pressure or consult a technician to inspect and service the feed dog mechanism.
20. Stitches Skipping – Needle and Thread Mismatch
Description of the problem: If your sewing machine is skipping stitches, it can disrupt the continuity of your sewing and weaken the seam.
Cause of the problem: Using a needle and thread combination that doesn’t match can cause the needle to struggle to pick up the thread, leading to skipped stitches.
Troubleshooting step-by-step:
- Turn off the machine and replace the current needle with a new one that is suitable for your fabric type and thickness.
- Ensure that the thread weight matches the needle size to promote smooth stitching.
- Re-thread the machine and run a test stitch on scrap fabric to see if the stitches are no longer skipping.
- If the issue persists, check the bobbin for any tangles or debris that might be affecting the thread flow. Clean the bobbin area if necessary.
- Consider adjusting the needle position or tension settings as per your machine’s manual to further improve stitch quality.
21. Thread Puckering – Incorrect Thread Tension
Description of the problem: Thread puckering is when the fabric gathers or wrinkles around the stitches, giving an undesirable appearance.
Cause of the problem: Incorrect thread tension, either too tight or too loose, can cause the fabric to pucker during sewing.
Troubleshooting step-by-step:
- Turn off the machine and rethread both the upper thread and the bobbin thread.
- Check the thread tension settings on your Brother CP100X and adjust them to achieve balanced tension for the fabric you are using.
- Run a test stitch on scrap fabric to see if the thread puckering issue has been resolved.
- If the fabric still puckers, try using a stabilizer or interfacing to support the fabric during sewing.
- Alternatively, consider using a different thread type or brand that is better suited for the fabric and sewing technique you are using.
22. Fabric Slippage – Insufficient Presser Foot Pressure
Description of the problem: Fabric slippage occurs when the fabric moves or shifts during sewing, leading to misaligned stitches.
Cause of the problem: Insufficient presser foot pressure can result in inadequate fabric grip, causing the fabric to slip while sewing.
Troubleshooting step-by-step:
- Turn off the machine and remove the fabric and presser foot.
- Adjust the presser foot pressure on your Brother CP100X to provide adequate grip on the fabric without causing distortion.
- Reassemble the presser foot and fabric, ensuring proper alignment.
- Run a test stitch on scrap fabric to see if the fabric slippage issue has been addressed.
- If the fabric continues to slip, consider using a walking foot or engage the machine’s feed dog drop for better control over the fabric.
23. Inconsistent Thread Tension – Faulty Tension Mechanism
Description of the problem: Inconsistent thread tension leads to variations in stitch quality, causing an uneven appearance.
Cause of the problem: A faulty tension mechanism or damaged tension discs can result in inconsistent thread tension.
Troubleshooting step-by-step:
- Turn off the machine and rethread both the upper thread and the bobbin thread.
- Inspect the tension discs and mechanism for any signs of damage or misalignment.
- If there are visible issues, consider seeking assistance from a certified technician to repair or replace the faulty parts.
- Run a test stitch on scrap fabric to see if the thread tension has evened out.
- If the problem persists, consult your Brother CP100X manual for advanced tension adjustment methods or contact Brother’s customer support for guidance.
24. Bobbin Thread Not Catching – Bobbin Winding or Insertion Error
Description of the problem: If the bobbin thread is not catching the upper thread, the machine will not form stitches correctly.
Cause of the problem: The issue might be due to improper bobbin winding or incorrect bobbin insertion.
Troubleshooting step-by-step:
- Turn off the machine and remove the bobbin.
- Check that the bobbin is correctly wound and inserted into the bobbin case with the thread end extending in the correct direction.
- Reinsert the bobbin into the machine and rethread the upper thread.
- Hold the upper thread end and manually turn the handwheel to lower the needle and raise the bobbin thread.
- Run a test stitch on scrap fabric to check if the bobbin thread is now catching the upper thread.
25. Thread Breakage – Burrs or Snags in the Needle Plate
Description of the problem: Frequent thread breakage can be frustrating and interrupt your sewing workflow.
Cause of the problem: Burrs or snags on the needle plate can catch and damage the thread as it passes through, leading to thread breakage.
Troubleshooting step-by-step:
- Turn off the machine and remove the fabric and presser foot.
- Inspect the needle plate for any visible burrs or snags. If you find any, carefully smooth them out using fine sandpaper or a metal file.
- Check the needle for any burrs or damage and replace it if necessary.
- Reassemble the presser foot and fabric, ensuring proper alignment.
- Run a test stitch on scrap fabric to see if the thread breakage issue has been resolved.
- If the problem persists, consider using a needle with a larger eye to reduce thread friction or consult a technician to inspect and service the needle plate area.
Brother CP100X Sewing Machine User Reviews
In this section, we will explore the feedback and experiences of users who have purchased and used the Brother CP100X sewing machine. The information provided here is gathered from user reviews available on Walmart’s website.
Positive Reviews from Brother CP100X Sewing Machine Users
- Some users were satisfied with the easy setup and convenience of the Brother CP100X. They appreciated the inclusion of a QR code on the machine, providing access to instructional videos for various tasks like threading.
- Customers praised the effectiveness of the automatic needle threader, which consistently worked well for them.
- Many users found the machine to be lightweight, making it easy to carry and transport, unlike heavier sewing machines they had used before.
- The wide variety of pre-programmed stitches (100 in total) and accompanying sewing feet delighted users, providing versatility and options for their sewing projects.
- The user-friendly interface and intuitive stitch selection process received positive feedback from beginners and experienced sewers alike.
Overall, the majority of users expressed satisfaction with the Brother CP100X sewing machine, citing its ease of use, features, and performance as the main reasons for their positive experiences.
Negative User Reviews of the Brother CP100X Sewing Machine
- Some users reported issues with the machine’s tension mechanism, leading to problems such as thread breakage and inconsistent stitching.
- Several customers encountered difficulties adjusting the tension on the machine, resulting in frustration during sewing projects.
- A few users were dissatisfied with the quality of stitches, mentioning that the thread tended to unravel easily or stitches were not secure.
- There were instances of users experiencing fabric slippage while sewing, possibly due to insufficient presser foot pressure.
- Some individuals faced challenges with thread nesting, where tangled thread built up on the underside of the fabric, causing sewing difficulties.
It’s important to note that negative feedback is a part of any product’s customer reviews, and individual experiences may vary. However, the majority of users reported positive experiences with the Brother CP100X sewing machine.
All user review information in this section is sourced from Walmart’s website.
Brother CP100X Common Problems
Janome JN-51 Common Problems
Janome JN508DX Common Problems
Brother CP100X Sewing Machine Manual
You can find the operating instructions and user manual for the Brother CP100X sewing machine on the manufacturer’s website. The manual provides comprehensive guidance on how to set up, use, and troubleshoot the sewing machine. Refer to the official Brother website for the most up-to-date and accurate information.
Brother CP100X Frequently Asked Questions
1. How can I obtain the user manual for the Brother CP100X sewing machine?
You can find the user manual and operating instructions for the Brother CP100X sewing machine on the manufacturer’s official website. The manual provides detailed information on setting up, using, and maintaining the machine.
2. Is the Brother CP100X suitable for beginners?
Yes, the Brother CP100X is designed with user-friendly features, making it suitable for both beginners and experienced sewers. The intuitive interface and instructional resources, such as YouTube videos, make it easier for beginners to get started.
3. Can the Brother CP100X handle heavy fabrics like denim and quilts?
Yes, the Brother CP100X is equipped with a durable metal frame and a powerful feed system, allowing it to handle a variety of fabrics, including denim and quilts. Its adjustable sewing speed control further enhances its versatility.
4. Does the machine have an automatic needle threader?
Yes, the Brother CP100X comes with a one-step automatic needle threader, making the threading process quick and convenient.
5. How many built-in stitches does the Brother CP100X have?
The Brother CP100X offers 100 unique built-in stitches, including utility, decorative, and heirloom stitch functions, as well as 8 auto-size one-step buttonholes, providing ample options for various sewing projects.
Conclusion
Whenever you encounter a problem with your Brother CP100X sewing machine, it is advisable to consult the user manual first. The manual provides detailed instructions on troubleshooting common issues and proper machine operation.
If you need further assistance, don’t hesitate to reach out to Brother’s customer service or visit an authorized service center for professional support and guidance.