Brother CP2160L Common Problems and Troubleshooting
Welcome to the troubleshooting guide for the Brother CP2160L computerized sewing machine. In this article, we will address common problems that users may encounter while using this specific model of the sewing machine.
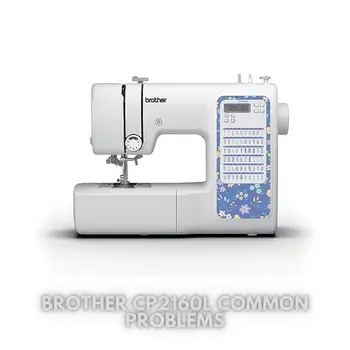
Whether you are a sewing enthusiast or a DIY project lover, the CP2160L offers a compact, durable, and feature-rich solution for all your sewing needs. It comes equipped with 60 built-in stitches, seven auto-size one-step buttonholes, and numerous other convenient features to enhance your sewing experience.
Brother CP2160L Overview
The Brother CP2160L sewing machine is designed to cater to a wide range of sewing projects, from simple tasks to more intricate creations. Below is a table summarizing the product details and features of the CP2160L sewing machine.
| Brand | Brother |
|---|---|
| Color | White |
| Material | Metal |
| Product Dimensions | 16.26″D x 6.7″W x 12.21″H |
| Item Weight | 10.5 Pounds |
| Power Source | Corded Electric |
| Is Electric | Yes |
| ASIN | B0BRQTWXQQ |
| Item model number | CP2160L |
| Customer Reviews | 4.7 out of 5 stars (271 ratings) |
| Best Sellers Rank | #30,952 in Arts, Crafts & Sewing (See Top 100 in Arts, Crafts & Sewing) |
| Number of pieces | 1 |
| Warranty Description | 25 Year Limited |
| Batteries required | No |
| Included Components | Needle set, Eyelet punch, L driver, Screwdriver, Bobbins (3), 7 sewing feet including: Zigzag foot, Buttonhole foot, Zipper foot, Button sewing foot, Overcasting foot, Blind stitch foot, Monogramming foot* (*Monogram foot is used for sewing decorative stitches. This machine cannot monogram), White accessory pouch, Operation manual, 1/2/25 Year Limited Warranty, Spool pin, Cleaning brush, Twin needle, Ball point needle, Seam ripper |
Causes of Common Problems with the Brother CP2160L
In the following subsections, we will explore some of the common problems that users may encounter while using the Brother CP2160L sewing machine. We will also provide troubleshooting tips and solutions to help you resolve these issues efficiently.
Common Problems with the Brother CP2160L
1. Thread Tension Issues
Description of the problem: You notice uneven stitches, looping, or thread breakage during sewing.
Cause of the problem: Incorrect thread tension settings or debris in the tension discs.
Troubleshooting:
- Ensure the machine is threaded correctly according to the user manual.
- Check and adjust the thread tension settings using the tension control dial.
- Clean the tension discs and surrounding area using the provided cleaning brush.
- Test sew on a scrap fabric to check if the tension is now balanced.
2. Jammed Bobbin or Needle
Description of the problem: The needle is hitting the bobbin case or getting jammed frequently.
Cause of the problem: Improperly inserted or wound bobbin, or incorrect needle size.
Troubleshooting:
- Turn off the machine and remove the needle plate to access the bobbin area.
- Check the bobbin for any tangles or uneven winding, and reinsert it correctly.
- Ensure you are using the correct needle size for the fabric you are working with.
- If the problem persists, check for any bent or damaged needle and replace it.
3. Needle Threader Not Working
Description of the problem: The automatic needle threader fails to thread the needle properly.
Cause of the problem: The needle threader is misaligned or not engaged correctly.
Troubleshooting:
- Make sure the needle is in the highest position.
- Engage the automatic needle threader by following the user manual instructions.
- Check if the hook of the needle threader aligns with the eye of the needle.
- If misaligned, gently adjust the needle threader until it lines up properly with the needle.
4. Skipped Stitches
Description of the problem: The machine skips stitches, leaving gaps in the fabric.
Cause of the problem: Dull or bent needle, incorrect threading, or fabric type.
Troubleshooting:
- Replace the needle with a new one, ensuring it is the correct size for the fabric.
- Check the threading of the machine and rethread it following the proper path.
- Use the appropriate type of needle and thread for the specific fabric you are working with.
- Slow down the sewing speed, as sewing too fast can cause skipped stitches.
5. Jammed Feed Dogs
Description of the problem: The feed dogs get stuck or fail to move the fabric properly.
Cause of the problem: Accumulated lint and debris around the feed dogs or mechanical issues.
Troubleshooting:
- Turn off the machine and remove the needle plate to access the feed dog area.
- Carefully clean the feed dogs and the surrounding area using the provided cleaning brush.
- If the feed dogs still don’t move, refer to the user manual for instructions on troubleshooting mechanical issues or seek professional repair.
6. Uneven Stitch Length
Description of the problem: The sewing machine produces stitches of varying lengths, resulting in an inconsistent stitch pattern.
Cause of the problem: Incorrect stitch length setting or a damaged feed dog.
Troubleshooting:
- Check and adjust the stitch length setting to the desired value using the stitch length control dial.
- Inspect the feed dogs for any signs of damage or debris and clean if necessary.
- If the feed dogs are damaged, seek professional repair or contact Brother customer support.
7. Bobbin Thread Keeps Tangling
Description of the problem: The bobbin thread frequently tangles or bunches up under the fabric while sewing.
Cause of the problem: Improper bobbin winding or incorrect bobbin insertion.
Troubleshooting:
- Ensure that the bobbin is wound evenly and correctly following the user manual guidelines.
- Insert the bobbin into the bobbin case in the correct direction and make sure it clicks into place.
- Check for any obstructions in the bobbin area and remove any tangled threads or debris.
- Adjust the bobbin tension if necessary, following the instructions in the user manual.
8. Needle Breakage
Description of the problem: The needle frequently breaks during sewing, disrupting the sewing process.
Cause of the problem: Use of incorrect needle type, sewing through multiple layers of thick fabric, or needle hitting pins or other objects.
Troubleshooting:
- Ensure you are using the correct type and size of needle suitable for the fabric you are sewing.
- When sewing through thick fabric or multiple layers, use a heavier-duty needle to prevent breakage.
- Check for any pins, zippers, or other objects that the needle may hit while sewing and avoid them.
- Make sure the needle is properly inserted and tightened in the needle clamp.
9. LCD Screen Malfunction
Description of the problem: The LCD screen displays distorted or flickering images, or it becomes unresponsive.
Cause of the problem: Loose or damaged connection, software glitch, or electrical issues.
Troubleshooting:
- Check the power connection and make sure the machine is receiving a stable power supply.
- Turn off the machine, wait a few seconds, and then turn it back on to reset the LCD screen.
- If the issue persists, try performing a factory reset according to the user manual instructions.
- If the LCD screen remains unresponsive or shows persistent issues, contact Brother customer support for further assistance.
10. Limited Needle-to-Arm Space
Description of the problem: The needle-to-arm space is not sufficient for handling larger projects comfortably.
Cause of the problem: Design limitation of the sewing machine model.
Troubleshooting:
- When working on larger projects, plan the layout and positioning of the fabric carefully to fit within the available space.
- Roll or fold the fabric as needed to create a compact arrangement for sewing.
- Consider using sewing aids or accessories, such as quilting extension tables, to extend the work area.
- If working on large projects frequently, consider upgrading to a sewing machine with a larger needle-to-arm space.
11. Thread Keeps Breaking
Description of the problem: The thread frequently breaks during sewing, causing frustration and interruptions.
Cause of the problem: Incorrect threading, use of low-quality thread, or burrs on the needle plate or thread path.
Troubleshooting:
- Re-thread the machine following the correct threading path as indicated in the user manual.
- Use high-quality thread suitable for the fabric and project you are working on.
- Check the needle plate and thread path for any burrs or sharp edges; if found, gently smooth them using fine sandpaper.
- Make sure the thread spool is sitting correctly on the spool pin to allow smooth thread flow.
12. Uneven Feed Dogs Movement
Description of the problem: The feed dogs do not move smoothly, causing uneven fabric feeding during sewing.
Cause of the problem: Dust, lint, or debris accumulation around the feed dogs or mechanical issues.
Troubleshooting:
- Turn off the machine and remove the needle plate to access the feed dog area.
- Clean the feed dogs and their surrounding area thoroughly using the provided cleaning brush.
- Apply a drop of sewing machine oil to the feed dog mechanism to lubricate it and improve its movement.
- If the feed dogs still do not move smoothly, refer to the user manual for instructions on troubleshooting mechanical issues or seek professional repair.
13. Bobbin Winding Difficulties
Description of the problem: Winding the bobbin becomes challenging or ineffective.
Cause of the problem: Improper threading of the bobbin winding mechanism or issues with the bobbin winder.
Troubleshooting:
- Ensure the bobbin winder is disengaged when not in use to prevent interference with regular sewing.
- Thread the bobbin correctly following the threading guide on the machine.
- Hold the thread securely while winding the bobbin to maintain even tension.
- If the bobbin winding problem persists, inspect the bobbin winder for any signs of damage or malfunction and seek professional assistance if needed.
14. Loud or Unusual Noises
Description of the problem: The sewing machine emits loud or unusual noises during operation.
Cause of the problem: Loose parts, improper lubrication, or mechanical issues.
Troubleshooting:
- Check all visible screws and components to ensure they are tightly secured.
- Apply sewing machine oil to the specified points in the user manual to lubricate the machine.
- Listen carefully to identify the source of the noise; if unsure, turn off the machine and consult the user manual or a professional technician.
- If the noise persists or worsens, discontinue use and have the machine inspected by a qualified technician to prevent further damage.
15. Stuck or Jammed Reverse Lever
Description of the problem: The reverse lever is difficult to engage or gets stuck in the reverse position.
Cause of the problem: Accumulated debris, improper lubrication, or mechanical issues with the reverse mechanism.
Troubleshooting:
- Turn off the machine and remove any visible debris around the reverse lever using the cleaning brush.
- Apply a small amount of sewing machine oil to the reverse lever and its surrounding area to improve its movement.
- Operate the reverse lever gently and avoid excessive force to prevent further jamming.
- If the reverse lever remains stuck or difficult to use, refer to the user manual for guidance or seek professional repair.
16. Thread Keeps Skipping out of the Needle
Description of the problem: The thread frequently slips out of the needle while sewing.
Cause of the problem: Improper threading, incorrect needle type, or worn-out needle.
Troubleshooting:
- Re-thread the machine carefully, ensuring the thread passes through the needle eye properly.
- Check if you are using the correct needle type and size for the fabric you are working on.
- Replace the needle with a new one if it is worn out or bent.
- Hold the thread taut while starting to sew to prevent it from slipping out of the needle.
17. Sewing Machine Won’t Turn On
Description of the problem: The sewing machine does not power up when the power switch is turned on.
Cause of the problem: Loose power cord, faulty power switch, or electrical issues.
Troubleshooting:
- Check if the power cord is securely plugged into both the sewing machine and the power outlet.
- Ensure the power switch is in the “ON” position and try using a different power outlet to rule out socket issues.
- If the machine still won’t turn on, check the power cord for any visible damage or replace it with a new one.
- If the problem persists, there might be internal electrical issues; contact Brother customer support or a qualified technician for assistance.
18. Uneven Presser Foot Pressure
Description of the problem: The presser foot applies uneven pressure on the fabric during sewing.
Cause of the problem: Incorrect presser foot pressure setting or mechanical issues.
Troubleshooting:
- Adjust the presser foot pressure using the pressure adjustment dial to suit the fabric thickness.
- Make sure the presser foot is clean and free from any debris or thread that might affect its movement.
- Check for any visible damage or misalignment in the presser foot mechanism; seek professional repair if needed.
- If working with lightweight or delicate fabrics, consider using a walking foot or a roller foot attachment to distribute pressure more evenly.
19. Bobbin Thread Not Catching
Description of the problem: The top thread fails to pick up the bobbin thread, resulting in no stitches formed.
Cause of the problem: Improperly inserted bobbin, incorrect threading, or bobbin tension issues.
Troubleshooting:
- Ensure the bobbin is inserted into the bobbin case in the correct direction and the thread is pulled through the tension spring.
- Re-thread the top thread, following the correct threading path indicated in the user manual.
- Check the bobbin tension; if it is too tight or too loose, adjust it using the bobbin case tension screw.
- Test sew on a scrap fabric to check if the bobbin thread is now catching properly.
20. Sewing Machine Running Slowly
Description of the problem: The sewing machine runs at a slower speed than usual.
Cause of the problem: Low tension on the foot controller, power supply issues, or mechanical problems.
Troubleshooting:
- Check the foot controller and make sure it is securely connected to the machine and pressed firmly to achieve higher speeds.
- Verify that the power supply is stable, and there are no fluctuations in the voltage.
- Turn off the machine and check for any obstructions or debris in the machine’s internal parts, such as the drive system.
- If the machine continues to run slowly, discontinue use and seek professional repair to diagnose and fix any mechanical issues.
21. Fabric Not Feeding Properly
Description of the problem: The fabric does not move smoothly through the machine during sewing.
Cause of the problem: Incorrect presser foot pressure, feed dog issues, or uneven fabric layers.
Troubleshooting:
- Adjust the presser foot pressure according to the fabric thickness and type.
- Check the feed dogs for any debris or lint buildup, and clean them thoroughly using the cleaning brush.
- Ensure the fabric is flat and evenly layered under the presser foot to facilitate smooth feeding.
- If the problem persists, consider using a walking foot or a quilting guide to help feed the fabric more evenly.
22. Needle Thread Tension Won’t Change
Description of the problem: The needle thread tension setting does not change even after adjusting the tension dial.
Cause of the problem: Mechanical issues with the tension control mechanism or debris interfering with the tension discs.
Troubleshooting:
- Try turning the tension dial from the lowest to the highest setting and back to see if there is any change.
- Clean the tension discs and the surrounding area to remove any lint or debris that may be affecting the tension adjustment.
- If the tension still won’t change, consult the user manual for any additional tension adjustments or seek professional repair.
- Consider using a different type of thread or needle to see if the tension issue is related to the specific combination of materials.
23. Stuck or Loose Stitch Selector
Description of the problem: The stitch selector knob is difficult to turn or keeps turning loosely.
Cause of the problem: Mechanical issues with the stitch selector mechanism or misalignment of internal parts.
Troubleshooting:
- Turn off the machine and check for any visible obstructions or debris around the stitch selector.
- Try gently applying sewing machine oil to the stitch selector mechanism to improve its movement.
- If the stitch selector remains stuck or loose, do not force it; consult the user manual or seek professional repair.
- Consider using the stitch selector at a slow and steady pace to avoid putting excessive pressure on the mechanism.
24. Inconsistent Thread Tension on Buttonholes
Description of the problem: Buttonholes have uneven thread tension, leading to irregular stitches.
Cause of the problem: Incorrect buttonhole settings, improper threading, or tension issues.
Troubleshooting:
- Review the user manual for proper buttonhole settings and ensure they are adjusted correctly.
- Double-check the threading of the machine, especially the top thread and the bobbin thread for consistent tension.
- Test sew a few buttonholes on a scrap fabric, adjusting the tension as needed until the desired result is achieved.
- Consider using stabilizers or interfacing to support the fabric during buttonhole stitching for more consistent results.
25. Built-In Stitches Not Working
Description of the problem: Some of the built-in stitches do not form correctly or are not selectable.
Cause of the problem: Mechanical issues with the stitch selector or problems with the stitch pattern selection mechanism.
Troubleshooting:
- Check the user manual for any specific instructions on selecting or using the built-in stitches.
- Ensure the stitch selector is correctly aligned and the machine is set to the correct stitch pattern setting.
- If the problem persists, consult the user manual for any troubleshooting steps or contact Brother customer support for assistance.
- Consider testing the machine with different fabric types and thread combinations to see if the issue is related to specific materials.
Brother CP2160L Sewing Machine User Reviews
When considering purchasing a sewing machine, it’s essential to learn from the experiences of other users. Reviews from real customers can provide valuable insights into the strengths and weaknesses of a particular model.
Here, we present a summary of user reviews for the Brother CP2160L sewing machine, sourced from Walmart’s website.
Positive Reviews from Brother CP2160L Sewing Machine Users
- Some users were satisfied with the ease of use and straightforward operation of the Brother CP2160L sewing machine. They appreciated the machine’s user-friendly design, making it ideal for beginners.
- Many users praised the machine’s versatility and range of built-in stitches. The presence of 60 unique stitches, including utility and decorative options, allowed them to explore various sewing techniques and create diverse projects.
- Several users were pleased with the machine’s ability to handle various fabric types. They found it suitable for lightweight fabrics like cotton and also capable of sewing through thicker materials like denim and quilts.
- Users admired the durability of the Brother CP2160L sewing machine. Some mentioned that despite being a more affordable option, it offered reliable performance and lasted longer compared to more expensive models they had used previously.
- Many users appreciated the advanced needle threading system, which made the initial setup hassle-free. This feature eliminated the frustration of threading the needle manually, making sewing more enjoyable.
Overall, the majority of users were satisfied with the Brother CP2160L sewing machine, especially those who were new to sewing or looking for a reliable and versatile option for their projects.
Negative User Reviews of the Brother CP2160L Sewing Machine
- Some users experienced issues with the machine’s stitch quality, reporting uneven stitches and skipped stitches. This inconsistency affected the final appearance of their sewing projects.
- Several users encountered difficulties with the bobbin, including issues with winding and tension. This caused frustration and interruptions during sewing sessions.
- Some users found the machine’s built-in light insufficient for certain sewing tasks, especially when working with dark fabrics or in dimly lit environments.
- A few users noted that the needle-to-arm space was limited, making it challenging to work on larger projects comfortably.
- There were a few reports of the sewing machine making unusual noises during operation. This raised concerns about potential mechanical issues or the need for servicing.
Despite these negative experiences, it’s important to note that negative reviews represent a minority of overall user feedback for the Brother CP2160L sewing machine.
All information about user reviews is sourced from Walmart.
Conclusively, the Brother CP2160L sewing machine has received positive feedback from the majority of users. Its ease of use, wide range of stitches, versatility, and durability make it an attractive option, especially for beginners and hobbyists looking for a reliable sewing companion.
Brother CP2160L Common Problems
Brother PQ1500SL Common Problems
Brother SM2700 Common Problems
Brother CP2160L Sewing Machine Manual
You can find the operating instructions and user manual for the Brother CP2160L sewing machine on the manufacturer’s website. Simply visit the Brother official website and navigate to the support or product page for the CP2160L model.
There, you will be able to download the comprehensive user manual, which provides detailed information on setting up and using the sewing machine, troubleshooting tips, maintenance guidelines, and more.
Brother CP2160L Frequently Asked Questions
1. How do I thread the Brother CP2160L sewing machine?
To thread the Brother CP2160L sewing machine, follow the step-by-step instructions provided in the user manual. Generally, the process involves winding the bobbin, inserting the bobbin into the bobbin case, threading the top thread through the machine’s guides and tension discs, and finally, passing the thread through the needle’s eye.
2. Can I sew through thick fabrics like denim using the Brother CP2160L?
Yes, the Brother CP2160L is equipped with a durable metal frame and an exceptional feed system, making it suitable for sewing through various fabrics, including denim and other thicker materials.
3. What should I do if the thread keeps breaking while sewing?
If the thread keeps breaking, first check if the machine is correctly threaded and if the tension is set appropriately. Ensure you are using high-quality thread suitable for the fabric. Also, inspect the needle and needle plate for any sharp edges or burrs that could be causing the breakage.
4. Why are the stitches skipping or uneven?
Skipped or uneven stitches may result from incorrect threading, improper needle type, or issues with the fabric’s handling. Double-check the threading path, use the correct needle size and type, and ensure the fabric is flat and smooth during sewing.
5. How can I adjust the presser foot pressure on the Brother CP2160L?
Adjusting the presser foot pressure can usually be done using a pressure adjustment dial on the sewing machine. Refer to the user manual for specific instructions on how to set the presser foot pressure according to the fabric’s thickness.
Conclusion
When encountering any issues or problems with your Brother CP2160L sewing machine, always refer to the user manual for detailed troubleshooting guidance.
If you cannot resolve the problem on your own, don’t hesitate to seek assistance from Brother’s customer service or a certified service center. They can provide expert support and ensure that your sewing machine continues to perform at its best.