Brother CP2160R Common Problems and Troubleshooting
Are you experiencing issues with your Brother CP2160R Computerized Sewing Machine? Don’t worry! In this article, we will address common problems that users might encounter with this fantastic sewing machine and provide troubleshooting solutions.
Whether you are a beginner or an experienced sewing enthusiast, the Brother CP2160R offers a range of features in a compact and durable design, making it an excellent choice for all your DIY projects and garment creations.
Brother CP2160R Overview
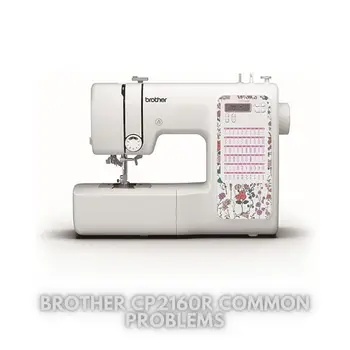
Experience a sewing machine like no other with the Brother CP2160R Computerized Sewing Machine. This versatile machine comes equipped with 60 unique built-in stitches, including utility, decorative, and heirloom stitch functions, along with seven auto-size buttonholes to cater to all your sewing needs.
The CP2160R boasts a durable metal frame construction, allowing it to tackle projects ranging from thick denim to heavy quilts with ease. The ample needle-to-arm workspace provides increased width, making it convenient for working on larger projects without any constraints.
One of the standout features of this sewing machine is the improved auto needle threader. Threading your machine is now a breeze, thanks to the 2-step automatic needle threader that smoothly pushes the thread through the needle, allowing you to focus on your sewing.
Whether you’re a seasoned pro or just starting, the CP2160R offers a variety of sewing techniques, made possible by the seven included sewing feet, including Zigzag foot, Buttonhole foot, Zipper sewing foot, Button sewing foot, Overcasting foot, Blind stitch foot, and Monogramming foot.
Complete with a Quick-Set bobbin and a super bright LED-lit work area, this sewing machine ensures that you have everything you need to unleash your creativity and make the sewing process enjoyable and efficient.
Product Details and Features
| Product | Description |
|---|---|
| Brand | Brother |
| Color | Clear |
| Material | Plastic, Metal |
| Power Source | Corded Electric |
| Is Electric | Yes |
Causes of Common Problems with the Brother CP2160R
In the following subsections, we will explore and address some of the common problems that users may encounter while using the Brother CP2160R sewing machine. From troubleshooting stitching issues to solving problems with the automatic needle threader, we’ve got you covered. Let’s dive into the solutions to enhance your sewing experience!
Common Problems with the Brother CP2160R and Troubleshooting
1. Jammed Needle – Needle Hits the Plate
Description of the problem: Sometimes, while sewing, you may notice that the needle gets jammed and hits the plate instead of smoothly moving up and down.
Cause of the problem: The most common reason for this issue is using the wrong type or size of needle, or the needle may be bent or damaged.
Troubleshooting step-by-step:
- Turn off the sewing machine and unplug it from the power source for safety.
- Check the needle type and size recommended for the fabric you are using. Ensure it is properly inserted and tightened.
- If the needle is damaged or bent, replace it with a new needle that matches the specifications for the CP2160R model.
- Test the machine with a scrap piece of fabric to ensure the needle moves freely without hitting the plate.
2. Uneven or Skipped Stitches
Description of the problem: Your sewing machine may produce uneven stitches, or it might skip stitches altogether while sewing, resulting in an inconsistent and unattractive seam.
Cause of the problem: This issue can occur due to incorrect threading, a worn-out needle, or a misaligned needle position.
Troubleshooting step-by-step:
- Check the threading of the machine, following the Brother CP2160R user manual. Make sure the thread is correctly guided through all the necessary points.
- Replace the needle with a new one, as a worn-out needle can cause stitching problems.
- Verify the needle position; it should be centered and inserted properly.
- Adjust the thread tension if necessary, ensuring it is appropriate for the fabric you are using.
3. Bobbin Winding Difficulties
Description of the problem: You might encounter difficulties when winding the bobbin, which can prevent you from smoothly starting your sewing projects.
Cause of the problem: Bobbin winding issues can arise due to improper bobbin placement or tension, or because the bobbin winder is not engaged correctly.
Troubleshooting step-by-step:
- Check that the bobbin is correctly placed on the bobbin winder spindle and secured.
- Ensure the bobbin winding mechanism is engaged properly; refer to the user manual for guidance.
- Verify the bobbin thread tension; it should be neither too loose nor too tight.
- If the bobbin winding problem persists, clean the bobbin area and remove any debris or thread entanglements that might be obstructing the process.
4. Error Messages on LCD Screen
Description of the problem: The LCD screen on your Brother CP2160R sewing machine might display error messages, preventing you from proceeding with your sewing tasks.
Cause of the problem: Error messages can be triggered by various issues, such as tangled threads, incorrect settings, or an internal sensor problem.
Troubleshooting step-by-step:
- Refer to the user manual to understand the specific error message and its meaning.
- Check the thread path and ensure there are no tangles or snags that could cause the error.
- Verify that you have selected the appropriate settings for your sewing project.
- If the error persists, try turning off the machine, wait a few seconds, and then turn it back on to reset the system.
- If the problem continues, it may indicate an internal issue that requires professional servicing.
5. Bobbin Thread Tension Issues
Description of the problem: You might notice imbalanced tension between the top thread and bobbin thread, resulting in visible loops or puckering on the fabric.
Cause of the problem: Uneven bobbin thread tension can be caused by improper threading, incorrect bobbin placement, or debris in the bobbin case.
Troubleshooting step-by-step:
- Remove the bobbin case and clean it thoroughly, ensuring there is no lint or debris that could affect the thread tension.
- Check that the bobbin is correctly wound and inserted into the bobbin case.
- Re-thread the machine, ensuring the thread is properly guided through all the necessary points, and that the presser foot is raised during threading.
- Adjust the bobbin tension if necessary, following the instructions in the user manual.
6. Thread Breakage during Sewing
Description of the problem: While sewing, you may encounter frequent thread breakage, disrupting the smooth flow of your stitching.
Cause of the problem: Thread breakage can be caused by several factors, such as using low-quality or old thread, incorrect threading, or tension issues.
Troubleshooting step-by-step:
- Check the thread quality and ensure you are using high-quality, suitable thread for your sewing project.
- Re-thread the machine, making sure the thread is correctly guided through all the necessary points and the tension disks.
- Verify the thread tension settings, adjusting them if necessary to achieve balanced tension.
- Clean the tension disks and bobbin area from any lint or debris that might be affecting the thread flow.
7. Noisy Operation
Description of the problem: Your Brother CP2160R sewing machine may produce loud or unusual noises during operation, causing concern.
Cause of the problem: Noisy operation can be a result of loose parts, insufficient lubrication, or an issue with the motor.
Troubleshooting step-by-step:
- Check for any loose screws or parts on the machine and tighten them if needed.
- Apply appropriate lubrication to the moving parts as specified in the user manual.
- If the noise persists, it could indicate an issue with the motor or internal components that may require professional inspection and repair.
8. Skipped or Misaligned Bobbin Winding
Description of the problem: The bobbin winding process may result in skipped winding or an improperly wound bobbin, affecting your sewing performance.
Cause of the problem: Skipped or misaligned bobbin winding can occur due to improper bobbin placement, insufficient tension, or a worn-out bobbin winder.
Troubleshooting step-by-step:
- Ensure the bobbin is securely placed on the bobbin winder spindle and that the bobbin winding mechanism is engaged correctly.
- Check and adjust the thread tension for the bobbin winding process.
- If the bobbin winder is worn-out or malfunctioning, consider replacing it or seek professional assistance.
9. Uneven Feed Dog Movement
Description of the problem: The feed dogs, responsible for advancing the fabric during sewing, may move unevenly or fail to move at all.
Cause of the problem: Uneven feed dog movement can be caused by dirt or debris in the feed dog area, incorrect settings, or mechanical issues.
Troubleshooting step-by-step:
- Turn off the machine and unplug it for safety.
- Clean the feed dog area thoroughly, removing any lint, dust, or stuck fabric.
- Check and adjust the feed dog height and position as per the user manual instructions.
- If the problem persists, there might be a mechanical issue that requires professional inspection and repair.
10. LCD Display Glitches
Description of the problem: The LCD display on your Brother CP2160R sewing machine may experience glitches or become unresponsive at times.
Cause of the problem: LCD display glitches can be caused by electrical issues, software bugs, or physical damage to the screen.
Troubleshooting step-by-step:
- Try turning off the machine and turning it back on to see if the display resumes normal functionality.
- If the problem persists, check for any physical damage to the LCD screen, and if present, consider seeking professional repair.
- Ensure the machine is up-to-date with the latest firmware or software updates to address potential software-related glitches.
- If none of the above steps resolve the issue, there may be an underlying electrical problem that requires expert attention.
11. Thread Tension Issues with Zigzag Stitches
Description of the problem: When using the zigzag stitch, you might encounter thread tension problems, resulting in loose or puckered stitches.
Cause of the problem: Improper threading, incorrect thread tension settings, or issues with the bobbin tension can cause this problem.
Troubleshooting step-by-step:
- Re-thread the machine, making sure the thread is properly guided through all the necessary points, including the tension disks.
- Adjust the thread tension for both the top thread and bobbin, ensuring they are balanced for the zigzag stitch.
- Use high-quality thread suitable for zigzag stitching to prevent thread breakage and tension issues.
- Test the zigzag stitch on scrap fabric and make necessary adjustments until achieving the desired results.
12. Jammed Reverse Stitch Lever
Description of the problem: The reverse stitch lever might get stuck or jammed, making it difficult to engage or disengage the reverse stitching function.
Cause of the problem: Dirt, debris, or lack of lubrication around the reverse stitch mechanism can cause this issue.
Troubleshooting step-by-step:
- Gently clean the reverse stitch lever area, removing any dust or debris that could be hindering its movement.
- If the lever is still jammed, apply lubrication to the moving parts, following the user manual guidelines.
- Work the lever back and forth gently to free it from any obstructions.
- If the problem persists, there might be a mechanical issue that requires professional attention.
13. Automatic Needle Threader Failure
Description of the problem: The automatic needle threader may stop working, making it challenging to thread the needle quickly and efficiently.
Cause of the problem: The needle threader may be misaligned, or there could be issues with the threading mechanism.
Troubleshooting step-by-step:
- Check the needle threader alignment; it should be positioned correctly to thread the needle accurately.
- Inspect the threading mechanism for any tangles or obstructions that might be preventing the threader from working correctly.
- Make sure the needle threader is properly engaged and activated according to the user manual instructions.
- If the automatic threader still fails, try threading the needle manually or consider seeking professional repair.
14. Bobbin Thread Getting Tangled
Description of the problem: The bobbin thread may become tangled or form thread nests on the underside of the fabric during sewing.
Cause of the problem: Incorrect bobbin placement, improper threading, or a lack of tension adjustment can lead to this issue.
Troubleshooting step-by-step:
- Remove the bobbin case and re-insert the bobbin, ensuring it is correctly positioned in the bobbin case.
- Re-thread the machine, making sure the thread is guided through all the necessary points and the tension disks.
- Check the bobbin thread tension and adjust it as needed for smooth sewing.
- Test the machine on scrap fabric to verify that the bobbin thread is feeding properly without tangling.
15. Uneven Stitch Length
Description of the problem: The stitch length on your sewing machine may vary or become irregular, affecting the overall appearance of your sewing projects.
Cause of the problem: Incorrect stitch length settings, mechanical issues, or inconsistent pressure on the foot pedal can lead to this problem.
Troubleshooting step-by-step:
- Verify the stitch length settings on the machine, and adjust them to achieve the desired stitch length.
- Ensure that the foot pedal is pressed consistently and smoothly, maintaining even pressure during sewing.
- If the problem persists, there might be mechanical issues within the machine that require professional examination and repair.
- Test the stitch length on scrap fabric, making adjustments as necessary until obtaining consistent and even stitches.
16. Bobbin Thread Not Catching
Description of the problem: The bobbin thread may fail to catch the top thread, resulting in loose or unsecured stitches.
Cause of the problem: Incorrect bobbin placement, improperly wound bobbin, or lint accumulation in the bobbin area can cause this issue.
Troubleshooting step-by-step:
- Check that the bobbin is inserted correctly in the bobbin case, with the thread unwinding in the correct direction.
- Ensure the bobbin is wound evenly and smoothly, without any snags or tangles in the thread.
- Remove the bobbin case and clean the area from any lint, dust, or thread remnants that may hinder the bobbin thread from catching.
- Re-thread the machine, paying close attention to the bobbin threading process, and verify the tension settings.
17. Needle Breakage
Description of the problem: The needle may break while sewing, interrupting your stitching process.
Cause of the problem: Needle breakage can occur due to using the wrong type or size of the needle, sewing through multiple layers of thick fabric, or hitting pins or other hard objects.
Troubleshooting step-by-step:
- Check that you are using the correct needle type and size recommended for the fabric you are sewing.
- When sewing thick or layered fabrics, slow down the sewing speed and use a heavier-duty needle suitable for the task.
- Ensure there are no pins or other hard objects in the fabric that could cause the needle to break.
- Inspect the needle plate and feed dogs for any damage that might be contributing to needle breakage.
18. Stitches Skipping in Specific Areas
Description of the problem: You might notice that the stitches skip or become inconsistent in certain areas of your sewing projects.
Cause of the problem: Uneven fabric thickness, improper fabric handling, or issues with the feed dogs can cause stitches to skip.
Troubleshooting step-by-step:
- Ensure the fabric is smooth and even under the presser foot, and use appropriate stabilizers if needed.
- Check for any irregularities in the fabric or seams that might be causing the needle to skip stitches.
- Clean the feed dogs and remove any lint or debris that could be obstructing their smooth movement.
- Try sewing slowly and gently guiding the fabric to avoid putting undue pressure on the needle.
19. Uneven or Loose Bobbin Tension
Description of the problem: The bobbin thread tension may be uneven or too loose, resulting in poorly formed stitches on the underside of the fabric.
Cause of the problem: Improper bobbin threading, incorrect tension settings, or issues with the bobbin case can lead to this problem.
Troubleshooting step-by-step:
- Re-thread the bobbin, ensuring the thread is correctly guided through the tension spring in the bobbin case.
- Adjust the bobbin thread tension as needed to achieve balanced tension with the top thread.
- Verify that the bobbin case is properly installed in the machine, with no obstructions or misalignments.
- Test the tension settings on scrap fabric, making adjustments until achieving even and balanced stitches.
20. Error E6: Thread Jam in Bobbin Area
Description of the problem: The sewing machine may display error code E6, indicating a thread jam in the bobbin area.
Cause of the problem: A thread tangle or obstruction in the bobbin area can trigger the E6 error message.
Troubleshooting step-by-step:
- Turn off the machine and unplug it for safety.
- Remove the needle plate and bobbin case to access the bobbin area.
- Carefully remove any tangled threads or debris that may be causing the jam.
- Inspect the bobbin case for any damage or misalignment and reassemble everything correctly.
- Plug the machine back in and turn it on to check if the E6 error message has cleared.
21. Thread Looping on the Bottom Side
Description of the problem: You may notice loops or nests of thread on the bottom side of the fabric after sewing.
Cause of the problem: Incorrect tension settings, improper threading, or lint buildup in the bobbin area can lead to thread looping.
Troubleshooting step-by-step:
- Re-thread the machine, ensuring the thread is properly guided through all the necessary points, including the tension disks and the bobbin case.
- Check the tension settings for both the top thread and bobbin thread, and make adjustments as needed.
- Clean the bobbin area from any lint or debris that might be affecting the thread flow.
- Use high-quality thread suitable for your sewing project to minimize thread looping.
22. Fabric Not Feeding Smoothly
Description of the problem: The fabric may not feed smoothly or may get stuck during sewing, affecting the stitching quality.
Cause of the problem: Issues with the feed dogs, improper presser foot pressure, or uneven fabric handling can cause this problem.
Troubleshooting step-by-step:
- Check that the feed dogs are engaged and moving smoothly as you sew.
- Adjust the presser foot pressure according to the fabric thickness and type to ensure smooth feeding.
- Hold the fabric gently and guide it evenly to prevent it from getting stuck or pulled excessively.
- Clean the feed dog area and remove any lint or debris that might hinder smooth fabric movement.
23. Needle Position Issues
Description of the problem: The needle may not be centered or aligned correctly, resulting in uneven stitches or difficulty in sewing precise lines.
Cause of the problem: Incorrect needle installation, a bent needle, or mechanical issues can lead to needle position problems.
Troubleshooting step-by-step:
- Ensure the needle is inserted correctly, with the flat side facing the back of the machine.
- Replace the needle with a new one if it appears bent or damaged.
- Check the needle position settings on the machine and adjust them to achieve the desired alignment.
- If the needle position issue persists, there might be a mechanical problem that requires professional inspection.
24. Limited Stitch Selection
Description of the problem: You may find that some built-in stitches are unavailable or not functioning as expected.
Cause of the problem: Software glitches, setting restrictions, or mechanical issues can cause limited stitch selection.
Troubleshooting step-by-step:
- Refer to the user manual to verify the available stitches and any setting limitations.
- Check for software updates or firmware upgrades that might address stitch selection issues.
- If specific stitches are still unavailable, there may be a mechanical problem that needs professional attention.
- Perform a reset to the default settings to see if it resolves the limited stitch selection problem.
25. Uneven Thread Tension in Buttonholes
Description of the problem: When creating buttonholes, you may encounter uneven thread tension, resulting in poorly formed buttonholes.
Cause of the problem: Incorrect thread tension settings, improper buttonhole foot installation, or fabric thickness can lead to this issue.
Troubleshooting step-by-step:
- Adjust the thread tension specifically for buttonhole stitching to ensure even and balanced tension.
- Ensure the buttonhole foot is securely attached and aligned correctly for consistent stitching.
- If the fabric is thick or has multiple layers, consider using stabilizers to maintain proper tension during buttonhole sewing.
- Test the buttonhole stitch on scrap fabric, making adjustments until achieving even and neatly finished buttonholes.
Brother CP2160R Sewing Machine User Reviews
Positive Reviews from Brother CP2160R Sewing Machine Users
Based on the user reviews available online, many users have expressed their satisfaction with the Brother CP2160R sewing machine. Some of the positive experiences and features associated with the machine include:
- Easy to Use: Users found the Brother CP2160R sewing machine to be user-friendly, making it accessible to both beginners and experienced sewers.
- Wide Range of Functions: The machine offers numerous built-in stitches and functions, providing versatility for various sewing projects.
- Durable and Stable: Users appreciated the machine’s sturdy construction and stability, allowing for smooth and reliable sewing.
- Clear and Beautiful Stitches: The Brother CP2160R produces high-quality and neat stitches, adding a professional touch to sewing projects.
- Intuitive and Practical: Many users found the machine to be intuitive and practical, making it easy to learn and operate.
Negative User Reviews of the Brother CP2160R Sewing Machine
Although the majority of users were satisfied with the Brother CP2160R sewing machine, there were some negative experiences reported by users. Some of the problems and issues associated with the machine include:
- Thread Tension Problems: Some users encountered difficulties with achieving proper thread tension, leading to uneven stitches or thread breakage.
- Bobbin Winding Issues: Several users experienced problems with the bobbin winding process, resulting in improperly wound bobbins or skipped winding.
- Needle Breakage: Some users faced issues with needle breakage while sewing, possibly due to using the wrong type of needle or sewing through thick fabrics.
- LCD Display Glitches: A few users reported glitches with the LCD display, such as unresponsiveness or irregular display behavior.
- Noisy Operation: Several users mentioned that the machine produced loud or unusual noises during sewing, which could be a concern for some.
All the information about user reviews is sourced from the site Walmart.
Despite some negative feedback, the overall satisfaction with the Brother CP2160R sewing machine appears to be quite positive, with many users praising its user-friendliness, functionality, and reliable performance.
Brother CP2160R Common Problems
Brother CP100X Common Problems
Brother CS7000i Common Problems
Brother CP2160R Sewing Machine Manual
The operating instructions for the Brother CP2160R sewing machine can be found on the manufacturer’s website. Please visit the Brother official website and navigate to the support or downloads section to access the comprehensive user manual for your specific model.
Brother CP2160R Frequently Asked Questions
1. How can I adjust the thread tension on the Brother CP2160R sewing machine?
To adjust the thread tension, locate the tension control dial on the machine. Turn the dial either clockwise or counterclockwise to increase or decrease the tension, respectively. Test the stitches on scrap fabric until you achieve the desired tension for your sewing project.
2. What should I do if the needle keeps breaking while using the Brother CP2160R?
If the needle keeps breaking, first check if you are using the correct needle type and size for your fabric. Also, inspect the needle for any damage and replace it if necessary. Ensure the needle is properly installed and securely tightened. If the issue persists, consult the user manual for troubleshooting tips or seek professional assistance.
3. How do I wind the bobbin on the Brother CP2160R sewing machine?
To wind the bobbin, place the thread spool on the spool pin, and pass the thread through the bobbin winder tension disc. Insert the bobbin onto the bobbin winder shaft and push it to the right. Hold the thread end and start the machine. The bobbin will automatically wind. Once the bobbin is full, cut the thread and remove the bobbin from the winder.
4. What can I do if the stitches are skipping or uneven on the Brother CP2160R?
If the stitches are skipping or uneven, first ensure that the fabric is properly placed and guided under the presser foot. Check for any obstructions or lint in the bobbin area that could affect the machine’s performance. Verify that the feed dogs are engaged and moving smoothly. Adjust the stitch length and tension settings as needed for even stitching.
5. How can I troubleshoot the E6 error message on the Brother CP2160R sewing machine?
The E6 error message indicates a thread jam in the bobbin area. Turn off the machine and unplug it for safety. Remove the needle plate and bobbin case to access the bobbin area. Carefully clear any tangled threads or debris. Reassemble everything correctly and turn the machine back on to check if the error message has cleared.
Conclusion
When encountering any issues with your Brother CP2160R sewing machine, it’s essential to refer to the user manual for guidance. If the problem persists or you need further assistance, do not hesitate to contact Brother’s customer service or visit an authorized service center. They can provide expert support and ensure your sewing machine operates smoothly and efficiently.