Brother CS7000i Common Problems and Troubleshooting
For any sewing enthusiast, having a dependable sewing machine is crucial. If you happen to own a Brother CS7000i sewing machine, you already know how it streamlines your everyday sewing tasks. In this article, we’ll delve into the typical issues that might occur with the Brother CS7000i and offer troubleshooting solutions to get you back to your sewing projects quickly.
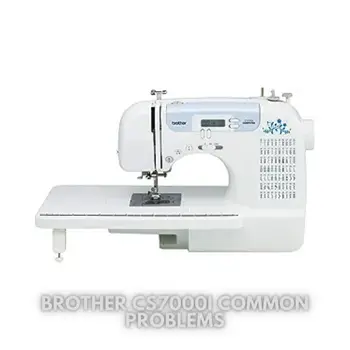
Brother CS7000i Overview
Looking to create your next quilting masterpiece? New to sewing? The CS7000i, feature-rich sewing and quilting machine, is a great option for a range of users.
The CS7000i is designed for ease of use, with convenient features like the bright backlit LCD display, automatic needle threader, easy-to-follow threading diagrams, Quick-set bobbin system, and adjustable sewing speed control.
This machine also features 70 built-in sewing stitches, including decorative stitches, quilting stitches, and seven styles of one-step, auto-size buttonholes. The free arm capability makes it easy to sew cuffs, sleeves, and skinny jeans, and the drop feed mechanism allows for free motion sewing and quilting.
The CS7000i is a great value, including sewing and quilting accessories right in the box.
Product Description: The Brother CS7000i is a versatile sewing and quilting machine with a host of user-friendly features. It comes with 70 unique built-in stitches, including utility, quilting, decorative, and heirloom stitches, as well as 7 auto-size buttonholes.
The machine boasts an automatic needle threader that makes threading a breeze and a jam-resistant drop-in top bobbin for easy bobbin changes.
Product Details
| Brand | Brother |
|---|---|
| Color | White |
| Material | Metal |
| Product Dimensions | 6.69″D x 16.02″W x 12.09″H |
| Item Weight | 17 Pounds |
| Power Source | Corded Electric |
| Is Electric | Yes |
| ASIN | B07T6MYVKG |
| Item model number | CS7000i |
| Customer Reviews | 4.7 out of 5 stars (19,979 ratings) |
| Best Sellers Rank | #27,708 in Arts, Crafts & Sewing (See Top 100 in Arts, Crafts & Sewing) |
| Warranty Description | 25-year limited. Free phone support for the life of the machine. |
| Batteries required | No |
| Included Components | Brother CS7000i Sewing and Quilting Machine, 70 Built-in Stitches, 2.0″ LCD Display, Wide Table, 10 Included Feet |
Product Features
- 70 unique built-in stitches, including utility, quilting, decorative, and heirloom stitches.
- 7 auto-size buttonholes for easy button sewing.
- Automatic needle threader for effortless threading.
- Jam-resistant drop-in top bobbin for easy bobbin changes.
- Backlit LCD display for easy stitch selections.
- Free arm capability for sewing cuffs, sleeves, and skinny jeans.
- Drop feed mechanism for free motion sewing and quilting.
- Included accessories: Protective hard case, wide table, 10 sewing feet, and instruction manual.
- At Your Side Support: Free technical support via online, live chat, or phone for the life of your machine.
Causes of Common Problems with the Brother CS7000i
The following subsections of the article will address possible problems and solutions with the Brother CS7000i sewing and quilting machine.
Common Problems and Troubleshooting with Brother CS7000i
Problem 1: Bobbin Thread Tension Issues
Description: The stitches on the underside of the fabric appear loopy or uneven, indicating a bobbin thread tension problem.
Cause: Incorrect bobbin tension or improper threading of the bobbin thread.
Troubleshooting:
- Remove the bobbin from the machine and rethread it following the correct path as per the user manual.
- Check if the bobbin tension is too tight or too loose. Adjust the tension using the bobbin tension screw, slightly turning it clockwise to tighten or counterclockwise to loosen.
- Test the stitches on a scrap fabric to ensure the tension is balanced and the stitches look even on both sides.
Problem 2: Needle Breakage
Description: The needle keeps breaking during sewing.
Cause: The needle may be bent, damaged, or not suitable for the fabric being used.
Troubleshooting:
- Turn off the machine and carefully remove the broken needle.
- Inspect the needle for any signs of damage, and if found, replace it with a new, compatible needle suitable for the fabric you are sewing.
- Ensure the needle is correctly inserted and tightened into the needle clamp.
- Check that you are using the appropriate needle size and type for the fabric thickness and type.
Problem 3: Uneven Feed Dogs
Description: The fabric is not moving smoothly or evenly through the machine while sewing.
Cause: The feed dogs may be dirty, obstructed, or not functioning correctly.
Troubleshooting:
- Turn off the machine and unplug it for safety.
- Open the bobbin cover and remove the needle plate to access the feed dogs.
- Clean any lint, dust, or debris from the feed dogs and surrounding area using a brush or a small vacuum attachment.
- Manually turn the handwheel towards you to check if the feed dogs are rising and falling as they should. If not, there might be a mechanical issue that requires professional servicing.
Problem 4: Skipped Stitches
Description: While sewing, the machine occasionally skips stitches, resulting in incomplete or uneven seams.
Cause: Skipped stitches can be caused by a dull or damaged needle, incorrect needle size, or improper thread tension.
Troubleshooting:
- Replace the needle with a new, appropriate needle type and size for your fabric.
- Check the needle thread tension; it should neither be too tight nor too loose. Adjust as needed.
- Ensure the thread is correctly threaded through the machine, including the upper thread tension discs and the take-up lever.
- If the problem persists, rethread the machine with a different thread and check if it solves the issue.
Problem 5: Thread Bunching Under the Fabric
Description: Excess thread accumulates in loops under the fabric, resulting in messy stitches.
Cause: This issue is commonly caused by incorrect threading of the upper thread or improper bobbin placement.
Troubleshooting:
- Turn off the machine and remove the fabric and the bobbin case.
- Rethread the upper thread carefully, ensuring it passes through all the thread guides and the tension discs properly.
- Check that the bobbin is loaded correctly in the bobbin case, with the thread unwinding in the correct direction.
- Reinsert the bobbin case into the machine, making sure it is securely in place.
- Test the machine on a scrap fabric to verify if the issue has been resolved.
Problem 6: Thread Tension Discrepancies between Top and Bottom Stitches
Description: The stitches on the top and bottom of the fabric appear uneven, with one side too tight and the other side too loose.
Cause: This issue can occur due to incorrect threading of the upper thread, incorrect bobbin tension, or a combination of both.
Troubleshooting:
- Remove the fabric and turn off the machine for safety.
- Rethread the upper thread, ensuring it passes through all the thread guides and tension discs correctly.
- Check and adjust the bobbin tension as necessary.
- Test the machine on a scrap fabric to ensure both sides of the stitches have balanced tension.
Problem 7: Jammed Bobbin Case
Description: The bobbin case gets stuck or jams during sewing, causing disruptions in the stitching process.
Cause: The bobbin case may have accumulated dirt, lint, or thread tangles, or it might not be correctly inserted.
Troubleshooting:
- Turn off the machine and unplug it to prevent any accidents.
- Remove the needle plate and the bobbin case to inspect for any debris or tangles.
- Clean the bobbin case area thoroughly using a brush or compressed air.
- Reinsert the bobbin case securely and make sure it sits in its designated position.
- Test the machine with a scrap fabric to ensure the bobbin case is working smoothly.
Problem 8: Erratic or Unresponsive Stitch Selection
Description: The machine does not respond to stitch selection or switches to different stitches unintentionally.
Cause: This problem can arise due to a malfunctioning stitch selector or electronic issues.
Troubleshooting:
- Turn off the machine and restart it to see if it resolves the issue.
- Check the stitch selector to ensure it is not stuck or obstructed by any debris.
- If the problem persists, perform a factory reset as per the user manual instructions.
- If the electronic issues continue, it may require professional servicing or replacement.
Problem 9: Noisy Operation
Description: The sewing machine produces excessive noise during operation, causing disruptions and discomfort.
Cause: Noise can result from loose parts, inadequate lubrication, or mechanical issues.
Troubleshooting:
- Turn off the machine and unplug it for safety.
- Inspect the machine for any loose screws, parts, or accessories, and tighten them if necessary.
- Lubricate the moving parts of the machine as per the user manual recommendations.
- Run the machine without fabric to identify the source of the noise. If it persists, seek professional maintenance.
Problem 10: Uneven Feed of Thick Fabrics
Description: The machine struggles to feed thick or multiple layers of fabric evenly, resulting in uneven stitching.
Cause: The feed dogs may not have enough grip on thick fabrics or the presser foot pressure needs adjustment.
Troubleshooting:
- Choose a suitable needle size and type for thick fabrics.
- Use a walking foot or Teflon foot attachment to aid the even feeding of thick fabrics.
- Adjust the presser foot pressure as per the user manual to accommodate the fabric thickness.
- Test the machine on a scrap fabric to ensure smooth feeding of thick fabrics.
Problem 11: Thread Breakage
Description: The thread frequently breaks during sewing, causing interruptions in the stitching process.
Cause: Thread breakage can be caused by a variety of factors, such as a rough needle eye, incorrect threading, or a damaged thread.
Troubleshooting:
- Turn off the machine and remove the broken thread from the needle and the bobbin area.
- Check the needle for any rough edges around the eye; replace it if necessary.
- Rethread the machine carefully, following the correct threading path as per the user manual.
- Use high-quality, compatible thread suitable for your fabric and project.
- Check the upper thread tension and adjust it to a balanced setting.
Problem 12: Skipped Buttonholes
Description: The machine skips stitches while creating buttonholes, resulting in incomplete buttonholes.
Cause: Skipped buttonholes can occur due to incorrect machine settings, improper positioning, or a dull needle.
Troubleshooting:
- Check that you are using the correct buttonhole foot and attaching it securely to the machine.
- Ensure the fabric is properly positioned under the foot, and the buttonhole markings align with the needle’s starting point.
- Try using a new, sharp needle suitable for buttonhole stitching.
- Experiment with different buttonhole settings on the machine to find the most suitable option for your fabric and buttons.
Problem 13: Uneven Thread Tension with Decorative Stitches
Description: When using decorative stitches, the thread tension appears uneven, causing unsightly results.
Cause: Decorative stitches often require different thread tension settings, and improper adjustment can lead to uneven stitches.
Troubleshooting:
- Refer to the user manual for recommended thread tension settings for various decorative stitches.
- Test decorative stitches on a scrap fabric with the same type of thread and fabric as your project.
- Adjust the thread tension for decorative stitches until you achieve balanced and even results.
- Consider using a stabilizer or interfacing to improve stitch quality on delicate or stretchy fabrics.
Problem 14: Jammed or Sluggish Foot Pedal
Description: The foot pedal becomes unresponsive, sticky, or difficult to control during sewing.
Cause: The foot pedal may have accumulated dirt, debris, or malfunctioned internally.
Troubleshooting:
- Disconnect the foot pedal from the machine and clean the surface to remove any dirt or dust.
- Inspect the pedal for any visible damage or loose connections.
- Reconnect the foot pedal securely to the machine and ensure it is placed on a stable surface during use.
- If the foot pedal remains unresponsive or sticky, consider replacing it with a compatible one.
Problem 15: Inconsistent Stitch Length
Description: The stitch length varies while sewing, resulting in irregular stitches.
Cause: Inconsistent stitch length can be caused by inconsistent pressure on the foot pedal or mechanical issues.
Troubleshooting:
- Practice controlling the foot pedal to maintain a steady and consistent speed while sewing.
- Use the machine’s speed control feature, if available, to regulate the sewing speed more precisely.
- If the problem persists, have the machine checked for any mechanical issues by a qualified technician.
- Adjust the stitch length setting on the machine to ensure it is set to your desired stitch length.
Problem 16: Fabric Jamming in the Bobbin Area
Description: The fabric gets stuck or jams in the bobbin area while sewing.
Cause: Fabric jamming can occur due to improper threading, insufficient presser foot pressure, or a damaged needle plate.
Troubleshooting:
- Turn off the machine and unplug it to avoid any accidents.
- Remove the fabric and check for any tangled threads or debris in the bobbin area.
- Re-thread the machine correctly, following the threading path as per the user manual.
- Adjust the presser foot pressure according to the fabric thickness and type.
- If fabric jamming persists, inspect the needle plate for any burrs or damage and replace if needed.
Problem 17: Fabric Puckering
Description: The fabric bunches or puckers while sewing, leading to an uneven or distorted appearance.
Cause: Fabric puckering can be caused by incorrect tension settings, using the wrong needle type, or insufficient stabilizer.
Troubleshooting:
- Ensure the machine is threaded correctly and that both the upper and bobbin thread tensions are balanced.
- Use a needle appropriate for your fabric type and weight, avoiding needles that are too thin or too thick.
- Add a stabilizer or interfacing to the fabric before sewing to prevent puckering, especially with lightweight or stretchy materials.
- Test different stitch lengths and tensions on a scrap fabric until you achieve the desired result.
Problem 18: Thread Keeps Tangling in the Bobbin
Description: The thread repeatedly gets tangled or knots in the bobbin area during sewing.
Cause: Thread tangling can result from incorrect bobbin winding, improper threading, or bobbin tension issues.
Troubleshooting:
- Unthread the machine and remove the bobbin from the bobbin case.
- Rewind the bobbin, ensuring it is wound evenly and tightly, following the correct winding path.
- Rethread the machine, double-checking that the upper thread passes through all the necessary guides and tension discs.
- Check and adjust the bobbin tension if it is too tight or too loose.
- Test the machine on a scrap fabric to see if the thread tangling issue has been resolved.
Problem 19: Uneven or Skipping Stitches with Thick Thread
Description: The machine struggles to sew evenly with thicker threads, resulting in uneven or skipped stitches.
Cause: The sewing machine’s needle may not be suitable for thicker threads or needs adjustment for thicker materials.
Troubleshooting:
- Use a needle size appropriate for the thickness of the thread you are using.
- Choose a needle specifically designed for heavy or specialty threads, such as topstitching needles.
- Ensure the thread path is clear and properly threaded through the machine, including the needle’s eye.
- Slow down the sewing speed to allow the machine to handle thicker threads more effectively.
Problem 20: Loose Stitches
Description: The stitches appear loose, with gaps between them, resulting in weak seams.
Cause: Loose stitches can be caused by low thread tension, incorrect threading, or using the wrong thread weight for the fabric.
Troubleshooting:
- Check and adjust the upper thread tension to a slightly higher setting.
- Rethread the machine carefully, making sure the thread passes through all the necessary guides and tension discs.
- Use a thread weight appropriate for your fabric type and thickness.
- Test the machine on a scrap fabric to ensure the stitches are adequately tight and secure.
Problem 21: Needle Threader Malfunction
Description: The automatic needle threader fails to work correctly, making it difficult to thread the needle.
Cause: The needle threader may be misaligned, or the mechanism might be damaged or dirty.
Troubleshooting:
- Ensure the machine is turned off and unplug it for safety.
- Clean the needle threader mechanism carefully using a soft brush or compressed air to remove any dirt or debris.
- Check the alignment of the needle threader; it should be close enough to pass through the needle eye but not touching it.
- If the threader remains malfunctioning, consult the user manual for instructions on adjusting or replacing it.
Problem 22: Stitches Skewing to One Side
Description: The stitches appear uneven, with the stitch lines slanting to one side.
Cause: Uneven stitch skewing can be caused by incorrect threading, an imbalanced needle thread tension, or fabric misalignment.
Troubleshooting:
- Rethread the machine carefully, ensuring the thread passes through all the necessary guides and tension discs correctly.
- Check and adjust the upper thread tension to ensure it is balanced on both sides of the fabric.
- Ensure the fabric is aligned straight under the presser foot during sewing.
- Test the machine with a scrap fabric to achieve even and straight stitches.
Problem 23: Bobbin Winder Not Functioning
Description: The bobbin winder fails to wind the bobbin, or the winding process is irregular.
Cause: The bobbin winder spindle may be loose or damaged, or there could be an issue with the bobbin winder mechanism.
Troubleshooting:
- Turn off the machine and unplug it before attempting any troubleshooting.
- Inspect the bobbin winder spindle for any visible damage or looseness; tighten it if necessary.
- Check that the bobbin is correctly placed on the winder spindle and that the winding mechanism engages properly.
- If the problem persists, consult the user manual for guidance on adjusting or repairing the bobbin winder.
Problem 24: Thread Jamming in the Take-Up Lever
Description: The thread gets stuck or tangled in the take-up lever during sewing.
Cause: Thread jamming in the take-up lever can occur due to improper threading or using low-quality thread.
Troubleshooting:
- Turn off the machine and unplug it to avoid any accidents.
- Check that the upper thread is threaded correctly through the take-up lever, following the threading path in the user manual.
- Use high-quality thread suitable for your sewing project to reduce the chances of thread jamming.
- Clean the take-up lever area to remove any accumulated lint or debris that may be causing the jamming.
Problem 25: Needle Strikes the Presser Foot
Description: The needle hits the presser foot during sewing, resulting in needle breakage or damage to the foot.
Cause: This issue can occur if the needle is not correctly inserted or if the presser foot height is not adjusted properly.
Troubleshooting:
- Turn off the machine and unplug it for safety.
- Ensure the needle is inserted correctly with the flat side facing the back of the machine.
- Check the presser foot height; it should be adjusted according to the fabric thickness and the type of stitch you are using.
- Use the appropriate presser foot for your sewing project and make sure it is attached securely.
Brother CS7000i Sewing Machine User Reviews
Here, we’ll provide an overview of user reviews for the Brother CS7000i sewing machine. All information about user reviews is taken from the site Walmart.com.
Positive Reviews from Brother CS7000i Sewing Machine Users
Some users were satisfied with the following parameters associated with positive experiences:
- Easy-to-Use: Many users found the Brother CS7000i sewing machine user-friendly, making it an excellent choice for beginners.
- Reliable for Business: Some users who run small businesses praised the machine’s reliability and its ability to handle a high volume of sewing without significant issues.
- Great Value: Several users considered the machine a great value for its features, including its wide range of built-in stitches and included accessories.
- Compact and Space-Saving: Users appreciated the machine’s compact design, as it didn’t take up too much space in their sewing areas.
- Efficient Stitching: Many users commended the machine’s smooth stitching performance and its capability to sew through multiple layers of fabric with ease.
Based on positive reviews, the Brother CS7000i sewing machine garnered praise for its ease of use, reliability, versatility, and space-saving design.
Negative User Reviews of the Brother CS7000i Sewing Machine
Some users were not satisfied with the following problems associated with negative experiences:
- Needle Breakage and Jams: A few users reported experiencing issues with the machine jamming and breaking needles, even when sewing on lightweight fabrics like quilter’s cotton.
- Tension and Stitching Problems: Some users encountered tension issues, resulting in loose loops and inconsistent stitches, especially when sewing through thicker layers of fabric.
- Bobbin Winder and Thread Tangling: Several users mentioned problems with the bobbin winder, such as thread tangling, and difficulties winding bobbins evenly.
- Needle Threader Malfunction: A few users reported issues with the automatic needle threader not working correctly, making it challenging to thread the needle.
- Reverse Sewing Issue: One user experienced an issue where the machine started sewing in reverse mode and was unable to resolve the problem by restarting the machine.
Despite receiving positive feedback, the Brother CS7000i sewing machine also faced negative feedback concerning needle breakage, bobbin winder issues, and tension problems.
Overall, the majority of users expressed satisfaction with the Brother CS7000i sewing machine, giving it a rating of 5.0 out of 5 stars on Walmart.com.
Brother CS7000i Common Problems
Brother ST4031HD Serger Common Problems
Brother SE1900 Common Problems
Brother CS7000i Sewing Machine Manual
The operating instructions and user manual for the Brother CS7000i sewing machine can be found on the manufacturer’s website. For comprehensive guidance on setting up, operating, and maintaining your sewing machine, it is recommended to refer to the official manual provided by Brother.
The manual contains valuable information on troubleshooting common issues and making the most of the machine’s features.
Brother CS7000i Frequently Asked Questions
Q: How do I thread the Brother CS7000i sewing machine?
A: Threading the Brother CS7000i sewing machine is a straightforward process. You can follow the step-by-step instructions outlined in the user manual provided by the manufacturer. Pay attention to the threading diagrams and ensure that the thread passes through all the necessary guides and tension discs correctly.
Q: What should I do if the machine keeps jamming while sewing?
A: Frequent machine jams can be caused by various factors, such as improper threading, using low-quality thread, or needle issues. Refer to the troubleshooting section in the user manual to identify the potential cause and follow the recommended steps to resolve the jamming problem. It is essential to use the correct needle type and high-quality thread suitable for your fabric.
Q: How can I adjust the thread tension on the Brother CS7000i?
A: The Brother CS7000i sewing machine allows you to adjust the thread tension to achieve the desired stitch quality. Refer to the user manual for instructions on adjusting the thread tension properly. Typically, there is a tension dial that you can turn to increase or decrease the tension. Test the tension adjustments on a scrap fabric to achieve balanced and even stitches.
Q: Can I sew through thick fabrics with the Brother CS7000i?
A: Yes, the Brother CS7000i sewing machine is designed to handle a wide range of fabric thicknesses. However, when sewing through thick materials, it is crucial to use the appropriate needle size and adjust the presser foot pressure accordingly. Test the stitch quality on a scrap fabric before sewing your actual project to ensure the machine can handle the thickness effectively.
Q: How often should I clean and maintain the Brother CS7000i sewing machine?
A: Regular cleaning and maintenance are essential to keep your sewing machine in good working condition. Follow the maintenance guidelines provided in the user manual to clean the machine, change needles, and oil moving parts as required. It is recommended to perform routine maintenance after extended use or when you notice any changes in the machine’s performance.
Conclusion
Whenever you encounter a problem with your Brother CS7000i sewing machine, it’s essential to consult the user manual, reach out to customer service, or visit an authorized service center for assistance.
The manual contains valuable troubleshooting information, and customer service representatives or service technicians can provide expert guidance to resolve issues effectively.
Proper care and maintenance, along with following the guidelines in the user manual, will ensure the longevity and optimal performance of your Brother CS7000i sewing machine.