Brother CS7000X Common Problems and Troubleshooting
Are you facing issues with your Brother CS7000X sewing and quilting machine? Don’t worry; we’ve got you covered! In this article, we’ll address common problems that users may encounter while using the Brother CS7000X.
Whether you’re a beginner or an experienced sewer, this machine offers a wide range of features to enhance your sewing projects. However, like any other appliance, it might face some hiccups along the way. We’ll provide troubleshooting tips and solutions to help you get back to your sewing with ease.
Let’s dive in and resolve those pesky issues together!
Brother CS7000X Overview
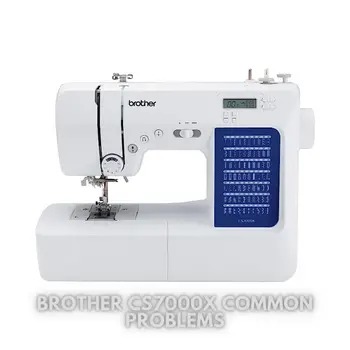
The CS7000X sewing and quilting machine is a great option for beginners and experienced sewers alike with a plethora of convenient features. An LCD display, improved automatic needle threader, large needle-to-arm workspace, a smaller free arm for sewing tight projects, and a fixed needle bar for stability, highlight some of the machine’s easy-to-use components.
With 70 built-in sewing stitches, including decorative stitches, quilting stitches, and seven styles of one-step, auto-size buttonholes, the possibilities are endless.
The CS7000X is a great value, including sewing and quilting accessories right in the box, such as 10 presser feet plus a quilt guide. Also included is the detachable wide table that is perfect for larger quilting projects and a hard-protective case for comfortable portability and class use.
| Product Details | Features |
|---|---|
| Brand | Brother |
| Color | White |
| Material | Metal |
| Product Dimensions | 6.65″D x 16.26″W x 12.21″H |
| Item Weight | 14 Pounds |
| Power Source | Corded Electric |
| Is Electric | Yes |
| Item Model Number | CS7000X |
| ASIN | B08BH5GTNC |
| Customer Reviews | 4.7 out of 5 stars 2,417 ratings |
| Best Sellers Rank | #1,954 in Arts, Crafts & Sewing (See Top 100 in Arts, Crafts & Sewing) |
| #12 in Sewing Machines | |
| Manufacturer | Brother International Corp |
| Country of Origin | Vietnam |
Causes of Common Problems with the Brother CS7000X
In the following subsections, we’ll explore some possible problems that users might encounter with the Brother CS7000X sewing and quilting machine and provide troubleshooting solutions to resolve them. Let’s identify the issues and get your sewing machine back to working flawlessly!
Common Problems and Troubleshooting for Brother CS7000X
1. Thread Tension Issues – Uneven Stitches
Description: One of the common problems with the Brother CS7000X is experiencing uneven stitches, where the upper and lower threads don’t interlock properly, leading to an inconsistent stitch appearance.
Cause: Incorrect thread tension settings can cause this issue. If the tension is too tight or too loose, it can result in uneven stitching.
Troubleshooting:
- Check the thread tension settings in your machine’s manual and ensure they are correctly adjusted for the fabric you’re using.
- Re-thread the upper thread, making sure it passes through all the necessary thread guides and the tension disc properly.
- Check the bobbin for any thread tangles or debris and re-insert it correctly into the bobbin case.
- Test the machine with a scrap fabric to ensure the tension is now balanced and producing even stitches.
2. Jammed Bobbin and Thread Breakage
Description: The Brother CS7000X may encounter issues with jammed bobbins or frequent thread breakage, causing frustration and interrupting your sewing flow.
Cause: Incorrect bobbin installation, debris in the bobbin area, or using poor-quality thread can lead to bobbin jams and thread breakage.
Troubleshooting:
- Remove the bobbin and clean the bobbin case area, removing any lint or tangled thread.
- Ensure the bobbin is wound correctly and inserted into the bobbin case with the thread unwinding in the correct direction.
- Use good-quality thread suitable for your fabric to reduce thread breakage.
- Check the needle for any burrs or damage and replace it if necessary, as a damaged needle can cause thread breakage.
3. Skipped Stitches
Description: Skipped stitches are when the machine fails to create stitches in certain areas of the fabric, leaving gaps in the sewing lines.
Cause: This issue can occur due to a bent or dull needle, improper needle size for the fabric, or incorrect machine settings.
Troubleshooting:
- Replace the needle with a new one, ensuring it is the correct size and type for the fabric you’re using.
- Check the needle position and insert it correctly into the needle holder, making sure it is not loose.
- Adjust the stitch length and speed settings on the machine to see if it resolves the skipped stitches.
- If the problem persists, consult the machine’s manual for any additional troubleshooting steps or consider seeking professional assistance.
4. Bobbin Winding Difficulties
Description: Some users might encounter difficulties while winding the bobbin, where the thread does not wind evenly or keeps slipping off the bobbin spool.
Cause: Incorrect bobbin threading or issues with the bobbin winder mechanism can cause problems with bobbin winding.
Troubleshooting:
- Ensure the bobbin is properly placed on the bobbin winder spindle and that the bobbin winding lever is engaged.
- Check the bobbin winding thread path and confirm that the thread is correctly threaded through the bobbin winder tension disk.
- Hold the thread with slight tension while winding the bobbin to ensure even winding.
- If the issue persists, check for any obstructions in the bobbin winding area and clean it if necessary.
5. Sewing Machine Not Powering On
Description: Some users may face difficulties in powering on the Brother CS7000X, where the machine does not respond to the power button.
Cause: This issue can occur due to a loose power cord connection, a faulty power switch, or an electrical problem.
Troubleshooting:
- Check the power cord connection to the machine and ensure it is securely plugged into a working power outlet.
- Inspect the power switch for any visible damage or debris and try toggling it a few times to see if it responds.
- Verify that the power outlet itself is functional by testing with another electrical device.
- If the machine still does not power on, contact Brother customer support or a qualified technician for further diagnosis and repair.
6. Thread Jam in the Bobbin Case
Description: Users may encounter thread jamming in the bobbin case, causing the machine to seize or produce irregular stitches.
Cause: This issue can be due to improper bobbin insertion, incorrect threading, or debris accumulation in the bobbin area.
Troubleshooting:
- Turn off the machine and remove the needle plate to access the bobbin case.
- Carefully remove any tangled thread or lint from the bobbin case and surrounding area.
- Re-insert the bobbin correctly into the bobbin case and ensure it rotates freely.
- Double-check the upper threading, ensuring it follows the correct path without any loops or tangles.
- Replace the needle plate and test the machine with scrap fabric to ensure smooth operation.
7. Irregular Feed Dog Movement
Description: The feed dogs, which move the fabric during stitching, may not work properly, causing uneven fabric feeding and stitching issues.
Cause: This problem can occur due to debris accumulation, a damaged feed dog mechanism, or incorrect stitch settings.
Troubleshooting:
- Clean the area around the feed dogs, removing any lint, dust, or fabric pieces that may obstruct their movement.
- Manually move the feed dogs up and down to check for any obstructions or irregularities.
- If the feed dogs are damaged or worn out, consider contacting a Brother service center for repair or replacement.
- Ensure the stitch length setting is appropriate for the fabric you’re using; a shorter stitch length can improve fabric feeding.
- Try using a sewing machine foot specifically designed for better fabric control, like a walking foot, to aid in smooth fabric feeding.
8. Uneven Fabric Tension
Description: While sewing, users may notice that the fabric appears stretched or puckered, indicating uneven tension issues.
Cause: Uneven fabric tension can result from incorrect threading, mismatched thread and fabric, or improper presser foot pressure.
Troubleshooting:
- Check the upper threading and re-thread the machine, ensuring the thread passes through all the thread guides correctly.
- Use high-quality thread suitable for the fabric you’re working with to minimize tension problems.
- Experiment with different needle sizes and types to find the best match for your fabric.
- Adjust the presser foot pressure as needed, reducing it for delicate fabrics and increasing it for thicker materials.
- Test the machine with a scrap fabric to ensure the tension is now balanced, resulting in even stitches and fabric appearance.
9. Bobbin Thread Showing on the Top
Description: The bobbin thread may appear on the top side of the fabric, spoiling the appearance of the stitch.
Cause: Incorrect upper threading, incorrect bobbin insertion, or mismatched thread and fabric can cause this issue.
Troubleshooting:
- Re-thread the upper thread, following the correct path and ensuring it passes through all the necessary thread guides.
- Check the bobbin for any tangles or loose threads and re-insert it correctly into the bobbin case.
- Use matching thread in the bobbin and the top thread to reduce the visibility of the bobbin thread on the fabric.
- Verify that the needle is inserted correctly and not damaged, as a bent needle can push the bobbin thread to the top.
- Adjust the upper thread tension slightly if needed to achieve a balanced stitch appearance.
10. Noisy Operation
Description: Users may notice an increase in noise during machine operation, which can be distracting and indicate potential issues.
Cause: Noise can be caused by various factors, such as a loose part, lack of lubrication, or a worn-out component.
Troubleshooting:
- Turn off the machine and check for any loose screws or parts; tighten them if necessary.
- Lubricate the moving parts of the machine according to the manufacturer’s recommendations to reduce friction noise.
- If the machine continues to produce excessive noise, consider seeking professional servicing to diagnose and resolve the issue.
- Regularly clean and maintain your Brother CS7000X sewing machine to prevent excessive noise caused by dirt and debris buildup.
- Always follow the maintenance instructions provided in the machine’s manual for optimal performance and longevity.
11. Needle Breakage
Description: The needle may break while sewing, causing frustration and potentially damaging the fabric.
Cause: Needle breakage can occur due to using the wrong needle size, sewing through thick layers without proper support, or a bent needle.
Troubleshooting:
- Ensure you are using the correct needle size and type for the fabric you’re working with.
- Provide additional support, such as using a stabilizer or walking foot, when sewing through multiple layers of thick fabric.
- Check the needle for any visible damage or bending, and replace it immediately if necessary.
- Slow down the sewing speed, especially when working on dense or thick materials, to reduce the risk of needle breakage.
- Inspect the needle plate for any burrs or sharp edges that could cause the needle to break, and file or replace it if needed.
12. Bobbin Thread Tangles
Description: The bobbin thread may tangle or loop underneath the fabric, causing irregular stitches and potential damage to the sewing machine.
Cause: Incorrect bobbin threading, improper bobbin tension, or using low-quality thread can lead to bobbin thread tangles.
Troubleshooting:
- Remove the bobbin and check for any tangles or knots in the bobbin thread.
- Ensure the bobbin is correctly threaded and placed in the bobbin case, following the machine’s manual instructions.
- Adjust the bobbin tension if necessary; a slight turn of the tension screw can make a difference.
- Use good-quality thread and avoid using old or low-quality thread that can cause tangles and breakage.
- Re-thread the machine, both upper and lower threads, and test the machine on scrap fabric to check for smooth operation.
13. Inconsistent Stitch Length
Description: The stitch length may vary even when set to a specific value, resulting in an inconsistent appearance of the sewing project.
Cause: Inconsistent stitch length can be caused by improper machine settings, a malfunctioning stitch length control, or a worn-out feed dog.
Troubleshooting:
- Check the stitch length settings and ensure they are correctly adjusted for the desired length.
- Test the machine on scrap fabric, adjusting the stitch length while observing the stitches to find the appropriate setting.
- If the stitch length control is not responding, consider seeking professional servicing or replacing the faulty part.
- Examine the feed dogs for any signs of wear or damage, and if necessary, consult a technician for repair or replacement.
- Keep the machine well-maintained and clean, as debris buildup can affect the machine’s stitch length consistency.
14. Jammed Automatic Needle Threader
Description: The automatic needle threader feature may get jammed or fail to thread the needle properly.
Cause: Dirt or lint buildup in the needle threader mechanism or incorrect usage of the automatic needle threader can cause jams.
Troubleshooting:
- Check the needle threader mechanism for any debris, and use a brush or compressed air to clean it gently.
- Ensure the needle is at the highest position and properly aligned with the needle threader before attempting to thread.
- Follow the machine’s manual instructions carefully when using the automatic needle threader.
- If the automatic needle threader continues to malfunction, thread the needle manually using a needle threader tool.
- Consider practicing with the automatic needle threader on scrap fabric to improve your technique and reduce jamming.
15. Skipped Buttonholes
Description: The machine may skip stitching some parts of the one-step buttonholes, leaving them incomplete or uneven.
Cause: Skipped buttonholes can be caused by incorrect fabric positioning, a damaged buttonhole foot, or incorrect machine settings.
Troubleshooting:
- Ensure the fabric is correctly positioned under the buttonhole foot and securely stabilized to prevent shifting during sewing.
- Inspect the buttonhole foot for any visible damage or wear, and replace it if necessary.
- Re-calibrate the machine for one-step buttonholes, following the instructions in the machine’s manual.
- Experiment with different stitch widths and lengths to find the best settings for precise and complete buttonholes.
- If the problem persists, try using a stabilizer or interfacing on the fabric to improve the buttonhole’s stitch quality.
16. Thread Fraying or Breaking
Description: The thread may fray or break during sewing, leading to stitching issues and frustration.
Cause: Thread fraying or breaking can result from using poor-quality thread, an incorrectly threaded machine, or a damaged needle.
Troubleshooting:
- Use high-quality thread suitable for the fabric you’re using to reduce thread fraying and breakage.
- Re-thread the upper thread, ensuring it follows the correct path and is properly tensioned.
- Check the needle for any visible damage or bending, and replace it if necessary.
- Test the machine with a scrap fabric to ensure the thread no longer frays or breaks during sewing.
- Keep the machine well-maintained and clean, as lint buildup can affect the thread’s smooth flow through the machine.
17. Stuck or Sluggish Feed Dogs
Description: The feed dogs may get stuck or move sluggishly, affecting the fabric feeding during sewing.
Cause: This issue can occur due to debris accumulation, lack of lubrication, or a malfunctioning feed dog mechanism.
Troubleshooting:
- Turn off the machine and remove the needle plate to access the feed dog area.
- Clean the area thoroughly, removing any lint, dust, or fabric pieces that may obstruct the feed dog movement.
- Lubricate the feed dog mechanism according to the manufacturer’s recommendations to ensure smooth operation.
- If the feed dogs are still sluggish, contact a Brother service center for professional inspection and repair.
- Regularly clean and maintain your Brother CS7000X sewing machine to prevent feed dog issues caused by dirt and debris buildup.
18. Fabric Puckering
Description: The fabric may pucker or gather, distorting the sewing project’s overall appearance.
Cause: Fabric puckering can be caused by incorrect tension settings, using the wrong needle, or sewing too quickly.
Troubleshooting:
- Re-adjust the thread tension settings, making slight changes until the puckering is minimized.
- Ensure you are using the correct needle type and size for the fabric you’re working with.
- Slow down the sewing speed, especially when working on delicate or lightweight fabrics.
- Test the machine on scrap fabric, adjusting the settings and techniques to achieve smooth and pucker-free stitching.
- Consider using a stabilizer or interfacing on the fabric to prevent puckering and improve stitch quality.
19. Uneven Bobbin Tension
Description: The bobbin thread tension may be uneven, causing visible variations in the stitching on the top and bottom sides of the fabric.
Cause: Uneven bobbin tension can result from incorrect bobbin insertion, debris in the bobbin case, or a malfunctioning tension mechanism.
Troubleshooting:
- Remove the bobbin and clean the bobbin case area, ensuring there are no tangles or debris affecting the tension.
- Re-insert the bobbin correctly into the bobbin case, following the machine’s manual instructions.
- Check the bobbin case tension screw and make slight adjustments if needed, using a small screwdriver.
- Test the machine with scrap fabric to ensure the bobbin tension is now balanced and producing even stitches.
- If the problem persists, consider replacing the bobbin case or contacting a Brother service center for assistance.
20. Thread Looping on the Bottom
Description: The thread may loop on the bottom side of the fabric, leading to messy and tangled stitches.
Cause: This issue can be caused by incorrect upper threading, improper bobbin insertion, or a damaged bobbin case.
Troubleshooting:
- Re-thread the upper thread, following the correct path and ensuring it passes through all the necessary thread guides.
- Check the bobbin for any tangles or loose threads and re-insert it correctly into the bobbin case.
- Verify that the needle is inserted correctly and not damaged, as a damaged needle can cause thread looping.
- Adjust the upper thread tension slightly if needed to achieve a balanced stitch appearance.
- Clean the bobbin case area to remove any lint or debris that may affect the thread’s smooth flow.
21. Uneven Feed Dogs
Description: The feed dogs may move unevenly or fail to raise and lower properly, resulting in irregular fabric feeding.
Cause: This issue can be caused by debris buildup, worn-out feed dog components, or a faulty feed dog mechanism.
Troubleshooting:
- Turn off the machine and remove the needle plate to access the feed dog area.
- Clean the feed dog area thoroughly, removing any lint, dust, or fabric pieces that may obstruct their movement.
- Inspect the feed dogs for any signs of wear or damage, and if necessary, consult a technician for repair or replacement.
- Manually move the feed dogs up and down to check for smooth movement and proper alignment.
- If the feed dogs are still uneven or malfunctioning, contact Brother customer support or a qualified technician for further assistance.
22. Bobbin Case Dislodgment
Description: The bobbin case may become dislodged during sewing, causing the machine to stop or produce irregular stitches.
Cause: Incorrect bobbin insertion or improper threading can cause the bobbin case to dislodge from its position.
Troubleshooting:
- Turn off the machine and carefully re-insert the bobbin into the bobbin case, following the machine’s manual instructions.
- Check the bobbin case for any visible damage or wear that could cause it to dislodge frequently.
- Ensure the bobbin case is securely locked into its designated position before resuming sewing.
- Re-thread the machine, both upper and lower threads, and test the machine on scrap fabric to check for proper bobbin case alignment.
- If the problem persists, consider seeking professional servicing or replacing the bobbin case if necessary.
23. Motor Overheating
Description: The sewing machine’s motor may overheat during extended use, potentially leading to temporary shutdowns.
Cause: Motor overheating can occur due to excessive sewing speed, extended sewing without breaks, or insufficient ventilation.
Troubleshooting:
- Reduce the sewing speed, especially when working on demanding or thick fabrics, to minimize motor strain.
- Take periodic breaks during prolonged sewing sessions to allow the motor to cool down.
- Ensure the machine is placed in a well-ventilated area to prevent heat buildup around the motor.
- Clean the machine’s internal components and remove any dust or debris that may obstruct ventilation.
- If the motor continues to overheat, avoid using the machine for an extended period and consult a technician for inspection and repair.
24. Limited Stitch Selection
Description: Users may find that the sewing machine offers limited stitch options or fails to access certain stitch functions.
Cause: This issue can occur due to incorrect stitch selection settings, a malfunctioning stitch selection dial, or electronic glitches.
Troubleshooting:
- Verify that you are using the correct stitch selection settings for the desired stitch pattern.
- Double-check the stitch selection dial or buttons to ensure they are set to the desired stitch.
- Try turning the machine off and on again to reset any electronic glitches that may be affecting stitch selection.
- If specific stitch options are still inaccessible, consult the machine’s manual or contact Brother customer support for further assistance.
- Regularly update the machine’s software and firmware, following the manufacturer’s guidelines, to address any potential software-related issues.
25. Incorrect Bobbin Thread Tension
Description: The bobbin thread tension may be too loose or too tight, resulting in uneven stitches on the fabric’s underside.
Cause: Incorrect bobbin tension settings, using the wrong bobbin type, or thread path obstructions can cause this issue.
Troubleshooting:
- Check the bobbin tension settings and make slight adjustments until the tension is balanced.
- Use the correct bobbin type and size recommended for your Brother CS7000X sewing machine.
- Remove the bobbin and clean the bobbin case area, ensuring there are no tangles or debris affecting the tension.
- Re-insert the bobbin correctly into the bobbin case, following the machine’s manual instructions.
- Test the machine with scrap fabric to ensure the bobbin tension is now balanced and producing even stitches on both sides.
These additional problems and troubleshooting steps should further assist users in resolving various issues they might encounter while using the Brother CS7000X sewing and quilting machine. As always, refer to the machine’s manual and seek professional assistance for complex issues.
Brother CS7000X Sewing Machine User Reviews
In this section, we will take a look at the user reviews for the Brother CS7000X sewing and quilting machine, sourced from Walmart’s website. We’ll summarize both positive and negative feedback provided by customers who have used this machine, offering insights into their experiences. Please note that all information about user reviews is taken from the site Walmart.com.
Positive Reviews from Brother CS7000X Sewing Machine Users
Some users were satisfied with the following parameters associated with the Brother CS7000X sewing machine:
- Easy to Use: Several customers found the Brother CS7000X easy to thread and use, making it a convenient choice for beginners and experienced sewers alike.
- Great Quality: Many users praised the machine’s build quality, indicating that it provided reliable performance and long-lasting durability.
- Good Value: Some customers appreciated the affordability of the Brother CS7000X, considering the wide range of features it offers at its price point.
- Included Accessories: Several users were pleased with the assortment of included accessories, such as presser feet and a wide table, enhancing the machine’s versatility.
- Computerized Features: Customers liked the convenience of computerized features, such as automatic stop with the needle down and adjustable max stitching speed, which improved their sewing experience.
The majority of users expressed positive experiences with the Brother CS7000X sewing machine, citing its user-friendly design, good quality, and value for money. It appears to be well-suited for various sewing projects, with a host of useful features that cater to both beginners and seasoned sewers.
Negative User Reviews of the Brother CS7000X Sewing Machine
Some users were not satisfied with the following problems associated with the Brother CS7000X sewing machine:
- Limited Handling of Thick Fabric: A few customers reported that the machine struggled to handle thicker fabrics effectively, leading to issues with stitch quality and feed.
- Bobbin Tension and Threading: Some users experienced challenges with bobbin tension, resulting in uneven stitches and difficulties with threading the machine properly.
- Noisy or Grinding Noise: A few customers encountered unusual noises, such as grinding sounds, inside the machine during sewing, potentially indicating mechanical issues.
- Stitch Problems: Some users mentioned inconsistent stitch length or skipped stitches, which impacted the overall sewing results and required troubleshooting.
- Customer Service and Warranty: A handful of customers expressed frustration with the warranty support or difficulty in obtaining replacement parts when needed.
While many customers had positive experiences with the Brother CS7000X sewing machine, some encountered issues related to handling certain fabrics, stitch quality, and customer service. These negative reviews highlight areas where the machine may have room for improvement, and it is essential for potential buyers to be aware of these considerations before making a purchase decision.
Brother CS7000X Common Problems
Brother SE600 Common Problems
Brother ST150HDH Common Problems
Brother CS7000X Sewing Machine Manual
The operating instructions for the Brother CS7000X sewing and quilting machine can be found on the manufacturer’s website. To access the manual, visit the official Brother website (www.brother.com) and navigate to the Support or Product Manuals section.
Search for the model “CS7000X” and download the user manual in PDF format. The manual provides comprehensive information about the machine’s features, functions, maintenance, and troubleshooting procedures.
Brother CS7000X Frequently Asked Questions
1. How can I thread the Brother CS7000X sewing machine properly?
To thread the Brother CS7000X, follow these steps:
- Turn off the machine and raise the needle to its highest position.
- Open the hinged front cover to access the thread spool.
- Place the thread spool on the spool pin and secure it with the spool cap.
- Guide the thread through the threading path, following the numbered arrows indicated on the machine.
- Use the automatic needle threader to thread the needle easily.
- Close the front cover and you’re ready to start sewing!
2. Why is my Brother CS7000X sewing machine not stitching correctly?
Stitching issues can arise due to various factors. Try the following troubleshooting steps:
- Check the needle to ensure it is not bent or dull, and replace it if necessary.
- Verify that the upper and lower threads are threaded correctly.
- Examine the bobbin for any tangles or debris and re-thread it.
- Adjust the tension settings based on the fabric and thread type you are using.
- Ensure the presser foot is lowered before sewing to engage the tension discs.
3. How can I resolve jamming issues with the Brother CS7000X sewing machine?
Follow these steps to address jamming problems:
- Turn off the machine and remove the fabric.
- Open the bobbin compartment and remove the bobbin case.
- Inspect the bobbin area for any tangled threads or obstructions.
- Clean the area using a soft brush or compressed air to remove lint and debris.
- Re-insert the bobbin case and ensure it is correctly positioned.
- Thread the machine again and test on a scrap fabric before resuming your project.
Conclusion
In case of any issues with your Brother CS7000X sewing and quilting machine, always refer to the user manual for specific troubleshooting steps.
If you encounter problems beyond your expertise, reach out to Brother’s customer service or visit an authorized service center for professional assistance. Proper maintenance, regular cleaning, and adhering to the manufacturer’s guidelines can ensure optimal performance and longevity of your sewing machine.