Brother Serger 1034D Heavy-Duty Metal Frame Overlock Common Problems and Troubleshooting
Welcome to the troubleshooting guide for the Brother Serger 1034D Heavy-Duty Metal Frame Overlock sewing machine. If you own this specific model of the sewing machine, you might encounter some common issues during your sewing projects. This article aims to address those problems and provide helpful solutions to keep your sewing machine running smoothly.
Brother Serger 1034D Heavy-Duty Metal Frame Overlock Overview
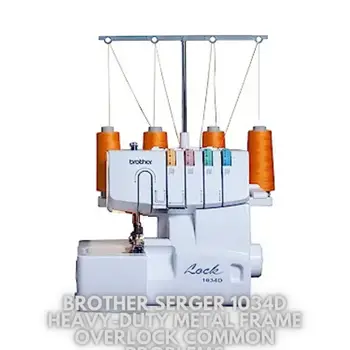
The Brother 1034D serger is a high-quality sewing machine equipped with a 3/4 lay-in thread system and a lower looper threader. It offers various stitch options, including 4 thread overlock, 3 thread overlock, narrow hem, rolled hem, and ribbon lock stitches.
With optional presser feet, you can also sew blind hem, pin tuck, and flat lock stitches. The machine features a free arm/flat bed convertible sewing surface and a F.A.S.T. lower looper threading system, making thread changes effortless.
The differential feed is designed to improve sewing results on stretch or thin fabrics, ensuring a perfect finish. The serger allows you to sew up to 1,300 stitches per minute, making it highly efficient for handling multiple layers of denim and other heavy materials.
The easy-to-use, color-coded upper thread guide and lower looper threading system, along with the included instruction manual, make threading a breeze.
Here are some key product details:
| Brand | Brother |
|---|---|
| Color | White |
| Material | Plastic, Metal |
| Product Dimensions | 10.98″D x 11.73″W x 13.19″H |
| Item Weight | 8.02 Pounds |
| Power Source | Corded Electric |
| Is Electric | Yes |
| Item Model Number | 1034D |
| Country of Origin | Taiwan |
| Is Discontinued By Manufacturer | No |
Causes of Common Problems with the Brother Serger 1034D Heavy-Duty Metal Frame Overlock
In the following subsections, we will address possible problems that you might encounter while using the Brother Serger 1034D Heavy-Duty Metal Frame Overlock sewing machine and provide troubleshooting solutions to resolve them effectively.
Common Problems with the Brother Serger 1034D Heavy-Duty Metal Frame Overlock and Troubleshooting
1. Thread Breakage – Upper Looper
Description of the Problem: One common issue you may encounter with the Brother Serger 1034D is thread breakage from the upper looper. This can disrupt your stitching process and result in uneven or incomplete stitches.
Cause of the Problem: Thread breakage from the upper looper is often caused by improper threading, tangled threads, or a worn-out looper.
Troubleshooting Step-by-Step:
- Turn off the machine and remove the thread from the upper looper.
- Inspect the looper for any signs of wear or damage. If damaged, replace the looper with a new one designed for the Brother Serger 1034D model.
- Thoroughly rethread the upper looper following the color-coded threading guide provided in the instruction manual.
- Ensure that the threads are not tangled and that they move smoothly through the tension discs and guides.
- After rethreading, conduct a test stitch on scrap fabric to check if the upper looper is functioning correctly.
2. Uneven Stitches – Differential Feed
Description of the Problem: Uneven stitches can occur when using the Brother Serger 1034D on stretchy or thin fabrics, resulting in an unprofessional finish.
Cause of the Problem: The differential feed settings might not be adjusted correctly for the specific fabric being used, causing uneven feeding of the fabric through the serger.
Troubleshooting Step-by-Step:
- Identify the type of fabric you are working with and adjust the differential feed settings accordingly. For stretchy fabrics, increase the differential feed ratio to prevent puckering. For thin fabrics, decrease the ratio to ensure smooth feeding.
- Refer to the user manual for guidance on adjusting the differential feed settings.
- Test the adjusted settings on a fabric scrap before working on your actual project to ensure the desired results.
3. Skipping Stitches – Needles and Tension
Description of the Problem: Skipping stitches can occur when the Brother Serger 1034D misses stitches or fails to create complete stitches.
Cause of the Problem: The most common reasons for skipping stitches are bent or dull needles and improper tension settings.
Troubleshooting Step-by-Step:
- Turn off the machine and replace the needles with new ones, ensuring they are compatible with the Brother Serger 1034D model.
- Check the needle alignment and make sure they are inserted properly and secured in place.
- Review the tension settings for both the upper and lower loopers. Adjust them as needed to achieve balanced tension.
- Test the stitching on a fabric scrap to confirm that the needles are stitching properly without skipping.
4. Fabric Puckering – Incorrect Stitch Length
Description of the Problem: Fabric puckering occurs when the fabric is gathered and wrinkled while being serged, leading to an unattractive finish.
Cause of the Problem: Fabric puckering is often a result of using an incorrect stitch length for the specific fabric type being sewn.
Troubleshooting Step-by-Step:
- Identify the type of fabric you are using and refer to the user manual or online resources for the recommended stitch length for that fabric.
- Adjust the stitch length accordingly on the Brother Serger 1034D.
- Test the adjusted stitch length on a fabric scrap to see if it eliminates the puckering issue.
- Make further adjustments as necessary until the fabric feeds smoothly without puckering.
5. Noisy Operation – Insufficient Lubrication
Description of the Problem: Excessive noise during operation can be quite bothersome and may indicate that your Brother Serger 1034D requires maintenance.
Cause of the Problem: Noisy operation is often caused by insufficient lubrication in the moving parts of the serger.
Troubleshooting Step-by-Step:
- Turn off the machine and unplug it from the power source.
- Refer to the user manual to locate the specific parts that require lubrication.
- Apply a small amount of sewing machine oil to the designated parts.
- After lubricating the machine, run it for a few minutes without any fabric to distribute the oil evenly.
- Plug the machine back in and test its operation. The noise should be significantly reduced.
6. Fabric Jamming – Lower Looper
Description of the Problem: Fabric jamming around the lower looper is a frustrating issue that can halt your sewing progress and may lead to damage to the fabric or the serger.
Cause of the Problem: Fabric jamming is often caused by improper threading of the lower looper, incorrect placement of the fabric, or a dull lower looper.
Troubleshooting Step-by-Step:
- Turn off the serger and carefully remove the jammed fabric.
- Check the threading of the lower looper and ensure it follows the correct path as shown in the user manual.
- Verify that the fabric is properly placed and not getting caught in any parts of the serger.
- Inspect the lower looper for any signs of dullness or damage. Replace it with a new looper if necessary.
- After troubleshooting, test the serger on a scrap fabric to confirm that the issue is resolved.
7. Excessive Vibration – Imbalance
Description of the Problem: Excessive vibration during operation can be unsettling and may indicate an imbalance within the Brother Serger 1034D.
Cause of the Problem: Vibration issues are often caused by an uneven distribution of weight or improper placement of the serger.
Troubleshooting Step-by-Step:
- Ensure that the serger is placed on a flat and stable surface.
- Check that all feet and attachments are securely attached to the serger.
- Verify that the serger’s internal components and moving parts are not obstructed or impeded in any way.
- Adjust the positioning of the serger to distribute its weight more evenly.
- Test the serger’s operation to see if the excessive vibration has been minimized.
8. Tangled Threads – Thread Tension
Description of the Problem: Tangled threads can result in messy and uneven stitches, making your sewing project look untidy.
Cause of the Problem: Tangled threads are often caused by improper thread tension settings or thread paths.
Troubleshooting Step-by-Step:
- Turn off the serger and remove the tangled threads.
- Check the thread tension settings for both the upper and lower loopers. Adjust them to the recommended settings for your fabric type.
- Verify that the threads follow the correct path through the tension discs and guides.
- Re-thread the serger, ensuring that the threads are not twisted or crossed.
- Conduct a test stitch on a fabric scrap to see if the threads are now feeding smoothly without tangling.
9. Uneven Cutting – Dull Blades
Description of the Problem: Uneven cutting can lead to fabric fraying and may result in an unfinished look for your sewing project.
Cause of the Problem: Uneven cutting is often caused by dull or damaged cutting blades in the serger.
Troubleshooting Step-by-Step:
- Turn off the serger and unplug it for safety.
- Carefully remove the blade cover to access the cutting blades.
- Inspect the cutting blades for any signs of dullness or damage. Replace the blades if necessary.
- Install the new or sharpened blades correctly according to the user manual.
- After replacing the blades, conduct a test stitch to ensure that the cutting is now even and clean.
10. Stitch Length Variation – Feed Dog Issues
Description of the Problem: Inconsistent stitch lengths can make your sewing project look unprofessional and poorly finished.
Cause of the Problem: Stitch length variation is often caused by feed dog issues, such as dirty or misaligned feed dogs.
Troubleshooting Step-by-Step:
- Turn off the serger and unplug it to prevent any accidents during troubleshooting.
- Clean the feed dogs thoroughly to remove any debris or lint that might be affecting their movement.
- Check the alignment of the feed dogs and adjust them if they appear misaligned.
- Perform a test stitch on a fabric scrap to check if the stitch length is now consistent.
- If the issue persists, consult the user manual for further troubleshooting or consider seeking professional assistance.
11. Looping on Fabric Edge – Stitch Width Adjustment
Description of the Problem: Looping on the fabric edge occurs when the stitches extend beyond the fabric’s edge, resulting in an untidy appearance.
Cause of the Problem: Looping is often caused by incorrect stitch width adjustment on the Brother Serger 1034D.
Troubleshooting Step-by-Step:
- Turn off the serger and unplug it for safety.
- Adjust the stitch width setting to ensure it matches the fabric’s width and your desired seam allowance.
- Test the adjusted stitch width on a fabric scrap to check if the looping issue has been resolved.
- Make further adjustments as needed until the stitches lay flat and evenly on the fabric edge.
12. Breaking Needles – Fabric Thickness
Description of the Problem: Breaking needles can be frustrating and may occur when working with thick fabrics, causing delays in your sewing project.
Cause of the Problem: Breaking needles is often caused by using regular or lightweight needles on thick fabrics that require heavy-duty needles.
Troubleshooting Step-by-Step:
- Turn off the serger and replace the broken needle with a heavy-duty needle suitable for the fabric type.
- Check the fabric thickness and ensure that the needle is appropriate for the fabric’s weight.
- Use the appropriate needle size and type recommended in the user manual for thick fabrics.
- Conduct a test stitch on a fabric scrap to verify that the needle can handle the fabric without breaking.
- If the needle continues to break, check for any issues with the needle alignment or needle bar and seek professional assistance if needed.
13. Skipping Stitches – Incorrect Thread Path
Description of the Problem: Skipping stitches may occur when the threads do not follow the correct path through the serger, resulting in an incomplete stitch formation.
Cause of the Problem: Skipping stitches are often caused by incorrect threading of the serger, especially if the threads are not seated properly in the tension discs or loopers.
Troubleshooting Step-by-Step:
- Turn off the serger and rethread it following the color-coded threading guide in the user manual.
- Double-check that the threads are securely seated in the tension discs and loopers.
- Verify that the threads move smoothly through the thread guides without any obstructions or tangles.
- Conduct a test stitch on a fabric scrap to see if the skipping issue has been resolved.
- If skipping stitches persist, check for any issues with the needle’s alignment or needle bar and consult the user manual for further guidance.
14. Fabric Gathering – Incorrect Differential Feed
Description of the Problem: Fabric gathering or bunching can occur when the differential feed settings are not adjusted correctly, resulting in undesirable effects on the fabric.
Cause of the Problem: Fabric gathering is often caused by using incorrect differential feed settings, particularly when the feed ratio is too high for the fabric being sewn.
Troubleshooting Step-by-Step:
- Identify the type of fabric you are using and refer to the user manual for the recommended differential feed settings.
- Adjust the differential feed ratio accordingly to match the fabric’s characteristics.
- Test the adjusted differential feed settings on a fabric scrap to check if the fabric feeding has improved.
- If the fabric still gathers excessively, adjust the settings further until you achieve the desired sewing results.
15. Inconsistent Tension – Thread Type Compatibility
Description of the Problem: Inconsistent tension can lead to unbalanced stitches and uneven fabric feeding, affecting the overall appearance of your sewing project.
Cause of the Problem: Inconsistent tension may be caused by using threads that are not compatible with the Brother Serger 1034D or not suitable for the chosen fabric type.
Troubleshooting Step-by-Step:
- Turn off the serger and rethread it, ensuring that you use high-quality threads suitable for the Brother Serger 1034D.
- Check the thread type and weight compatibility for the specific fabric you are working with.
- Adjust the tension settings for both the upper and lower loopers to achieve balanced tension for the chosen threads and fabric.
- Conduct a test stitch on a fabric scrap to see if the tension is now consistent and balanced.
- If you still encounter tension issues, consult the user manual for additional troubleshooting tips or consider seeking professional assistance.
16. Fabric Slippage – Insufficient Pressure on Presser Foot
Description of the Problem: Fabric slippage can occur when the presser foot does not apply enough pressure on the fabric, causing it to move unevenly during stitching.
Cause of the Problem: Insufficient pressure on the presser foot is often caused by improper presser foot adjustment or a damaged presser foot spring.
Troubleshooting Step-by-Step:
- Turn off the serger and adjust the presser foot pressure using the appropriate dial or lever.
- Test the adjusted presser foot pressure on a fabric scrap to check if the fabric feeds smoothly without slippage.
- If the issue persists, inspect the presser foot spring for any signs of damage and replace it if necessary.
- Re-test the serger with the new presser foot spring to ensure proper fabric feeding.
17. Fabric Puckering – Incorrect Tension Settings
Description of the Problem: Fabric puckering can occur when the thread tension settings are too tight, causing the fabric to gather and form wrinkles.
Cause of the Problem: Incorrect tension settings, particularly overly tight thread tension, can lead to fabric puckering during sewing.
Troubleshooting Step-by-Step:
- Turn off the serger and adjust both the upper and lower looper tension settings to a slightly looser setting.
- Conduct a test stitch on a fabric scrap to see if the fabric puckering has improved.
- If the fabric still puckers, adjust the tension settings gradually until you achieve smooth stitching without puckering.
- Refer to the user manual for recommended tension settings for different fabric types and stitches.
18. Skipped Stitches – Worn-out Needles
Description of the Problem: Skipped stitches can occur when the needles are worn out, leading to incomplete or irregular stitches.
Cause of the Problem: Worn-out needles may become blunt or bent over time, resulting in skipped stitches during sewing.
Troubleshooting Step-by-Step:
- Turn off the serger and replace both needles with new ones suitable for the Brother Serger 1034D.
- Ensure that the needles are correctly inserted and securely fastened.
- Conduct a test stitch on a fabric scrap to see if the skipped stitches issue has been resolved.
- If the problem persists, check for any issues with the needle alignment or needle bar and seek professional assistance if needed.
19. Fabric Waviness – Incorrect Differential Feed Ratio
Description of the Problem: Fabric waviness occurs when the differential feed ratio is not set correctly, leading to rippling or stretching of the fabric.
Cause of the Problem: Incorrect differential feed settings, particularly when the ratio is too high or too low, can cause fabric waviness during sewing.
Troubleshooting Step-by-Step:
- Identify the type of fabric you are using and refer to the user manual for the recommended differential feed ratio.
- Adjust the differential feed settings accordingly to match the fabric’s characteristics and desired stitching outcome.
- Conduct a test stitch on a fabric scrap to check if the fabric waviness issue has been minimized.
- Make further adjustments to the differential feed ratio if necessary until the fabric feeds smoothly without waviness.
20. Broken Threads – Incorrect Needle Threader Usage
Description of the Problem: Broken threads can occur when using the needle threader incorrectly, causing the thread to fray or snap.
Cause of the Problem: Broken threads are often caused by pulling the thread too forcefully through the needle threader, leading to damage or misalignment.
Troubleshooting Step-by-Step:
- Turn off the serger and rethread the needles manually without using the needle threader.
- Thread the needles following the proper path through the needle eyes and guides.
- If you wish to use the needle threader, refer to the user manual for the correct usage instructions.
- Conduct a test stitch on a fabric scrap to see if the thread breakage issue has been resolved.
- If the threads still break, check for any issues with the needle alignment or needle bar and consult the user manual for additional troubleshooting tips.
21. Uneven Stitch Width – Bent Needle
Description of the Problem: Uneven stitch width can result in an irregular appearance of your stitches, affecting the overall quality of your sewing project.
Cause of the Problem: Uneven stitch width is often caused by using a bent or damaged needle, which affects the needle’s ability to create consistent stitches.
Troubleshooting Step-by-Step:
- Turn off the serger and replace both needles with new, straight needles suitable for the Brother Serger 1034D.
- Ensure that the new needles are correctly inserted and securely fastened.
- Conduct a test stitch on a fabric scrap to check if the uneven stitch width issue has been resolved.
- If the problem persists, check for any issues with the needle alignment or needle bar and seek professional assistance if needed.
22. Excessive Noise – Loose Screws
Description of the Problem: Excessive noise during operation can be distracting and may indicate loose components within the Brother Serger 1034D.
Cause of the Problem: Loose screws or fasteners can cause vibrations and noise during sewing, affecting the serger’s stability.
Troubleshooting Step-by-Step:
- Turn off the serger and unplug it from the power source.
- Inspect the serger for any visible loose screws or fasteners.
- Tighten any loose screws or fasteners using the appropriate tools.
- After tightening all screws, run the serger without any fabric to check if the excessive noise has been reduced.
- If the noise persists, consider seeking professional assistance to ensure all components are properly tightened and secured.
23. Fabric Feeding Issues – Feed Dog Height
Description of the Problem: Fabric feeding issues may occur when the feed dogs are not adjusted to the appropriate height for the fabric thickness.
Cause of the Problem: Improper feed dog height can result in uneven feeding of the fabric, causing fabric jams or skipped stitches.
Troubleshooting Step-by-Step:
- Turn off the serger and refer to the user manual for instructions on adjusting the feed dog height.
- Set the feed dog height to the appropriate level based on the fabric thickness.
- Conduct a test stitch on a fabric scrap to check if the fabric feeding issues have improved.
- If the fabric still encounters feeding problems, reevaluate the feed dog height setting and make further adjustments if necessary.
24. Looper Thread Breakage – Incorrect Thread Tension
Description of the Problem: Looper thread breakage can interrupt your sewing process and may occur due to incorrect thread tension settings.
Cause of the Problem: Incorrect tension settings for the looper threads can lead to excessive strain on the threads, causing them to break during sewing.
Troubleshooting Step-by-Step:
- Turn off the serger and rethread both the upper and lower loopers following the correct threading paths.
- Adjust the looper thread tension settings to the recommended levels for the fabric type being used.
- Conduct a test stitch on a fabric scrap to see if the looper thread breakage issue has been resolved.
- If the threads continue to break, inspect the thread guides and tension discs for any obstructions or damage, and clean or replace them if necessary.
25. Stitch Misalignment – Blade Position
Description of the Problem: Stitch misalignment occurs when the serger’s blades are not positioned correctly, resulting in uneven trimming of fabric edges.
Cause of the Problem: Blade misalignment can occur due to improper installation or shifting of the blades during use.
Troubleshooting Step-by-Step:
- Turn off the serger and unplug it from the power source.
- Check the alignment of the serger’s blades and adjust them if necessary to ensure they are correctly positioned.
- Conduct a test stitch on a fabric scrap to see if the stitch misalignment issue has been corrected.
- If the stitches are still misaligned, refer to the user manual or seek professional assistance to ensure proper blade positioning.
Brother Serger 1034D Heavy-Duty Metal Frame Overlock Sewing Machine User Reviews
Positive Reviews from Brother Serger 1034D Heavy-Duty Metal Frame Overlock Sewing Machine Users
- Some users were satisfied with the ease of installation and threading of the Brother Serger 1034D. They found helpful resources online, like YouTube videos, to guide them through the setup process successfully.
- Several users expressed their delight with the machine’s performance and its ability to handle different types of materials effectively. They appreciated the time-saving features and overall efficiency it brought to their sewing projects.
- One user was particularly impressed with the build quality, describing the serger as a “must-have” for sewing enthusiasts. They appreciated its reliability and how it improved their sewing experience.
- Users appreciated the versatility of the Brother Serger 1034D, with its ability to create professional stitches like overlock, rolled hem, narrow hem, and more. This wide range of stitch options allowed them to experiment with different sewing techniques.
- Many customers found the Brother Serger 1034D to be a great value for the price, considering its sturdy metal frame, high performance, and the variety of accessories that came with it.
These positive reviews indicate that a significant number of users had a positive experience with the Brother Serger 1034D Heavy-Duty Metal Frame Overlock sewing machine. They praised its threading ease, performance on various fabrics, and overall value for money.
Negative User Reviews of the Brother Serger 1034D Heavy-Duty Metal Frame Overlock Sewing Machine
- Some users reported experiencing power-related issues with the machine, such as flickering lights and sudden loss of power, which affected their ability to sew effectively.
- A few customers expressed frustration with the customer service from Brother when seeking after-service support. They encountered difficulties in getting the necessary assistance for their machine-related problems.
- Several users mentioned issues with the machine’s durability, citing mechanical breakdowns and stripped screws after relatively short periods of use.
- One customer had difficulties with returning a damaged machine and faced challenges in getting the necessary support from Brother, leading to additional costs for servicing.
- Some users found the machine to be unreliable, experiencing sudden malfunctions after minimal usage, which ultimately led them to seek alternative sewing machine options.
These negative reviews reveal that there were some issues reported by users regarding the Brother Serger 1034D Heavy-Duty Metal Frame Overlock sewing machine. Problems with power, customer service experiences, and mechanical breakdowns were among the primary concerns.
All the information about user reviews is taken from the site Walmart.com.
The majority of users seemed to be satisfied with the Brother Serger 1034D Heavy-Duty Metal Frame Overlock sewing machine, appreciating its ease of use, performance, and versatility.
However, there were some negative experiences related to power issues, customer service, and mechanical reliability. As with any product, individual experiences may vary, and it’s essential for potential buyers to consider both positive and negative feedback before making a purchasing decision.
Brother Serger 1034D Heavy-Duty Metal Frame Overlock Common Problems
Brother PE900 Common Problems
Brother SE700 Common Problems
Brother Serger 1034D Heavy-Duty Metal Frame Overlock Sewing Machine Manual
The operating instructions and user manual for the Brother Serger 1034D Heavy-Duty Metal Frame Overlock sewing machine can be found at the manufacturer’s website. For detailed guidance on setting up, operating, and troubleshooting the machine, users are encouraged to refer to the official manual provided by Brother.
Brother Serger 1034D Heavy-Duty Metal Frame Overlock Frequently Asked Questions
1. How do I thread the Brother Serger 1034D?
To thread the Brother Serger 1034D, follow the step-by-step instructions provided in the user manual. The serger comes with a color-coded thread guide and a lower looper threading system, making the threading process more straightforward. If you encounter difficulties, refer to the manual or seek assistance from Brother’s customer service.
2. Why does my fabric keep puckering during sewing?
Fabric puckering can occur due to incorrect tension settings. Ensure that the upper and lower looper tensions are appropriately adjusted for the fabric type you are using. Conduct test stitches on fabric scraps to achieve the desired stitch appearance without puckering.
3. How can I fix skipped stitches on my Brother Serger 1034D?
Skipped stitches are often a result of worn-out needles. Replace both needles with new, compatible ones for the Brother Serger 1034D. Additionally, ensure that the needles are correctly inserted and fastened. If the issue persists, consult the user manual or seek professional assistance.
4. My Brother Serger 1034D is making excessive noise. What should I do?
Excessive noise can be caused by loose screws or fasteners within the machine. Turn off the serger, unplug it, and inspect for any visible loose screws. Tighten them using the appropriate tools. If the noise continues, consider seeking professional help to ensure all components are securely fastened.
5. Why is my fabric not feeding smoothly through the serger?
Uneven fabric feeding can be a result of incorrect feed dog height. Refer to the user manual for instructions on adjusting the feed dog height based on the fabric thickness. Test the serger on fabric scraps to ensure smooth and even fabric feeding.
Conclusion
When encountering problems with your Brother Serger 1034D Heavy-Duty Metal Frame Overlock sewing machine, it is essential to consult the user manual provided by the manufacturer. The manual offers detailed instructions on setup, operation, and troubleshooting. If the issue persists or you need further assistance, consider reaching out to Brother’s customer service or an authorized service center for expert support and resolution.