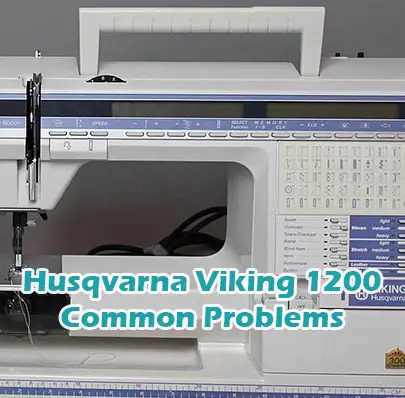
Husqvarna Viking 1200 Common Problems and Troubleshooting
If you’re encountering issues with your Husqvarna Viking 1200 sewing machine, you’re not alone. Sewing machines, like any complex piece of equipment, can sometimes experience problems that hinder their performance. In this guide, we’ll explore common issues that users of the Husqvarna Viking 1200 may encounter and provide troubleshooting tips to help you get back to your sewing projects with ease.
Causes of Common Problems with the Husqvarna Viking 1200
This introductory snippet will address the possible problems and solutions with the Husqvarna Viking 1200 sewing machine.
Here you can find all the
parts and accessories for the Husqvarna Viking 1200
guaranteed to fit your sewing machine
Common Problems and Troubleshooting
Below are 25 common problems that users may encounter with the Husqvarna Viking 1200 sewing machine, along with their causes and troubleshooting steps:
Problem 1: Needle Threader Not Working
Description: The needle threader on the Husqvarna Viking 1200 is not functioning properly, making it difficult to thread the needle.
Cause: There could be several reasons for this issue, such as a misaligned needle threader, a bent or dull needle, or debris obstructing the threader mechanism.
Troubleshooting:
- Begin by ensuring that the needle is inserted correctly and is not bent or damaged. Replace the needle if necessary.
- Clean the needle threader mechanism with a soft brush to remove any dust or debris that may be obstructing it.
- Check the alignment of the needle threader and adjust it if needed according to the manufacturer’s instructions.
- If the problem persists, contact a certified technician for further inspection and repair.
Problem 2: Needle Up/Down Setting Not Responding
Description: The needle on the Husqvarna Viking 1200 is not moving to the desired position when using the needle up/down setting.
Cause: This issue may occur due to a malfunction in the machine’s electronic components, a faulty setting, or a mechanical obstruction preventing the needle from moving.
Troubleshooting:
- Ensure that the needle up/down setting is selected correctly on the machine’s control panel or settings menu.
- Check for any mechanical obstructions, such as tangled thread or fabric, that may be preventing the needle from moving.
- Try resetting the machine by turning it off and unplugging it for a few minutes before restarting.
- If the problem persists, consult the user manual for troubleshooting tips specific to the needle up/down setting, or contact customer support for assistance.
Problem 3: Embroidery Stitches Skipped or Uneven
Description: The embroidery stitches produced by the Husqvarna Viking 1200 are skipping or appearing uneven, resulting in poor embroidery quality.
Cause: Several factors can contribute to skipped or uneven embroidery stitches, including incorrect tension settings, improper hooping of the fabric, dull or damaged needles, or an issue with the embroidery design file.
Troubleshooting:
- Check the tension settings on the machine and adjust them according to the fabric and thread being used. Refer to the user manual for guidance on adjusting tension.
- Ensure that the fabric is properly hooped and that there are no wrinkles or folds that could interfere with the embroidery process.
- Verify that the needle being used is suitable for embroidery and is not dull or damaged. Replace the needle if necessary.
- If using an embroidery design file, check for any errors or inconsistencies in the design itself. Try embroidering a different design to see if the issue persists.
- If the problem continues, consider consulting a professional embroiderer or technician for further assistance and troubleshooting.
Problem 4: One Step Buttonhole Not Forming Correctly
Description: The one-step buttonhole function on the Husqvarna Viking 1200 is not creating buttonholes of the correct size or shape.
Cause: This issue may arise from incorrect settings, improper placement of the buttonhole foot, fabric thickness, or a mechanical problem with the machine’s buttonhole mechanism.
Troubleshooting:
- Ensure that the buttonhole foot is securely attached to the machine and that the fabric is positioned correctly beneath it.
- Check the buttonhole settings on the machine and adjust them according to the size and type of button being used. Refer to the user manual for guidance on adjusting buttonhole settings.
- If the fabric being used is thick or bulky, consider using a stabilizer or interfacing to provide additional support and prevent distortion during the buttonhole formation.
- Test the buttonhole function on a scrap piece of fabric to verify that the settings are correct and adjust as needed.
- If the problem persists, inspect the machine’s buttonhole mechanism for any signs of damage or obstruction. Contact customer support or a certified technician for further assistance if necessary.
Problem 5: Drop-In Bobbin Jamming
Description: The drop-in bobbin on the Husqvarna Viking 1200 is jamming or getting stuck during sewing, causing thread jams and uneven stitches.
Cause: A drop-in bobbin may jam due to incorrect insertion, tangled thread, debris in the bobbin area, or a malfunction in the bobbin case.
Troubleshooting:
- Remove the needle plate and bobbin case from the machine to access the bobbin area.
- Carefully remove the bobbin and check for any tangled thread or debris that may be causing the jam. Clean the bobbin area with a soft brush or compressed air to remove any dust or lint.
- Ensure that the bobbin is inserted correctly into the bobbin case, following the directional arrows or markings on the machine.
- Replace the bobbin with a new one if it is damaged or worn.
- Reassemble the bobbin case and needle plate, ensuring that everything is securely in place before resuming sewing.
- If the problem persists, consider consulting a certified technician for further inspection and repair of the bobbin mechanism.
Problem 6: Free Arm Not Engaging
Description: The free arm feature on the Husqvarna Viking 1200 is not engaging properly, preventing access to the free arm for sewing cuffs, sleeves, or other cylindrical items.
Cause: The free arm may fail to engage due to a mechanical issue, such as a disconnected or misaligned free arm lever, or obstruction preventing the free arm from lowering into position.
Troubleshooting:
- Check the free arm lever or switch on the machine and ensure that it is in the correct position to engage the free arm. Refer to the user manual for guidance on operating the free arm.
- Inspect the area around the free arm for any obstructions, such as tangled thread or fabric scraps, that may be preventing it from lowering into position.
- Gently push or jiggle the free arm to see if it will lower into place. If it does not move freely, there may be a mechanical issue that requires further inspection and repair.
- If the free arm still does not engage, contact customer support or a certified technician for assistance in diagnosing and resolving the issue.
Problem 7: Adjustable Stitch Length and Width Not Changing
Description: The stitch length and width adjustments on the Husqvarna Viking 1200 are not changing the stitch length or width as expected, resulting in stitches that are too long, too short, too wide, or too narrow.
Cause: This issue may occur due to a malfunction in the machine’s electronic controls, a mechanical problem with the stitch length and width mechanism, or incorrect settings selected on the machine.
Troubleshooting:
- Check the stitch length and width settings on the machine’s control panel or settings menu and ensure that they are adjusted to the desired values.
- Test the machine on a scrap piece of fabric to verify that the stitch length and width adjustments are functioning correctly. Make any necessary adjustments to the settings.
- Clean the machine’s stitch length and width mechanism with a soft brush to remove any dust or debris that may be causing it to malfunction.
- If the problem persists, consult the user manual for troubleshooting tips specific to the stitch length and width adjustments, or contact customer support for assistance.
Problem 8: Adjustable Presser Foot Pressure Not Working
Description: The adjustable presser foot pressure feature on the Husqvarna Viking 1200 is not changing the pressure exerted by the presser foot on the fabric, causing uneven feeding and stitching.
Cause: This issue may arise from a malfunction in the machine’s presser foot pressure adjustment mechanism, incorrect settings selected on the machine, or an obstruction preventing the presser foot from moving freely.
Troubleshooting:
- Check the presser foot pressure adjustment settings on the machine and ensure that they are adjusted to the desired pressure level.
- Test the machine on a scrap piece of fabric to verify that the presser foot pressure adjustments are functioning correctly. Make any necessary adjustments to the settings.
- Clean the machine’s presser foot pressure adjustment mechanism with a soft brush to remove any dust or debris that may be causing it to malfunction.
- If the problem persists, consult the user manual for troubleshooting tips specific to the presser foot pressure adjustment, or contact customer support for assistance.
Problem 9: Adjustable Needle Position Not Changing
Description: The adjustable needle position feature on the Husqvarna Viking 1200 is not changing the position of the needle, preventing precise stitching and seam allowances.
Cause: This issue may occur due to a malfunction in the machine’s needle position adjustment mechanism, incorrect settings selected on the machine, or an obstruction preventing the needle from moving laterally.
Troubleshooting:
- Check the needle position adjustment settings on the machine and ensure that they are adjusted to the desired position (left, center, or right).
- Test the machine on a scrap piece of fabric to verify that the needle position adjustments are functioning correctly. Make any necessary adjustments to the settings.
- Clean the machine’s needle position adjustment mechanism with a soft brush to remove any dust or debris that may be causing it to malfunction.
- If the problem persists, consult the user manual for troubleshooting tips specific to the needle position adjustment, or contact customer support for assistance.
Problem 10: Embroidery Machine Not Recognizing Design Files
Description: The embroidery machine function on the Husqvarna Viking 1200 is not recognizing or properly reading embroidery design files from external devices or software.
Cause: This issue may occur due to compatibility issues with the file format, incorrect file transfer settings, corrupted design files, or a malfunction in the machine’s embroidery software.
Troubleshooting:
- Check the file format of the embroidery design files to ensure that they are compatible with the machine’s software. Refer to the user manual for a list of supported file formats.
- Verify that the design files were transferred to the machine or external device correctly and that there are no errors or interruptions during the transfer process.
- If using external software to create or edit embroidery designs, ensure that the software is compatible with the machine and that the design files are saved in a compatible format.
- Try using different design files or transferring them from a different source to see if the issue persists.
- If the problem continues, contact customer support or the manufacturer for assistance in troubleshooting and resolving the issue with the embroidery machine’s software.
Problem 11: Auto Threading Not Working
Description: The auto threading feature on the Husqvarna Viking 1200 is not threading the needle automatically, requiring manual threading instead.
Cause: This issue may arise from a malfunction in the machine’s auto threading mechanism, improper alignment of the threader with the needle, or incorrect threading technique.
Troubleshooting:
- Ensure that the auto threading mechanism is engaged and functioning properly according to the manufacturer’s instructions. Check for any visible signs of damage or obstruction.
- Align the threader with the needle and verify that the thread is passing through the thread guide and tension discs correctly before attempting to engage the auto threading feature.
- If the machine continues to have difficulty auto threading, try manually threading the needle using the traditional method to ensure that the needle and thread are properly aligned.
- Clean the auto threading mechanism and surrounding area with a soft brush to remove any dust, lint, or debris that may be interfering with its operation.
- If the problem persists, contact customer support or a certified technician for further assistance and troubleshooting with the auto threading feature.
Problem 12: Machine Not Turning On
Description: The Husqvarna Viking 1200 is not powering on when the power button is pressed, preventing any operation of the machine.
Cause: This issue may occur due to a disconnected power cord, a blown fuse, a malfunctioning power switch, or an electrical problem within the machine.
Troubleshooting:
- Check that the power cord is securely plugged into both the machine and the power outlet. Try plugging the machine into a different outlet to rule out any issues with the power source.
- Inspect the power cord for any visible signs of damage or wear. If the cord is damaged, replace it with a new one from the manufacturer.
- Verify that the power switch is in the “on” position and functioning correctly. Press the switch firmly to ensure proper contact.
- If the machine still does not power on, check the fuse in the machine’s power cord or plug. Replace the fuse if it is blown, following the manufacturer’s instructions.
- If none of the above steps resolve the issue, there may be an internal electrical problem with the machine. In this case, contact customer support or a certified technician for further assistance and repair.
Problem 13: Machine Making Unusual Noise
Description: The Husqvarna Viking 1200 is emitting unusual or loud noises during operation, indicating a potential mechanical or internal problem.
Cause: Unusual noises from the machine may be caused by various factors, including loose or damaged components, lack of lubrication, or foreign objects stuck in the machine.
Troubleshooting:
- Stop the machine immediately if you hear any unusual noises and inspect it for any visible signs of damage or obstruction.
- Check that all screws, nuts, and bolts are securely tightened and that there are no loose or rattling components.
- Apply lubrication to the machine’s moving parts according to the manufacturer’s recommendations, as lack of lubrication can cause friction and noise.
- Remove the needle plate and bobbin case to inspect the internal components for any foreign objects, such as broken needles or thread tangles, that may be causing the noise.
- If the problem persists, refrain from using the machine further and contact customer support or a certified technician for professional inspection and repair.
Here you can find all the
parts and accessories for the Husqvarna Viking 1200
guaranteed to fit your sewing machine
Problem 14: Machine Not Feeding Fabric Properly
Description: The fabric is not being fed through the machine smoothly or consistently, resulting in uneven stitches or fabric bunching.
Cause: Poor fabric feeding may occur due to various reasons, including incorrect presser foot pressure, improper threading, or a malfunctioning feed dog mechanism.
Troubleshooting:
- Adjust the presser foot pressure according to the thickness and type of fabric being used. Increase the pressure for thicker fabrics and decrease it for thinner fabrics.
- Verify that the machine is threaded correctly, following the threading guide in the user manual. Ensure that the thread is passing through all thread guides and tension discs properly.
- Clean the feed dogs and surrounding area with a soft brush to remove any dust, lint, or debris that may be obstructing the fabric feeding mechanism.
- Test the machine on a scrap piece of fabric to see if the feeding issue persists. If so, check the feed dog mechanism for any signs of damage or misalignment and adjust or repair as needed.
- If the problem continues, contact customer support or a certified technician for further assistance and troubleshooting with the fabric feeding mechanism.
Problem 15: Thread Breakage During Sewing
Description: The thread keeps breaking while sewing with the Husqvarna Viking 1200, causing interruptions and affecting stitch quality.
Cause: Thread breakage can occur due to various factors, including improper tension settings, a dull or damaged needle, incorrect needle/thread/fabric combination, or a malfunctioning thread delivery system.
Troubleshooting:
- Check the tension settings on the machine and adjust them according to the thread and fabric being used. Ensure that the tension discs are clean and free from debris.
- Inspect the needle for any signs of damage or wear and replace it with a new one if necessary. Use the correct needle type and size for the fabric being sewn.
- Verify that the thread is compatible with the needle and fabric, and that it is not old or brittle. If necessary, switch to a higher-quality thread or a different brand.
- Re-thread the machine, making sure to follow the correct threading path and tension adjustments. Check for any tangles or knots in the thread.
- Clean the thread delivery system, including the thread guides, tension discs, and bobbin area, to remove any debris or lint that may be causing the thread to break.
- If the problem persists, try adjusting the sewing speed or using a different stitch type to see if it affects the thread breakage. If all else fails, contact customer support or a certified technician for further assistance.
Problem 16: Uneven Tension Across Stitches
Description: The tension of stitches is uneven, with some stitches appearing loose and others tight, resulting in an inconsistent stitch appearance.
Cause: Uneven tension across stitches may be caused by various factors, including incorrect tension settings, improper threading, or a malfunctioning tension mechanism.
Troubleshooting:
- Check the tension settings on the machine and adjust them according to the fabric and thread being used. Test the tension on a scrap piece of fabric to ensure even stitches.
- Verify that the machine is threaded correctly, following the threading guide in the user manual. Ensure that the thread is passing through all thread guides and tension discs properly.
- Clean the tension discs and surrounding area with a soft brush to remove any dust, lint, or debris that may be affecting the tension mechanism.
- If the problem persists, there may be an issue with the tension mechanism itself. Contact customer support or a certified technician for further assistance and troubleshooting.
Problem 17: Fabric Puckering During Sewing
Description: The fabric is puckering or gathering unnaturally while sewing with the Husqvarna Viking 1200, resulting in an unsightly finish.
Cause: Fabric puckering can occur due to various reasons, including incorrect tension settings, improper presser foot pressure, using the wrong needle or thread for the fabric, or sewing too quickly.
Troubleshooting:
- Adjust the tension settings on the machine to achieve a balanced tension that is appropriate for the fabric being sewn. Test the tension on a scrap piece of fabric before sewing the actual project.
- Check the presser foot pressure and adjust it according to the thickness and type of fabric being used. Increase the pressure for thicker fabrics and decrease it for thinner fabrics.
- Use the correct needle type and size for the fabric being sewn, and ensure that the needle is in good condition and not dull or damaged.
- Slow down the sewing speed to allow the machine to feed the fabric more evenly and reduce the risk of puckering.
- If the problem persists, consider using a stabilizer or interfacing to provide additional support to the fabric and prevent puckering. If all else fails, contact customer support or a certified technician for further assistance.
Problem 18: Bobbin Thread Not Catching
Description: The bobbin thread is not being caught by the needle thread, resulting in loose stitches or no stitches at all.
Cause: The bobbin thread may fail to catch due to various
reasons, including incorrect bobbin insertion, a poorly wound bobbin, improper threading, or a malfunctioning bobbin tension.
Troubleshooting:
- Remove the bobbin and re-insert it into the bobbin case, ensuring that it is wound correctly and inserted in the right direction according to the machine’s instructions.
- Rethread the machine, making sure to follow the correct threading path and tension adjustments. Check for any tangles or knots in the thread.
- Clean the bobbin area, including the bobbin case and surrounding components, to remove any dust, lint, or debris that may be obstructing the thread path.
- Check the bobbin tension and adjust it if necessary according to the machine’s instructions. Test the tension on a scrap piece of fabric to ensure even stitches.
- If the problem persists, try using a different bobbin or thread to see if it affects the thread catching. If all else fails, contact customer support or a certified technician for further assistance.
Problem 19: Thread Getting Tangled in Bobbin Area
Description: The thread is getting tangled or bunched up in the bobbin area of the Husqvarna Viking 1200, causing thread jams and interruptions during sewing.
Cause: Thread tangling in the bobbin area may occur due to various reasons, including improper threading, using the wrong bobbin size or type, incorrect bobbin tension, or a malfunctioning bobbin case.
Troubleshooting:
- Rethread the machine, ensuring that the thread is passing through all thread guides and tension discs properly. Check for any tangles or knots in the thread.
- Verify that the bobbin being used is the correct size and type for the machine, and that it is wound evenly and inserted correctly into the bobbin case.
- Check the bobbin tension and adjust it if necessary according to the machine’s instructions. Test the tension on a scrap piece of fabric to ensure even stitches.
- Clean the bobbin area, including the bobbin case and surrounding components, to remove any dust, lint, or debris that may be obstructing the thread path.
- If the problem persists, there may be an issue with the bobbin case or tension mechanism. Contact customer support or a certified technician for further assistance and troubleshooting.
Problem 20: Machine Not Completing Stitch Pattern
Description: The Husqvarna Viking 1200 is not completing the selected stitch pattern or is skipping stitches during sewing.
Cause: This issue may occur due to various reasons, including incorrect settings, a malfunctioning stitch selection mechanism, a dull or damaged needle, or an issue with the machine’s timing.
Troubleshooting:
- Check the stitch selection settings on the machine and ensure that the correct stitch pattern is selected. Test the machine on a scrap piece of fabric to verify that the selected stitch pattern is completing correctly.
- Inspect the needle for any signs of damage or wear and replace it with a new one if necessary. Use the correct needle type and size for the fabric being sewn.
- Clean the machine’s stitch selection mechanism with a soft brush to remove any dust or debris that may be causing it to malfunction.
- If the problem persists, there may be an issue with the machine’s timing or other internal components. Contact customer support or a certified technician for further assistance and troubleshooting.
Problem 21: Error Message Displayed on Screen
Description: An error message is displayed on the screen of the Husqvarna Viking 1200, indicating a problem that needs to be addressed.
Cause: Error messages can be triggered by various issues, including machine malfunctions, incorrect settings, or user errors.
Troubleshooting:
- Take note of the specific error message being displayed and consult the user manual for guidance on troubleshooting and resolving the issue.
- Follow any instructions provided in the error message, such as checking for thread jams, rethreading the machine, or restarting the machine.
- If the error message persists, contact customer support or a certified technician for further assistance and troubleshooting.
Problem 22: Machine Running Slowly or Sluggishly
Description: The Husqvarna Viking 1200 is running slowly or sluggishly, affecting sewing efficiency and productivity.
Cause: This issue may occur due to various reasons, including a buildup of dust or debris in the machine’s internal components, a lack of lubrication, or a mechanical problem.
Troubleshooting:
- Clean the machine thoroughly, paying special attention to the internal components, such as the feed dogs, bobbin area, and needle bar, to remove any dust or debris that may be causing friction and slowing down the machine.
- Apply lubrication to the machine’s moving parts according to the manufacturer’s recommendations, as lack of lubrication can cause friction and slow down the machine.
- Check for any signs of mechanical problems, such as worn or damaged parts, loose belts, or misaligned components. If necessary, contact customer support or a certified technician for further assistance and repair.
Problem 23: Machine Not Responding to Foot Pedal
Description: The foot pedal of the Husqvarna Viking 1200 is not responding when pressed, preventing the machine from sewing.
Cause: This issue may occur due to various reasons, including a disconnected or faulty foot pedal, incorrect settings, or a malfunction in the machine’s pedal control system.
Troubleshooting:
- Check that the foot pedal is securely plugged into the machine and that the connection is not loose or damaged.
- Inspect the foot pedal for any visible signs of damage or wear, such as frayed wires or broken components. Replace the foot pedal if necessary.
- Verify that the foot pedal is compatible with the machine and that it is not damaged or malfunctioning.
- Check the settings on the machine to ensure that the foot pedal control is enabled and functioning correctly. Test the machine with a different foot pedal if available.
- If the problem persists, contact customer support or a certified technician for further assistance and troubleshooting with the foot pedal control system.
Problem 24: Machine Displaying Incorrect Stitch Count
Description: The stitch count displayed on the screen of the Husqvarna Viking 1200 does not match the actual number of stitches sewn, indicating a potential problem with the machine’s stitch counting mechanism.
Cause: Incorrect stitch counts may be caused by various factors, including user error, a malfunction in the machine’s stitch counting system, or a problem with the electronic components.
Troubleshooting:
- Double-check the stitch count displayed on the screen against the actual number of stitches sewn to verify the discrepancy. Count the stitches manually if necessary.
- Reset the machine by turning it off and unplugging it for a few minutes before restarting. This may help reset the stitch counting system and resolve any temporary glitches.
- If the problem persists, contact customer support or a certified technician for further assistance and troubleshooting with the machine’s stitch counting mechanism.
Problem 25: Machine Not Holding Memory Settings
Description: The Husqvarna Viking 1200 is not holding memory settings or programmed patterns, requiring reprogramming each time the machine is turned on.
Cause: This issue may occur due to various reasons, including a low battery in the machine’s memory backup system, corrupted memory settings, or a malfunction in the electronic components.
Troubleshooting:
1. Check the battery level of the machine’s memory backup system and replace the battery if necessary. Consult the user manual for instructions on replacing the battery.
- Reset the machine to its default settings and reprogram the desired patterns or settings. Test the machine to see if the memory settings are now being retained.
- If the problem persists, there may be an issue with the machine’s memory storage or electronic components. Contact customer support or a certified technician for further assistance and troubleshooting.
These troubleshooting steps should help identify and resolve common problems with the Husqvarna Viking 1200, ensuring optimal performance and sewing results. If any issues persist or worsen despite troubleshooting attempts, it is recommended to contact customer support or a certified technician for professional assistance and repair.
Here you can find all the
parts and accessories for the Husqvarna Viking 1200
guaranteed to fit your sewing machine
Husqvarna Viking 1200 Sewing Machine Manual
The operating instructions for the Husqvarna Viking 1200 sewing machine can be found on the manufacturer’s website. Please visit the official Husqvarna Viking website to access the manual for comprehensive guidance on operating your sewing machine effectively and troubleshooting common issues.
Frequently Asked Questions (FAQ) about Husqvarna Viking 1200
Q: How do I adjust the tension on my Husqvarna Viking 1200 sewing machine?
A: To adjust the tension on the Husqvarna Viking 1200, you can use the tension adjustment dial located on the machine. Experiment with different tension settings while testing on scrap fabric until you achieve the desired stitch appearance.
Q: What should I do if my Husqvarna Viking 1200 keeps jamming?
A: If your Husqvarna Viking 1200 is experiencing frequent jamming, try cleaning the bobbin area, re-threading the machine, and ensuring the needle is inserted correctly. If the issue persists, contact customer service or a certified technician for assistance.
Q: How often should I oil my Husqvarna Viking 1200 sewing machine?
A: It is recommended to oil your Husqvarna Viking 1200 sewing machine regularly, following the guidelines provided in the machine’s manual. Typically, this involves oiling the machine after every 8-10 hours of use or as indicated by the manufacturer.
Q: Why is my Husqvarna Viking 1200 not sewing properly?
A: Several factors could contribute to improper sewing on the Husqvarna Viking 1200, including incorrect threading, needle issues, or tension problems. Refer to the troubleshooting section in the manual for guidance, or seek assistance from customer service if needed.
Q: Can I use different brands of needles and thread with my Husqvarna Viking 1200?
A: While it’s generally recommended to use high-quality needles and thread compatible with your sewing machine, you can experiment with different brands. However, ensure that the needle size and type are suitable for the fabric you’re sewing and that the thread is of good quality to avoid potential issues.
Conclusion
For any issues with your Husqvarna Viking 1200 sewing machine, always refer to the manual, contact customer service, or visit a service center for assistance. Proper maintenance and troubleshooting techniques can help ensure optimal performance and longevity of your machine.
Husqvarna Viking 1140 Common Problems