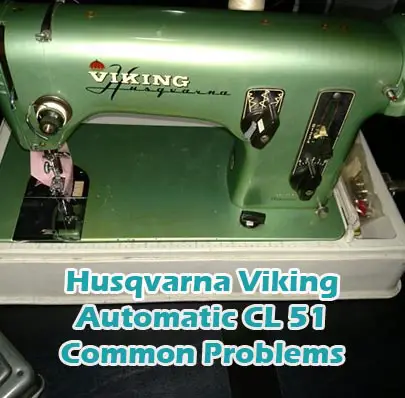
Husqvarna Viking Automatic CL 51 Common Problems and Troubleshooting
Are you experiencing issues with your Husqvarna Viking Automatic CL 51 sewing machine? Whether you’re a seasoned seamstress or just starting out, encountering common problems can be frustrating.
In this guide, we’ll address potential issues that users may face with this specific model. From minor hiccups to more significant malfunctions, understanding the root causes and troubleshooting steps can help you get back to your sewing projects with ease.
Causes of Common Problems with the Husqvarna Viking Automatic CL 51
This section will address various common problems and their corresponding troubleshooting solutions for the Husqvarna Viking Automatic CL 51 sewing machine.
Antique Retro
Here, we’ll explore potential issues that may arise due to the vintage nature of the Husqvarna Viking Automatic CL 51 sewing machine. Despite its classic appeal, older machines may encounter specific challenges that require unique troubleshooting approaches.
Common Problems with the Husqvarna Viking Automatic CL 51
Thread Breaking
- Problem: Thread breaking frequently during sewing.
- Cause: Incorrect threading or tension, damaged needle, or low-quality thread.
- Troubleshooting:
- Re-thread the machine, ensuring correct threading paths.
- Check and adjust the tension settings according to the machine’s manual.
- Replace the needle with a new one suitable for the fabric being sewn.
- Use high-quality thread appropriate for the project.
Bobbin Jamming
- Problem: Bobbin getting stuck or jamming frequently.
- Cause: Improperly wound bobbin, debris or lint in the bobbin area, or incorrect bobbin type.
- Troubleshooting:
- Ensure the bobbin is wound evenly and inserted correctly into the bobbin case.
- Clean the bobbin area to remove any accumulated debris or lint.
- Use the appropriate type and size of bobbin recommended for the Husqvarna Viking Automatic CL 51.
Uneven Stitching
- Problem: Stitches appearing uneven or irregular.
- Cause: Incorrect tension settings, damaged needle, or improper machine maintenance.
- Troubleshooting:
- Adjust the tension settings according to the fabric and thread being used.
- Replace the needle with a new one suitable for the fabric.
- Regularly clean and oil the machine as per the manufacturer’s instructions.
Machine Skipping Stitches
- Problem: The machine skips stitches while sewing.
- Cause: Dull or damaged needle, incorrect needle size, or incorrect threading.
- Troubleshooting:
- Replace the needle with a new one appropriate for the fabric.
- Ensure the needle is inserted correctly and tightened securely.
- Check the threading paths and re-thread the machine.
Machine Not Powering On
- Problem: The machine does not turn on when powered.
- Cause: Faulty power cord, loose connection, or internal electrical issue.
- Troubleshooting:
- Check that the power cord is securely plugged into the outlet and the machine.
- Inspect the power cord for any damage or fraying and replace if necessary.
- If the issue persists, contact a certified technician for further diagnosis and repair.
Stitch Skips
Description: The machine skips stitches or fails to sew consistently.
Cause: Dull or damaged needle, incorrect needle threading, or insufficient presser foot pressure.
Troubleshooting: Replace the needle, ensure proper threading, and adjust the presser foot pressure as needed.
Noise During Operation
Description: Unusual or loud noises occur while sewing.
Cause: Loose parts, worn-out components, or lack of lubrication.
Troubleshooting: Tighten any loose parts, inspect and replace worn-out components, and lubricate the machine following manufacturer guidelines.
Fabric Pulling
Description: The fabric is pulled or dragged unevenly during sewing.
Cause: Incorrect presser foot pressure, improper stitch length or tension, or using the wrong type of presser foot.
Troubleshooting: Adjust presser foot pressure, stitch length, and tension settings to suit the fabric being used, and ensure the appropriate presser foot is installed.
Thread Tension Issues
Description: Inconsistent thread tension results in loose or tight stitches.
Cause: Improper threading, worn-out tension discs, or malfunctioning tension mechanism.
Troubleshooting: Re-thread the machine correctly, clean or replace tension discs if necessary, and inspect the tension mechanism for any faults.
Buttonholing Problems
Description: Difficulties in creating consistent and precise buttonholes.
Cause: Incorrect buttonhole settings, dull or damaged buttonhole cutter, or fabric slipping during the process.
Troubleshooting: Adjust buttonhole settings according to fabric thickness, sharpen or replace the buttonhole cutter, and use stabilizers to prevent fabric slippage.
Thread Jamming in Bobbin Case
Description: Threads get tangled or jammed in the bobbin case.
Cause: Incorrect bobbin insertion, lint buildup, or damaged bobbin case.
Troubleshooting: Ensure the bobbin is inserted correctly, clean the bobbin case and surrounding area of any lint, and inspect the bobbin case for damage.
Needle Plate Damage
Description: The needle plate is scratched, bent, or damaged.
Cause: Accidentally hitting the needle plate with the needle, using incorrect needle plate for the sewing task, or improper maintenance.
Troubleshooting: Replace the damaged needle plate, avoid hitting it with the needle, and regularly clean and maintain the needle plate.
Thread Bunching Under Fabric
Description: Threads bunch up under the fabric, creating loops or knots.
Cause: Incorrect bobbin tension, improper threading, or dull needle.
Troubleshooting: Adjust bobbin tension, re-thread the machine following correct threading path, and replace the needle with a sharp one.
Feed Dogs Not Functioning
Description: Fabric does not advance smoothly due to feed dogs not moving.
Cause: Jammed feed dogs, disconnected feed dog mechanism, or lack of lubrication.
Troubleshooting: Clear any obstructions from the feed dog area, check and reconnect the feed dog mechanism if necessary, and lubricate the feed dogs as recommended.
Electrical Issues
Description: The machine experiences power fluctuations, lights flicker, or fails to turn on.
Cause: Faulty power cord, loose connections, or electrical component malfunction.
Troubleshooting: Check the power cord for damage, ensure all connections are secure, and consult a professional technician for electrical component inspection and repair.
Thread Cutter Malfunction
Description: The built-in thread cutter fails to cut the thread cleanly.
Cause: Dull or misaligned thread cutter blade, debris accumulation, or mechanical issues.
Troubleshooting: Clean the thread cutter area, inspect and realign the blade if necessary, and address any mechanical issues that may be causing the malfunction.
Bobbin Winding Problems
Description: Issues arise while winding the bobbin, such as uneven winding or bobbin slipping off.
Cause: Incorrect bobbin threading, loose bobbin tension, or malfunctioning bobbin winding mechanism.
Troubleshooting: Ensure correct bobbin threading, adjust bobbin tension if possible, and inspect the bobbin winding mechanism for any faults.
Foot Pedal Malfunction
Description: The foot pedal does not respond consistently or fails to control machine speed.
Cause: Loose connections, damaged pedal cord, or internal electrical issues.
Troubleshooting: Check and tighten pedal connections, inspect the pedal cord for damage, and test with a different power source if possible.
Thread Spool Holder Issues
Description: The thread spool holder does not hold the thread securely or causes tangling.
Cause: Loose or misaligned spool holder, improper thread placement, or worn-out parts.
Troubleshooting: Adjust or tighten the spool holder, ensure correct thread placement, and replace worn-out parts if necessary.
Pattern Selection Problems
Description: Difficulties arise in selecting or changing stitching patterns.
Cause: Faulty pattern selection mechanism, button or dial issues, or software glitches.
Troubleshooting: Clean and inspect the pattern selection components, ensure smooth operation of buttons or dials, and update or recalibrate the machine software if applicable.
Husqvarna Viking Automatic CL 51 Sewing Machine Manual
The operating instructions for the Husqvarna Viking Automatic CL 51 sewing machine can be found on the manufacturer’s website. Please visit the official website of Husqvarna Viking and navigate to the support or resources section to access the manual for your specific model.
Frequently Asked Questions
1. Why does my thread keep breaking?
Thread breakage can occur due to incorrect threading, improper tension settings, or using old or poor-quality thread. Try re-threading the machine, adjusting the tension, and using high-quality thread to prevent breakage.
2. How do I fix uneven stitching?
Uneven stitching may result from tension issues, incorrect needle size, or dirty feed dogs. Try adjusting the tension settings, using the correct needle for your fabric, and cleaning the feed dogs to achieve even stitches.
3. What should I do if my machine jams?
If your machine jams, first turn off the power and remove any tangled threads or fabric. Check for any obstructions in the bobbin area or needle plate. Once cleared, re-thread the machine and test sew on scrap fabric before resuming your project.
4. How often should I oil my sewing machine?
The frequency of oiling depends on your usage and the manufacturer’s recommendations. Generally, it’s advisable to oil your machine after every 8-10 hours of sewing. Refer to your machine’s manual for specific instructions on oiling points and types of oil to use.
5. What can I do if my machine is making strange noises?
Unusual noises may indicate mechanical issues or the need for lubrication. Check for loose parts, worn-out components, or debris in the machine. Lubricate the moving parts according to the manufacturer’s instructions and seek professional help if the issue persists.
Conclusion
For any issues encountered with your Husqvarna Viking Automatic CL 51 sewing machine, it’s always recommended to refer to the manual, contact customer service, or visit a certified service center for assistance. Proper maintenance and troubleshooting can help keep your machine running smoothly and extend its lifespan.
Husqvarna Viking Automatic 21 Common Problems