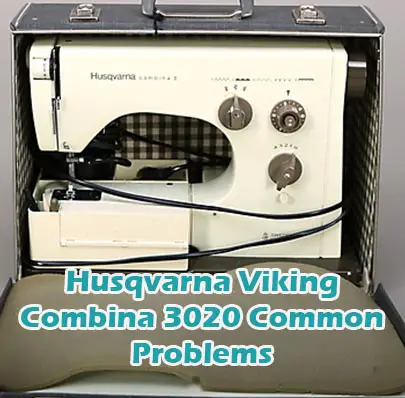
Husqvarna Viking Combina 3020 Common Problems and Troubleshooting
Are you encountering issues with your Husqvarna Viking Combina 3020 sewing machine? This article is here to help you troubleshoot common problems you may encounter while using this specific model. Whether you’re a beginner or an experienced user, understanding the potential issues and their solutions can greatly enhance your sewing experience with the Husqvarna Viking Combina 3020.
Causes of Common Problems with the Husqvarna Viking Combina 3020
This section will address possible problems and solutions with the Husqvarna Viking Combina 3020 sewing machine.
Common Problems with the Husqvarna Viking Combina 3020
-
Thread Breakage
Description of the problem: Threads keep breaking during sewing.
Cause of the problem: Incorrect threading or tension settings.
Troubleshooting step-by-step:
- Re-thread the machine following the threading guide specific to the Husqvarna Viking Combina 3020.
- Check the tension settings and adjust them according to the fabric being used.
- Inspect the needle for any damage or dullness and replace if necessary.
-
Uneven Stitching
Description of the problem: Stitches appear uneven or irregular.
Cause of the problem: Improper needle insertion or bobbin tension issues.
Troubleshooting step-by-step:
- Ensure the needle is inserted correctly and securely into the machine.
- Check the bobbin tension and adjust it if it’s too tight or too loose.
- Clean the bobbin area and remove any lint or debris that may be affecting the stitching.
-
Machine Jamming
Description of the problem: The machine gets stuck or jams while sewing.
Cause of the problem: Obstructions in the feed dogs or bobbin area.
Troubleshooting step-by-step:
- Turn off the machine and remove the fabric from the feed dogs.
- Inspect the bobbin area for any tangled threads or debris and clean it thoroughly.
- Ensure the presser foot is securely attached and not causing any obstructions.
-
Needle Breakage
Description of the problem: Needles keep breaking during sewing.
Cause of the problem: Using the wrong needle size or bent needles.
Troubleshooting step-by-step:
- Verify that the needle being used is appropriate for the fabric being sewn.
- Replace the needle if it appears bent or damaged.
- Ensure the needle is inserted correctly and securely into the machine.
-
Bobbin Thread Tangling
Description of the problem: Bobbin thread gets tangled or bunches up.
Cause of the problem: Incorrect bobbin threading or tension issues.
Troubleshooting step-by-step:
- Re-thread the bobbin following the specific instructions for the Husqvarna Viking Combina 3020.
- Check the bobbin tension and adjust it if necessary.
- Ensure the bobbin case is properly inserted and seated in the machine.
Machine Not Powering On
Description of the problem: The sewing machine does not turn on when the power button is pressed.
Cause of the problem: Power cord issues or internal electrical faults.
Troubleshooting step-by-step:
- Check that the power cord is securely plugged into the machine and the power outlet.
- Test the power outlet with another device to ensure it’s functioning properly.
- If the power cord appears damaged, replace it with a new one compatible with the Husqvarna Viking Combina 3020.
- If the issue persists, contact a qualified technician to inspect for internal electrical faults.
Bobbin Case Misalignment
Description of the problem: The bobbin case does not sit properly or moves out of place during sewing.
Cause of the problem: Incorrect installation or loose bobbin case screws.
Troubleshooting step-by-step:
- Remove the bobbin case and re-insert it according to the machine’s manual for proper alignment.
- Tighten the bobbin case screws securely to prevent movement during operation.
- Inspect the bobbin case for any damage or debris that may be affecting its alignment.
Feed Dogs Not Moving
Description of the problem: The feed dogs fail to advance the fabric during sewing.
Cause of the problem: Dirty or obstructed feed dogs, or mechanical issues.
Troubleshooting step-by-step:
- Clean the feed dogs thoroughly using a brush or lint remover to remove any accumulated debris.
- Check for any obstructions around the feed dogs and remove them carefully.
- If the feed dogs still do not move, contact a professional technician to inspect for mechanical issues.
Noisy Operation
Description of the problem: The sewing machine produces loud or unusual noises during operation.
Cause of the problem: Lack of lubrication, loose parts, or internal mechanical issues.
Troubleshooting step-by-step:
- Apply lubricating oil to the moving parts of the sewing machine as per the manufacturer’s instructions.
- Tighten any loose screws or parts that may be causing the noise.
- If the issue persists, consult the machine’s manual for further troubleshooting or contact customer support.
Thread Bunching Under Fabric
Description of the problem: Threads bunch up or form loops underneath the fabric.
Cause of the problem: Incorrect threading of the upper thread or bobbin, or tension imbalances.
Troubleshooting step-by-step:
- Re-thread both the upper thread and bobbin, ensuring they are properly seated and tensioned.
- Check the tension settings on the machine and adjust them according to the fabric being used.
- If the issue persists, try using a different needle size or type, as a dull or incorrect needle can also cause thread bunching.
Stitch Length Inconsistency
Description of the problem: The length of stitches varies inconsistently.
Cause of the problem: Incorrect settings or mechanical issues with the stitch length mechanism.
Troubleshooting step-by-step:
- Adjust the stitch length settings on the machine to the desired length.
- Ensure the stitch length selector is functioning properly and not stuck in between settings.
- Inspect the internal mechanisms related to stitch length for any signs of damage or misalignment.
Thread Tension Issues
Description of the problem: Uneven tension between the upper and lower threads.
Cause of the problem: Improper threading, incorrect tension settings, or mechanical issues.
Troubleshooting step-by-step:
- Re-thread both the upper thread and bobbin, ensuring they are correctly threaded according to the machine’s manual.
- Adjust the tension settings for both the upper thread and bobbin to achieve balanced tension.
- Clean the tension discs and bobbin case area to remove any debris that may be affecting tension.
Needle Threader Malfunction
Description of the problem: The automatic needle threader fails to work.
Cause of the problem: Misalignment or damage to the needle threader mechanism.
Troubleshooting step-by-step:
- Ensure the needle is at the highest position before attempting to use the needle threader.
- Check for any obstructions or tangled threads around the needle threader mechanism and remove them.
- If the issue persists, consult the machine’s manual for manual threading instructions or seek professional repair.
Presser Foot Pressure Issues
Description of the problem: Inconsistent pressure exerted by the presser foot on the fabric.
Cause of the problem: Improper adjustment of presser foot pressure or mechanical issues.
Troubleshooting step-by-step:
- Adjust the presser foot pressure according to the thickness of the fabric being sewn.
- Clean the presser foot mechanism and ensure it moves freely without any obstructions.
- If the issue persists, consult the machine’s manual for further troubleshooting or contact customer support.
Buttonhole Malfunction
Description of the problem: The sewing machine fails to create proper buttonholes.
Cause of the problem: Incorrect buttonhole settings, needle issues, or mechanical faults.
Troubleshooting step-by-step:
- Verify that the buttonhole foot is attached correctly and compatible with the machine.
- Ensure the needle used for creating buttonholes is appropriate and not damaged.
- Adjust the buttonhole settings on the machine to match the desired buttonhole size and style.
Bobbin Winding Troubles
Description of the problem: Difficulties in winding the bobbin properly.
Cause of the problem: Improper threading of the bobbin winding mechanism or tension issues.
Troubleshooting step-by-step:
- Ensure the bobbin is placed securely on the winding spindle and the thread is correctly threaded through the bobbin winding guide.
- Check the bobbin winding tension and adjust it if necessary to achieve smooth and even winding.
- If the bobbin still does not wind properly, inspect the bobbin winding mechanism for any signs of damage or obstruction.
Feed Dog Height Adjustment
Description of the problem: Difficulties in adjusting the height of the feed dogs.
Cause of the problem: Stuck or malfunctioning feed dog adjustment mechanism.
Troubleshooting step-by-step:
- Ensure the machine is turned off and the needle is in the highest position before attempting to adjust the feed dog height.
- Check for any debris or obstruction around the feed dog adjustment dial and clean it if necessary.
- If the adjustment mechanism still does not work, consult the machine’s manual for manual adjustment instructions or seek professional repair.
Thread Cutter Dysfunction
Description of the problem: The built-in thread cutter does not function properly.
Cause of the problem: Dull or misaligned thread cutter blade, or mechanical issues.
Troubleshooting step-by-step:
- Inspect the thread cutter blade for any signs of damage or dullness and replace it if necessary.
- Ensure the thread cutter mechanism is not obstructed by any thread remnants or debris.
- If the thread cutter still does not work, consult the machine’s manual for alternative thread cutting methods or seek professional repair.
Bobbin Case Latch Problems
Description of the problem: Difficulties in opening or closing the bobbin case latch.
Cause of the problem: Misaligned or damaged bobbin case latch, or debris accumulation.
Troubleshooting step-by-step:
- Check for any debris or tangled threads around the bobbin case latch and clean it thoroughly.
- Inspect the bobbin case latch for any signs of misalignment or damage and adjust or replace it if necessary.
- If the problem persists, consult the machine’s manual for alternative methods of accessing the bobbin case or seek professional repair.
Foot Pedal Connection Issues
Description of the problem: The foot pedal does not establish a proper connection with the sewing machine.
Cause of the problem: Loose or damaged foot pedal cable, or internal electrical faults.
Troubleshooting step-by-step:
- Ensure the foot pedal cable is securely plugged into the machine and the foot pedal.
- Check for any visible damage or fraying along the foot pedal cable and replace it if necessary.
- If the issue persists, contact a qualified technician to inspect for internal electrical faults.
Bobbin Thread Not Catching
Description of the problem: The bobbin thread does not catch the upper thread during sewing.
Cause of the problem: Improper bobbin insertion or tension, or issues with the bobbin case.
Troubleshooting step-by-step:
- Ensure the bobbin is inserted correctly into the bobbin case and that the thread is properly threaded through the tension mechanism.
- Check the bobbin tension and adjust it if necessary to ensure proper thread tension.
- Inspect the bobbin case for any signs of damage or debris that may be preventing the bobbin thread from catching.
Needle Bar Jamming
Description of the problem: The needle bar gets stuck or jams during sewing.
Cause of the problem: Lack of lubrication, bent needle, or mechanical issues with the needle bar.
Troubleshooting step-by-step:
- Apply lubricating oil to the needle bar mechanism as per the manufacturer’s instructions.
- Inspect the needle for any signs of bending or damage and replace it if necessary.
- If the issue persists, consult the machine’s manual for further troubleshooting or contact customer support.
Thread Knots on Fabric
Description of the problem: Knots of thread appear on the fabric surface during sewing.
Cause of the problem: Tension issues, incorrect threading, or machine speed.
Troubleshooting step-by-step:
- Check the tension settings for both the upper thread and bobbin and adjust them as needed.
- Re-thread the machine, ensuring the thread is properly seated and threaded through all guides and tension discs.
- Adjust the sewing speed to a slower setting to prevent excessive thread buildup and knotting.
Automatic Thread Cutter Malfunction
Description of the problem: The automatic thread cutter feature does not work as intended.
Cause of the problem: Mechanical issues with the thread cutter mechanism or sensor malfunction.
Troubleshooting step-by-step:
- Inspect the thread cutter mechanism for any signs of obstruction or damage and clean it if necessary.
- Ensure the thread cutter sensor is not blocked by any debris and is functioning properly.
- If the issue persists, consult the machine’s manual for manual thread cutting methods or seek professional repair.
Presser Foot Stuck in Up Position
Description of the problem: The presser foot remains stuck in the raised position and does not lower.
Cause of the problem: Mechanical issues with the presser foot lifter mechanism.
Troubleshooting step-by-step:
- Ensure the presser foot lifter lever is not stuck or obstructed and moves freely.
- Inspect the presser foot lifter mechanism for any signs of damage or misalignment and adjust or repair as needed.
- If the presser foot still does not lower, consult the machine’s manual for alternative methods of lowering the presser foot or seek professional repair.
Husqvarna Viking Combina 3020 Sewing Machine Manual
The operating instructions for the Husqvarna Viking Combina 3020 sewing machine can be found on the manufacturer’s website. Please visit the official Husqvarna Viking website and navigate to the support or downloads section to access the manual.
Frequently Asked Questions about the Husqvarna Viking Combina 3020
Q: How do I troubleshoot thread breakage issues with my Husqvarna Viking Combina 3020?
A: Thread breakage can be caused by incorrect threading or tension settings. Re-thread the machine following the threading guide specific to the Husqvarna Viking Combina 3020 and adjust the tension settings according to the fabric being used.
Q: Why are my stitches uneven on the Husqvarna Viking Combina 3020?
A: Uneven stitches can result from improper needle insertion or bobbin tension issues. Ensure the needle is inserted correctly and securely into the machine, and check the bobbin tension, adjusting it if it’s too tight or too loose.
Q: How can I fix machine jamming problems with the Husqvarna Viking Combina 3020?
A: Machine jamming can occur due to obstructions in the feed dogs or bobbin area. Turn off the machine, remove the fabric from the feed dogs, and inspect the bobbin area for tangled threads or debris. Clean the area thoroughly and ensure the presser foot is securely attached.
Q: What should I do if needles keep breaking on the Husqvarna Viking Combina 3020?
A: Needle breakage may be caused by using the wrong needle size or bent needles. Verify that the needle being used is appropriate for the fabric being sewn, replace the needle if it appears bent or damaged, and ensure it is inserted correctly into the machine.
Q: How do I troubleshoot bobbin thread tangling issues with my Husqvarna Viking Combina 3020?
A: Bobbin thread tangling can result from incorrect bobbin threading or tension issues. Re-thread the bobbin following the specific instructions for the Husqvarna Viking Combina 3020, check the bobbin tension, and ensure the bobbin case is properly inserted and seated in the machine.
Conclusion
Always refer to the manual, customer service, or service center whenever possible if there is a problem with your Husqvarna Viking Combina 3020 sewing machine. Proper troubleshooting and maintenance are essential for optimal performance and longevity.
Husqvarna Viking Combina 3010 Common Problems