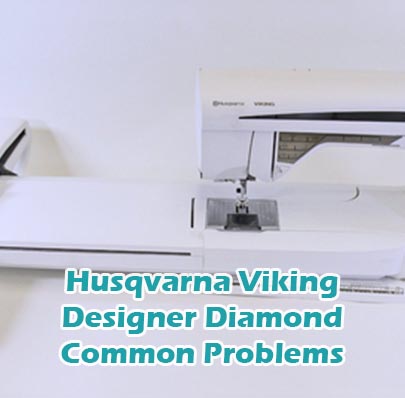
Husqvarna Viking Designer Diamond Common Problems and Troubleshooting
Welcome to our guide on troubleshooting common issues with the Husqvarna Viking Designer Diamond sewing machine. As a proud owner of this sophisticated piece of equipment, you understand the importance of precision and reliability in your sewing projects. However, like any complex machine, the Designer Diamond may encounter occasional problems that can disrupt your workflow. In this article, we’ll explore some common issues that users may face with this model and provide effective troubleshooting solutions to ensure that your sewing experience remains seamless and enjoyable.
Causes of Common Problems with the Husqvarna Viking Designer Diamond
This section serves as an introduction to the various issues that users may encounter with the Husqvarna Viking Designer Diamond sewing machine. Subsequent subsections will delve into specific problems and their respective troubleshooting steps, ensuring that you can address any issues you may face effectively.
Common Problems with the Husqvarna Viking Designer Diamond
1. Thread Breaking
Description of the problem: One common issue experienced by Husqvarna Viking Designer Diamond users is frequent thread breaking during sewing.
Cause of the problem: Thread breaking can occur due to various reasons, such as incorrect threading, improper tension settings, or using low-quality or old thread.
Troubleshooting step-by-step:
- Ensure that the machine is correctly threaded according to the user manual.
- Check the tension settings and adjust them as needed. Start with the default settings and make incremental adjustments if necessary.
- Use high-quality, fresh thread appropriate for your sewing project.
- Clean the machine and remove any lint or debris that may be causing interference with the thread.
- If the problem persists, consider consulting a professional technician for further inspection and maintenance.
2. Bobbin Jamming
Description of the problem: Another common issue faced by Husqvarna Viking Designer Diamond users is bobbin jamming, where the bobbin thread gets tangled or stuck.
Cause of the problem: Bobbin jamming can occur due to various reasons, including improper bobbin insertion, incorrect threading, or a dirty bobbin case.
Troubleshooting step-by-step:
- Remove the bobbin and clean the bobbin case area thoroughly, removing any lint or debris.
- Ensure that the bobbin is inserted correctly into the bobbin case, following the directional arrow.
- Check the bobbin tension and adjust it if necessary.
- Re-thread the machine carefully, making sure the thread is properly seated in the tension discs and guides.
- If the problem persists, try using a different bobbin or consult a professional technician for assistance.
3. Needle Breakage
Description of the problem: Husqvarna Viking Designer Diamond users may encounter issues with needle breakage during sewing.
Cause of the problem: Needle breakage can be caused by several factors, such as using the wrong needle size or type, sewing over thick seams or pins, or a bent or damaged needle.
Troubleshooting step-by-step:
- Ensure that you are using the correct needle size and type for your fabric and sewing project.
- Avoid sewing over thick seams or pins, as this can put excessive strain on the needle.
- Inspect the needle for any signs of damage, such as bends or burrs, and replace it if necessary.
- Check the needle position and make sure it is inserted correctly and securely into the needle clamp.
- If the problem persists, try adjusting the machine’s tension settings or consult a professional technician for assistance.
4. Uneven Stitching
Description of the problem: Users of the Husqvarna Viking Designer Diamond may notice uneven stitching or skipped stitches in their sewing projects.
Cause of the problem: Uneven stitching can occur due to issues such as improper tension settings, a dull or damaged needle, or incorrect threading.
Troubleshooting step-by-step:
- Check the tension settings and adjust them as needed, ensuring that the upper and lower threads are properly balanced.
- Inspect the needle for any signs of damage or wear and replace it if necessary.
- Re-thread the machine carefully, following the threading diagram in the user manual.
- Clean the machine and remove any lint or debris that may be affecting the stitching quality.
- If the problem persists, try using a different type of thread or fabric, as some materials may require specific adjustments.
5. Machine Freezing or Error Messages
Description of the problem: Some users may experience their Husqvarna Viking Designer Diamond freezing during operation or displaying error messages on the screen.
Cause of the problem: Machine freezing or error messages can be caused by various factors, including software glitches, electrical issues, or mechanical malfunctions.
Troubleshooting step-by-step:
- Try restarting the machine by turning it off and then back on again.
- Check for any error messages on the screen and consult the user manual for guidance on troubleshooting specific codes.
- Ensure that the machine is plugged in securely and that there are no loose connections or damaged cords.
- If the problem persists, consider updating the machine’s software if a newer version is available.
- If none of the above steps resolve the issue, contact customer support for further assistance or consult a professional technician.
6. Fabric Feed Issues
Description of the problem: Users may encounter difficulties with the fabric feeding smoothly through the machine during sewing.
Cause of the problem: Fabric feed issues can arise due to factors such as a dirty or damaged feed dog, improper presser foot pressure, or incorrect stitch length settings.
Troubleshooting step-by-step:
- Inspect the feed dog for any dirt, debris, or damage, and clean or replace it as necessary.
- Adjust the presser foot pressure according to the thickness of the fabric being sewn.
- Check the stitch length settings and adjust them to match the fabric type and desired sewing technique.
- Ensure that the fabric is properly positioned and guided through the machine, avoiding any dragging or bunching.
- If the problem persists, consider using a walking foot attachment or consulting a professional technician for further assistance.
7. Bobbin Thread Showing on Top
Description of the problem: Some users may notice the bobbin thread appearing on the top side of their sewing projects, causing an unsightly finish.
Cause of the problem: Bobbin thread showing on top can be caused by incorrect bobbin tension, improper threading, or a malfunctioning bobbin case.
Troubleshooting step-by-step:
- Check the bobbin tension and adjust it if necessary, ensuring that the thread feeds smoothly from the bobbin without excessive looseness or tightness.
- Re-thread the bobbin and ensure that it is inserted correctly into the bobbin case, following the directional arrow.
- Clean the bobbin case area and remove any lint or debris that may be obstructing the thread’s path.
- Inspect the bobbin case for any signs of damage or wear and replace it if needed.
- If the issue persists, consider using a different type of thread or consulting a professional technician for further diagnosis.
8. Thread Nesting Underneath
Description of the problem: Users may experience thread nesting, also known as bird’s nesting, where the upper thread forms loops or tangles underneath the fabric.
Cause of the problem: Thread nesting can occur due to factors such as incorrect tension settings, improper threading, or a dull or damaged needle.
Troubleshooting step-by-step:
- Check the tension settings for both the upper and lower threads and adjust them as needed to achieve balanced tension.
- Re-thread the machine, making sure the thread is properly seated in the tension discs and guides.
- Inspect the needle for any signs of damage or wear and replace it if necessary.
- Ensure that the bobbin is inserted correctly into the bobbin case and that the thread is feeding smoothly.
- If the problem persists, try using a different type of thread or fabric, as some materials may require specific adjustments.
9. Motor Overheating
Description of the problem: Some users may notice their Husqvarna Viking Designer Diamond’s motor overheating during prolonged sewing sessions.
Cause of the problem: Motor overheating can be caused by factors such as excessive use, inadequate ventilation, or a malfunctioning motor.
Troubleshooting step-by-step:
- Allow the machine to cool down by turning it off and unplugging it for a period of time.
- Ensure that the machine is placed in a well-ventilated area with sufficient airflow around the motor.
- Check for any obstructions or blockages around the motor that may be restricting airflow.
- If the problem persists, reduce the speed or frequency of use to prevent overheating, and consider consulting a professional technician for further inspection.
10. Buttonhole Malfunction
Description of the problem: Users may encounter issues with buttonhole stitching, such as inconsistent stitch length or incomplete buttonholes.
Cause of the problem: Buttonhole malfunctions can occur due to factors such as incorrect buttonhole settings, improper positioning of the fabric, or a dull or damaged needle.
Troubleshooting step-by-step:
- Check the buttonhole settings and adjust them according to the desired button size and fabric thickness.
- Ensure that the fabric is positioned correctly and securely in the buttonhole foot, with the buttonhole marked accurately.
- Inspect the needle for any signs of damage or wear and replace it if necessary.
- Test the buttonhole function on a scrap piece of fabric to ensure proper stitching before sewing on the actual garment.
- If the problem persists, consult the user manual for specific troubleshooting tips or contact customer support for assistance.
11. Thread Tension Issues
Description of the problem: Users may encounter inconsistencies in thread tension, resulting in uneven stitching or puckering of the fabric.
Cause of the problem: Thread tension issues can arise due to factors such as incorrect tension settings, improper threading, or a dirty tension mechanism.
Troubleshooting step-by-step:
- Check the tension settings for both the upper and lower threads and adjust them as needed to achieve balanced tension.
- Re-thread the machine, ensuring that the thread is properly seated in the tension discs and guides.
- Clean the tension mechanism and remove any dirt, lint, or debris that may be affecting its function.
- Test the tension on a scrap piece of fabric to ensure consistent stitching before proceeding with your project.
- If the problem persists, consider consulting a professional technician for further inspection and adjustment.
12. Needle Threader Malfunction
Description of the problem: Some users may experience issues with the automatic needle threader function not working properly.
Cause of the problem: Needle threader malfunctions can occur due to factors such as misalignment, damage to the needle threader mechanism, or incorrect usage.
Troubleshooting step-by-step:
- Check for any visible damage or obstruction to the needle threader mechanism and gently realign it if necessary.
- Ensure that the needle is positioned correctly and that the needle threader is engaged according to the user manual instructions.
- Inspect the needle threader for any accumulated dust, lint, or debris, and clean it using a soft brush or compressed air.
- If the problem persists, try manually threading the needle or consult the user manual for alternative threading methods.
- If the issue remains unresolved, contact customer support for further assistance or schedule a repair with a certified technician.
13. Button Foot Sticking
Description of the problem: Users may encounter difficulties with the button sewing foot sticking or not moving smoothly during operation.
Cause of the problem: Button foot sticking can occur due to factors such as dirt or debris buildup, improper alignment, or lack of lubrication.
Troubleshooting step-by-step:
- Remove the button foot and clean it thoroughly, removing any accumulated dirt, lint, or debris.
- Inspect the button foot mechanism for any signs of misalignment or damage and adjust or repair it as needed.
- Apply a small amount of sewing machine oil to lubricate the moving parts of the button foot mechanism.
- Test the button foot on scrap fabric to ensure smooth movement before resuming your sewing project.
- If the problem persists, consider replacing the button foot or contacting a professional technician for further assistance.
14. Fabric Puckering
Description of the problem: Users may notice puckering or gathering of the fabric while sewing, resulting in an uneven or distorted seam.
Cause of the problem: Fabric puckering can occur due to factors such as incorrect tension settings, using the wrong needle type or size, or sewing too quickly.
Troubleshooting step-by-step:
- Check the tension settings for both the upper and lower threads and adjust them as needed to achieve balanced tension.
- Ensure that you are using the appropriate needle type and size for the fabric being sewn.
- Slow down the sewing speed to allow the fabric to feed more smoothly through the machine.
- If possible, use a stabilizer or interfacing to support the fabric and prevent puckering.
- Experiment with different stitching techniques or presser foot pressure settings to minimize puckering.
15. Stitch Selector Not Working
Description of the problem: Users may find that the stitch selector on their Husqvarna Viking Designer Diamond is unresponsive or not functioning properly.
Cause of the problem: Issues with the stitch selector can arise due to factors such as electrical malfunctions, mechanical failures, or software glitches.
Troubleshooting step-by-step:
- Ensure that the machine is plugged in securely and that there are no loose connections or damaged cords.
- Check for any visible damage or obstruction to the stitch selector dial or buttons and clean or repair them as needed.
- If possible, perform a factory reset on the machine to restore default settings and eliminate any software-related issues.
- If the problem persists, contact customer support for further assistance or schedule a repair with a certified technician.
- Consider using manual stitch selection as an alternative method until the issue is resolved.
16. Bobbin Winding Difficulties
Description of the problem: Users may encounter challenges with winding the bobbin, such as uneven winding or the bobbin thread slipping off.
Cause of the problem: Bobbin winding difficulties can arise due to factors such as improper threading of the bobbin winder, tension issues, or debris in the bobbin winding mechanism.
Troubleshooting step-by-step:
- Ensure that the bobbin winder is engaged correctly and that the bobbin is placed securely on the winder spindle.
- Check the bobbin winding tension and adjust it if necessary to achieve smooth and even winding.
- Clean the bobbin winding mechanism and remove any lint, dust, or debris that may be obstructing the winding process.
- Hold the thread taut while winding the bobbin to prevent it from slipping off or becoming tangled.
- If the problem persists, try using a different bobbin or consult the user manual for specific troubleshooting instructions.
17. Feed Dog Not Moving
Description of the problem: Users may notice that the feed dogs, which help move the fabric during sewing, are not moving or engaging properly.
Cause of the problem: Issues with the feed dogs can occur due to factors such as dirt or debris buildup, mechanical problems, or a malfunctioning feed dog mechanism.
Troubleshooting step-by-step:
- Check for any visible obstructions or blockages around the feed dog area and clean them thoroughly.
- Ensure that the feed dog lever or switch is in the correct position to engage the feed dogs.
- Inspect the feed dog mechanism for any signs of damage or wear and repair or replace it as needed.
- Test the machine on scrap fabric to verify that the feed dogs are moving smoothly and engaging properly.
- If the issue persists, contact customer support for further assistance or schedule a repair with a certified technician.
18. Thread Cutter Not Functioning
Description of the problem: Users may find that the automatic thread cutter feature on their sewing machine is not working as expected.
Cause of the problem: Issues with the thread cutter can occur due to factors such as dull or misaligned blades, electrical malfunctions, or debris buildup.
Troubleshooting step-by-step:
- Check the thread cutter blades for any signs of dullness or damage and replace them if necessary.
- Ensure that the thread cutter mechanism is clean and free of lint, dust, or debris that may be obstructing its function.
- Verify that the thread cutter feature is enabled in the machine settings and that it is being activated correctly.
- If the problem persists, try using manual thread cutting methods or consult the user manual for alternative solutions.
- If all else fails, contact customer support for further assistance or schedule a repair with a certified technician.
19. LCD Screen Displaying Incorrect Information
Description of the problem: Users may experience issues with the LCD screen on their sewing machine displaying incorrect information or becoming unresponsive.
Cause of the problem: LCD screen problems can occur due to factors such as software glitches, electrical malfunctions, or physical damage to the screen.
Troubleshooting step-by-step:
- Try resetting the machine to its factory settings to see if that resolves the display issue.
- Check for any visible damage or scratches on the LCD screen and gently clean it with a soft, dry cloth.
- Ensure that the machine is plugged in securely and that there are no loose connections or damaged cords.
- If possible, update the machine’s software to the latest version to address any known display-related issues.
- If the problem persists, contact customer support for further assistance or schedule a repair with a certified technician.
20. Foot Pedal Not Responding
Description of the problem: Some users may find that the foot pedal, which controls the sewing machine’s speed, is not responding or is intermittently working.
Cause of the problem: Issues with the foot pedal can occur due to factors such as loose connections, worn-out components, or electrical malfunctions.
Troubleshooting step-by-step:
- Check the connection between the foot pedal and the sewing machine to ensure it is securely plugged in.
- Inspect the foot pedal cable for any signs of damage or fraying and replace it if necessary.
- Test the foot pedal on a different sewing machine (if available) to determine if the issue lies with the pedal or the machine itself.
- If possible, try using a different foot pedal compatible with your sewing machine to see if that resolves the problem.
- If the issue persists, contact customer support for further assistance or schedule a repair with a certified technician.
21. Thread Sensor Error
Description of the problem: Users may encounter a thread sensor error message on their Husqvarna Viking Designer Diamond, indicating a problem with the thread detection system.
Cause of the problem: Thread sensor errors can occur due to factors such as sensor misalignment, thread sensor malfunctions, or tangled thread.
Troubleshooting step-by-step:
- Check for any visible obstructions or entangled thread around the thread sensor area and clear them if necessary.
- Inspect the thread sensor for any signs of damage or misalignment and adjust or repair it as needed.
- Ensure that the thread is properly threaded through the machine according to the user manual instructions.
- If the problem persists, try using a different spool of thread or consult a professional technician for further assistance.
- Consider disabling the thread sensor feature as a temporary solution if the error message continues to appear frequently.
22. Stitch Width/Length Adjustment Not Working
Description of the problem: Some users may find that the stitch width or length adjustment feature on their sewing machine is not functioning properly.
Cause of the problem: Issues with stitch width or length adjustment can occur due to factors such as mechanical jams, software glitches, or worn-out adjustment controls.
Troubleshooting step-by-step:
- Check for any visible obstructions or jams in the stitch width/length adjustment mechanism and clear them if necessary.
- If the adjustment controls are electronic, try performing a reset or calibration procedure as outlined in the user manual.
- Inspect the adjustment controls for any signs of damage or wear and replace them if needed.
- If the problem persists, consider using manual stitch width/length adjustments as an alternative method.
- Contact customer support for further assistance or schedule a repair with a certified technician if the issue cannot be resolved.
23. Bobbin Case Popping Out
Description of the problem: Users may experience the bobbin case popping out of place during sewing, causing interruptions and potential damage to the machine.
Cause of the problem: Bobbin case popping out can occur due to factors such as improper installation, incorrect bobbin threading, or excessive machine vibration.
Troubleshooting step-by-step:
- Ensure that the bobbin case is inserted correctly into its designated slot and that it snaps securely into place.
- Check the bobbin threading to ensure it is done according to the user manual instructions, with the thread properly seated in the tension spring.
- Inspect the bobbin case and surrounding area for any signs of damage or wear that may be affecting its stability.
- If the machine is vibrating excessively during operation, consider placing it on a stable surface or using anti-vibration pads.
- If the problem persists, consult a professional technician for further inspection and adjustment.
24. Noisy Operation
Description of the problem: Users may notice excessive noise coming from their Husqvarna Viking Designer Diamond during operation, which can be disruptive and indicate potential mechanical issues.
Cause of the problem: Noisy operation can be caused by factors such as loose or worn-out components, inadequate lubrication, or improper machine setup.
Troubleshooting step-by-step:
- Inspect the machine for any loose screws, bolts, or parts that may be causing the noise and tighten them if necessary.
- Apply sewing machine oil to lubricate moving parts and reduce friction, paying special attention to areas such as the needle bar and feed mechanism.
- Ensure that the machine is set up on a stable surface and that all parts are properly aligned and seated.
- If the noise persists, consider contacting customer support for further assistance or scheduling a professional inspection.
- Avoid using the machine until the issue is resolved to prevent further damage or safety hazards.
25. Bobbin Thread Tension Fluctuations
Description of the problem: Users may experience fluctuations in bobbin thread tension, resulting in inconsistent stitching quality and difficulty maintaining proper tension settings.
Cause of the problem: Bobbin thread tension fluctuations can occur due to factors such as bobbin winding inconsistencies, bobbin case issues, or machine calibration problems.
Troubleshooting step-by-step:
- Check the bobbin winding process to ensure that the thread is wound evenly and smoothly onto the bobbin.
- Inspect the bobbin case for any signs of damage, wear, or improper threading that may be affecting tension consistency.
- If possible, adjust the bobbin tension using the tension screw on the bobbin case to achieve optimal tension balance.
- If the problem persists, consider consulting the user manual for advanced tension adjustment techniques or seeking professional assistance.
- Avoid prolonged use of the machine until the tension issue is resolved to prevent damage to your sewing projects.
Husqvarna Viking Designer Diamond Sewing Machine Manual
The operating instructions for the Husqvarna Viking Designer Diamond sewing machine can be found on the manufacturer’s website. Users can visit the official website of Husqvarna Viking and navigate to the support or downloads section to access the manual. The manual provides comprehensive guidance on operating the machine, including setup, threading, stitching techniques, maintenance, and troubleshooting tips.
Frequently Asked Questions about the Husqvarna Viking Designer Diamond
Q: How do I troubleshoot thread breaking issues with my Husqvarna Viking Designer Diamond?
A: Thread breaking can occur due to various reasons such as incorrect threading, improper tension settings, or using low-quality thread. Refer to the troubleshooting steps provided in the article to address this issue.
Q: What should I do if my Husqvarna Viking Designer Diamond’s needle keeps breaking?
A: Needle breakage can be caused by factors such as using the wrong needle size, sewing over thick seams, or a damaged needle. Check the needle size and type, avoid sewing over thick seams, and ensure the needle is properly inserted and not bent.
Q: How can I fix uneven stitching or skipped stitches on my Husqvarna Viking Designer Diamond?
A: Uneven stitching or skipped stitches can result from improper tension settings, a dull needle, or incorrect threading. Adjust the tension settings, replace the needle if necessary, and ensure proper threading following the machine’s manual.
Q: My Husqvarna Viking Designer Diamond freezes during operation. What should I do?
A: Machine freezing can be due to software glitches, electrical issues, or mechanical malfunctions. Try restarting the machine, checking for error messages, and updating the software if available. If the problem persists, contact customer support or a professional technician for assistance.
Q: How do I troubleshoot fabric feed issues with my Husqvarna Viking Designer Diamond?
A: Fabric feed issues can occur due to a dirty feed dog, improper presser foot pressure, or incorrect stitch length settings. Clean the feed dog, adjust presser foot pressure, and ensure correct stitch length settings to resolve this problem.
Conclusion
Users of the Husqvarna Viking Designer Diamond sewing machine are encouraged to always refer to the manual, customer service, or service center whenever they encounter a problem with their machine. These resources provide valuable guidance and support to ensure optimal performance and troubleshooting of the sewing machine.
Husqvarna Viking Designer Diamond Royale 1 Common Problems