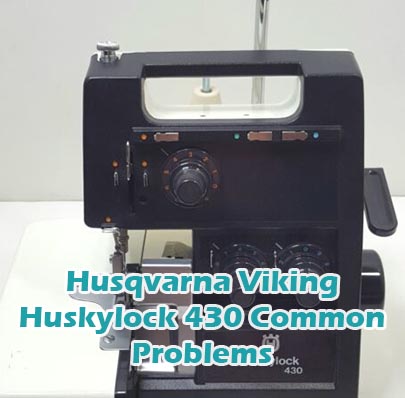
Husqvarna Viking Huskylock 430 Common Problems and Troubleshooting
Welcome to our guide on troubleshooting common problems with the Husqvarna Viking Huskylock 430 sewing machine. If you own this model, you may encounter various issues during your sewing projects. In this article, we’ll explore potential problems and provide solutions tailored to the specific features of the Husqvarna Viking Huskylock 430. Whether you’re a seasoned seamstress or just starting out, understanding these common issues and how to resolve them can help ensure smooth and enjoyable sewing experiences.
Causes of Common Problems with the Husqvarna Viking Huskylock 430
This section serves as an introduction to the various problems you may encounter with the Husqvarna Viking Huskylock 430 sewing machine. We’ll delve into specific issues and provide troubleshooting tips to address them effectively. From basic setup to advanced stitching techniques, we’ll cover a range of potential challenges and their solutions tailored to this particular model.
Common Problems with the Husqvarna Viking Huskylock 430
1. Tension Discrepancy – Thread Breakage
- Description of the Problem: The machine exhibits tension issues leading to frequent thread breakage.
- Cause of the Problem: Incorrect threading or improper tension settings.
- Troubleshooting:
- Re-thread the upper and lower threads following the machine’s threading guide.
- Check the tension settings and adjust them according to the fabric and thread being used.
- Clean the tension discs and the bobbin area for any debris that might be affecting tension.
2. Skipped Stitches – Uneven Stitching
- Description of the Problem: The machine occasionally skips stitches, resulting in uneven stitching.
- Cause of the Problem: Dull or incorrectly installed needles, or improper machine setup.
- Troubleshooting:
- Replace the needle with a new, appropriate needle for the fabric being used.
- Ensure the needle is properly inserted and tightened according to the machine’s instructions.
- Check the stitch length and adjust if necessary, ensuring it matches the fabric thickness.
3. Fabric Jamming – Needle Breakage
- Description of the Problem: Fabric gets jammed in the machine, leading to needle breakage.
- Cause of the Problem: Incorrect needle type or size, or fabric feed issues.
- Troubleshooting:
- Ensure the needle is appropriate for the fabric being used and replace it if necessary.
- Check the fabric feed mechanism for any obstructions or damage and clear or repair as needed.
- Slow down the stitching speed when working with thicker fabrics to prevent jamming.
4. Overheating – Motor Issues
- Description of the Problem: The machine overheats during prolonged use, causing motor issues.
- Cause of the Problem: Dust and lint buildup, or insufficient cooling.
- Troubleshooting:
- Regularly clean the machine, especially the motor area, to remove dust and lint buildup.
- Ensure the machine has proper ventilation and is not placed near heat sources.
- Allow the machine to cool down between prolonged sewing sessions to prevent overheating.
5. Uneven Cutting – Blade Dullness
- Description of the Problem: The cutting blade produces uneven cuts or struggles to cut through fabric.
- Cause of the Problem: Dull or damaged cutting blade.
- Troubleshooting:
- Replace the cutting blade with a new one suitable for the fabric being used.
- Ensure the cutting blade is properly aligned and installed according to the machine’s instructions.
- Regularly clean the cutting area to prevent buildup that can dull the blade.
6. Differential Feed Issues – Uneven Fabric Feed
- Description of the Problem: The fabric feed is uneven, resulting in gathering or stretching of the fabric.
- Cause of the Problem: Incorrectly adjusted or malfunctioning differential feed mechanism.
- Troubleshooting:
- Adjust the differential feed settings according to the type and stretchiness of the fabric.
- Check for any obstructions or damage in the feed mechanism and repair or replace if necessary.
- Ensure both the front and back feed dogs are engaged properly and functioning smoothly.
7. Thread Jamming – Bobbin Area Blockage
- Description of the Problem: Threads get jammed in the bobbin area, causing disruptions in sewing.
- Cause of the Problem: Accumulation of lint or debris in the bobbin case or shuttle area.
- Troubleshooting:
- Clean the bobbin case and shuttle area thoroughly with a brush or compressed air to remove any lint or debris.
- Ensure the bobbin is inserted correctly and is wound evenly to prevent thread snags.
- Consider using a lint roller or adhesive tape to remove stubborn debris from hard-to-reach areas.
8. Stitch Formation Problems – Loops or Bunched Stitches
- Description of the Problem: The machine produces loops or bunched stitches instead of clean, even stitches.
- Cause of the Problem: Incorrect threading, bobbin tension issues, or needle damage.
- Troubleshooting:
- Re-thread the machine, ensuring both upper and lower threads are properly seated and tensioned.
- Adjust the bobbin tension using the tension screw according to the machine’s manual.
- Check the needle for any damage or dullness and replace it with a new one if necessary.
9. Motor Noise – Excessive Vibrations
- Description of the Problem: The motor emits loud noises or excessive vibrations during operation.
- Cause of the Problem: Misalignment of internal components or worn-out motor parts.
- Troubleshooting:
- Inspect the motor and internal components for any signs of misalignment or damage.
- Tighten any loose screws or bolts that may be causing vibrations.
- If the issue persists, consider contacting a certified technician for motor inspection and repair.
10. Stitch Length Variations – Inconsistent Stitching Length
- Description of the Problem: The machine produces stitches with inconsistent lengths despite consistent settings.
- Cause of the Problem: Mechanical issues within the stitch length adjustment mechanism.
- Troubleshooting:
- Check the stitch length adjustment dial for any obstructions or damage.
- Ensure the dial is set to the desired stitch length and is not slipping during operation.
- If necessary, lubricate the stitch length adjustment mechanism according to the machine’s manual.
11. Thread Tension Release – Inconsistent Release
- Description of the Problem: The thread tension release feature does not consistently release tension as intended.
- Cause of the Problem: Malfunctioning tension release mechanism or improper calibration.
- Troubleshooting:
- Inspect the tension release mechanism for any damage or obstructions.
- Ensure the tension release lever or button is engaging properly and not stuck.
- Calibrate the tension release mechanism according to the machine’s manual if possible.
12. Foot Pressure Adjustment – Ineffective Adjustment
- Description of the Problem: The foot pressure adjustment does not effectively control the pressure on the fabric.
- Cause of the Problem: Stiff or worn-out foot pressure adjustment mechanism.
- Troubleshooting:
- Inspect the foot pressure adjustment mechanism for any signs of damage or wear.
- Clean and lubricate the mechanism if it appears stiff or obstructed.
- If the issue persists, consider replacing the foot pressure adjustment mechanism.
13. Thread Cutter Malfunction – Inoperative Cutter
- Description of the Problem: The thread cutter feature fails to cut the thread properly or does not function at all.
- Cause of the Problem: Dull or misaligned cutting blade, or mechanical issues with the cutter mechanism.
- Troubleshooting:
- Inspect the cutting blade for dullness or damage and replace if necessary.
- Ensure the cutting blade is properly aligned and making contact with the thread.
- If the issue persists, check the cutter mechanism for any obstructions or misalignments.
14. Stitch Selector Malfunction – Inaccurate Stitch Selection
- Description of the Problem: The stitch selector does not accurately select the desired stitch pattern.
- Cause of the Problem: Faulty stitch selector mechanism or internal component misalignment.
- Troubleshooting:
- Ensure the stitch selector dial or buttons are free from obstructions and move smoothly.
- Check for any misalignments or damage in the stitch selector mechanism.
- If necessary, calibrate or replace the stitch selector mechanism according to the machine’s manual.
15. Presser Foot Lifter Issues – Stuck Lifter
- Description of the Problem: The presser foot lifter becomes stuck and does not raise or lower the presser foot smoothly.
- Cause of the Problem: Dirt or debris buildup, worn-out lifter mechanism, or misalignment.
- Troubleshooting:
- Clean the presser foot lifter mechanism thoroughly to remove any dirt or debris.
- Inspect the lifter mechanism for signs of wear and tear, and replace if necessary.
- Check for any misalignments and adjust or repair the lifter mechanism accordingly.
16. Stitch Width Variation – Inconsistent Stitch Width
- Description of the Problem: The machine produces stitches with varying widths, even when set to a consistent width setting.
- Cause of the Problem: Mechanical issues within the stitch width adjustment mechanism.
- Troubleshooting:
- Check the stitch width adjustment dial for any obstructions or damage.
- Ensure the dial is set to the desired stitch width and is not slipping during operation.
- If necessary, lubricate the stitch width adjustment mechanism according to the machine’s manual.
17. Thread Jamming in Feed Dogs – Fabric Snags
- Description of the Problem: Threads get jammed in the feed dogs, causing fabric snags and interruptions in sewing.
- Cause of the Problem: Accumulation of lint or debris in the feed dog area.
- Troubleshooting:
- Clean the feed dog area thoroughly with a brush or compressed air to remove any lint or debris.
- Ensure the feed dogs are properly aligned and moving freely.
- Consider using a lint roller or adhesive tape to remove stubborn debris from between the feed dogs.
18. Bobbin Winding Malfunction – Uneven Bobbin Winding
- Description of the Problem: The bobbin winding process produces unevenly wound bobbins or fails to wind the bobbin at all.
- Cause of the Problem: Improper bobbin threading, tension issues, or malfunctioning bobbin winding mechanism.
- Troubleshooting:
- Ensure the bobbin is inserted correctly onto the winding spindle and the thread is properly threaded through the tension disc.
- Check the bobbin winding tension and adjust if necessary.
- If the issue persists, inspect the bobbin winding mechanism for any faults or damage.
19. Needle Bar Alignment – Needle Deflection
- Description of the Problem: The needle deflects or hits the presser foot, causing stitching errors or breakage.
- Cause of the Problem: Misalignment of the needle bar or presser foot.
- Troubleshooting:
- Check the alignment of the needle bar and presser foot using the machine’s manual as a guide.
- Adjust the needle bar or presser foot alignment if necessary to ensure proper clearance.
- If adjustments do not resolve the issue, consult a professional technician for further inspection and adjustment.
20. Thread Fraying – Poor Thread Quality
- Description of the Problem: The thread frays or shreds during sewing, leading to weak stitches and potential breakage.
- Cause of the Problem: Low-quality or old thread, improper thread tension, or rough thread path.
- Troubleshooting:
- Use high-quality thread appropriate for the fabric being sewn.
- Check the thread tension and adjust as needed to prevent excessive stress on the thread.
- Ensure the thread path is smooth and free from any rough edges or burrs that could cause fraying.
21. Thread Bunching Underneath – Bobbin Tension Issues
- Description of the Problem: Threads bunch up underneath the fabric, causing unsightly loops or knots.
- Cause of the Problem: Incorrect bobbin tension settings or improperly wound bobbin.
- Troubleshooting:
- Check the bobbin tension and adjust it according to the machine’s manual.
- Ensure the bobbin is wound evenly and inserted correctly into the bobbin case.
- Clean the bobbin case and surrounding area to remove any lint or debris that may affect tension.
22. Thread Skipping – Needle or Timing Issues
- Description of the Problem: The machine skips stitches or fails to pick up the bobbin thread.
- Cause of the Problem: Bent or dull needle, incorrect needle size, or timing out of adjustment.
- Troubleshooting:
- Replace the needle with a new one appropriate for the fabric being sewn.
- Check the needle alignment and timing according to the machine’s manual.
- If timing is off, consult a professional technician for adjustment.
23. Feed Dog Engagement – Inconsistent Feeding
- Description of the Problem: The feed dogs fail to consistently engage with the fabric, resulting in uneven feeding.
- Cause of the Problem: Dirt or debris buildup, feed dog mechanism malfunction, or incorrect presser foot pressure.
- Troubleshooting:
- Clean the feed dog area to remove any lint or debris that may be obstructing movement.
- Inspect the feed dog mechanism for any signs of damage or wear and replace if necessary.
- Adjust the presser foot pressure to ensure proper engagement with the fabric.
24. Uneven Presser Foot Pressure – Fabric Dragging
- Description of the Problem: The presser foot applies uneven pressure to the fabric, causing it to drag or pucker.
- Cause of the Problem: Misaligned presser foot, worn-out presser foot mechanism, or incorrect presser foot pressure setting.
- Troubleshooting:
- Check the alignment of the presser foot and adjust if necessary.
- Inspect the presser foot mechanism for signs of wear and replace if needed.
- Adjust the presser foot pressure according to the fabric being sewn.
25. Bobbin Case Jamming – Bobbin Case Damage
- Description of the Problem: The bobbin case gets jammed or stuck, preventing smooth stitching.
- Cause of the Problem: Damage or misalignment of the bobbin case, improper insertion, or debris buildup.
- Troubleshooting:
- Inspect the bobbin case for any signs of damage or misalignment and replace if necessary.
- Ensure the bobbin is inserted correctly into the bobbin case.
- Clean the bobbin case area to remove any lint or debris that may be causing the jamming.
Husqvarna Viking Huskylock 430 Sewing Machine Manual
The operating instructions for the Husqvarna Viking Huskylock 430 can be found at the manufacturer’s website. Please visit the website to access the comprehensive manual for detailed guidance on operating your sewing machine.
Frequently Asked Questions
Q: How can I resolve tension issues causing thread breakage on my Husqvarna Viking Huskylock 430?
A: To resolve tension issues, ensure both upper and lower threads are correctly threaded following the machine’s threading guide. Adjust the tension settings according to the fabric and thread being used. Additionally, clean the tension discs and the bobbin area for any debris that might be affecting tension.
Q: What should I do if my Husqvarna Viking Huskylock 430 is producing skipped stitches?
A: Skipped stitches can be caused by dull or incorrectly installed needles, or improper machine setup. Replace the needle with a new, appropriate needle for the fabric being used. Ensure the needle is properly inserted and tightened according to the machine’s instructions. Check the stitch length and adjust if necessary, ensuring it matches the fabric thickness.
Q: How can I prevent fabric jamming and needle breakage on my Husqvarna Viking Huskylock 430?
A: Fabric jamming and needle breakage may occur due to incorrect needle type or size, or fabric feed issues. Ensure the needle is appropriate for the fabric being used and replace it if necessary. Check the fabric feed mechanism for any obstructions or damage and clear or repair as needed. Slow down the stitching speed when working with thicker fabrics to prevent jamming.
Q: What should I do if my Husqvarna Viking Huskylock 430 is overheating during prolonged use?
A: Overheating issues may arise due to dust and lint buildup or insufficient cooling. Regularly clean the machine, especially the motor area, to remove dust and lint buildup. Ensure the machine has proper ventilation and is not placed near heat sources. Allow the machine to cool down between prolonged sewing sessions to prevent overheating.
Q: How can I troubleshoot uneven cutting or blade dullness on my Husqvarna Viking Huskylock 430?
A: Uneven cutting or blade dullness issues may occur due to a dull or damaged cutting blade. Replace the cutting blade with a new one suitable for the fabric being used. Ensure the cutting blade is properly aligned and installed according to the machine’s instructions. Regularly clean the cutting area to prevent buildup that can dull the blade.
Conclusion
Always refer to the manual, customer service, or service center whenever possible if there is a problem with your Husqvarna Viking Huskylock 430 sewing machine. These resources provide comprehensive guidance and support for troubleshooting and resolving any issues you may encounter.
Husqvarna Viking Huskylock 440 Common Problems