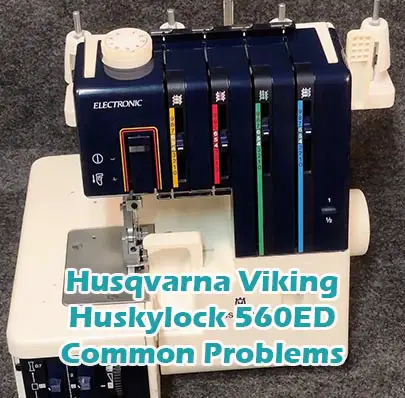
Husqvarna Viking Huskylock 560ED Common Problems and Troubleshooting
Are you experiencing issues with your Husqvarna Viking Huskylock 560ED sewing machine? Whether you’re a seasoned seamstress or a novice crafter, encountering problems with your trusty machine can be frustrating. In this comprehensive guide, we’ll explore common issues that users may face with the Husqvarna Viking Huskylock 560ED and provide troubleshooting solutions to get you back to your sewing projects in no time.
Causes of Common Problems with the Husqvarna Viking Huskylock 560ED
This article aims to address various issues that users may encounter with the Husqvarna Viking Huskylock 560ED sewing machine. From threading problems to tension issues, we’ll delve into the root causes of these issues and provide step-by-step troubleshooting guidance to help you resolve them effectively.
Product Details
Before diving into troubleshooting, let’s familiarize ourselves with the Husqvarna Viking Huskylock 560ED sewing machine. This electric overlock machine boasts a range of features designed to streamline your sewing projects, including:
- Multiple stitching options
- Adjustable thread tension
- Easy threading system
- Integrated cutting blade
- And more
Common Problems and Troubleshooting
Thread Breakage on the Husqvarna Viking Huskylock 560ED
- Description: Thread breakage is a common issue experienced by users of the Husqvarna Viking Huskylock 560ED sewing machine, leading to interruptions in stitching and frustration.
Cause of the Problem: Thread breakage can occur due to various factors, including incorrect threading, tangled or worn-out thread, or improper tension settings.
Troubleshooting:- Ensure that the machine is correctly threaded, following the threading guide provided in the user manual.
- Check the condition of the thread, replacing it if it appears tangled, old, or damaged.
- Adjust the tension settings on the machine according to the fabric and thread being used, making sure they are within the recommended range.
- Clean the machine, including the bobbin case and tension discs, to remove any lint or debris that may be causing interference with the thread.
- If the problem persists, consider consulting a professional technician for further assistance.
Uneven Stitching on the Husqvarna Viking Huskylock 560ED
- Description: Users may encounter issues with uneven stitching while using the Husqvarna Viking Huskylock 560ED sewing machine, resulting in an unsightly finish on their projects.
Cause of the Problem: Uneven stitching can be caused by factors such as incorrect threading, uneven tension settings, or a dull needle.
Troubleshooting:- Check the threading of the machine, ensuring that both the upper and lower threads are properly inserted and tensioned.
- Adjust the tension settings on the machine, ensuring that they are balanced for the type of fabric and thread being used.
- Replace the needle with a new, sharp one, as a dull needle can cause skipped stitches and uneven stitching.
- Test the machine on a scrap piece of fabric before starting your project to ensure that the stitching is even and consistent.
- If the issue persists, try re-threading the machine and adjusting the tension settings again, making small increments until the desired result is achieved.
Machine Jamming on the Husqvarna Viking Huskylock 560ED
- Description: Jamming or seizing of the machine is a frustrating issue that can occur with the Husqvarna Viking Huskylock 560ED sewing machine, halting the sewing process and potentially causing damage to the fabric and machine.
Cause of the Problem: Machine jamming can be caused by various factors, including tangled thread, improperly inserted or damaged needles, or debris in the bobbin area.
Troubleshooting:- Turn off the machine and unplug it from the power source to prevent any further damage.
- Carefully remove the fabric and any tangled thread from the machine, taking care not to force or pull on the fabric.
- Check the needle for any signs of damage or bending, replacing it if necessary.
- Clean the bobbin area and feed dogs of the machine, removing any lint, dust, or debris that may be causing obstruction.
- After ensuring that the machine is clear of any obstructions, re-thread it and test it on a scrap piece of fabric to ensure smooth operation.
Difficulty in Threading the Husqvarna Viking Huskylock 560ED
- Description: Threading the Husqvarna Viking Huskylock 560ED sewing machine can be challenging for some users, leading to frustration and difficulty in starting sewing projects.
Cause of the Problem: Difficulty in threading can be caused by factors such as inadequate lighting, unfamiliarity with the threading process, or physical limitations.
Troubleshooting:- Ensure that you are threading the machine in a well-lit area, using additional lighting if necessary to clearly see the threading path.
- Refer to the threading guide provided in the user manual, following each step carefully to ensure proper threading of the machine.
- If you have difficulty reaching certain areas of the machine due to physical limitations, consider using threading aids such as tweezers or a magnifying glass to assist you.
- Practice threading the machine several times until you feel comfortable with the process, taking note of any areas where you may encounter difficulty.
- If you continue to experience difficulty, consider seeking assistance from a knowledgeable friend or professional technician who can provide guidance and support.
Overlocking Blade Malfunction on the Husqvarna Viking Huskylock 560ED
- Description: Users may encounter issues with the overlocking blade of the Husqvarna Viking Huskylock 560ED sewing machine, resulting in uneven cutting or failure to trim fabric edges properly.
Cause of the Problem: Overlocking blade malfunction can be caused by factors such as blade dullness, misalignment, or debris buildup.
Troubleshooting:- Inspect the overlocking blade for any signs of dullness or damage, replacing it if necessary.
- Ensure that the blade is properly aligned with the fabric edge, adjusting it if it appears to be off-center or crooked.
- Clean the blade and surrounding area of the machine, removing any lint, dust, or debris that may be interfering with its operation.
- Test the machine on a scrap piece of fabric to ensure that the overlocking blade is functioning properly and trimming the fabric edges evenly.
- If the problem persists, consult the user manual for guidance on blade maintenance or consider seeking assistance from a professional technician.
Thread Breakage
Description: Thread breakage during sewing can disrupt your workflow and result in unfinished projects.
Cause: Incorrect threading or tension, dull needles, or using low-quality thread can lead to thread breakage.
Troubleshooting:
- Check the threading of the machine, ensuring it follows the correct path as per the machine manual.
- Adjust the tension settings according to the fabric being used and ensure the needle is suitable for the fabric.
- Replace the needle if it’s dull or bent.
- Use high-quality thread suitable for the project at hand.
Uneven Stitching
Description: Uneven stitching can result in an unprofessional finish on your sewing projects.
Cause: Uneven tension, incorrect needle type or size, or a damaged presser foot may cause uneven stitching.
Troubleshooting:
- Check and adjust the tension settings for balanced stitching.
- Ensure you’re using the correct needle type and size for the fabric being sewn.
- Inspect the presser foot for any damage and replace if necessary.
Looper Issues
Description: Problems with the looper can result in skipped stitches or loopy seams.
Cause: Incorrect threading, looper misalignment, or a bent looper may cause issues with the looper.
Troubleshooting:
- Re-thread the looper following the machine manual’s instructions carefully.
- Check for any misalignment of the looper and adjust if needed.
- If the looper is bent, replace it with a new one.
Fabric Jamming
Description: Fabric jamming in the machine can halt your sewing progress and potentially damage the fabric.
Cause: Improper threading, incorrect presser foot pressure, or debris in the machine may lead to fabric jamming.
Troubleshooting:
- Ensure the machine is correctly threaded and the presser foot pressure is adjusted according to the fabric being used.
- Clean the machine regularly, removing any accumulated lint or debris.
Stitch Skips
Description: Stitch skips can result in incomplete seams and compromise the structural integrity of your sewing projects.
Cause: Dull or bent needles, improper threading, or incorrect machine settings may cause stitch skips.
Troubleshooting:
- Replace the needle with a new one if it’s dull or bent.
- Double-check the threading of the machine, ensuring it’s done correctly.
- Adjust the machine settings, such as stitch length and tension, as needed.
Needle Breakage
Description: Needle breakage can occur unexpectedly during sewing, causing frustration and interrupting your workflow.
Cause: Using the wrong needle size or type, sewing over pins, or sewing through thick layers of fabric can lead to needle breakage.
Troubleshooting:
- Ensure you’re using the correct needle size and type for the fabric being sewn.
- Avoid sewing over pins, as this can put unnecessary strain on the needle.
- When sewing through thick layers of fabric, consider using a heavier-duty needle.
Bobbin Tension Issues
Description: Inconsistent bobbin tension can result in unsightly stitches and affect the overall quality of your sewing projects.
Cause: Incorrectly wound bobbin, debris in the bobbin case, or improper bobbin tension settings may cause bobbin tension issues.
Troubleshooting:
- Ensure the bobbin is correctly wound and inserted into the bobbin case.
- Clean the bobbin case regularly, removing any lint or debris that may affect tension.
- Adjust the bobbin tension settings as needed, following the machine manual’s instructions.
Machine Jamming During Threading
Description: Jamming during threading can be frustrating and may indicate underlying issues with the machine.
Cause: Improper threading technique, tangled thread, or debris in the threading path may cause jamming during threading.
Troubleshooting:
- Ensure you’re following the correct threading path as per the machine manual.
- Check for any tangled thread or knots and remove them before threading.
- Clean the threading path thoroughly, removing any debris that may obstruct the thread.
Machine Not Powering On
Description: A sewing machine that fails to power on can halt your sewing projects altogether.
Cause: Loose power cord connection, blown fuse, or a malfunctioning power switch may prevent the machine from powering on.
Troubleshooting:
- Check the power cord connection to ensure it’s securely plugged into the power outlet and the machine.
- If applicable, check the fuse in the machine’s power plug and replace if necessary.
- Test the power switch for functionality and consider replacing it if it’s faulty.
Difficulty with Differential Feed
Description: Difficulty adjusting the differential feed can lead to uneven or distorted stitches, especially when working with stretchy fabrics.
Cause: Incorrect settings or improper adjustment of the differential feed mechanism may cause difficulties with differential feed.
Troubleshooting:
- Review the machine manual for instructions on adjusting the differential feed settings.
- Experiment with different settings to find the optimal configuration for the fabric being used.
- If unsure, seek assistance from a knowledgeable sewing machine technician.
Thread Lint Accumulation
Description: Accumulation of thread lint within the machine can lead to performance issues and affect stitch quality.
Cause: Lack of regular maintenance, using low-quality thread, or sewing with fabrics prone to shedding may contribute to thread lint accumulation.
Troubleshooting:
- Regularly clean the machine, including the bobbin case, feed dogs, and thread path, to remove accumulated lint.
- Use high-quality thread that is less likely to shed and contribute to lint buildup.
- Consider using a lint brush or compressed air to remove stubborn lint from hard-to-reach areas.
Stitch Length Irregularities
Description: Irregularities in stitch length can affect the appearance and durability of seams.
Cause: Incorrect machine settings, damaged feed dogs, or inconsistent fabric feeding may cause stitch length irregularities.
Troubleshooting:
- Ensure the machine is set to the appropriate stitch length for the fabric and project.
- Inspect the feed dogs for any damage or wear and replace if necessary.
- Check the fabric feeding mechanism for any obstructions or irregularities that may affect stitch length.
Noise During Operation
Description: Unusual or excessive noise during machine operation can indicate underlying issues.
Cause: Loose parts, lack of lubrication, or worn components may contribute to noise during operation.
Troubleshooting:
- Inspect the machine for any loose parts or screws and tighten them as needed.
- Ensure the machine is properly lubricated according to the manufacturer’s recommendations.
- If noise persists, consult a professional technician to diagnose and address any worn or damaged components.
Difficulty with Threading the Needle
Description: Difficulty threading the needle can be frustrating and may indicate issues with the threading mechanism.
Cause: Poor lighting, misaligned needle or thread guide, or shaky hands may contribute to difficulty threading the needle.
Troubleshooting:
- Ensure you’re threading the needle in a well-lit area to improve visibility.
- Check for any misalignment of the needle or thread guide and adjust as needed.
- If threading difficulties persist, consider using a needle threader tool or magnifying glass to assist with threading.
Seam Puckering
Description: Puckered seams can detract from the appearance of your sewing projects and indicate tension or fabric handling issues.
Cause: Incorrect tension settings, using the wrong needle or thread, or sewing too quickly may cause seam puckering.
Troubleshooting:
- Adjust the tension settings, ensuring they are balanced for the fabric being sewn.
- Use the appropriate needle and thread combination for the fabric and project requirements.
- Slow down sewing speed to allow the fabric to feed evenly through the machine.
Foot Pedal Malfunction
Description: A malfunctioning foot pedal can impede your ability to control the sewing machine’s speed.
Cause: Loose connections, worn-out components, or internal wiring issues may cause foot pedal malfunction.
Troubleshooting:
- Check the connections between the foot pedal and the machine, ensuring they are securely plugged in.
- Inspect the foot pedal for any visible damage or wear and replace if necessary.
- If possible, test the foot pedal with another compatible machine to determine if the issue lies with the pedal or the machine.
Stitching Skipping Over Heavy Seams
Description: The machine may skip stitches when sewing over thick or bulky seams, compromising the seam strength.
Cause: Insufficient presser foot pressure, incorrect needle type or size, or inadequate thread tension may cause stitching to skip over heavy seams.
Troubleshooting:
- Increase the presser foot pressure to ensure adequate fabric feeding over heavy seams.
- Use a heavier-duty needle suitable for sewing through thick fabrics and multiple layers.
- Adjust the thread tension to accommodate the increased fabric thickness.
Bobbin Case Jamming
Description: The bobbin case may jam or become difficult to remove, hindering the sewing process.
Cause: Improper insertion of the bobbin, debris accumulation in the bobbin case, or damaged bobbin case components may lead to bobbin case jamming.
Troubleshooting:
- Ensure the bobbin is inserted correctly into the bobbin case, following the machine manual’s instructions.
- Clean the bobbin case regularly to remove any accumulated lint or debris.
- If the bobbin case is damaged or worn, replace it with a new one.
Thread Knots on the Underside of Fabric
Description: Knots or tangles of thread may appear on the underside of fabric, affecting the appearance and quality of seams.
Cause: Improper threading, incorrect bobbin tension, or bobbin winding issues may cause thread knots on the underside of fabric.
Troubleshooting:
- Double-check the threading of both the upper thread and the bobbin, ensuring they are correctly threaded.
- Adjust the bobbin tension to achieve balanced tension between the upper and lower threads.
- If encountering issues with bobbin winding, ensure the bobbin is winding smoothly and evenly.
Needle Plate Damage
Description: Damage to the needle plate can lead to fabric snagging, uneven stitching, or needle breakage.
Cause: Accidental impact, improper needle plate installation, or use of incorrect needle plate for the sewing task may cause needle plate damage.
Troubleshooting:
- Inspect the needle plate for any visible damage, such as scratches, gouges, or dents.
- If damage is found, replace the needle plate with a new one compatible with the machine model.
- Ensure proper installation of the needle plate, ensuring it is securely attached and aligned with the feed dogs.
Husqvarna Viking Huskylock 560ED Sewing Machine Manual
For detailed operating instructions and maintenance guidelines for the Husqvarna Viking Huskylock 560ED sewing machine, please visit the manufacturer’s website. You can typically find the user manual available for download or access the online user guide directly from the manufacturer’s support section.
Husqvarna Viking Huskylock 560ED Frequently Asked Questions
Q: How can I prevent thread breakage while using the Husqvarna Viking Huskylock 560ED?
A: To prevent thread breakage, ensure proper threading of the machine, use high-quality thread suitable for the fabric, and regularly replace dull or bent needles.
Q: What should I do if I encounter uneven stitching with the Husqvarna Viking Huskylock 560ED?
A: Check and adjust the tension settings, use the correct needle type and size for the fabric, and inspect the presser foot for any damage that may cause uneven stitching.
Q: How do I troubleshoot looper issues with the Husqvarna Viking Huskylock 560ED?
A: Re-thread the looper following the machine manual’s instructions carefully, check for any misalignment of the looper, and replace it if bent.
Q: What can I do if my fabric keeps jamming in the Husqvarna Viking Huskylock 560ED?
A: Ensure the machine is correctly threaded and the presser foot pressure is adjusted according to the fabric being used. Additionally, clean the machine regularly to remove any accumulated lint or debris.
Q: How do I troubleshoot needle breakage with the Husqvarna Viking Huskylock 560ED?
A: Use the correct needle size and type for the fabric, avoid sewing over pins, and consider using a heavier-duty needle when sewing through thick layers of fabric.
Conclusion
For any issues encountered with your Husqvarna Viking Huskylock 560ED sewing machine, it is recommended to refer to the user manual, contact customer service, or visit an authorized service center for assistance. Proper maintenance and following operating instructions can help ensure optimal performance and longevity of your machine.
Husqvarna Viking Huskylock 560 Common Problems