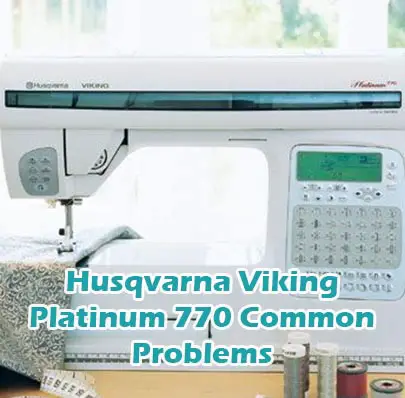
Husqvarna Viking Platinum 770 Common Problems and Troubleshooting
If you’re experiencing issues with your Husqvarna Viking Platinum 770 sewing machine, you’re not alone. Even the most advanced machines can encounter problems from time to time. This article aims to provide solutions to common issues that users may face with the Husqvarna Viking Platinum 770 model. Whether it’s a glitch in its computerized system or a minor mechanical hiccup, we’ve got you covered with troubleshooting tips tailored specifically for this machine.
Common Problems with the Husqvarna Viking Platinum 770
1. Thread Tension Discrepancy
- Description of the problem:
Uneven stitches or thread bunching on the fabric. - Cause of the problem:
Incorrect tension settings or dirty/burrs on the tension disks. - Troubleshooting step-by-step:
- Check the tension settings according to the machine manual.
- Clean the tension disks with a small brush to remove any debris.
- Ensure the thread is properly seated in the tension discs.
- Test with scrap fabric to adjust tension settings if necessary.
2. Bobbin Thread Jamming
- Description of the problem:
Bobbin thread getting stuck or jamming during sewing. - Cause of the problem:
Incorrectly inserted bobbin, lint buildup in the bobbin area, or a damaged bobbin case. - Troubleshooting step-by-step:
- Remove the bobbin and reinsert it following the machine manual.
- Clean out any lint or debris from the bobbin area using a brush or compressed air.
- Inspect the bobbin case for any damage and replace if necessary.
3. Needle Breakage
- Description of the problem:
Needles breaking frequently during sewing. - Cause of the problem:
Bent or dull needles, improper needle size for fabric, or hitting a hard object while sewing. - Troubleshooting step-by-step:
- Replace the needle with a new, appropriate needle for the fabric being used.
- Check for any obstructions or damage in the needle area.
- Ensure proper threading and tension settings.
- Avoid sewing over pins or other hard objects.
4. Feed Dog Issues
- Description of the problem:
Fabric not feeding properly or uneven feeding. - Cause of the problem:
Dirty or damaged feed dogs, incorrect presser foot pressure, or incorrect stitch length. - Troubleshooting step-by-step:
- Clean the feed dogs thoroughly with a brush to remove any lint or debris.
- Adjust the presser foot pressure according to the fabric being used.
- Check and adjust the stitch length if necessary.
- Test with scrap fabric to ensure proper feeding.
5. Machine Freezing or Error Messages
- Description of the problem:
The machine freezes during operation or displays error messages. - Cause of the problem:
Software glitches, improper setup, or sensor issues. - Troubleshooting step-by-step:
- Turn off the machine and unplug it for a few minutes, then restart.
- Check for any software updates available for your machine.
- Ensure all connections are secure and no obstructions are blocking sensors.
- Contact customer support if the issue persists.
6. Bobbin Winding Difficulties
- Description of the problem:
Difficulty in winding the bobbin evenly or the bobbin winding mechanism not functioning properly. - Cause of the problem:
Incorrect bobbin winding settings, improperly seated bobbin, or mechanical issues with the bobbin winding mechanism. - Troubleshooting step-by-step:
- Ensure the bobbin is properly inserted on the winding spindle.
- Check and adjust the tension settings for bobbin winding if applicable.
- Clean the bobbin winding mechanism and surrounding area to remove any debris.
- If the issue persists, consult the machine manual for further troubleshooting or contact customer support.
7. Thread Cutter Malfunction
- Description of the problem:
The built-in thread cutter fails to cut the thread cleanly or jams frequently. - Cause of the problem:
Dull or misaligned thread cutter blades, debris accumulation around the thread cutter, or mechanical issues. - Troubleshooting step-by-step:
- Inspect the thread cutter blades for any damage or dullness and replace if necessary.
- Clean around the thread cutter area to remove any lint or debris.
- Check for proper alignment of the thread cutter mechanism.
- If the problem persists, consult the machine manual for further instructions or seek professional assistance.
8. Stitch Skips or Irregular Stitch Formation
- Description of the problem:
Stitches skipping or forming irregularly during sewing, leading to a flawed finish. - Cause of the problem:
Improper needle threading, incorrect needle or thread combination, or mechanical issues. - Troubleshooting step-by-step:
- Re-thread the needle, ensuring proper threading according to the machine manual.
- Check the needle size and type compatibility with the fabric and thread being used.
- Clean and oil the machine following manufacturer’s instructions to address any mechanical issues.
- If the problem persists, consider consulting a professional technician for further inspection and maintenance.
9. Bobbin Case Dislodgment
- Description of the problem:
The bobbin case dislodges or moves out of position during sewing, causing disruptions in stitching. - Cause of the problem:
Loose or improperly installed bobbin case, mechanical issues with the bobbin case holder, or excessive vibration. - Troubleshooting step-by-step:
- Ensure the bobbin case is properly seated and secured in its holder.
- Check for any damage or wear on the bobbin case and holder components.
- Adjust the bobbin case tension if necessary, following the machine manual guidelines.
- If the issue persists, seek professional assistance to diagnose and address any underlying mechanical issues.
10. Needle Threader Malfunction
- Description of the problem:
The automatic needle threader fails to work consistently or becomes jammed. - Cause of the problem:
Misalignment of the needle threader mechanism, damage to the threader hook, or accumulation of lint or debris. - Troubleshooting step-by-step:
- Inspect the needle threader mechanism for any visible misalignment or damage.
- Clean the threader area carefully to remove any lint or debris that may be obstructing the mechanism.
- If possible, adjust the alignment of the needle threader according to the machine manual.
- If the problem persists, consider manual threading as an alternative or seek professional repair assistance.
6. Bobbin Winding Malfunction
- Description of the problem:
The bobbin winding mechanism does not engage or winds unevenly. - Cause of the problem:
Improperly seated bobbin, tangled thread, or a malfunctioning bobbin winding mechanism. - Troubleshooting step-by-step:
- Ensure the bobbin is correctly inserted and engaged for winding.
- Check for any tangled thread that may be obstructing the winding process.
- Clean the bobbin winding area and check for any visible damage.
- If the issue persists, contact customer support for further assistance.
7. Thread Cutter Not Functioning
- Description of the problem:
The automatic thread cutter feature does not cut the thread properly. - Cause of the problem:
Dull or misaligned thread cutter blade, debris accumulation, or software malfunction. - Troubleshooting step-by-step:
- Inspect the thread cutter blade for any signs of damage or dullness.
- Clean the thread cutter area to remove any lint or debris that may be obstructing the blade.
- Check for any software updates available for your machine that may address this issue.
- If the problem persists, consider manually trimming threads with scissors until the issue can be resolved.
8. Stitches Skipping or Looping
- Description of the problem:
Stitches are skipped or loops appear in the stitching. - Cause of the problem:
Improper needle threading, incorrect needle size, or a timing issue. - Troubleshooting step-by-step:
- Re-thread the needle, ensuring the thread is properly seated in the tension discs and threading path.
- Check the needle size to ensure it is appropriate for the fabric being used.
- Inspect the machine’s timing according to the manufacturer’s instructions.
- If necessary, consult a professional technician for further assistance with timing adjustments.
9. Motor Overheating
- Description of the problem:
The sewing machine’s motor becomes excessively hot during use. - Cause of the problem:
Overuse, insufficient lubrication, or a malfunctioning motor. - Troubleshooting step-by-step:
- Allow the machine to cool down for a period of time before resuming use.
- Ensure proper lubrication of moving parts according to the manufacturer’s recommendations.
- Inspect the motor for any signs of damage or malfunction.
- If the motor continues to overheat, discontinue use and seek professional repair services.
10. Buttonhole Malfunction
- Description of the problem:
Buttonholes are not formed correctly or consistently. - Cause of the problem:
Incorrect settings, dull or damaged buttonhole foot, or software glitches. - Troubleshooting step-by-step:
- Verify that the machine is set to the correct buttonhole stitch and size.
- Check the condition of the buttonhole foot and replace if necessary.
- Reset the machine to its default settings and try again.
- If the issue persists, consider manually sewing buttonholes until the problem can be resolved.
11. Bobbin Case Misplacement
- Description of the problem:
The bobbin case dislodges or moves out of position during sewing. - Cause of the problem:
Loose screws, incorrect installation, or machine vibrations. - Troubleshooting step-by-step:
- Turn off the machine and unplug it for safety.
- Inspect the bobbin case area for any loose screws or visible damage.
- If screws are loose, tighten them carefully according to the machine manual.
- Reinstall the bobbin case securely and ensure it clicks into place.
- Consider using vibration-absorbing pads under the machine to minimize movement.
12. Uneven Stitch Length
- Description of the problem:
Stitches vary in length or consistency across the fabric. - Cause of the problem:
Incorrect tension settings, worn feed dogs, or bobbin tension issues. - Troubleshooting step-by-step:
- Check and adjust the upper thread tension according to the machine manual.
- Inspect the feed dogs for wear and replace if necessary.
- Adjust the bobbin tension carefully using the appropriate tools.
- Test stitch on scrap fabric to ensure even stitching.
13. Thread Fraying or Breaking
- Description of the problem:
Thread frays or breaks frequently during sewing. - Cause of the problem:
Poor quality thread, rough or burrs on machine parts, or incorrect threading. - Troubleshooting step-by-step:
- Use high-quality thread appropriate for the fabric being sewn.
- Inspect the needle plate, tension discs, and needle for any rough spots or burrs.
- Smooth out any rough areas with fine sandpaper or emery cloth.
- Ensure proper threading and tension settings.
14. Thread Jamming in Bobbin Area
- Description of the problem:
Thread gets stuck or jams in the bobbin area, causing sewing to halt. - Cause of the problem:
Improperly wound bobbin, debris in the bobbin area, or incorrect bobbin size. - Troubleshooting step-by-step:
- Remove the bobbin and check for any tangles or uneven winding.
- Clean out any lint or debris from the bobbin area using a brush or compressed air.
- Ensure the bobbin is the correct size and type for your machine.
- Reinsert the bobbin and test sew on scrap fabric to ensure proper function.
15. Needle Positioning Error
- Description of the problem:
The needle does not stop in the correct position after sewing. - Cause of the problem:
Incorrect needle positioning settings, mechanical issues, or software glitches. - Troubleshooting step-by-step:
- Check and adjust the needle positioning settings according to the machine manual.
- Inspect the needle positioning mechanism for any obstructions or damage.
- Reset the machine to its default settings and test sew on scrap fabric.
- If the problem persists, contact customer support for further assistance.
11. Uneven Stitch Quality
- Description of the problem:
The stitches produced by the machine are uneven in appearance. - Cause of the problem:
Uneven tension, bent or damaged needle, or improper presser foot pressure. - Troubleshooting step-by-step:
- Check and adjust the tension settings according to the fabric being used.
- Inspect the needle for any signs of damage or bending, and replace if necessary.
- Adjust the presser foot pressure to ensure even fabric feeding.
- If the problem persists, consider using a stabilizer or interfacing with the fabric.
12. Thread Breakage
- Description of the problem:
The thread frequently breaks during sewing. - Cause of the problem:
Incorrect threading, rough or damaged thread, or tension issues. - Troubleshooting step-by-step:
- Re-thread the machine, ensuring the thread path is correct and free from tangles.
- Inspect the thread for any signs of roughness or damage, and replace if necessary.
- Check and adjust the tension settings according to the fabric and thread being used.
- If the problem persists, try using a different type or weight of thread.
13. Irregular Bobbin Winding
- Description of the problem:
The bobbin winding process produces uneven or irregularly wound bobbins. - Cause of the problem:
Improper bobbin placement, tangled thread, or a malfunctioning bobbin winding mechanism. - Troubleshooting step-by-step:
- Ensure the bobbin is placed securely on the winding spindle.
- Check for any tangled thread that may be obstructing the winding process.
- Inspect the bobbin winding mechanism for any signs of damage or malfunction.
- If the issue persists, consider winding bobbins manually until the problem can be resolved.
14. Fabric Jamming
- Description of the problem:
The fabric gets stuck or jammed in the machine during sewing. - Cause of the problem:
Incorrect needle size, buildup of lint or debris, or problems with the feed dogs. - Troubleshooting step-by-step:
- Ensure the needle size is appropriate for the fabric being used.
- Clean the machine thoroughly, paying special attention to the feed dogs and bobbin area.
- Check for any obstructions in the machine’s path and remove them if necessary.
- If the problem persists, consider using a different type of needle or adjusting the presser foot pressure.
15. Thread Nesting Underneath Fabric
- Description of the problem:
The thread forms nests or loops underneath the fabric. - Cause of the problem:
Incorrect threading, bobbin tension issues, or machine timing problems. - Troubleshooting step-by-step:
- Re-thread both the needle and bobbin, ensuring the thread paths are correct and free from tangles.
- Check and adjust the bobbin tension according to the machine’s manual.
- Inspect the machine’s timing according to the manufacturer’s instructions.
- If the issue persists, consult a professional technician for further assistance.
Husqvarna Viking Platinum 770 Sewing Machine Manual
The operating instructions for the Husqvarna Viking Platinum 770 sewing machine can be found on the manufacturer’s website. Please visit the official Husqvarna Viking website to access the manual for detailed guidance on operating your machine safely and effectively.
Frequently Asked Questions about the Husqvarna Viking Platinum 770
1. How do I adjust the thread tension on the Husqvarna Viking Platinum 770?
To adjust the thread tension on the Husqvarna Viking Platinum 770, refer to the machine’s manual for specific instructions. Generally, tension adjustments can be made using the tension dial or digital settings on the machine.
2. What should I do if my needle keeps breaking while using the Husqvarna Viking Platinum 770?
If your needle keeps breaking, first ensure you are using the correct needle type and size for your fabric. Additionally, check for any burrs or damage on the needle, and replace it if necessary. Finally, verify that the needle is correctly inserted and tightened in the machine.
3. How do I clean and maintain my Husqvarna Viking Platinum 770 sewing machine?
Regular cleaning and maintenance are essential for optimal performance of your sewing machine. Consult the machine’s manual for specific instructions on cleaning and oiling the machine. It’s important to keep the bobbin area, feed dogs, and needle plate free from lint and debris to prevent issues.
4. Why is my stitching uneven or skipping stitches on the Husqvarna Viking Platinum 770?
Uneven or skipped stitches can be caused by various factors, including incorrect needle threading, needle damage, or tension issues. Refer to the troubleshooting section of the machine’s manual for step-by-step instructions on identifying and resolving stitching problems.
5. Can I perform basic repairs and adjustments on my Husqvarna Viking Platinum 770 at home?
While some basic repairs and adjustments can be done at home, it’s recommended to seek professional assistance for more complex issues. Consult the machine’s manual for guidance on basic maintenance tasks, and contact customer service or a certified service center for further assistance.
Conclusion
For any problems encountered with your Husqvarna Viking Platinum 770 sewing machine, always refer to the manual provided by the manufacturer for specific troubleshooting guidance. Additionally, do not hesitate to contact customer service or visit a certified service center for professional assistance when needed.
Husqvarna Viking Platinum 755 Common Problems