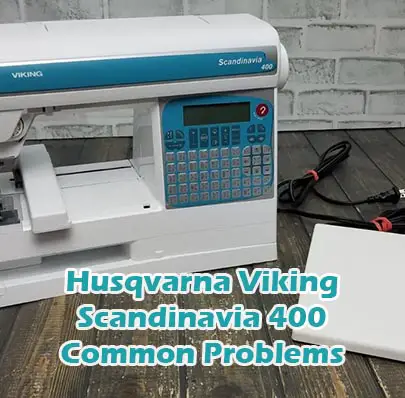
Husqvarna Viking Scandinavia 400 Common Problems and Troubleshooting
Welcome to our guide on troubleshooting common issues with the Husqvarna Viking Scandinavia 400 sewing machine. This model is renowned for its precision and efficiency, but like any mechanical device, it may encounter occasional problems. In this article, we’ll explore some of the typical issues users may face and provide solutions to address them.
Causes of Common Problems with the Husqvarna Viking Scandinavia 400
1. Thread Tension Issues
- Description of the problem: Uneven stitches or thread bunching on the fabric.
- Cause of the problem: Incorrect thread tension settings.
- Troubleshooting step-by-step:
- Ensure that the machine is threaded correctly.
- Adjust the tension settings according to the fabric and thread being used.
- Test stitch on a scrap fabric to check for desired tension.
2. Bobbin Jamming
- Description of the problem: The bobbin gets stuck or jams during sewing.
- Cause of the problem: Improperly inserted or wound bobbin, debris in the bobbin area, or incorrect bobbin tension.
- Troubleshooting step-by-step:
- Clean the bobbin area and ensure there is no lint or debris.
- Check the bobbin tension and adjust if necessary.
- Reinsert the bobbin properly, ensuring it rotates freely.
3. Needle Breakage
- Description of the problem: Needles frequently break during sewing.
- Cause of the problem: Bent or dull needles, incorrect needle size for the fabric, or improper needle insertion.
- Troubleshooting step-by-step:
- Replace the needle with a new one of the correct size and type.
- Ensure the needle is inserted correctly and tightened securely.
- Use the appropriate needle for the fabric being sewn.
4. Feed Dogs Not Moving
- Description of the problem: The feed dogs fail to advance the fabric while sewing.
- Cause of the problem: Feed dogs mechanism jammed, disengaged, or obstructed.
- Troubleshooting step-by-step:
- Check for any obstructions or debris around the feed dogs and remove them.
- Ensure the feed dog mechanism is engaged correctly.
- Manually turn the handwheel to check if the feed dogs are moving freely.
5. Bobbin Winding Problems
- Description of the problem: Issues with winding thread onto the bobbin.
- Cause of the problem: Improperly inserted bobbin, incorrect threading of the bobbin winding mechanism, or damaged bobbin winding components.
- Troubleshooting step-by-step:
- Ensure the bobbin is inserted correctly into the bobbin winding mechanism.
- Check that the thread is threaded properly through the bobbin winding tension disk.
- Inspect the bobbin winding components for any damage and replace if necessary.
6. Stitch Skipping
- Description of the problem: Occasional skipped stitches in the sewing pattern.
- Cause of the problem: Dull or damaged needle, improper threading, or incorrect stitch length.
- Troubleshooting step-by-step:
- Replace the needle with a new one suitable for the fabric.
- Ensure the machine is threaded correctly, with the presser foot up.
- Adjust the stitch length to the appropriate setting for the fabric being sewn.
7. Bobbin Thread Showing on Top
- Description of the problem: Bobbin thread is visible on the top side of the fabric.
- Cause of the problem: Incorrectly threaded bobbin, bobbin tension too loose, or upper thread tension too tight.
- Troubleshooting step-by-step:
- Re-thread the bobbin, ensuring it is inserted correctly and wound evenly.
- Adjust the bobbin tension slightly tighter using the appropriate screw.
- Loosen the upper thread tension by turning the tension dial or knob counterclockwise.
8. Fabric Jamming in the Feed Dogs
- Description of the problem: Fabric gets stuck or jammed in the feed dogs while sewing.
- Cause of the problem: Incorrect fabric feeding technique, debris accumulation, or feed dog misalignment.
- Troubleshooting step-by-step:
- Ensure the fabric is placed smoothly and evenly under the presser foot before sewing.
- Clean the feed dogs area thoroughly to remove any lint or debris.
- Check the alignment of the feed dogs and adjust if necessary according to the machine’s manual.
9. Thread Bunching on the Underside
- Description of the problem: Excessive thread bunching on the underside of the fabric.
- Cause of the problem: Upper thread tension too loose, incorrectly inserted bobbin, or lint buildup in the bobbin case.
- Troubleshooting step-by-step:
- Adjust the upper thread tension slightly tighter using the tension dial or knob.
- Re-insert the bobbin, ensuring it is threaded correctly and rotating in the correct direction.
- Clean the bobbin case area to remove any lint or debris that may be causing the thread to bunch.
10. Needle Threader Malfunction
- Description of the problem: The automatic needle threader fails to work properly.
- Cause of the problem: Misaligned needle, damaged needle threader mechanism, or insufficient lighting.
- Troubleshooting step-by-step:
- Ensure the needle is properly aligned and inserted according to the machine’s manual.
- Inspect the needle threader mechanism for any visible damage and replace if necessary.
- Improve the lighting in the sewing area to aid in the needle threading process.
11. Uneven Stitching
- Description of the problem: Inconsistent stitch length or tension resulting in uneven stitching.
- Cause of the problem: Incorrect tension settings, dirty or damaged feed dogs, or misaligned presser foot.
- Troubleshooting step-by-step:
- Adjust the tension settings according to the fabric being used.
- Clean the feed dogs thoroughly to remove any dirt or debris.
- Ensure the presser foot is aligned correctly and securely attached to the machine.
12. Thread Breakage
- Description of the problem: Thread frequently breaks while sewing.
- Cause of the problem: Incorrect threading, rough or damaged thread, or burrs on the needle plate.
- Troubleshooting step-by-step:
- Re-thread the machine, ensuring the thread is properly seated in the tension disks.
- Use high-quality thread appropriate for the fabric and needle size.
- Check the needle plate for any burrs or rough spots and smooth them out if necessary.
13. Motor Malfunction
- Description of the problem: The sewing machine motor fails to operate or runs erratically.
- Cause of the problem: Electrical issues, loose connections, or motor damage.
- Troubleshooting step-by-step:
- Check the power cord and connections to ensure they are secure and undamaged.
- Inspect the motor for any visible damage or signs of overheating.
- If possible, test the machine with a different power source to rule out electrical issues.
14. Bobbin Case Misalignment
- Description of the problem: The bobbin case moves out of alignment during sewing.
- Cause of the problem: Loose screws, worn bobbin case components, or improper installation.
- Troubleshooting step-by-step:
- Tighten any loose screws on the bobbin case and surrounding components.
- Inspect the bobbin case for signs of wear and replace any damaged parts.
- Reinstall the bobbin case according to the machine’s manual, ensuring it is securely in place.
15. Buttonhole Malfunction
- Description of the problem: The sewing machine fails to create consistent or properly sized buttonholes.
- Cause of the problem: Incorrect buttonhole settings, dull or damaged needle, or debris in the buttonhole mechanism.
- Troubleshooting step-by-step:
- Adjust the buttonhole settings according to the desired size and fabric thickness.
- Replace the needle with a new one suitable for creating buttonholes.
- Clean the buttonhole mechanism thoroughly to remove any lint or debris.
16. Fabric Not Feeding Properly
- Description of the problem: The fabric does not move smoothly through the machine during sewing.
- Cause of the problem: Dirty feed dogs, incorrect presser foot pressure, or feed dog malfunction.
- Troubleshooting step-by-step:
- Clean the feed dogs thoroughly to remove any debris or lint.
- Adjust the presser foot pressure according to the fabric thickness.
- Check for any feed dog malfunctions and repair or replace them as needed.
17. Bobbin Winding Not Engaging
- Description of the problem: The bobbin winding mechanism does not engage when attempting to wind a bobbin.
- Cause of the problem: Bobbin winding switch in the wrong position, mechanical issue with the winding mechanism, or power supply problem.
- Troubleshooting step-by-step:
- Ensure the bobbin winding switch is in the correct position for winding.
- Check for any visible mechanical issues with the bobbin winding mechanism and repair as needed.
- Test the machine with a different power source to rule out power supply issues.
18. Uneven Bobbin Tension
- Description of the problem: Inconsistent tension in the bobbin thread resulting in irregular stitches.
- Cause of the problem: Improperly adjusted bobbin tension screw, damaged bobbin case, or incorrect bobbin type.
- Troubleshooting step-by-step:
- Adjust the bobbin tension screw slightly to achieve the desired tension.
- Inspect the bobbin case for any signs of damage and replace if necessary.
- Ensure the correct type and size of bobbin are being used for the machine.
19. Stitch Length Variation
- Description of the problem: Inconsistent stitch length throughout sewing projects.
- Cause of the problem: Incorrect stitch length setting, worn feed dogs, or mechanical issue with the stitch length regulator.
- Troubleshooting step-by-step:
- Adjust the stitch length setting to the desired length for the fabric being sewn.
- Inspect the feed dogs for signs of wear and replace if necessary.
- Check for any mechanical issues with the stitch length regulator and repair as needed.
20. Thread Cutter Not Functioning
- Description of the problem: The built-in thread cutter does not cut the thread properly.
- Cause of the problem: Blunt or misaligned thread cutter blade, debris accumulation, or mechanical malfunction.
- Troubleshooting step-by-step:
- Clean the thread cutter area to remove any lint or debris.
- Inspect the thread cutter blade for sharpness and alignment, replacing or adjusting as needed.
- Check for any mechanical issues with the thread cutter mechanism and repair as necessary.
21. Thread Getting Caught in Bobbin Case
- Description of the problem: Upper thread getting tangled or caught in the bobbin case area.
- Cause of the problem: Improper threading, bobbin case tension too tight, or damaged bobbin case.
- Troubleshooting step-by-step:
- Re-thread the upper thread, ensuring it is properly guided through all thread guides and tension disks.
- Adjust the tension of the bobbin case slightly to reduce thread tension.
- Inspect the bobbin case for any signs of damage and replace if necessary.
22. Needle Hits Presser Foot
- Description of the problem: The needle strikes the presser foot during sewing, causing damage or breakage.
- Cause of the problem: Incorrect needle size, improper presser foot attachment, or misaligned needle bar.
- Troubleshooting step-by-step:
- Ensure the correct needle size and type are being used for the fabric being sewn.
- Check that the presser foot is securely attached and compatible with the selected stitch.
- Inspect the needle bar alignment and adjust if necessary according to the machine’s manual.
23. Thread Getting Stuck in Bobbin Winding Mechanism
- Description of the problem: Thread becomes entangled or stuck in the bobbin winding mechanism during bobbin winding.
- Cause of the problem: Incorrect threading of the bobbin winding mechanism, debris accumulation, or mechanical malfunction.
- Troubleshooting step-by-step:
- Re-thread the bobbin winding mechanism, ensuring the thread is guided properly through all components.
- Clean the bobbin winding area thoroughly to remove any lint or debris that may be causing the thread to get stuck.
- Check for any mechanical issues with the bobbin winding mechanism and repair as necessary.
24. Feed Dogs Not Lowering
- Description of the problem: The feed dogs do not lower when using the drop feed feature.
- Cause of the problem: Mechanical issue with the drop feed mechanism, obstruction preventing movement, or incorrect setting selection.
- Troubleshooting step-by-step:
- Check for any visible obstructions around the feed dogs area and remove them.
- Inspect the drop feed mechanism for any signs of damage or misalignment and repair as needed.
- Ensure the correct setting is selected for lowering the feed dogs, according to the machine’s manual.
25. Stitch Selector Not Working
- Description of the problem: The stitch selector dial or buttons do not change the selected stitch on the machine.
- Cause of the problem: Mechanical issue with the stitch selector mechanism, dirt or debris accumulation, or electrical malfunction.
- Troubleshooting step-by-step:
- Clean the stitch selector area to remove any dirt or debris that may be obstructing the mechanism.
- Inspect the stitch selector mechanism for any signs of damage or misalignment and repair as needed.
- If the issue persists, consult a qualified technician to diagnose and repair any electrical faults.
Husqvarna Viking Scandinavia 400 Sewing Machine Manual
The operating instructions for the Husqvarna Viking Scandinavia 400 can be found on the manufacturer’s website. Users can visit the official Husqvarna Viking website and navigate to the support or downloads section to access the manual.
Husqvarna Viking Scandinavia 400 Frequently Asked Questions
1. How do I adjust the tension on the Husqvarna Viking Scandinavia 400?
To adjust the tension on the Husqvarna Viking Scandinavia 400, refer to the machine’s manual for specific instructions. Generally, tension adjustments can be made using the tension dial or knobs located on the machine.
2. Why is my needle breaking frequently?
Frequent needle breakage can be caused by several factors, including using the wrong needle size or type, sewing over thick seams, or having a bent or damaged needle. Ensure you are using the correct needle for your fabric and replace it if it shows signs of damage.
3. How do I clean the feed dogs on the Husqvarna Viking Scandinavia 400?
To clean the feed dogs, first, turn off the machine and remove the presser foot and needle plate. Use a small brush or lint remover to gently brush away any lint or debris that has accumulated on the feed dogs. Avoid using compressed air, as this can push debris further into the machine.
4. What should I do if my stitches are skipping?
If stitches are skipping, first ensure that the machine is threaded correctly and the needle is inserted properly. Additionally, try using a new needle appropriate for the fabric being sewn. If the issue persists, adjusting the tension or consulting the machine’s manual for troubleshooting tips may be necessary.
5. How do I troubleshoot bobbin winding issues?
If you are experiencing problems with bobbin winding, check that the bobbin is inserted correctly and the winding mechanism is engaged. Ensure the thread is properly threaded through the tension disk and that there are no obstructions in the bobbin winding area.
Conclusion
For any issues with the Husqvarna Viking Scandinavia 400 sewing machine, it is advisable to always refer to the manual, customer service, or service center whenever possible. These resources can provide specific guidance and assistance tailored to your machine’s needs.
Husqvarna Viking Sophia Common Problems