Poolin EOC05 Common Problems and Troubleshooting
Welcome to our guide on solving common problems with the Poolin EOC05 sewing machine. As a proud owner of the Poolin EOC05, you know the joy of creative embroidery. However, like any technology, it can encounter issues. In this article, we’ll address potential problems and provide solutions, ensuring that your embroidery experience remains smooth and enjoyable.
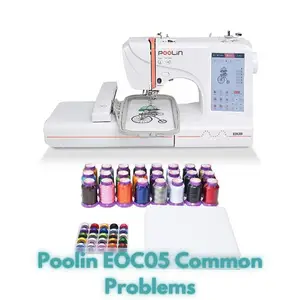
Poolin EOC05 Overview
Discover the features and specifications that make the Poolin EOC05 a remarkable embroidery machine:
| Product Details | Specification and Features |
|---|---|
| Brand | Poolin |
| Color | Computerized |
| Material | Aluminum |
| Product Dimensions | 21.7″D x 13.8″W x 11.8″H |
| Item Weight | 22 Pounds |
| Power Source | Corded Electric |
| Is Electric | Yes |
Key Features:
- 7″ Colorful Touchscreen for easy operation and pattern editing
- Easy-to-use Control System with built-in designs and fonts
- Large Embroidery Area: 4″ x 9.2″
- Additional Embroidery Accessories included
- Beginner Friendly with automatic needle threader and bobbin winding system
- Software Tip: Designs must be exported in dst/dsb format
Causes of Common Problems with the Poolin EOC05
Embarking on our troubleshooting journey, let’s explore potential issues you might encounter with your Poolin EOC05 embroidery machine and learn how to resolve them.
Common Problems and Troubleshooting for Poolin EOC05
1. Thread Breakage During Embroidery
Description: Threads keep breaking while the machine is embroidering.
Cause: Incorrect tension settings or using low-quality threads.
Troubleshooting:
- Check the thread tension settings in the machine and adjust as needed.
- Use high-quality embroidery threads designed for the Poolin EOC05.
2. Uneven Embroidery Stitches
Description: Embroidery stitches appear uneven or inconsistent.
Cause: Hoop misalignment or incorrect fabric stabilization.
Troubleshooting:
- Ensure the embroidery hoop is properly aligned and secure.
- Use appropriate stabilizers for the fabric you’re embroidering on.
3. Design Not Centered Properly
Description: Embroidery design is not centered as expected.
Cause: Incorrect design placement or hoop positioning.
Troubleshooting:
- Double-check the design placement in the machine’s software before starting.
- Make sure the embroidery hoop is correctly positioned and tightened.
4. Bobbin Thread Showing on Top
Description: Bobbin thread is visible on the top side of the embroidery.
Cause: Improper bobbin tension or incorrect upper thread tension.
Troubleshooting:
- Adjust the bobbin tension according to the machine’s manual.
- Check and adjust the upper thread tension if necessary.
5. Machine Stops Mid-Embroidery
Description: The machine stops unexpectedly in the middle of embroidery.
Cause: Thread jam, design file corruption, or power interruption.
Troubleshooting:
- Check for any thread jams or tangled threads in the machine.
- If using a USB drive for design files, ensure they are not corrupted.
- Ensure a stable power source to prevent interruptions.
6. Embroidery Design Puckering
Description: The fabric puckers or gathers around the embroidered area.
Cause: Incorrect stabilizer choice or excessive tension.
Troubleshooting:
- Select the appropriate stabilizer for the fabric type.
- Reduce the tension settings on the machine.
7. Skipped Stitches in Embroidery
Description: Stitches are missing in certain parts of the embroidery design.
Cause: Dull needle, incorrect needle size, or design complexity.
Troubleshooting:
- Replace the needle with a new, sharp one.
- Ensure the needle size matches the fabric and thread being used.
- Simplify intricate designs that may be causing stitching issues.
8. Embroidery Machine Jamming
Description: The machine gets stuck or jams during embroidery.
Cause: Obstructed bobbin area, tangled threads, or mechanical issues.
Troubleshooting:
- Clean the bobbin area and remove any debris.
- Check for tangled threads and rethread the machine as needed.
- If problems persist, consult the machine’s manual for troubleshooting mechanical issues.
9. Incorrect Thread Tension
Description: Threads appear too loose or too tight in the embroidery.
Cause: Incorrect tension settings, improper threading, or bobbin issues.
Troubleshooting:
- Adjust the upper thread tension according to the fabric and design.
- Ensure proper threading of both the upper thread and bobbin.
- If needed, adjust the bobbin tension as per the machine’s instructions.
10. Embroidery Software Compatibility
Description: Design files created in software don’t work well with the machine.
Cause: Incompatible file formats or software versions.
Troubleshooting:
- Export designs in the compatible format (e.g., dst/dsb) for the machine.
- Ensure the embroidery software is up-to-date and compatible with the machine model.
11. Thread Nesting Underneath
Description: Threads create a messy nest of loops underneath the fabric.
Cause: Incorrect bobbin threading, bobbin tension issues, or upper thread mismanagement.
Troubleshooting:
- Rethread the bobbin following the machine’s threading guide.
- Check and adjust the bobbin tension if loops are forming underneath.
- Ensure the upper thread is properly threaded and has no knots or tangles.
12. Embroidery Hoop Slipping
Description: The embroidery hoop shifts or slips while stitching.
Cause: Loose hoop screws, inadequate fabric tension, or worn-out hoop brackets.
Troubleshooting:
- Tighten the hoop screws securely to prevent movement.
- Ensure the fabric is taut and properly secured in the hoop.
- If hoop brackets are worn, consider replacing them for better grip.
13. Broken Needles
Description: Needles break frequently during embroidery.
Cause: Incorrect needle type, dull needles, or design density.
Troubleshooting:
- Use needles specifically designed for embroidery.
- Replace dull needles with sharp ones before starting a new project.
- Adjust design density in the software to reduce strain on the needle.
14. Design Not Aligning
Description: Embroidery design doesn’t align properly with previous stitches.
Cause: Hoop movement, software misalignment, or fabric shifting.
Troubleshooting:
- Ensure the embroidery hoop remains steady and doesn’t shift during stitching.
- Double-check the design alignment in the embroidery software before stitching.
- Use appropriate stabilizers to prevent fabric from shifting during embroidery.
15. Limited Stitch Size
Description: Unable to create designs larger than a certain stitch size.
Cause: Machine limitations, design software settings, or hoop size restrictions.
Troubleshooting:
- Check the machine’s specifications for maximum embroidery area.
- Adjust the design size settings in the embroidery software accordingly.
- Ensure the hoop you’re using can accommodate the desired design size.
16. Slow Stitching Speed
Description: The embroidery machine is stitching at a slower pace than usual.
Cause: Incorrect speed settings, design complexity, or mechanical issues.
Troubleshooting:
- Check and adjust the stitching speed settings on the machine.
- If the design is complex, it may naturally take longer to stitch.
- If the issue persists, consult the machine’s manual for potential mechanical problems.
17. Thread Snapping on Hoop Entry
Description: Threads break when the needle enters the fabric to begin stitching.
Cause: Incorrect threading, needle damage, or hoop misalignment.
Troubleshooting:
- Double-check the upper thread threading, ensuring it’s properly guided through all loops.
- Replace the needle if it’s bent or damaged.
- Ensure the hoop is aligned and fabric is secure to prevent thread breakage.
18. Thread Shredding or Fraying
Description: Threads become frayed or start shredding while embroidering.
Cause: Rough needle eye, tension issues, or using old threads.
Troubleshooting:
- Inspect the needle’s eye for any rough spots and replace if necessary.
- Adjust the tension settings to prevent excessive stress on the thread.
- Use high-quality threads and avoid using old or brittle ones.
19. Misalignment of Colors
Description: Embroidery design colors appear misaligned or off-sync.
Cause: Design color sequence error or software compatibility issues.
Troubleshooting:
- Review the design color sequence in the embroidery software and make corrections if needed.
- Ensure the design file and software are compatible with the Poolin EOC05.
20. Excessive Thread Nesting on Top
Description: Threads create knots or nests on the top side of the embroidery.
Cause: Upper thread tension too loose or improper threading.
Troubleshooting:
- Adjust the upper thread tension to ensure it’s neither too loose nor too tight.
- Rethread the machine carefully, following the threading path correctly.
21. Thread Puckering in Dense Designs
Description: Threads pucker or create ridges in densely stitched areas.
Cause: Insufficient stabilizer or tension issues in dense designs.
Troubleshooting:
- Use a proper stabilizer to support dense designs and prevent fabric distortion.
- Adjust the upper thread tension to minimize excessive pulling in densely stitched areas.
22. Embroidery Design Misalignment
Description: Parts of the embroidery design do not align correctly.
Cause: Hoop movement during stitching, design scaling issues, or fabric shift.
Troubleshooting:
- Ensure the hoop remains stable and immobile during the embroidery process.
- Verify the design scaling settings in the software before stitching.
- Use proper fabric stabilization to prevent shifting during stitching.
23. Irregular Lettering in Designs
Description: Lettering or fonts appear distorted or irregular in the embroidery.
Cause: Incorrect lettering settings or incompatible font formats.
Troubleshooting:
- Check and adjust the lettering settings in the embroidery software.
- Use fonts that are compatible with the machine and software.
24. Incomplete Embroidery Patterns
Description: Parts of the embroidery design are missing or incomplete.
Cause: Design file corruption, software glitches, or interrupted stitching.
Troubleshooting:
- Ensure the design files are not corrupted and properly loaded into the machine.
- If using a USB drive, make sure it remains connected throughout the stitching process.
- Check the embroidery software for any glitches that may affect the design transfer.
25. Fabric Pulling During Stitching
Description: The fabric gets pulled or dragged during embroidery.
Cause: Improper hoop tension, dense stitching, or incorrect fabric handling.
Troubleshooting:
- Ensure the fabric is evenly tensioned in the hoop to prevent pulling.
- Consider reducing stitch density in areas where excessive pulling occurs.
- Hold the fabric taut and provide slight resistance to prevent dragging during stitching.
Poolin EOC05 Sewing Machine User Reviews
Discover what users are saying about their experiences with the Poolin EOC05 sewing machine.
Positive Reviews from Poolin EOC05 Sewing Machine Users
- Many users were satisfied with the following positive experiences:
- Efficient embroidery process and ease of use.
- USB transfer for simplified design transfer.
- Quality stitching and impressive embroidery results.
- Good value for the price and a great addition to sewing projects.
- Positive interactions with the friendly pro dealer on social media.
- Customers found the machine suitable for their needs, especially for home embroidery projects.
- Availability of tutorials on YouTube helped users familiarize themselves with the machine’s features.
Negative User Reviews of the Poolin EOC05 Sewing Machine
- Some users were not satisfied with the following problems:
- Issues with thread bunching and tension, leading to interrupted stitching.
- Complaints about foot pedal malfunctions affecting sewing.
- Problems with the computer board causing the machine to malfunction.
- Received used or defective machines that required repairs.
- Missing components such as foot pedals upon delivery.
- Technical difficulties, such as the stitch-length dial being broken or malfunctioning.
- Several users expressed dissatisfaction with their customer service experiences.
- Some customers received machines that were already broken or malfunctioned shortly after purchase.
Several users praised the machine’s ease of use, embroidery quality, and value for the price. Positive interactions with the pro dealer and availability of tutorials also contributed to a positive experience.
Overall, the user feedback highlights the versatility and convenience of the Poolin EOC05 sewing machine, making it a valuable tool for both beginners and experienced embroiderers.
Poolin EOC05 Sewing Machine Manual
To access the operating instructions for the Poolin EOC05 sewing machine, please visit the manufacturer’s website. You can find detailed guidance on how to set up, use, and maintain your sewing machine in the provided manual.
Poolin EOC05 Frequently Asked Questions
1. Why is my embroidery design misaligned during stitching?
Answer: Misalignment can occur due to hoop movement or fabric shifting. Make sure the hoop is secure, and consider using stabilizers to prevent fabric movement during stitching.
2. How do I prevent thread nesting underneath the fabric?
Answer: Thread nesting can be prevented by rethreading the bobbin following the machine’s guide, checking bobbin tension, and ensuring the upper thread is free of knots and tangles.
3. What should I do if my threads keep breaking frequently?
Answer: Frequent thread breakage can be caused by a dull needle, incorrect needle size, or design complexity. Replace the needle, ensure it matches fabric and thread, and simplify intricate designs.
4. Why are my embroidery letters appearing distorted?
Answer: Distorted letters might result from incorrect lettering settings or incompatible font formats. Check and adjust the lettering settings in the embroidery software, and use compatible fonts.
5. How can I fix fabric pulling during stitching?
Answer: Prevent fabric pulling by ensuring even hoop tension, reducing stitch density in affected areas, and holding the fabric taut while stitching to prevent dragging.
Conclusion
For any issues or problems with your Poolin EOC05 sewing machine, it’s recommended to consult the provided manual for troubleshooting guidance. In case you encounter difficulties beyond what the manual covers, consider reaching out to the customer service or a service center for professional assistance.